












How to Clean Sticky Floors for Good: A Step-by-Step Guide

How to Clean Sticky Floors for Good: A Step-by-Step Guide

Editorial TeamDreame |
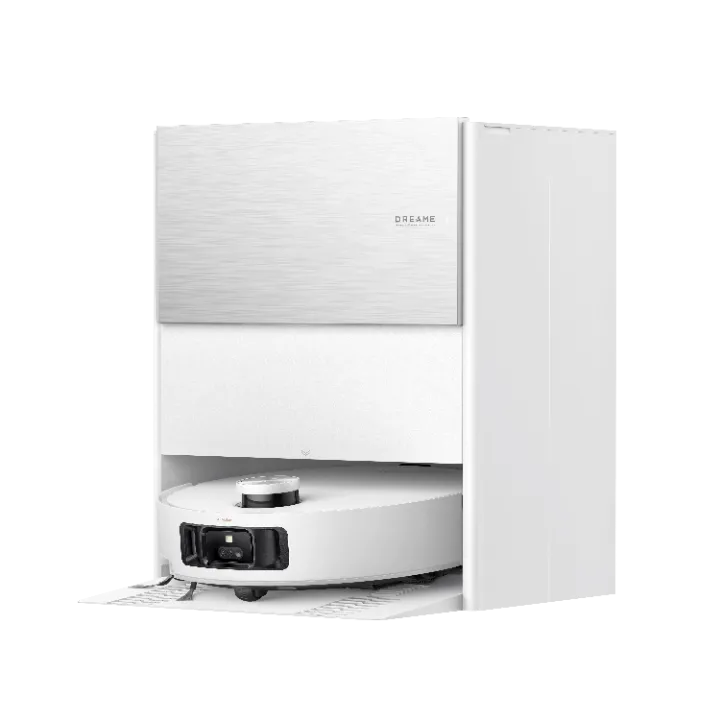
There’s nothing more frustrating than mopping your floors, only to find them feeling tacky or sticky under your feet an hour later. It’s a counterintuitive problem that can make you feel like your hard work was for nothing. You scrubbed, you cleaned, but the floor feels dirtier than when you started. If this sounds familiar, take a breath. The problem isn't your effort—it's a misunderstanding of what actually causes that sticky feeling. The solution isn't to scrub harder; it's to fix the cleaning process itself. This guide will walk you through a clear diagnosis of why your floors get sticky and provide a professional method to strip old residue, clean correctly, and finally maintain that truly clean, non-tacky floor you’ve been after. Why Are Your Floors Sticky? Before you can find the right solution, you have to understand the problem. In almost every case, that sticky feeling comes down to one of a few common culprits that have more to do with your cleaning method than the dirt itself. 4 Most Common Causes of Floor Stickiness Cleaner Residue: Most floor cleaners contain ingredients called surfactants. Their job is to lift dirt, but they are often designed to leave a microscopic film behind. This leftover chemical residue is inherently tacky and acts as a "dirt magnet," attracting new dust and grime and starting the sticky cycle all over again. Using Too Much Product: This is the single biggest mistake. Every cleaner has a recommended dilution rate—the perfect mix of cleaner and water. When you use too much soap, there isn't enough water to rinse it all away, guaranteeing a sticky, soapy residue is left on the floor. Dirty Water and Mops: If you mop your whole floor with a single bucket of water, you’re not really cleaning. After the first few passes, you're just redistributing a thin film of dirty, soapy water across the entire surface, which dries into a tacky layer. Grease and Spills: While cleaning residue causes widespread stickiness, stubborn sticky spots are often from the kitchen. Cooking oils can create a greasy film, and sugary spills from juice or soda will leave a tacky patch if not cleaned up thoroughly. Recommended Method to Deep Clean Any Sticky Floor This is the complete, step-by-step process professionals use to tackle sticky floors. Mastering this technique is more important than the specific brand of cleaner you choose because it removes the root cause of the problem: buildup. Step 1: Always Start with a Dry Prep This is a non-negotiable first step. Following the proper vacuum-first, then-mop cleaning rule, you must remove all loose debris like dust, hair, and crumbs. If you skip this, you’ll just turn that dry dirt into a "muddy slurry" that your mop will spread around, creating streaks and adding to the sticky film. Step 2: Strip Old Residue with a "Reset Rinse" Now, it's time to strip the invisible film of old cleaner that’s causing the stickiness. The best way to do this is with a simple, effective solution that cuts through the buildup without adding more soap. Mop your entire floor with a solution of 1 cup of white vinegar per gallon of warm water. The natural acidity of the vinegar neutralizes and breaks down the alkaline soap residue left behind by old cleaners. For heavy buildup, you may need to repeat this step. Step 3: Mop Correctly with the Two-Bucket System This is the professional secret to stop re-contaminating your floor. Instead of using one bucket that gets progressively filthier, you use two. Bucket One (Solution Bucket): Contains your properly diluted cleaning solution (or just the vinegar/water mix). Bucket Two (Rinse Bucket): Contains clean, plain water. Dip your clean mop in Bucket One and wring it out. Mop a small section of the floor. Then, before getting more cleaner, rinse the dirty mop thoroughly in Bucket Two. Wring it out completely before dipping it back in Bucket One for a fresh solution. This disciplined process ensures dirt is removed from the floor and trapped in the rinse bucket, not spread back onto your floor. Adjusting Your Cleaning for Different Floor Types Using the right technique is critical, but using the right solution for your specific floor is essential to avoid costly damage. What works on tile can permanently ruin natural stone. Floor Type Recommended DIY Solution Sealed Hardwood pH-neutral wood cleaner is safest. (Optional: 1/4 cup white vinegar per gallon of water) Laminate Spray bottle with equal parts water, vinegar, & isopropyl alcohol. Tile, Vinyl, & Linoleum 1 cup of white vinegar per gallon of warm water. Natural Stone (Marble, Granite) A few drops of pH-neutral soap in water, or a dedicated stone cleaner. How to Clean Sealed Hardwood and Laminate Floors The number one rule for these floors is to use minimal water. A mop should always be damp, not wet. Hardwood: The safest choice is a pH-neutral cleaner specifically formulated for wood. If you use the vinegar solution, make sure it’s highly diluted (1/4 cup per gallon) and always perform a spot test in a hidden area first, as the acid can dull some polyurethane finishes over time. Laminate: The fiberboard core of laminate is extremely vulnerable to water damage. A great DIY solution is a spray bottle with equal parts water, vinegar, and isopropyl alcohol—the alcohol helps the solution evaporate very quickly. A properly cleaned laminate floor should dry in a minute or two. And a critical warning: NEVER use a steam mop on laminate. Dreame Take The fear of damaging wood floors with heat and water is valid. It’s why tools like the Dreame H15 Pro Heat Wet Dry Vacuum are designed to solve this specific problem. It can clean with hot water to dissolve stubborn grime while being certified as safe for wooden floors, ensuring no deformation or damage.[1] How to Clean Tile, Vinyl, and Linoleum Floors These resilient surfaces are very durable and respond perfectly to the white vinegar and water solution for stripping residue and general cleaning. While the ceramic or porcelain tile itself is tough, the cement-based grout between them is not. Acidic cleaners like vinegar can slowly eat away at it over time. For targeted cleaning, it’s safer to learn how to clean floor tile grout with a paste of baking soda and water and a stiff brush. For step by step instructions, read our guides:  Clean and Protect Vinyl Plank Flooring Clean and Mop Tile Floors Clean Linoleum Floors  How to Clean Natural Stone (Marble, Granite, Travertine) This is the one floor type where you must be extremely careful. NEVER use vinegar, ammonia, lemon juice, or any other acidic cleaner on natural stone. The acid will react with the minerals in the stone and cause permanent damage called etching, which looks like a dull, cloudy spot. Use a cleaner specifically labeled as pH-neutral and safe for natural stone. In a pinch, a few drops of pH-neutral dish soap in warm water will work. For a complete breakdown, read our essential tips on how to clean marble floors. How to Keep Floors from Getting Sticky Again Now that your floors are truly clean, the goal is to keep them that way. Shifting from reactive deep cleaning to proactive maintenance will save you a world of effort. Set Up a First Line of Defense A huge amount of dirt is tracked in from outside. Use high-quality doormats both outside and inside your entrances. Even better, adopt a "no shoes in the house" policy to stop street grime from ever touching your floors. Use the Right Cleaner (and the Right Amount) Always follow the dilution instructions on your cleaner. And when buying a new one, look for terms like "residue-free." You can perform a "glass test." Spray a little of the cleaner onto a mirror and wipe it clean. If it leaves behind a streak or a hazy film, it will do the same on your floor. Keep Your Cleaning Tools Clean A dirty mop spreads dirt. It’s that simple. Make sure you learn how to clean your mop head and machine wash and dry your microfiber mop pads after every use. Rinse your buckets and let them dry completely to prevent bacteria growth. Make Your Routine Automatic The single mosteffective way to prevent sticky buildup is a consistent cleaning schedule. This is where modern technology can be a game-changer. Here’s how smart vacuums solve the core problems we've discussed: It Automates the "Dry Prep": A robot vacuum running on a daily schedule constantly removes the loose dust and debris that would otherwise turn into a "muddy slurry" during mopping. A top-tier model like the Dreame L50 Ultra, ranked #1 on Vacuum Wars Top 20 Robot Vacuums list [2025], automates this crucial preventative step with powerful suction. It Solves the "Dirty Water" Problem: Unlike manual mopping where water gets progressively dirtier, advanced robotic mops use systems that apply consistent pressure with fresh water, ensuring grime is lifted, not spread around. Some, like the Dreame Matrix10 Ultra, even feature a Multi-Mop™ Switching Dock that can swap out different mop types mid-clean. For example, a bristled mop for a tile kitchen and a soft sponge mop for a bathroom, all for a truly tailored and hygienic clean. It Handles Its Own "Tool Hygiene": The self-cleaning dock automates the final crucial step. It washes and dries the mop pads after each cleaning run, ensuring the device always starts with a perfectly clean tool. Frequently Asked Questions Why are my floors still sticky after mopping? This is almost always caused by residue. The most likely reasons are that you used too much cleaning solution and didn't rinse it away, or you used a dirty mop and bucket, which just spread a thin layer of grime across the floor. How do you get sticky residue off the floor? The best way is to mop with a solution of one cup of white vinegar in a gallon of warm water. The acid in the vinegar is excellent at breaking down and dissolving the soapy or greasy film that causes stickiness. Just be sure not to use it on natural stone. Does vinegar get rid of sticky floors? Yes, it’s highly effective for most floor types. Vinegar is an acetic acid that naturally cuts through the alkaline residue left by many soaps and cleaners. It cleans without leaving a new film behind, which is key to breaking the sticky cycle. How do you clean a dirty, sticky floor? Start with a dry prep by thoroughly sweeping or vacuuming. Then, perform a "reset rinse" with a warm water and vinegar solution to strip the sticky residue. For future cleans, adopt the two-bucket method to ensure you're always cleaning with a clean mop.

Continue reading
Can Robot Vacuums Climb Stairs? A Look at the Future of Multi-Floor Cleaning

Can Robot Vacuums Climb Stairs? A Look at the Future of Multi-Floor Clea...

Editorial TeamDreame |
For your home to be cleaned completely automatically, robot vacuums need to solve one big problem: getting up and down the stairs. While today's robot vacuums are experts at cleaning a single floor on their own, the ability to move between storeys is the next big step for the technology—especially for multi-storey homes, basements, and split-level layouts. Let's look at where this new technology stands. We will explain how today's robot vacuums keep themselves safe in homes with stairs, and show you the best ways you can get your multi-storey home cleaned right now. Can You Buy a Stair-Climbing Robot Vacuum Today? Right now, you can't buy a robot vacuum that can climb a full flight of stairs. It's a difficult problem that engineers are working hard to solve in their labs. The good news is that we've already seen early models. At the IFA 2025 tech show in Berlin, the first of these concepts was demonstrated to the public. As a result, many experts believe the first robot vacuums that can climb stairs will be available for purchase around 2026. This future ability to climb is a huge jump in technology compared to how even the best robots vacuum today get over small bumps and rugs. How a Future Robot Vacuum Will Climb Stairs Robot vacuums can climb stairs in a few fundamentally different ways, each with its own trade-offs. Modular, two-part systems in which a standard vacuum robot docks with a specialized stair-climbing platform, are taking the lead. Caterpillar-track platforms: The Dreame Cyber X follows this concept. Think of this as a mini construction vehicle. The vacuum rides on a docking platform with large treads that grip the stairs. At the bottom, the treads stay flat so the robot vacuum can roll into place. Then the front treads lift, "feel" the first step, tilt the unit, and pull it smoothly onto the next level. The process repeats step by step, with no extra hardware needed on your stairs. It looks dramatic but works surprisingly fluidly. Scissor-lift legs: This design, seen in MOVA Zeus 60 demos, uses a platform with compact lifting legs that raise the robot vacuum, slide the front wheels onto the next step, then pull the rest of the body along. It's slower than tracks, but very stable. Some demo units have even tackled curved or spiral staircases, handling step heights up to about 25 cm (10 in). Beyond these, early concepts include tracked robot vacuums with flippers or bogie suspensions (robust but bulky and loud), tri-star wheel clusters that "step" over risers (simple but vibey on flat floors), and wheel-leg ("wheg") hybrids that roll like wheels yet act like short legs for climbs (promising, still maturing). In short, stairs are solvable, but every approach balances speed, stability, noise, cost, and home-friendliness. How Your Robot Vacuum Avoids Falling Down Stairs While engineers work on the complex problem of climbing up, the issue of falling down the stairs was solved years ago. You can be sure your robot vacuum is safe to approach a staircase because of its built-in cliff sensors. These sensors work by sending out an invisible light beam towards the floor. The science is simple: On solid ground, the light bounces off the floor and back to the vacuum robot's sensor. At the edge of a stair, the light beam goes into the empty space and doesn't bounce back. When the light doesn't bounce back, it instantly tells the robot vacuum to stop and turn around. This simple, reliable system ensures your robot vacuum can detect stairs and will never fall. How Today's Robot Vacuums Get Over Bumps and Thresholds Beyond the major challenge of stairs, your robot vacuum also has to deal with everyday bumps on the floor. To keep it from getting stuck on things like transition strips between rooms, patio door tracks, or the edges of thick rugs, the best robot vacuums have advanced mobility systems. For example, the Dreame X50 Ultra uses the ProLeap System. This smart system uses small, motorised retractable legs to lift the vacuum's body over obstacles. This system helps you in a few key ways: Robot vacuums clean without stopping, easily crossing bumps up to a couple of inches high so they can move freely between rooms. You get a more thorough clean because the robot vacuum can reach every part of a room, rather than being blocked by a high doorway. You don't have to babysit it—so you can schedule a cleaning and trust that the robot vacuum will finish the job without your help. How to Clean a Multi-Storey Home Today That ability to handle thresholds is a key part of the complete cleaning solutions you can use for your multi-level home today. Here are two practical guides for the best options available right now. Option 1: Use Multi-Floor Mapping with One Robot Vacuum This is a smart and affordable way to clean your whole house with a single device. Here's how you can set it up: Step 1: Map Your First Floor. Place the robot vacuum on its dock on your main floor. Clear away small items like shoes or cables, open all doors, and start the initial mapping run in the app. The robot vacuum will use its lasers to create an accurate map. Step 2: Save the Map. Once the mapping is done, you can name the map in your app (e.g., "Downstairs"). Step 3: Map Your Second Floor. Carry the robot vacuum (without its dock) to your second floor. Place it in a central spot and start a new cleaning cycle. The robot vacuum will recognize it's in a new place and create a second map. Step 4: Save the Second Map. When it's finished, save and name this map (e.g., "Upstairs"). Step 5: Clean Any Floor, Any Time. Now, you can carry the vacuum robot to the floor you want cleaned. It will automatically recognize where it is, use the correct map, and start cleaning. Option 2: Use a Separate Robot Vacuum for Each Floor This method is for those who want the easiest, most hands-off cleaning experience. Step 1: Pick a Home for Each Dock. Find a good spot on each floor for the robot vacuum's charging dock, preferably with good Wi-Fi coverage. Step 2: Set Up Each Robot Vacuum. Treat each robot vacuum like it's in a separate home. Have each one create a map for its designated floor. Step 3: Create Unique Schedules. In the app, you can give each robot vacuum its own cleaning schedule. You could have the "Upstairs" vacuum clean on Mondays and Fridays, and the "Downstairs" vacuum clean on Tuesdays and Saturdays. Step 4: Enjoy Full Automation. That's it. Your entire home will now be cleaned automatically on a regular schedule, with no need for you to ever move a robot vacuum again. Frequently Asked Questions Will stair-climbing robot vacuums be able to clean the stairs? No. The main goal of this new technology is to let the robot vacuum travel between floors. It is not designed to clean the narrow steps of the stairs. A handheld vacuum is still the best tool for cleaning the stairs themselves. How high a bump can a normal robot vacuum get over? Most standard robot vacuums can clear bumps around 1.3–1.9 cm (½–¾ in). Robot vacuums with special features like the ProLeap System can handle much higher bumps, often over 5 cm (2 in). Do I need Wi-Fi for multi-floor mapping? You typically need Wi-Fi to create and save the maps for the first time. After a map is saved in the robot vacuum's memory, it can clean that floor without being connected to Wi-Fi. Will stair-climbing robot vacuums be very expensive? Like most brand-new technology, the first models that can climb stairs will likely cost more. As the technology gets better and more common, the prices should come down over time. How do I get a floor ready for the robot vacuum to map it? Pick up shoes, toys, and cables off the floor. Open doors to all the rooms you want the vacuum to clean. A clear space helps the robot vacuum create a more accurate, efficient map. Conclusion The invention of a stair-climbing robot vacuum would be a huge step forward for home cleaning. While that technology is being perfected, you can already get excellent results in multi-storey homes using today’s best features—smart navigation, strong threshold handling, and multi-floor mapping—to keep every level clean, including basements and split-levels.
Continue reading
Robot Vacuum Costume Ideas: How to Decorate Your Robot Vacuum Creatively & Safely

Robot Vacuum Costume Ideas: How to Decorate Your Robot Vacuum Creatively...

Editorial TeamDreame |
Have you ever watched your robot vacuum beavering away as it cleans the floor and thought “this little helper deserves a worthy identity”? Whether you want to turn it into a party guest, a tech-savvy pet, or the star of a household parade, decorating your robot vacuum is a playful way to bring a dash of personality to your daily cleaning routine. But before you break out the Lady GaGa hairdo, let’s explore how to safely dress up your robotic companion without compromising its clever cleaning abilities. Get to Know Your Robot Vacuum Before You Decorate It You should consider important safety factors before you start transforming your robot vacuum into a household celebrity: never cover sensors, cameras, docking contacts, or other critical components. Remember that adding anything too heavy or bulky could hinder movement or interfere with charging and cleaning. Robot Vacuum Decoration Safety Checklist Do not block key features such as LDS, front cameras, 3D sensors, cliff sensors, bumpers, vents, side/main brush or mop extend paths, charging contacts or auto-empty ports. Keep all decorations lightweight and confined to the top surface only. Avoid using dangling fabrics or strings, and steer clear of any flammable materials near warm components or docks. After decorating, recheck the under-sofa clearance and confirm the robot can still align and dock properly. Check whether decorative add-ons are approved by the manufacturer. Possible Types of Decorations Personalizing a robot vacuum is fun and popular with some owners. The key is to use safe, lightweight materials that don't obstruct any sensors, vents or moving parts. Robot vacuum stickers, skins, and decals The simplest way to give your robot vacuum a fresh look is with vinyl stickers or custom skins. They come in endless designs, from minimalist patterns to funny faces, and can transform your vacuum look in minutes. Pros: Adds a protective layer; Easy to apply and remove without residue; Thin and lightweight; Many designs available. Cons: Can be difficult to align perfectly; Designs might not fit all models. Adhesive Felt or Fabric   For something softer and more tactile, felt or fabric patches add a cozy, handcrafted feel. They work especially well for themed or seasonal decorations. Pros: Soft, adds a tactile element; Easy to cut and customize. Cons: Can collect dust and hair; Could obstruct sensors if not carefully placed. 3D Prints and Shells If you have access to a 3D printer, small decorative panels or emblems can personalize your robot vacuum in creative ways, just keep them light and flat. You can even design a whole 3D-printed shells to personalize you robot vacuum and match your home's decor. Pros: Highly customizable; Can create unique, personalized elements. Cons: Requires careful placement to not interfere with sensors; Can detach and cause a jam. Materials (such as PLA or ABS) might not be durable or impact-resistant. Clip-on / Strap-on Costumes These turn your robot vacuum into instant entertainment. Great for parties, holidays, or social media fun. Pros: Colorful and entertaining Cons: Can obstruct sensors or interfere with docking; Can cause entanglement and hinder performance. The DIY For craft lovers, nothing beats a handmade touch. Paint, paper, foam, or repurposed materials can make your robot vacuum one of a kind. Pros: Unlimited creativity and personal expression; Turns the vacuum into a fun part of your home decor. Cons: Could impede the vacuum’s navigation and performance by obstructing sensors or vents. Type of decoration Pros Cons Stickers, skins, decals Easy to apply, many designs available Can be difficult to align perfectly Adhesive felt or fabric Soft, easy to cut and customize Could collect dust or obstruct sensors 3D prints, shells Customize with personality Requires careful placement Clip-on, strap-on Playful and entertaining Could hinder sensors or performance DIY Unlimited expression Could impede navigation and performance How to Decorate Your Robot Vacuum Safely (Step-by-Step) Get the Right Fit Before you grab your decorations, you need to know your robot vacuum's measurements. It’s like a custom-fitted outfit for your little helper. Measure your robot vacuum carefully, noting its shape and size—use a ruler or measuring tape for accuracy. Be sure to watch out for the sensors. Avoid covering any sensors or buttons. Check your model for the exact locations of these components: Top: LiDAR/LDS Front: camera/3D structured-light window; IR sensors Edges: bumper seam, side vents Arcs: leave room above side brush swing Rear/Top: charging area or manual buttons Dressing the Robot Vacuum With measurements in hand, you can now begin to outfit your mighty mite. Clean the top so it's dust-free for better adhesion. Make and mark the template for the diameter and all cutouts. Dry fit with painter’s tape, then verify the sensors and bumpers are fully clear. Apply stickers or skins from the center outward, then pop any bubbles with a pin. Add low-profile accents, such as Velcro tabs for seasonal add-ons. Test run to check its edge-following, under-sofa pass, and dock approach elements are all clear and fully functional. Adjust anything that rubs or blocks. Top 9 Robot Vacuum Costume Ideas Based on popular ideas found online, here are 9 safe decoration ideas for a robot vacuum. Some include fun names. The key is to use low-profile, lightweight, and easily removable decorations that won't interfere with the vacuum's sensors and mechanisms. Fun: A popular choice is to give the vacuum a themed look, such as a shark, ladybug or turtle. Cat-themed: Some pet owners have opted for a "Cat Taxi" decal, showing a cartoon cat riding the vacuum. Googly eyes: A classic way to add personality is to put a pair of vinyl or lightweight plastic eyes on the front of the vacuum, making it look like it's "looking" as it cleans, adding a bit of humor to your home. Seasonal stickers: Decorate your vacuum for the holidays with removable decals. Think a pumpkin or ghost for Halloween, a reindeer for Christmas or a bunny for Easter. Character faces: Give your vacuum a face with a vinyl decal kit that includes eyes, a nose, and a mouth. Decorative bumper strips: Some users apply thin, adhesive strips of decorative material to the vacuum's bumper, adding a touch of color without adding bulk or blocking sensors. Team sports decal: Showcase your team spirit by adding a decal with your favorite sports team's logo or mascot.  Minimalist designs: For a more subtle look, opt for a solid-color wrap or a geometric pattern, giving it a sleek and modern appearance. Custom name decal: Personalize it with a custom decal that gives your robot friend an official name. Pro tip: If you want guests or kids to remember and engage with your device, give it a name that gets a chuckle. Pet & Kid Safety Notes If you have children or pets, safety comes first—use this checklist for safe robot vacuum costumes. Avoid choking hazards: Use costumes without small elements that could detach and be ingested. Use non-toxic materials: Ensure all materials used, including adhesives, paints and fabrics, are certified as non-toxic and pet-safe. Secure attachments: All costume elements should be securely attached to the vacuum with strong, pet-safe adhesives or low-profile fasteners. Rounded edges: The costume should have rounded edges to prevent scratches or injuries to curious kids or animals that may interact with the robot. No interference with sensors: The costume must not cover or block any of the robot's sensors, cameras, or wheels. Don’t tempt chewers: Avoid using materials or designs such as plush fabrics or dangly parts that might look like a toy or something tempting to chew on. Lightweight materials: Use only lightweight materials that won't add significant weight to the robot. Fire safety: Do not use any materials that could pose a fire risk or trap heat. How to Remove Robot Vacuum Decorations To remove vinyl decals, gently lift an edge with your fingernail or a plastic card, then slowly peel the sticker away. After removing any type of decorations, wipe down the robot vacuum's exterior with a dry or slightly damp microfiber cloth to remove any residue or dust. Be sure to check the wheels, brushes, and sensors for any lingering adhesive or debris. FAQ What is the best decoration for a robot vacuum?  A simple pair of googly eyes is a common decoration. A possibility in pet homes is a small shark fin or other playful animal accessory. Are robot vacuum stickers safe for daily cleaning?  Yes. Most robot vacuum stickers are made from durable, waterproof vinyl that can handle daily use. They won’t peel easily and can be wiped clean with a damp cloth without affecting performance. Just be sure they don’t cover any sensors or vents. Do robot vacuum skins and decals affect navigation?  Skins and decals generally do not affect navigation as long as they do not cover or obstruct the robot's LiDAR, cameras, or infrared sensors. Do robot vacuum costumes protect against scratches and dirt? A little. Soft fabrics or clip-on covers can offer light protection from scuffs and dust buildup, especially on glossy surfaces. However, they’re mostly decorative. Avoid thick materials that could block sensors or restrict the vacuum’s movement. Can I use a costumed robot vacuum during mopping?  A costume during mopping is not recommended because it could absorb water, get tangled in the brushes, or interfere with the robot's cleaning functionality. Will decorations void my warranty?  Intentional cosmetic modifications or decorations that impact the machine's usability or restoration could void the limited warranty, according to some manufacturers. Final Thoughts Decorating your robot vacuum is a fun way to bring personality to your cleaning routine—but safety comes first. Stick to lightweight, removable decorations, keep sensors clear, and always test performance after decorating.With the right balance of creativity and care, your vacuum can be both a powerful cleaning helper and the star of your home.
Continue reading
The Best Robot Vacuum for Mixed Floors: Your Complete Guide

The Best Robot Vacuum for Mixed Floors: Your Complete Guide

Editorial TeamDreame |
How many cleaning tools sit in your closet? You've got the vacuum cleaner for carpets, the mop for tiles, a steam cleaner for tough spots, and all different kinds of brushes for various surfaces... Mixed floors make you constantly stop, switch equipment, and restart in each room. What if one smart robot vacuum could handle it all? Why Your Mixed Floors Are Hard to Clean? Most homes aren't just one type of floor. You might have hardwood in the living room, carpet in the bedrooms, and tile in the kitchen. It looks great, but it can be a real headache to clean properly. Hardwood scratches easily. When you use rough brushes, you leave permanent marks. Too much power also blows dust around your room instead of picking it up. Tile has grooves where dirt hides. The spaces between your tiles collect grime that surface cleaning can't reach. You need real scrubbing power to get it out. Laminate warps when wet. Even a little extra water makes your boards bubble up and ruins your floor forever. Carpet holds onto everything. Dirt, hair, and dust sink deep into the fibers. When you do light cleaning, you only get surface stuff, leaving your floor looking dirty. A regular vacuum cleaner uses the same power everywhere. It either hurts your delicate floors or doesn't clean your tough ones well enough. Even the best cordless stick vacuum can't match the convenience and consistency of a robot vacuum and mop combo for mixed floors. What Each of Your Floors Really Needs Your Floor Type Main Problem You Face What Actually Works Best Solution Hardwood Scratches from rough cleaning Soft brushes, gentle power Robot vacuum for hardwood floors with sensors Tile Dirt stuck between tiles Strong suction, scrubbing action Floor cleaner with scrubbing mops Laminate Water damage from wet mopping Light, controlled water use Self-emptying robot vacuum with water control Carpet Deep dirt and hair you can't reach Strong suction, hair-resistant brushes Best robot vacuum for carpet with anti-tangle tech What are the Must-Have Robot Vacuum Features for Mixed Floors? Smart robot vacuums fix mixed floor problems with four key features. These work together to clean every surface the right way without any help from you. 1. Adaptive Suction Power Think of this as cruise control for cleaning. The robot uses sensors to detect when it moves from a hard floor onto a rug or carpet, and it automatically kicks the suction into high gear. This is critical for pulling out the dust, dander, and allergens trapped deep in carpet fibers. Once it moves back onto a hard floor, it dials the power down. This intelligent adjustment isn't just for a better clean; it also conserves battery life, allowing the robot to cover more ground on a single charge and operate more quietly on your hard surfaces. 2. Multi-Surface Brushes and Rollers If you've ever had to stop and untangle a brush roller clogged with hair, you know how frustrating it can be. The design of the brush is fundamental to good performance on mixed floors. A basic, stiff-bristled brush just doesn't cut it. The best robot vacuum for pet hair and the best vacuum cleaner for pet hair both use smarter systems, often a bristleless, all-rubber design that resists tangles, or a combination that uses soft silicone fins to sweep hard floors gently while still agitating carpet fibers. Look for models that specifically mention "anti-tangle" features, as this will dramatically reduce the amount of maintenance you have to perform. 3. Advanced Navigation Systems An effective robot vacuum doesn't just bump its way around. It "sees" and maps your home using smart mapping technology, most commonly LiDAR, which works like a mini GPS for your house. This is what separates a truly "smart" vacuum from a basic one. The real win here is efficiency and total control. Because it knows your floor plan, it cleans in neat, methodical rows so it doesn't miss spots. More importantly, it gives you powerful tools in the app: you can set virtual walls to keep it out of a room, create no-go zones around a pet's food bowls, tell it to clean only the kitchen after dinner, and even save maps for multiple floors of your home. 4. Mop-Lifting and Water-Level Adjustment This is probably the single biggest upgrade for anyone with both hard floors and rugs. Mop-lifting technology solves the age-old problem of soggy carpets and makes robot mop and vacuum combos truly effective. A self-emptying robot vacuum with this feature can mop your hard floors, and the moment its sensors detect a rug, it will automatically lift the wet mop pads completely clear of the carpet. Without this, you would have to manually remove the mop attachment or create cumbersome "no-mop zones" in the app around every rug. Mop-lifting enables true, unattended, whole-home cleaning. Paired with adjustable water levels, it gives you the confidence to clean delicate laminate and scrub durable tile in the same cleaning run. What Are Some of The Best Robot Vacuums for Mixed Floors? Want one robot for wood, tile, and carpet? Choose models with carpet boost, rubber multi-surface brush, and auto mop-lift, so it vacuums hard floors, deep-cleans rugs, and never wets them. You can consider the models below. X50 Ultra: Climbs 2-Inch Obstacles Handles 5 carpet types automatically. Thick rugs, bathroom mats, yoga mats - each gets the right treatment without your input. Never gets stuck at door frames. The robotic legs lift over barriers that trap other vacuums. Your cleaning actually finishes instead of stopping halfway. Reaches impossible spaces. Height adjusts to clean under beds and couches where dust builds up for months. Two specialized brushes handle hardwood and carpets properly - no more choosing between floors. L40s Ultra: Zero Hair Tangles Guaranteed Three cleaning modes: Vacuum-only for carpets, mop-only for spills, or both together. Stop compromising and start getting results. End brush maintenance forever. Handles pet hair and human hair (up to 11.8 inches (30cm)) without clogging. Your cleaning time goes to actual cleaning, not cutting hair out of brushes. Solves pet hair problems completely. Long dog fur, cat hair, shedding - all picked up without jamming. No more avoiding rooms where pets spend time. D20 Plus: Set-and-Forget Cleaning Work on all your floors perfectly. Changes power by itself when moving between hardwood, tile, and carpet. Each surface gets exactly what it needs. Cleans for months without help. The big dust bag means you don't empty it for 150 days. Your cleaning happens automatically while you focus on other things. Never miss spots or get lost. Smart mapping creates the best cleaning path through your home. Every room gets cleaned completely, every time. The Real Differences What Matters Most X50 Ultra L40s Ultra D20 Plus Getting unstuck Climbs 2" barriers Crosses thresholds Smart PathFinder Navigation Pet hair solved ✓HyperStream Detangling DuoBrush ✓HyperStream Detangling DuoBrush ✓HyperStream Detangling DuoBrush Reaches everywhere Extendable mop and side brush Extendable mop and side brush Careful edge cleaning Hard floor protection 20,000Pa Suction Bristled Rubber Brush designed for full floor contact 19,000PaSuctionDelicate rubber brush 13,000Pa Suction, deep cleaning into floor gaps Carpet protection 5 smart modes Removable mops Surface detection Less work for you Full automation No brush cleaning 150-day hands-free These three robot vacuums actually solve mixed floor problems. Making Your Choice Work You don't need multiple tools or complicated routines to clean your mixed floors. One smart robot vacuum adjusts to every surface in your house automatically. Look for power that changes by itself, smart navigation, mop lifting, and tangle-free brushes. These four features ensure your robot cleans every floor type properly without damage or missed spots. With the right robot vacuum, you easily turn your daily floor cleaning into something that just happens in the background. Your floors are clean every day without switching tools, changing settings, or doing any maintenance work. FAQs Q1: Which robot vacuum can do multiple floors? For multiple floors: If you mean different floor types (hardwood, tile, carpet), all three Dreame models handle mixed surfaces perfectly. If you mean multiple building levels, robot vacuums cannot move between floors by themselves. All of them need to be carried between levels. But the X50 Ultra has retractable legs that can climb over door thresholds easily, making it move better between rooms. The L40s Ultra and D20 Plus also work well on multiple floors. All of them create separate maps for each level. Q2: Can robot vacuums be used on different surfaces? Yes—if they have appropriate surface detection. These three recommended models can automatically switch cleaning modes from hardwood to carpet, raise mops to prevent wetting, and then lower them for hard floor surfaces. Lower-end or older designs have difficulty making passes and may lug around wet mops on carpets or apply improper suction power, harming floors. Q3: Are robot vacuums good for uneven floors? They struggle most on uneven surfaces and become stuck on raised changes. The X50 Ultra and L50 Ultra are equipped with robotic legs that raise them over surfaces that are up to 6 cm (2.36 in) high. The L40s Ultra and D20 Plus work well on slight bumps but can struggle with taller transitions. For big height changes, you need the more advanced model's ability to climb.
Continue reading
Robot Mop Cleaning Solutions: The Ultimate Guide to a Deeper, Safer Clean

Robot Mop Cleaning Solutions: The Ultimate Guide to a Deeper, Safer Clean

Editorial TeamDreame |
Have you ever done the "white sock test" after your robot vacuum cleaner finishes a cycle? Or just walked barefoot across the kitchen floor? Perhaps too often, the floor appears clean, but it lacks that perfectly smooth, squeaky-clean feel underfoot. It might even feel a little sticky. That's the residue that plain water can't lift. If you're chasing that satisfying, barefoot-on-a-spotless-floor feeling, the secret lies in a better robot, and also a better cleaning solution. Let's talk about how to make your floors look clean and feel great. Is a Robot Mop Cleaning Solution Worth It? Think about washing dishes with just water. Can you clean a greasy plate properly? Probably not. The same thing happens with robot mopping. While your robot vacuum and mop are powerful, using them with only water is like trying to clean with one hand tied behind your back. So yes, a robot mop cleaning solution is definitely worth it. Why Water-Only Cleaning Is Not Enough Water has natural limits that restrain it from cleaning well. Surface tension makes water drops stick together. This causes water to roll around on surfaces instead of spreading out, so it can't get into dirt and lift it. Many everyday messes create extra problems. Kitchen grease, oily paw prints from pets, and food spills actually push water away. When your robot mops with only water, it often just spreads these oily messes around instead of cleaning them up. What's left behind? A dull, streaky mess on your floors. How Cleaning Solutions Work A good robot vacuum cleaning solution uses two key ingredients that work together: surfactants and enzymes. Surfactants Break Down Water's Barriers These special cleaners act like tiny magnets for dirt. Each cleaning molecule has two parts: One end that sticks to water Another end that hates water but loves grease and dirt Using a cleaning solution with your robot vacuum and mop helps break down water's surface tension. This creates molecules that grab onto dirt and grease, lifting them off the floor so the vacuum's mop pad can easily wipe them away. Enzymes Target Specific Stains If regular cleaners handle everyday dirt, these special ingredients are like expert stain-fighting enzymes. These natural proteins speed up cleaning by targeting specific types of messes. According to the American Cleaning Institute, enzymes work by breaking down stains into smaller pieces that surfactants can easily remove. They work like a lock and key: each type is made to break down a particular kind of stain. Cleaner Type What It Is Common Stains Protein fighters Protease Food spills, pet messes, milk, and blood Grease fighters Lipase Kitchen grease, butter, oily marks Starch fighters Amylase Pasta sauce, gravy, potatoes, ice cream By using these specialized enzymes to dismantle big, stuck-on molecules into tiny pieces that dissolve in water, your robot mop can wipe away stubborn stains that would normally require intense scrubbing. 4 Benefits of Using a Robot Vacuum Cleaning Solution Using a quality robot mop cleaning solution gives you several benefits: Deeper Cleaning: It effectively removes germs and sticky residues that water alone cannot tackle. Streak-Free Results: The solution dries quickly, leaving no marks or residue behind. Saved Money: These highly concentrated solutions last for months, providing a low cost per use. Longer Robot Vacuum Lifespan: The low-foam, metal-safe formulas help prevent damage to the robot's pumps, seals, and tubes. In summary, while your robot handles the scrubbing, the cleaning solution does the essential work, together delivering professional results. What is the Best Robot Mop Solution? If you've decided to use a cleaning solution, the next question is which one to choose. The market offers two main types, official and generic, and the difference between them is critical for your robot's health and performance. Official Brand Cleaners: The Safe Pick This is, without question, the safest and smartest choice for your robotic vacuum cleaner. You don't have to worry about compatibility. The same people who built your robot also made these cleaning solutions. They tested them with every part inside your machine: the plastic water tank, rubber pieces, and water pump. Everything works together perfectly, making your cleaner a true robot vacuum and mop combo. You don't have to guess about performance. The cleaner is made specifically for how your vacuum works: how fast water flows and what kind of mop pad it uses. This means you get great cleaning without problems like too much foam (which can break the pump) or streaky floors. You don't have to stress about your warranty. This is the biggest reason to choose official cleaners. If you use anything else and your robot breaks, the company might refuse to fix it for free. Then you're stuck paying hundreds or thousands of dollars for repairs. With official cleaners, your warranty stays safe. Universal Cleaners: Maybe a Gamble These third-party solutions may seem attractive because they often cost less or offer multiple scents, but they can also cause unexpected issues. Universal cleaners claim to work for "all robot vacuums," but that's impossible since different brands use different materials inside. Plus, you're on your own if something goes wrong. If a universal cleaner breaks your vacuum, you may be denied warranty coverage. Important: The official solution is generally your safest bet and your best robot mop solution. Can You Make a DIY Robot Vacuum Solution? No. The internet is full of "hacks" suggesting you can use common household products in your robot mop. It's easy to think, "What's the harm in a little vinegar?" The hard truth is that these DIY solutions can cause damage to your high-tech cleaning vacuum. A Breakdown of the Chemical Dangers Common household products can seriously damage your robot vacuum cleaner: Vinegar: Even diluted, this acid slowly eats away at your robot's rubber seals and metal parts Essential oils & soaps: A few drops of these sticky substances will clog spray nozzles and make your tank brittle Bleach & strong cleaners: Strong often means they are corrosive and will destroy your robot's delicate internal components Regular floor cleaners: Designed for buckets, not robots - they foam up and jam your water pump Cleaning Solutions: What to Use & What to Avoid For a quick reference, use this simple guide to make the right choice every time. Solution Type Our Verdict Risk to Robot Vacuum and Mop Impact on Floors Warranty Status Manufacturer-Approved Solution Gold Standard None - Designed for it Streak-free shine Protected Plain Water Safe Backup None May leave water spots Protected Universal "Robot" Cleaner High Risk Potential for corrosion/clogs Can leave residue/streaks At Risk / Likely Void DIY Vinegar Solution Do Not Use High - Corrodes seals/metal Can dull finishes Void DIY Essential Oils/Soap Do Not Use High - Degrades plastic, clogs tubes Leaves sticky, dirt-attracting film Void Standard Floor Cleaner Do Not Use High - Foaming, residue buildup Leaves sticky residue Void Bleach/Harsh Chemicals Do Not Use Extreme - Severe corrosion Can cause permanent damage/discolouration Void How to Use Cleaning Solution in Your Robot Vacuum? Using the cleaning solution is simple. The exact method depends on whether your robot has a fully automated docking station or a manual-fill tank. For Robots with Auto-Mixing Stations These advanced systems significantly simplify the cleaning process. Locate the solution cartridge: Open your docking station to find the dedicated cartridge or reservoir for the cleaning solution. Fill the cartridge or insert a new one. Use undiluted concentrate. Do not add water. The station is designed to automatically mix the perfect ratio of solution and water for every cleaning and mop-washing cycle. Ensure the cartridge is secured. Close the lid, and you're done. Your robot vacuum will handle the rest. For Robots with Manual-Fill Water Tanks This method requires one simple measurement. Check the golden ratio: Most manufacturers recommend a dilution ratio of 1:200 or 1:300. This usually translates to about one capful of solution for a standard-sized clean-water tank in a docking station. Always check the bottle for the specific recommendation for your product. Fill with water first: This is a crucial pro-tip. Always fill the clean water tank with cool water before adding the solution. Adding the solution first can cause it to foam up excessively when you add water from the tap. Measure and add the solution: Use the bottle's cap as a measuring tool, as intended by the manufacturer, and add the recommended amount to the water-filled tank. Close and start clean: Secure the tank lid, place it back in the dock or robot, and start your cleaning cycle. FAQs Q1: What cleaning solution can I safely use in my robot vacuum? The safest and most effective option is always the cleaning solution specifically made by your robot's manufacturer. If that's not available, using plain, cool water is the only other universally recommended option that will not damage your device or void your warranty. Q2: Can I put vinegar in my robot vacuum? No. This is one of the most common but dangerous DIY mistakes. Vinegar is acidic and will corrode the robot's internal rubber seals and metal parts over time, leading to leaks and permanent damage. Q3: Can I use bleach or other disinfectants in my robot vacuum? Absolutely not. Harsh chemicals such as bleach and ammonia are highly corrosive and will quickly damage the sensitive internal components of your robot. They can also damage your floors. Q4: Which cleaners should be avoided for all types of floors? In general, avoid highly acidic cleaners (such as undiluted vinegar) on natural stone, including marble and granite, as they can cause etching. Also, avoid oily or waxy cleaners (like oil soaps or polishes) as they leave a residue that dulls the finish and can make floors slippery. Always stick to pH-neutral formulas for the broadest safety. Conclusion Water alone can't handle grease because it doesn't spread well. Special cleaners use ingredients that grab dirt and break down tough stains, giving you much better cleaning. For safer use, select cleaning solutions that are made by the manufacturer of your robot vacuum. These products are designed to protect the internal components and help maintain your warranty. Other cleaners may not function properly, and homemade mixtures, such as vinegar or oils, can damage your robot vacuum. Use official cleaning solutions to get the best results and help your vacuum last for many years. Ready to unlock a truly effortless and brilliant clean? Discover Dreame's specially formulated cleaning solution, engineered to bring out the best in your robot and your floors.
Continue reading
Can Robot Vacuums Really Avoid Dog Poop?

Can Robot Vacuums Really Avoid Dog Poop?

Editorial TeamDreame |
Do you have a fluffy, cute pet at home that makes you feel annoyed? Although they are very lovely, the poop they leave behind is really a big headache for many people when it comes to cleaning. Unlike other types of trash, its shape is unpredictable, and sometimes it's wet... This creates cleaning difficulties for many families, and sometimes, an unsuitable robot vacuum can even make the situation worse. With technology getting better, can robot vacuum cleaners solve the dog poop problem these days? The answer is yes. With a good obstacle avoidance system, they can clean up dog poop instead of smearing it across your floors. Why Traditional Robot Vacuums Fail the "Poop Test"? If you've ever owned a basic robot vacuum, you know sometimes they can be clumsy. They bump into furniture, get tangled in cables, and, most disastrously, they can't really tell what's regular trash and what's dog poop. Here's why these older models are a gamble in a pet owner's home. They Navigate by "Feeling" Their Way Around Basic robot vacuums use "bump and turn" to get around. Think of a robot gently bumping its way through your home: it goes straight until it hits something, like a wall or chair leg, then turns and keeps going. Some models have simple infrared sensors that work like weak flashlights to spot big things. Unlike a smart navigation robot vacuum that plans its route, these basic models work blindly. This works okay with common hard obstacles like furniture or larger trash. But pet messes? Their shapes are irregular, and sometimes, they can be soft and wet, or much too low for the regular sensor to detect. So once the cleaner hits the poop, trouble starts... and triggers what pet owners online call a "poopocalypse." Their Brushes Are Designed to Sweep... and Smear That's when things get really bad. Once those wheels and brushes get dirty, the robot keeps cleaning like nothing happened. The spinning brushes that usually sweep up dust and crumbs don't know they hit something messy. The brushes grab the soft, wet waste and spread it in circles across your floor. Each spin makes it worse: they throw pieces everywhere and push the mess deep into your carpet or across your hard floors. The robot keeps moving, leaving a trail of smeared waste as the dirty brushes and wheels carry the mess from room to room. One small accident becomes streaks and smears all over your house. The robot turns into a mess-spreader until you catch it and turn it off. They Can't See What's Right in Front of Them The root cause of all these problems is simple: pet waste is hard to spot. It's usually small, soft, and sits flat on the ground, perfect for slipping past detection. Wet accidents are even worse since there's nothing solid to detect. This gets worse in certain situations: Dark rooms - Sensors don't work well in low light, so robots bump into more things Thick carpets - Carpet texture hides pet accidents from sensors, making detection even harder Messy areas - Around toys and cords, robots think everything is normal stuff to go around, including accidents Once the robot hits the mess, the disaster spreads quickly throughout your home. How Smart Robot Cleaners Avoid Pet Waste? The latest robot vacuums have evolved from simple cleaning gadgets into truly intelligent home assistants. They avoid pet waste not with one single trick, but by combining several layers of advanced technology that allow them to perceive, understand, and navigate the world in a way that older models never could. The Dreame X50 Ultra is a prime example of this technology in action. AI Recognition (Seeing "what" it is) The first major upgrade is equipping robot vacuums with a reliable method for identifying objects. A front RGB camera continuously scans the path ahead, while onboard AI models classify what it sees: cables, socks, pet bowls, shoes, and pet waste. Instead of guessing by shape alone, it uses a trained library of everyday items to choose the right response (avoid, slow down, reroute). Modern systems recognize well over a hundred object types, including pet messes, so the robot vacuum can clean smartly rather than blindly. For example, the Dreame X50 Ultra's AI can identify up to 200 different types of objects, including dog poop. It's a true AI robot vacuum that can clean smartly. Depth Sensing & Low-Light Vision (Knowing "where" it is) Cameras need help in dim rooms—under beds, at night, or on rainy days. That's why advanced bots pair vision with active depth sensing: Structured light or dual-line laser projects a "visual" pattern or laser lines onto the floor. The distortion reveals an object's shape and distance (great for small hazards like wires and socks). An LED fill light automatically turns on in low light so the camera can still see clearly. Together, these enable the robot to perceive obstacles with high accuracy even in poor ambient light. Example: The X50 Ultra uses 3D structured light to detect and map smaller items like wiring and socks. This system is further enhanced with built-in LED lights that automatically turn on in dim environments, like on rainy days or during late-night cleanings. This gives the robot vacuum a superpower: it can "see" and avoid obstacles with incredible accuracy, even in complete darkness. Smart Navigation (Building the map and choosing the path) Obstacle recognition works best when it rides on top of a robust map. High-end robots use LiDAR (often direct Time-of-Flight, dToF, inside the LiDAR unit) to create a precise 2D floor map of your home. That map handles rooms, zones, and efficient row-by-row cleaning; the front vision/depth stack adds a local 3D understanding of objects in the robot's path. Think of it as a simple but powerful loop: See: The camera + depth sensors detect something ahead. Think: AI classifies it (e.g., pet waste) and notes its position relative to the map. Avoid: The navigation system plots a clean detour with a safe buffer, then resumes the route without you stepping in. The result is fewer tangles, fewer smears, and far fewer "come rescue me" moments. Exactly what you want in a home with pets. Buyer's Guide: What to Look For in a "Poop-Proof" Robot Vacuum Ready to invest in a pet-friendly robot vacuum that you can actually trust? Focus on these non-negotiables so the bot avoids accidents, doesn't smear them, and still keeps up with hair and daily dirt. 1. AI Obstacle Recognition (The Most Important Feature) Don't settle for vague "obstacle avoidance." Look for models that explicitly state AI object recognition and pet waste avoidance. That means a front RGB camera, depth sensing (e.g., dual-line laser/structured light), and LED lighting for dark rooms. This combo lets the robot vacuum identify cords, socks, bowls, and pet messes, and steer a safe path around them. Why it matters: Fewer rescues and, crucially, no contact with accidents—even in low light. Some examples: Dreame X50 Ultra (RGB AI vision + Dual-Line Laser + LED) Dreame L40s Ultra (RGB AI vision + Single-Line Laser + LED) Budget pick: Dreame D20 Pro Plus. It offers LDS navigation and Single-Line Laser sensing. Great value, but it doesn't include AI. Choose accordingly if this is a must. 2. Mop Safety Logic Many of the best robot vacuums are now combo vac-and-mop units. This raises a new fear: what if it tries to mop the mess? Rest assured, the same AI object recognition technology applies here. When the robot identifies pet waste, its programming overrides all cleaning functions in that area. It will intelligently navigate around the mess, ensuring its mopping pads never come close to making contact. A "poop-proof" robot also needs the right mop management so it never drags a wet pad through trouble. Look for: Mop lift for short-pile rugs (and pad removal options for long-pile). No-mop zones and no-go zones you can draw on the map. Automatic skip/ detour logic when pet waste is recognized (mopping and brushing are suppressed near the hazard). Why it matters: Even perfect avoidance is pointless if a damp pad swipes too close. Some examples: X50 Ultra and L40s Ultra pair AI avoidance with hot-wash and dry docks, so the mop pads start clean and dry after each cycle. D20 Plus supports no-go/no-mop zoning and auto-empty; mop care is manual. 3. Strong Pickup & No Tangled Hair A robot vacuum that avoids poop but leaves fur-tumbleweeds everywhere isn't a complete solution. According to the Asthma and Allergy Foundation of America, pet dander is a major source of indoor allergens. A robot vacuum for pets with robust suction is essential for lifting stubborn hair, dander, and dirt from deep within carpets and hard-to-reach crevices, ensuring a not just visibly clean, but healthier home. Look for: High airflow/suction, above 10,000 Pa Tangle-resistant main brush (dual-roller or anti-wrap design). A sealed auto-empty bag so you're not breathing the bin. Why it matters: You get fewer clogs if the rollers are kept clean. Sealed bags plus hot washing and drying mean less odor and less need for handling. Some examples: X50 Ultra: full-service dock, premium hair and dust pickup. L40s Ultra: hot wash/dry + auto-empty for everyday convenience. D20 Plus: auto-empty for dust control at a friendlier price. 4. Navigation You Can Trust Reliable poop avoidance rides on a reliable map. Look for: LDS mapping for accurate rooms/zones and efficient paths. Per-room suction/water settings, schedule by zone, and easy no-go/no-mop editing. Low-light support (LED fill) so vision works at night. Why it matters: You control where the robot goes and where it absolutely doesn't. Some examples: All three vacuums like X50 Ultra, L40s Ultra, and D20 Plus offer LDS mapping and robust app control. 5. Self-Emptying System For the most hands-off experience, choose a model with a self-empty dock. It automatically vacuums the robot's bin into a sealed bag, so you're not dumping dust and dander after every run. Why it matters for pet homes: Weeks of cleaning without touching an allergen-filled bin. Some examples: X50 Ultra and L40s Ultra pair auto-empty with pad wash/dry; D20 Plus offers auto-empty at a lower price point. Quick Matching Guide What you need Model Features Highest confidence, lowest touch Dreame X50 Ultra AI vision + full-service dock Great balance of brains and budget Dreame L40s Ultra AI + hot wash/dry + auto-empty Value pick with strong mapping and auto-empty Dreame D20 Plus Pet-friendly basics: verify if pet-waste AI is essential for you Final Check: Read Pet-Specific Reviews Before you buy, do your homework. Don't just look at the overall star rating. Use the search function in the reviews section on retail sites and look for keywords like "dog," "cat," "pet accident," or "poop." This will filter the results to show you exactly what you need to know from people in your situation. No robot vacuum is 100% accident-proof. AI is excellent, not infallible. Do a quick floor check on the cleaning days. First-week setup pays off: Add no-go/no-mop lines around litter areas, pet beds, and food bowls; schedule runs when pets are less active. Keep "eyes" clean: Wipe the front camera window, depth sensors, and LiDAR with a dry microfiber so the robot can "see" accurately. Feature Benefit for Pet Owners AI Vision & Recognition Avoids pet accidents (like poop) for mess-free cleaning. Powerful Suction Lifts stubborn pet hair and dander from all floors. Smart Mopping Keeps wet mops away from messes to prevent smearing. Self-Emptying Provides weeks of hands-free, hygienic cleaning. Precise Mapping Cleans every corner efficiently without getting lost. Achieving Peace of Mind in a Pet-Friendly Smart Home So, can robot vacuums avoid dog poop? The answer is a resounding yes, but only for the advanced pet-friendly robot vacuum equipped with the right AI and sensor technology. Gone are the days of gambling with your floors. With the right device, you gain the confidence to schedule cleanings while you're away, the benefit of a healthier home with fewer allergens, and most importantly, more quality time to spend with your furry family members. It's about removing a major source of stress and reclaiming your time and energy. Ready to say goodbye to the fear of the poopocalypse for good? Explore Dreame's lineup of AI-powered robot vacuums and discover a smarter way to clean.
Continue reading





















