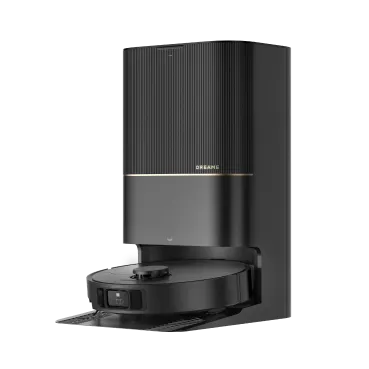
Pet hair no longer overwhelms your home thanks to advanced robot vacuums like the Dreame X50 Ultra, offering deep suction, smart navigation, and easy maintenance.
Dock placement decides the best robot vacuum for small apartment living, not square footage. A compact floor plan finishes on a fraction of a charge, so focus on dock footprint and body height.
The Dreame D30 Ultra CE and Dreame X60 Ultra are the proven picks from our collection we'd recommend most to small apartment owners, with the five choices below sorted by situation.
Does a Small Apartment Really Need a Robot Vacuum?
Yes, a robot vacuum is worth it if you have hard floors or pets. Small apartment here means a studio or one-bedroom, roughly 42 to 70 m². It handles daily crumbs and shed hair best, and both pile up faster than you'd think in a space that size.
What about a flagship?
You don't need one for the power. A small floor plan finishes on a fraction of one charge, so the big battery and the top suction figures are the parts you can skip. A slim body is worth paying for if your sofa and bed sit low, since the dust under them is harder to reach, and hot water mop washing is worth it if your whole place is hard floor.
Best Overall for a Small Apartment
Dreame pick: The Dreame D30 Ultra CE empties its own bin and washes its own mop, so you never carry a dust cup to the kitchen bin or rinse a dirty pad in the bathroom sink.
The Multifunctional PowerDock™ 2.0 handles both jobs between runs. With 100-Day Auto-Empty you empty nothing for months at a time, and the only accessory that needs your shelf space is a spare bag. you empty nothing for months at a time, and the only supply needing shelf space is a spare bag.
The base station takes up 457 x 340mm of floor, so measure your wall spot before you commit. Our guide to must-have robot vacuum dock features covers what each dock type does for you, from auto-empty to hot water mop washing.
25,000 Pa Vormax™ suction handles hard floors and low-pile carpet, and the DuoScrub Mopping System uses two scrubbing pads to lift dried spills instead of leaving them half-cleaned. Carpets with deep pile need stronger suction, so check what you have on your floor before you decide. At $699.99 CAD, the mop washing is what separates this dock from one that only empties.
[product handle="d30-ultra-ce-robot-vacuum" slogan="Best Overall for a Small Apartment"]
Also consider: Roborock, the premium name most people cross-shop at this price, and iRobot, the most widely recognized alternative in the same range.
Best for Tight Corners and Low Furniture
Dreame pick: Most of the dirt in a small apartment ends up along the walls and in the corners, and the Dreame X60 Ultra is built to reach it.
Dual Flex Arm Technology pushes the side brush and the mop pad outward as it passes, so it cleans along baseboards instead of curving around them. In a studio where furniture sits against every wall, that reach does more work than raw suction.
The 7.95cm slim design clears low platform beds and legless sofas, and VersaLift™ DToF Navigation retracts the laser sensor so the body can slide under them. It climbs thresholds up to 8.8cm, which covers the raised door frames in older apartments. At $2,099.99 CAD, its 35,000 Pa Vormax™ suction goes beyond what a small apartment needs day to day, so you get both reach and power that come in handy if you have a pet or plan to move to a bigger place later.
[product handle="x60-ultra-robot-vacuum" slogan="Best for Tight Corners and Low Furniture"]
Also consider: eufy, a popular name at the slim end of the category, and SwitchBot, another compact-format alternative.
Best for Complex Layouts with Pets and Kids
Dreame pick: A small apartment with a dog and a toddler holds more objects per square foot than any house, and the Dreame X60 Max Ultra Complete is the pick that knows how to get around them.
Dual 120° AI cameras detect 280+ object types, down to things measuring 10mm, so a charging cable or a chew toy gets routed around rather than dragged into the next room.
The Dual-Solution Compartment is what puts this pick in the pet category. The dock holds a floor cleaner alongside a soybean-derived pet odor neutralizer, and Auto Solution Adding refills both on its own, so it handles accidents both effectively and safely. It is the most expensive pick here at $2,399.99 CAD, and is worth it for households with busy floors.
[product handle="x60-max-ultra-complete-robot-vacuum" slogan="Best for Complex Layouts with Pets and Kids"]
Also consider: Roborock, the premium alternative for obstacle avoidance, and Shark, a familiar name in the same space.
Best Mid-Range
Dreame pick: The Dreame L60 Ultra FE is the choice if you want the dock handling the upkeep without the flagship price.
Get extended reach with Dual Flex Arm Tech pushes the brush and mop out toward your edges and corners, so you don't have to follow up with a cloth along the baseboards. The All-in-One PowerDock™ runs auto-empty for up to 100 days.
100°C ThermoHub™ Mop Self-Cleaning washes the pads at the dock, so dirty pads never go back down on your floor. The TriCut™ Brush 3.0 cuts and clears hair as it spins, saving you from detangling the roller after every run.
30,000 Pa Vormax™ suction lifts debris in a single pass, and the 5,200mAh battery is built for multi-room runs, so a one-bedroom finishes without stopping to recharge. It comes in at $1,399.99 CAD.
[product handle="l60-ultra-fe-robot-vacuum" slogan="Best Mid-Range"]
Also consider: Roborock, a widely available mid-range alternative, and eufy, another popular vacuum and mop option here.
Best Budget Pick for the Smallest Spaces
Dreame pick: The Dreame D20 Air Plus is the best robot vacuum for small spaces on a tight budget, since it's the most budget-friendly option that still includes a dock that empties the bin for you.
Up to 120-Day Hands-Free Dust Collection runs into a 4L dust bag, so you go four months without touching it. Smart Pathfinder™ Tech with LiDAR maps your apartment properly rather than bouncing off furniture, which counts for more in a small floor plan than in a house.
Priced at $349.99 CAD, its 20,000 Pa Vormax™ Suction easily handles hard floors and the low-pile rug by the sofa.
[product handle="d20-air-plus-robot-vacuum" slogan="Best Budget Pick for the Smallest Spaces"]
Also consider: eufy, a familiar budget alternative, and iRobot, a recognizable entry-level name.
Important: The dock empties the bin but does not wash or dry the mop. You rinse the flat 2-in-1 pad by hand after a mopping run, which is the trade-off for the lowest price on this list. Consider this if your apartment is hard-floor end to end and you use the mop often.
What to Look For in the Best Robot Vacuum for a Small Apartment
The dock matters more than anything else when you're picking the best robot vacuum for apartment living, both where it fits and how much it handles for you. Navigation sets how efficiently it covers your floor, and noise sets whether you can run it while you're home.
Where the dock goes
A dock needs a permanent spot against a wall near an outlet, plus clear floor in front so it can line up and reverse in. Footprints vary more than you would expect, from around 293 x 201mm on a dock that only empties to 457 x 340mm on one that also washes and dries the mop. In a studio, the spot you give up is often the one square foot you were saving for something else.
Pro-tip: Measure the dock spot before you buy, and include the clear space in front of it. A dock needs room to back in, so the usable gap runs wider than the base.
Whether an auto-empty dock is worth it
An auto-empty dock is worth it if you have pets or long hair in the house. It buys you months of not touching the bin, and the fuller docks wash and dry the mop pads too. The cost is a bigger base, so skip it if the only place it fits is your one free wall.
Our range of robot vacuums for apartments filters by base station, so you can narrow to the models that come with one.
Vacuum height against your lowest furniture
Use a tape measure to measure the gap under your lowest furniture, usually the bed or the sofa. Any vacuum taller than that gap won't fit underneath. Small apartments also carry more doorways per square foot than houses, so a bathroom lip or a thick runner will strand a machine that cannot lift over it.
How the robot vacuum navigates
LiDAR is the one worth paying for, even in 37 m². Gyroscope models bounce and cover ground they already did, which wastes the short run a small floor plan needs. Cameras spot objects on the floor, so they work alongside LiDAR rather than replacing it. The comparison of robot vacuum mapping vs no mapping sets out what LiDAR unlocks, from no-go zones to room scheduling.
How quiet the robot vacuum is
Most models run quietest in their lowest suction mode, and quiet mode on the X60 Max Ultra Complete measures 59 dB. The dock emptying cycle is the louder moment at over 70 dB, so schedule that for when you are out. Our roundup of the quietest robot vacuums lists the noise levels by mode.
How Dreame Tests Robot Vacuums
The standard industry test for a robot vacuum is dust pickup in an empty square room. Your home is not an empty room, so Dreame's testing starts where that test ends.
Hair is the clearest example. Engineers run each robot vacuum against a blended mix of hair lengths from 3cm to 30cm, built to clog and tangle a poorly designed roller brush. After every run, the team collects and weighs the hair from three collection points: the dust box, the roller brush, and the side brush. The result is a hair tangling rate, which shows how much hair the vacuum actually swallowed versus how much wrapped around its brushes. Cleaning efficiency alone hides that difference, and it's the difference that matters in a home with pets or long hair.
Durability gets the same scrutiny. Every model passes compression and drop testing, then vibration runs that simulate real shipping. Environmental simulation chambers expose finished units to extreme heat, humidity, rain, and salt spray.
Independent reviewers back the results. Vacuum Wars, which runs standardized testing across dozens of robot vacuums each year, ranked Dreame #1 in 2025. Read the full methodology in How Dreame Tests Robot Vacuums.
Choosing the Best Robot Vacuum for Apartment Living
Every pick above cleans a small apartment well, so what separates them is how much upkeep you hand over and how much you budget for it.
Browse the full range of robot vacuums for a wider look at our models.
The robot vacuum comparison tool lines models up against each other on suction, battery, and every dock feature, so you can check the ones you are torn between.
Frequently Asked Questions
Do robot vacuums work in small apartments?
Yes, robot vacuums work well in small apartments, often better than in a large house. The whole floor plan is done in one pass, so the constraint is where the dock lives rather than whether the machine can cover the space.
Which robot vacuum is best for a small house?
The Dreame D30 Ultra CE is the pick for a small house, since Smart Pathfinder™ Tech routes it room by room and its Smart Carpet Cleaning Strategy is built for multi-floor homes. A small house has more rooms across the same square footage than an apartment, so mapping matters more than it does in a studio.
How much space does a robot vacuum dock need?
A dock needs its own space on the floor, plus a clear space in front so it can line up and reverse in. Allow more room than the base itself takes, and pick a spot near an outlet that can stay free.
Do I need a self-emptying dock in a small apartment?
It depends on whether you have wall space to spare. The dock takes the weekly bin job off your list, which is the whole appeal. The bigger base takes more floor space, and you keep a few spare bags on hand, so it requires more storage space in a tight floor plan.
Can a robot vacuum be too loud for apartment living?
No, not if you pick the mode and the timing. The loudest setting on the X60 Max Ultra Complete reaches 70 dB, while standard cleaning sits at 60 dB, around the level of normal conversation. The dock emptying is louder again but only a short burst, so set cleans to run while you're out.
Amazon now runs Prime Day twice a year, once in June and once in early October, alongside Black Friday week in late November. Each sales window favors different product categories. This article compares Prime Day vs Black Friday deals and provides tips on when to buy if you have a vacuum in your cart.
A vacuum in its second year on the market usually drops further during either Prime Day or Black Friday than a new release does, which means the age of what you are buying may matter more than the event you shop for.
Prime Day vs Black Friday: What Actually Differs
The biggest differences between Amazon Prime Day vs Black Friday are who can shop and how long the pricing lasts. Both events have posted similar price drops on overlapping products in recent years, so choosing an event based on rumored discounts may not be reliable. Below are the two key differences between these events.
Prime Day is an Amazon-exclusive event, while Black Friday is for everyone
Prime Day pricing requires an Amazon Prime membership, so without one, you either pay full price or pay for the membership on top of your purchases. Black Friday runs across Amazon, Target, Costco, Best Buy, and other major retailers or brand stores with no membership required, giving you more room to compare the same vacuum across stores before you commit.
However, that doesn't mean Amazon is the only place running discounts during Prime Day. Brands may launch separate promotions on their own websites at the same time, giving shoppers another place to compare prices, bundles, gifts, or other purchase benefits. These are independent brand promotions rather than part of Amazon Prime Day itself.
Prime Day lasts for two short periods, while Black Friday is an entire shopping season
The mid-year Prime Day ran for four days in June 2026, and the fall event, Prime Big Deal Days, is due to run for two days in early October. Meanwhile, Black Friday pricing opens in early November and runs through Cyber Monday on November 30, spanning roughly four weeks.
With just six Prime-only days spread across the year versus a month of pricing across every retailer, you have more chances to find your specific model in stock during Black Friday.
What Prime Day does well and where it's limited
Pros
One store to watch, so tracking a single model's price is simple
Short, fixed dates are easy to plan around
Runs twice a year, in June and October
Cons
You need a Prime membership, or you pay the standard price
Amazon only, so you can't compare across retailers in the same window
Two days in October leave little room if your configuration sells out
What Black Friday does well and where it's limited
Pros
Open to everyone, with no membership needed
Amazon, Target, Costco, and Best Buy all run promotions at once
About four weeks of pricing gives you more chances to catch your model
Cons
Prices are spread across many retailers, so tracking one model takes more work
Popular configurations can sell out as the weeks go on
The table below puts all three events side by side, with the June and October Prime events in their own columns, so you can check access and timing for each sale at a glance.
Event
Prime Day (June)
Prime Big Deal Days (October)
Black Friday
Who can shop
Prime members only
Prime members only
Everyone, every retailer
When it runs
June 23–26, 2026 (4 days)
October 6–7, 2026 (2 days)
November 27, with pricing running ~4 weeks through Cyber Monday, November 30
Where it runs
Amazon only
Amazon only
Amazon, Target, Costco, Best Buy, and more
How wide the catalog goes
Millions of items, heavy on Amazon-sold brands
Smaller catalog, holiday-focused
Broadest selection across all retailers
How Prime Day, Prime Big Deal Days, and Black Friday compare on access, timing, and catalog coverage.
Amazon Runs Two Prime Days a Year
Amazon runs a second Prime event every October, called Prime Big Deal Days, about seven weeks before Black Friday. The mid-year Prime Day already ran in June and covered most of the same categories, so October is the Prime window still ahead of you.
The October event: Prime Big Deal Days
Prime Big Deal Days is the event people mean when they search "October Prime Day." Amazon has confirmed it for October 6 to 7, 2026, giving Prime members 48 hours of pricing at the start of the holiday shopping season.
Our guide on the best Prime Day robot vacuum deals compares three Dreame models for the October event and explains why total value matters more than the biggest markdown.
Why the spacing to Black Friday matters
About seven weeks sit between the October event and Black Friday, which is long enough for a popular configuration to sell out before November, and short enough that waiting is still a reasonable plan.
Which Categories Are Cheaper on Prime Day vs Black Friday?
Items with the best discounts during Prime Day events
Categories sold mainly through Amazon tend to see their best pricing when Amazon runs its own sale.
Amazon devices, such as Kindle, Echo, Ring, and Fire TV
Small kitchen appliances, like coffee makers and air fryers
Robot vacuums and other home cleaning tech
Household essentials, including paper goods and cleaning supplies
Beauty and grooming products
Items with the largest discounts over Black Friday week
Categories every major retailer stocks go lower in November, since Amazon, Target, Costco, and Best Buy all price the same products in the same week.
TVs, especially larger and premium screens
Laptops and tech gadgets
Large appliances, such as refrigerators and washers
Apparel and shoes
Mattresses
Holiday gift sets
How to Tell a Real Discount From a Mark-Up?
The easiest way to judge Prime Day deals vs Black Friday deals is to write down the standard price for any model you are considering, at least a week before either sale opens. Every discount claim you see during the sale becomes easy to verify once you have that number in front of you.
Find the standard price first
Every vacuum has a published retail price (MSRP) that stays the same year-round, so look it up on the manufacturer's website before any sale starts and write it down. Once you have that number, you can judge any discount on the day in a few seconds. For example, on Dreame, you might find:
D20 Pro Plus — $749.99 CAD
L40 Ultra Gen2 — $1,099.99 CAD
The crossed-out price on a sale listing is not always what the product was selling for last week. It is often the original price from launch, which can make the discount look larger than it is. The number you wrote down yourself is a more reliable comparison.
Match the full model name before you buy
An "L40" and an "L40 Ultra Gen2" can be several hundred dollars apart, but a sale listing sometimes uses the shorter name for both.
The suffix usually tells you the product model generation or what comes included in the box, so a missing word can mean a different dock, different features, or an older release.
Always check the complete model name against the figure you wrote down before you add anything to your cart.
Dreame Take: We display the retail price for each model on our website throughout the year. This allows you to easily compare prices during any sale. We believe that providing this information is one of the most helpful things a brand can do during the shopping season.
Should You Buy in October or Wait for Black Friday in November?
In terms of the Black Friday vs Prime Day decision, buy in October if you already know the model you want and it is in stock, and wait for Black Friday if you are still comparing brands or haven't settled on a model.
Buy in October when you already have a specific product model in mind
Specific colors or vacuum dock options may sell out as the holiday season progresses, so buying in October gives you the best chance of getting the exact version you want.
If the price during the October event matches or sits close to the retail figure you wrote down earlier, that is a good time to buy.
How long a model has been on the market matters more than which sale you pick. A model in its first season rarely moves far at either event, while the generation it replaced has more room to drop.
If you want the latest generation anyway, the Dreame X60 Ultra Robot Vacuum is worth shortlisting, with a slim body that slides under most sofas and beds.
Wait for Black Friday when you are still choosing
You get more options to compare in one week during Black Friday than at any other time of year. Amazon, Target, Costco, and Best Buy all run promotions at the same time, so if you haven't settled on a brand or model, you can compare pricing across all four in a single window.
If you're in the market for a robot vacuum, our best robot vacuums guide matches models to the household they suit best, from homes with pets and carpets to large houses and small apartments.
Prime Day vs Black Friday: Either Sale Works When You Know the Standard Price
You have the sales event calendar, and you can check the retail prices for anything you might want to buy ahead of time. Next, decide whether the sale prices are good enough to check out the items in your cart.
You can also browse Dreame's range of vacuum cleaners, from robot vacuums to wet dry models, to find the one you want to track for the sales.
Frequently Asked Questions
Is Prime Day better than Black Friday?
Neither event is reliably cheaper than the other, and both have posted similar discounts on overlapping products in recent years. Prime Day is members-only and runs on Amazon alone, while Black Friday runs across every major retailer. A model in its second year on the market tends to drop further at either sale than a new release does, so the product's age matters more than the date you shop.
Will Amazon prices get better on Black Friday?
Amazon's Black Friday prices are sometimes lower than the Prime Day prices on the same product, but the reverse has also been true in recent years. There is no consistent rule for which event undercuts the other, so the most reliable approach is to write down the retail price beforehand and compare it against whatever number you see on the day.
What is the cheapest day to buy on Amazon?
No single day is consistently the cheapest across all products. The two Prime events in June and October and Black Friday week in late November are the three largest discount windows, but individual models can also see price drops at other points in the year. Writing down the retail price ahead of time lets you recognize a good deal whenever it appears, regardless of the event.
Why is Prime Day such a big deal?
Amazon concentrates a large volume of deals into a short members-only window, which tends to push prices lower than the smaller weekly promotions you see throughout the year. The event has grown every year since it launched, and Amazon now runs it twice annually, once in June and once in October, giving shoppers two chances instead of one.
Is it better to order off Amazon on Black Friday or Cyber Monday?
Most retailers now run the same pricing from Black Friday through Cyber Monday, so the price gap between the two days is smaller than it used to be. Our black friday vs cyber monday comparison covers the remaining distinctions.
When is October Prime Day 2026?
Amazon has confirmed Prime Big Deal Days for October 6 to 7, 2026. It runs for two days and is open to Prime members only. For the full 2026 event timeline, including the summer Prime Day and October Prime Big Deal Days, see our guide: When Is Prime Day 2026?.
The best robot vacuum for corners pushes its side brush and mop past the round body, right into the strip where your wall meets the floor. We've compared models from budget picks that stop short of the baseboard to flagships that reach all the way in. We think the Dreame X60 Max Ultra Complete is the best all-rounder for corners and the Dreame Matrix10 Ultra is the best choice for baseboards.
Best Overall Robot Vacuum for Corners
Dreame Pick: At $2,399.99 CAD, the Dreame X60 Max Ultra Complete extends both its side brush and mop pad past the round body using Dual Flex Arm Technology (SideReach™ and MopExtend™ RoboSwing). It sweeps and mops your corners, clearing both dry dust and the line of grime along the baseboard.
Dust builds up fastest in the corners you rarely check, under the couch and behind the bed frame. At 7.95cm tall with its VersaLift DToF turret retracted, the X60 Max Ultra Complete slides under most furniture to reach those spots without you pulling anything out. On carpet, the mop lifts 10.5mm and the vacuum takes over, so your carpeted corners get vacuumed but not mopped.
35,000 Pa of Vormax™ suction pulls the dust wedged into corners rather than leaving a faint line behind. The AI-Enhanced OmniSight™ System with Dual 120° AI Cameras recognizes 280+ objects, so the vacuum steers around pet bowls and shoes instead of nudging them into the spot you just cleaned.
[product handle="x60-max-ultra-complete-robot-vacuum" slogan="Best Overall for Corners"]
Also consider: Roborock is the premium alternative most buyers cross-shop here, with Ecovacs offering extending hardware as well. Dyson is newer to the category but shows up consistently across this search.
Dreame Take: A clean floor only feels clean when the corners match the middle of the room. We believe you shouldn't have to go over the edges by hand after every run, so we build extending arms that carry the brush and mop out to the spots a round body can't reach.
Best Robot Vacuum That Cleans Baseboards and Along Walls
Dreame Pick: The Dreame Matrix10 Ultra cleans right up against your baseboards with Dual Flex Arm Technology. Its side brush and mop extend up to 4.5cm when the vacuum detects corners and low-clearance areas, so the grime line you're used to seeing along your walls clears up properly.
Your heaviest grime spots get a targeted rewash through OmniDirt™ Detection, which scans the floor and sends the robot vacuum back to re-clean the areas that need it. Baseboards build up grime faster than the rest of your floor, so the rewash matters most along that strip.
The suction on the Matrix10 Ultra reaches 30,000 Pa Vormax™, enough to keep your floors clean each run, while the mop fully detaches on thick carpet so the robot vacuum switches to dry-only without dragging a damp pad across the carpet pile.
[product handle="matrix10-ultra-robot-vacuum" slogan="Best for Cleaning Baseboards"]
Also consider: Ecovacs and Shark both show up in baseboard-focused shopping results, with Ecovacs at the flagship end and Shark more recognizable to households already using their cordless vacuums.
Best Robot Vacuum for Edges With Mopping
Dreame Pick: Priced at $1,399.99 CAD, the Dreame Aqua10 Ultra Roller rinses its roller mop with fresh water continuously as it cleans, so your corners get mopped with clean water even at the end of a full run. The roller extends about 40mm outward past the body to reach into tight edges along walls and furniture bases.
30,000 Pa of suction moves dry debris ahead of the roller, so your hard floors get vacuumed and mopped in one pass. On carpet, AutoSeal™ closes the roller and lifts it 14mm, and the robot vacuum switches to dry vacuuming only.
[product handle="aqua10-ultra-roller-robot-vacuum" slogan="Best for Mopping Corners"]
Also consider: Roborock and Narwal both offer extending mopping hardware, with Narwal known for its roller-style approach and Roborock for its broader premium lineup.
Best Value Robot Vacuum That Gets Corners
Dreame Pick: The Dreame L40 Ultra Gen2 extends both its side brush and mop into corners and along edges, the same type of hardware the premium picks use, at just $1,099.99 CAD. With this robot vacuum, your corners are cleaned the same way, and the dock auto-empties for up to 100 days so cleaning stays hands-free even longer.
The DuoScrub Mopping System runs cold water, which handles everyday dust and light spills on hard floors well, though heavier kitchen grease clears more thoroughly with a follow-up pass.
The L40 Ultra Gen2 delivers 25,000 Pa suction, and the mop lifts 10.5mm on carpet to keep your rugs dry. 3DAdapt structured light handles obstacle avoidance as it works through rooms, steering the robot vacuum around furniture and shoes.
[product handle="l40-ultra-gen2-robot-vacuum" slogan="Best Value for Corners"]
Also consider: eufy and Shark are the most common value alternatives in this search, with eufy known for budget-friendly smart features and Shark for its wide retail availability.
Best Budget Robot Vacuum for Corners
Dreame Pick: The Dreame D20 Air Plus cleans your corners with 20,000 Pa of suction and a side brush tuned for edge coverage, and the auto-empty dock holds up to 120 days of debris so you're not emptying a dustbin after every run.
At $349.99 CAD, the robot vacuum handles both vacuuming and mopping across your hard floors.
The side brush works from the body's edge rather than extending outward, so your corner reach depends on how close the robot vacuum drives to the wall. The L40 Ultra Gen2 mentioned above offers extended reach at the next price point, which helps if the remaining dust line along your baseboards bothers you over time.
[product handle="d20-air-plus-robot-vacuum" slogan="Best Budget for Cleaning Corners"]
Also consider: eufy and Shark are the most common budget alternatives in this search, with both widely available at major retailers.
How to Choose a Robot Vacuum for Corners
A robot vacuum's side brush reach is the biggest factor when you're choosing a robot vacuum for cleaning corners, and whether the mop extends as well determines how much of the grime line it'll clear on its run.
Does the side brush extend or just spin?
An extending side brush pushes outward past the robot vacuum's body and reaches the strip where your wall meets the floor. A fixed brush cleans only as far as the body allows, which is why a dust line along your baseboards keeps showing up after each run. Our robot vacuum corner-cleaning guide explains how the extending mechanism works and what it changes on each pass.
Does the mop extend too?
Your hard-floor corners collect wet grime along with dry dust, and only an extending mop reaches close enough to clear both. The brush handles the dry debris, but the grime line along your baseboard stays put until the mop gets there too. A brush-only extension is enough if your floors are mostly dusty and you mop less often, because it still clears the dust line along your baseboards.
Read our guide on how Dreame vacuums clean edges to learn more about extending hardware differences model by model.
Does it fit under furniture to reach hidden corners?
Most of the dust you notice builds up under furniture, where the robot vacuum needs to be slim enough to fit. A retractable navigation turret makes the body low enough to slide under your couch and behind your bed frame, so check the robot vacuum's body height in the specs if under-furniture reach matters in your home.
Does the mop lift or detach on carpet?
A mop that lifts or detaches on carpet lets the vacuum clean your rugs and carpeted corners without dragging a damp pad across them. Check the mop lift height in the specs, and look for full mop removal if you have thick or high-pile carpet.
Pro-tip: Check the side brush before troubleshooting anything else. Hair wrapped around it shortens the brush's reach by a surprising amount, and a corner that used to come clean will start collecting dust again.
How Dreame Tests Robot Vacuums
The standard industry test for a robot vacuum is dust pickup in an empty square room. Your home is not an empty room, so Dreame's testing starts where that test ends.
Hair is the clearest example. Engineers run each robot vacuum against a blended mix of hair lengths from 3cm to 30cm, built to clog and tangle a poorly designed roller brush. After every run, the team collects and weighs the hair from three collection points: the dust box, the roller brush, and the side brush. The result is a hair tangling rate, which shows how much hair the vacuum actually swallowed versus how much wrapped around its brushes. Cleaning efficiency alone hides that difference, and it's the difference that matters in a home with pets or long hair.
Durability gets the same scrutiny. Every model passes compression and drop testing, then vibration runs that simulate real shipping. Environmental simulation chambers expose finished units to extreme heat, humidity, rain, and salt spray.
Independent reviewers back the results. Vacuum Wars, which runs standardized testing across dozens of robot vacuums each year, ranked Dreame #1 in 2025. Read the full methodology in How Dreame Tests Robot Vacuums.
Pick the Right Robot Vacuum for Your Corners, Edges, and Baseboards
Every robot vacuum on this list above the budget pick extends its brush and mop past the body, which determines whether corners get cleaned or stay dusty.
You can choose a suitable robot vacuum depending on whether you need the mop to extend too, how much grime builds up along your baseboards between cleans, and what you're comfortable spending. The options above are ordered to make that choice straightforward, so start with the one closest to how you clean and what your floors need.
You can browse every model on this list in Dreame's full range of robot vacuums, with filters for price and mop type to help you narrow things down.
The robot vacuum comparison tool puts suction and mop extension side by side, so you can compare your shortlist before you buy.
Frequently Asked Questions
Is it worth paying more for a robot vacuum that cleans corners?
Yes, if you want your corners and edges cleaned properly, paying more gets you extending hardware that physically reaches past the round body, where a fixed brush falls short. The Dreame L40 Ultra Gen2 is one of the most affordable models with both an extending brush and mop, so you get corner reach without paying flagship prices.
Can a robot vacuum clean baseboards?
Not the baseboard itself, but a robot vacuum does clean the floor strip right against it, where dust lines and grime build up. Models with an extending brush sweep that strip, and a swinging mop wipes behind it. The baseboard itself is a vertical surface, which no robot vacuum cleans, but the floor edge where mess usually collects is well within reach of an extending model.
Which robot vacuum is best for corners and edges?
The Dreame X60 Max Ultra Complete is the best robot vacuum for corners and edges. Its side brush and mop pad both extend past the body, so dry debris and wet grime get handled in the same run. It also has the strongest suction on this list and a 7.95cm body that slides under furniture, which puts hidden corners within reach too.
Why does my robot vacuum leave dust in corners?
Your robot vacuum most likely has a fixed side brush that stops short of the corner, leaving a strip of dust the body can't reach. A worn or hair-wrapped brush makes the problem worse by shortening the reach even further. Check the brush first. If it's clean and intact, see whether furniture blocks the approach angle before the robot vacuum gets close enough.
Do robot vacuums clean corners as well as a regular vacuum?
Not quite, but an extending robot vacuum gets close enough that most people stop noticing the difference in daily cleaning. A crevice tool on a stick vacuum still reaches deeper into a tight 90-degree corner, so it's worth keeping one for seasonal deep cleans. An extending robot vacuum, though, can handle the day-to-day dust and grime along your baseboards.
Most robot vacuums clean in the dark without much trouble, but it depends on how they find their way. A model that maps with a laser doesn't need any light in the room, since it sends out laser pulses and measures how long they take to bounce back to gauge distance. A model that leans on a camera has a harder time once the lights go out.
So do robot vacuums work in the dark? For getting around, yes.
This guide covers which navigation types hold up after dark, and what changes for spotting objects on the floor at night.
How Do Robot Vacuums Function in the Dark?
Whether a robot vacuum can work in the dark depends on which sensor it uses to get around, and the main one, a laser, doesn't rely on the light in the room at all. Camera-based obstacle spotting is the one part that needs light, so it's what gets less reliable once the lights are out.
Some models get around this by adding their own light, so the cameras keep working in a dark room, and just as usefully in the spots that stay dark all day, like under a bed or a low sofa. That same light does double duty on these models, picking out easy-to-miss things like hair or a clear liquid spill that a camera would otherwise struggle to see in low light.
Mapping and route planning stay accurate in a dark room, and docking is no different, so a robot vacuum running at midnight covers the floor as thoroughly as it would at noon. Darkness does affect how reliably it steers around a stray cord or a sock, and how the laser handles mapping depends on how it measures a room, which the next section breaks down.
If you're weighing whether mapping is worth having at all, this comparison of robot vacuum mapping vs no mapping breaks down what the upgrade changes.
Why Laser Navigation Works With the Lights Off
Laser navigation works in the dark because the sensor uses its own light rather than relying on the room's. It measures distance directly, so an unlit room and a sunny one make no difference to these robot vacuum sensors.
How laser mapping measures a room
Think of it less like a camera and more like sonar that runs on light. The beam travels out, hits something solid, and returns, and the length of that round trip tells the vacuum how far away the wall or table leg is. Since it times a reflection rather than reading light, the room's light level doesn't factor in.
For the deeper mechanics, this explainer on LiDAR navigation in robot vacuums covers how the laser reads a room, and why it maps just as accurately at 2am as it does in the afternoon.
Cameras work the other way round
A camera does the reverse. It reads the light already in the room as it bounces off the furniture and walls, which is why a camera-only navigator struggles in the dark without a laser backing it up. Most capable robot vacuums pair the two, so the laser maps in the dark and the cameras handle what's on the floor. Darkness only affects the camera's job of spotting objects, as explained below.
What to Know About Robot Vacuum Cleaning in the Dark
Navigation still holds up in the dark. What changes is object detection, since spotting a cord or a mess on the floor is the camera's job, and a camera needs light to do it.
Small objects get missed more often
The camera spots a loose cable or a flat pet accident, and it needs light to do it well, so in a dark room, a camera-dependent robot vacuum is likelier to roll over a mess it would usually steer around. If yours navigates by camera alone, leaving one small light on, a hallway lamp or a nightlight, gives it enough to work with after dark.
Docking isn't affected
Worried it won't find its way back to the dock? It doesn't need light for that. Docking runs on infrared, which works the same in the dark as in daylight, so a robot vacuum returns and recharges on schedule, whatever the hour.
Some models add their own light
Some robot vacuums build a light into the body, so the camera keeps spotting objects even in a pitch-black room. If avoiding small messes after dark matters to you, that feature is worth considering.
Can a Robot Vacuum Cross Dark Floors in the Dark?
Dark flooring is a separate issue from a dark room, though the two can overlap. A robot vacuum reads the floor beneath it with cliff sensors that fire infrared downward, and those work the same whether the lights are on or off.
The catch is that very dark carpet or tile absorbs that infrared, so the sensor can misread it as a drop and stop, whether the room is lit or dark. For the full picture on dark and black flooring, including why it happens and how to fix it, see this guide on if robot vacuums can clean on dark floors.
Should You Run a Robot Vacuum at Night?
Yes, and a robot vacuum that maps with a laser is well suited to it, since that navigation reads the same in the dark as in daylight. Night works in its favor because the floor is empty. No one's walking through, and nothing's being moved, so the vacuum gets one uninterrupted run, and you wake up to clean floors.
Spotting stray objects on the floor still needs light, so clear the floor before bedtime. The last two things to check on are sound and your pets.
Sound carries further through a quiet house than it does during the day, and a pet left alone with a machine that starts moving on its own can take a few runs to get used to it. If you've got light sleepers upstairs or a pet that spooks easily, run a supervised clean or two first. If everyone's fine with it, lock in the nightly schedule. Most pets settle into the routine within a few nights.
Pro-tip: If your robot vacuum empties itself at the dock, where you place the dock makes overnight runs easier. The dock clears the onboard dust box with a short, loud burst when the clean finishes, so keeping the dock out of bedrooms, or timing the run to end before anyone's asleep, keeps that one noisy moment from being a problem.
Running a Robot Vacuum After Dark
Do robot vacuums work in the dark? Yes. A laser-mapping robot vacuum finds its way by sending out a beam to measure distance, so a dark room is no harder to navigate than a bright one. Dodging obstacles can be a little trickier at night, so clear the floor before a run, and you're good to go. Browse our robot vacuums to find one built for your home.
Top 3 Robot Vacuums for Cleaning in the Dark
X60 Max Ultra Complete, the flagship choice. A proactive light reveals dark corners for its cameras, so it keeps spotting obstacles at night the way it does by day.
L60 Ultra PE, the value pick. Strong suction and a mop that lifts over carpet handle high-traffic messes, and its obstacle avoidance keeps identifying clutter as it navigates.
L60 Pro Ultra, the mid-range choice. Its liftable LiDAR maps by measuring distance rather than reading light, so a dark room maps exactly like a bright one.
Frequently Asked Questions
Can a robot vacuum see in the dark?
It depends on how it navigates. A model that maps with a laser doesn't need to see at all, since it sends out laser pulses and times how long they take to bounce back, which works in any lighting. A camera-based model can't do that, because a camera needs light to make out what's around it. So for navigation, a laser-based model works in the dark without a problem; only the camera's job of spotting objects gets harder.
Do robot vacuums need light to work?
For getting around, no. A model that maps with a laser sends out pulses that work in full darkness. Spotting small items on the floor like cords and pet messes is the part that needs light, though not much, roughly enough to see the floor by, like a nightlight or some daylight through a window. A fully blacked-out room is where a camera-based system starts to miss things.
Can you run a robot vacuum at night?
Yes, and cleaning accuracy holds up fine after dark. The two things to plan around are sound carrying through a quiet house and giving a pet time to get used to a machine that starts on its own.
Do robot vacuums have cameras recording in the dark?
No, not on their own. The cameras on a robot vacuum are there for navigation and obstacle avoidance, not surveillance. Some models offer an optional remote-view feature you can turn on yourself, but by default, nothing records or streams.
If you're working out how to remove hair from a vacuum roller, the quickest fix is a seam ripper run along the brush so the wrapped hair lifts away in one piece. Switch the vacuum off first, and unplug it if it's corded.
This guide starts with what you'll need and the four-step method for upright and cordless stick vacuums, where you take the brush roll out and cut the hair free by hand. Robot vacuums and wet dry vacuums follow, each with its own steps. The mistakes section then covers the cuts that damage a brush for good. The last two sections explain when to replace a worn brush and whether an anti-tangle design can spare you this job next time.
What You'll Need to Remove Hair From Brush Roller
You need a seam ripper and a pair of tweezers, and a small pair of scissors makes a useful backup.
Seam ripper (the best option): This small sewing tool has a hook that slides under wrapped hair, plus a tiny guard ball that keeps the point off the bristles or rubber fins underneath. You'll find one in the sewing aisle of most craft or general stores.
Small scissors (the backup): A small pair with blunt tips works if you keep the blades inside the gaps between bristle rows. The tips slip into the bristle bases more easily than a seam ripper does, so go slowly.
Tweezers: These pull out loose ends and short strands the blade can't reach, like the hair packed around the end caps.
Skip utility knives and box cutters, since their long blades reach the bristle bases and the roller core in a single pass. Large kitchen scissors are too bulky to follow the gaps between bristle rows.
How to Get Hair Out of a Vacuum Roller on Upright and Cordless Stick Vacuums
Clearing hair from an upright or cordless stick roller takes about ten minutes, and most of that time goes into careful cutting. The brush roll needs to come out first, so work through the steps below in order.
Step 1: Cut the power
Unplug a corded upright or take the battery out of a cordless stick before your hand goes near the brush. Cutting the power keeps the roller from spinning if the vacuum gets switched on by accident while your fingers and a blade are on it.
Step 2: Take out the brush roll
Upright brush plates usually come off with two to four screws or a slide latch, and most cordless sticks release the brush with a button on the floor head. If the plate won't budge, check the manual rather than prying it off with a screwdriver, since the plastic clips snap easily.
Step 3: Cut the hair free along the gaps
Look along the roller and you'll see narrow gaps between the rows of bristles, where the bare roller shows through. These gaps spiral from one end of the roll to the other. Slide the tip of the seam ripper into a gap, under the hair, and push it along so it cuts the hair without touching the bristles. This is how to get hair out of a vacuum roller without shortening a single bristle.
How much cutting you need depends on the wrap. Short pet fur and loose strands usually pull off with your fingers or tweezers, with no cutting at all. Long hair wound into a tight band needs one cut along a gap, and a thick, matted wrap may need cuts in two or three gaps before it comes loose. Once the wrap is cut along its length, it slides off as a single sleeve.
Pro-tip: Cut in short strokes from the middle of the roll out toward each end. The hair splits into two halves that slide off either side, instead of one tight band you have to work loose.
Step 4: Clear the end caps before you refit the roller
The end caps are the plastic pieces at each end of the roller. Take them off if they come off by hand, since hair packs in around the bearing inside, the small part that lets the roller spin, and makes the roller run hot and slow. Seat each end of the roller fully into its cap before you close the plate. A roller that sits crooked grinds against its housing.
How to Remove Hair From a Robot Vacuum and Wet Dry Rollers
The cutting method stays the same, but what changes is how you get the brush out and where the hair hides. Find your vacuum below and follow the part that fits it.
Robot vacuums
If you're figuring out how to get hair out of a vacuum brush on a robot vacuum, start with where the hair hides.
Long hair is tougher on a robot vacuum than pet fur, and our guide to robot vacuums and long hair covers where it tangles and which features help.
Power off: Turn off the robot vacuum, then flip it over.
Remove the brush guard: On most models, press the one or two release tabs on the plastic guard over the main brush and lift it off. A few older or budget models use a small screw instead, so check the manual if it won't move.
Cut the hair free: On a rubber or part-rubber brush, run the seam ripper along the gaps between the rubber fins, keeping the point off the rubber.
Clear the side brush: This is the small spinning brush at the front edge that sweeps dust out of corners, and hair wraps around the spot where it attaches. If it pulls off by hand, take it off and unwind the hair. If it's fixed in place, work around it with tweezers and snip tight wraps with small scissors.
Check the wheels: The small front caster wheel swivels as the vacuum turns and usually pulls straight out, so unwind any hair and push it back in. Hair also winds around the axles of the two larger drive wheels, where tweezers and the seam ripper tease it out.
The step-by-step guide on how to clean your robot vacuum brushes shows how to release the guard and how often to check it in a pet home.
Wet dry vacuums
A wet dry roller usually needs a rinse rather than a cut.
Run a self-clean first: If your model has a self-cleaning cycle, run it while the vacuum is on its dock. It often clears most of the hair on its own.
Power off: Turn the vacuum off and lift it off its dock before you touch the roller.
Remove the roller: Most models release it with a button or latch on the roller cover. The position varies by model, so your manual will show you where it sits.
Check the ends and scraper: Hair tends to collect at the ends of the roller and around the scraper if your model has one. A quick rinse usually clears what's left without any cutting.
Mistakes That Damage a Brush Roll and How to Avoid Them
A brush roll has a few easy-to-damage parts right where you're working, from the bristles themselves to the drive belt at the end of an upright's roller. A slipped blade or a well-meant shortcut can damage them for good, so here's what to watch for and which vacuums each one applies to.
Cutting across the bristle rows
A blade dragged across the roll trims the bristles along with the hair, and they don't grow back. Shorter bristles stop reaching into carpet pile, so the vacuum picks up less from rugs and carpet. Avoid it by keeping every cut inside the gaps between bristle rows. This applies to any bristled roll, including the bristled brushes on some robot vacuums.
Nicking the drive belt on an upright
Belt-driven uprights have a rubber belt looped around one end of the roller, right where a slipping blade lands. A belt that's been nicked can keep running for weeks before it snaps, and then the brush stops turning with no obvious cause. Avoid it by stopping your cut a finger's width short of the belt and pulling the last bit of hair free with tweezers. Many cordless sticks have no belt at all, so you can skip this one if that's what you own.
Our guide to a vacuum brush not spinning covers eight fixes in order, from clearing tangled hair to spotting a stretched or cracked belt.
Burning the hair off
Heat melts the bristle bases and can warp the plastic housing the roller sits in, which leaves the brush rubbing as it turns. Avoid it by skipping any tip that involves a flame. This applies to every vacuum.
When to Replace the Brush Roll
Replace the brush roll when a thorough clean no longer brings it back. A brush that still leaves hair and grit behind after you've cleared it has usually worn past the point where cutting helps. These are the signs to look for:
Bristles worn short or splayed: Flattened or bent bristles no longer reach into carpet pile.
Torn rubber fins: On robot vacuum brushes, split fins leave gaps that dirt and hair slip past.
A wobbling roller: A cracked or warped core rubs against its housing as it spins.
Grinding after a clean: A roller that still grinds or catches once the end caps are clear may have a worn bearing.
Brush rolls are made to be replaced, so a worn one doesn't mean you need a new vacuum. Dreame sells replacement brush rolls for its robot and cordless stick vacuums, including anti-tangle designs for several models.
Check whether an anti-tangle version fits your vacuum before you order a standard one. Many robot vacuum apps also track brush wear, so check yours for a replacement reminder.
Do Anti-Tangle Brushes Stop Hair From Wrapping?
An anti-tangle brush cuts down how often you have to clear hair by hand, but it won't take the job away completely. Long strands can still collect at the ends of the roller or around the wheels, so a quick check every few weeks is still worth doing.
Most anti-tangle brushes work in one of these ways.
A built-in cutting edge: A small blade or comb sits against the roller and cuts hair as the brush spins, so strands break off before they can wind tight.
Twin brushes: Two brushes turn side by side with no open gap between them, so long hair has nowhere to grip.
Raised ridges: Ridges along the brush stop strands from lying flat and binding to the roller.
An anti-tangle design pays off most in homes with long human hair or a heavy-shedding pet, where a standard brush wraps up fastest.
Top 3 Vacuums That Resist Hair Wrap
Dreame Z30 Cordless Stick Vacuum - For the stick vacuum this guide is built around. Its multi-surface brush has Anti-Tangle Ridges that reduce the chance of hair tangling, and the brush comes out with a release button when you do need to clear it.
Dreame L60 Pro Ultra Robot Vacuum - For homes that let a robot vacuum handle the daily clean and would rather not think about the brush. Its HyperStream™ Detangling DuoBrush uses two brushes working together, engineered to avoid tangles on both hard floors and carpet.
Dreame Aero Pro Wet Dry Vacuum - For hard floors and anyone already used to rinsing a roller. Advanced TangleCut™ 2.0 Tech lifts pet fur and long hair as you clean, so the roller stays clear without clogging.
[product handle="aero-pro-wet-dry-vacuum"]
Keeping a Brush Roll Clear Between Deep Cleans
Once you know how to remove hair from a vacuum roller, a quick check every few weeks can save you from cutting through a thick wrap again, since a thin layer of wrapped hair lifts off in seconds. Our guide on how to clean the vacuum brush picks up where hair removal stops, covering the housing and how to wash a roll that's built for water.
Browse Dreame's range of vacuums built for pet hair, which brings together pet-focused models from every Dreame vacuum type, many with brushes designed to resist hair wrap.
Frequently Asked Questions
How do you get hair stuck out of vacuum wheels?
Use tweezers to pull the hair off the wheel axle, the rod each wheel spins on. Robot vacuums and uprights have wheels big enough to work around with a seam ripper too. The wheels on a cordless stick sit under the floor head and are much smaller, so tweezers usually fit best.
How do you take apart a vacuum brush roller?
It depends on the vacuum, but most brush rollers come out without special tools. Uprights usually use two to four screws or a slide latch on the brush plate, and cordless sticks release the brush with a button. Robot vacuums and wet dry vacuums mostly unclip by hand, though a few robot vacuums use a small screw, so check your manual if a part won't move.
Can I remove the bristles from my vacuum?
No. The bristles lift hair and grit out of carpet pile, and a pulled row doesn't go back in. Cut the hair along the gaps between bristle rows instead.
How often should you clean hair off a vacuum roller?
Every two to four weeks suits an upright or stick in a shedding home, and weekly suits a robot vacuum that runs every day. A roller that starts to sound strained or slows on carpet is due for a clean sooner.
Can you wash a vacuum brush roller?
Only if the manual says so. Wet dry vacuum rollers are built to be rinsed, while a motorized brush roll with bearings usually isn't. Whichever you have, let it dry completely before it goes back in.























 Robot Lawn Mowers


































 Humidifiers


 Smart Door Lock


 Australia
 中国大陆
中国大陆 日本
日本


 Türkiye


 Ireland
 Portugal
 Italia
 Netherlands
 Belgium
 Greece
 Polska
 Norway
 Sweden
 Finland
 Denmark
 Hungary
 Czechia
 Slovenia
 Croatia
 Switzerland
 United
Kingdom
United
Kingdom
 Canada


 Colombia


