






















 Robot Lawn Mowers


































 Humidifiers


 Smart Door Lock


 Canada
 Australia
 中国大陆
中国大陆 日本
日本


 Türkiye


 Ireland
 Portugal
 Italia
 Netherlands
 Belgium
 Greece
 Polska
 Norway
 Sweden
 Finland
 Denmark
 Hungary
 Czechia
 Slovenia
 Croatia
 Switzerland
 United
Kingdom
United
Kingdom


 Colombia

In this article
A robot vacuum not charging is usually caused by something quick to fix, like a dirty contact or a dock that's lost power. A worn-out battery is the one exception, and that means replacing it rather than fixing it.
This guide runs through seven checks in the order most likely to solve your problem, starting with the one that works most often, so you can get your robot vacuum back on schedule.

Why Your Robot Vacuum Stops Charging
Your robot vacuum stops charging for a few reasons, and dirty charging contacts are at the top. Grime and dust build up on the metal pads where the robot vacuum meets the dock, and that thin layer blocks the current. These are the other usual causes:
- A dock with no power
- A docking spot that keeps the robot vacuum from lining up
- An app or firmware glitch
- A worn-out battery
If you have wondered why your robot vacuum is not charging, the answer is almost always one of these, and each gets less likely as you move down the list. Start with the contacts and only move on if the light or app still shows no charge.
7 Fixes for a Robot Vacuum That Won't Charge
You can resolve most robot vacuum charging issues by ensuring the connection between the robot vacuum and the dock is solid, whether that's due to a dirty contact or a dock that's shifted out of position. The fixes that we recommend below tackle one of these points, working from fastest to slowest, ending with the one where a new battery is the fix.
Wipe the charging contacts clean
You can try wiping the two metal strips underneath the robot vacuum and the matching pads on the dock, with a clean, dry cloth to remove any dust or grime that's built up on the charging contact area.
Once both sides look clear, try setting the robot vacuum back on the dock and see if it picks up the charge again within a few seconds. You can do this every couple of weeks to keep the buildup from coming back.
Our guide on cleaning your robot vacuum properly also walks through cleaning the brushes, filters, and sensors if you're looking for a more in-depth maintenance guide.
Confirm if the dock has power
You can check if your dock has power by making sure that the plug is seated firmly in a working outlet and the cable is connected to the dock.
If the dock light still isn't coming on, try flipping any wall switch tied to that outlet, or plug it into a different outlet to see if that changes anything. A tripped power strip or a switched-off outlet is very easy to miss if you haven't moved the dock for some time.
Give the dock a clear, level space against a wall
Try setting the robot vacuum dock against a wall on level ground, and clearing away cables or thick rug edges within a couple of feet so it has a straight, unobstructed connection to the charging pins.
Sometimes, a wobbly or angled dock can leave the robot vacuum parking just short of those pins, which makes it look like you have a dead battery issue on your hands.
Restart the robot vacuum
Sometimes, all it takes to resolve a technical charging issue is simply restarting the robot vacuum to clear a software hiccup. Power-cycle the robot vacuum by turning it off and waiting about 10 seconds before turning it back on, then place it back on the dock.
If the charging status still isn't updating, a full reset usually clears a software-related charging issue. You can also read our walkthrough on resetting a robot vacuum if you don't want to wipe your saved maps with a full reset.
Unplug and reconnect the battery
If you're comfortable opening the battery cover, try removing the battery and putting it back in again. Power down the robot vacuum first and remove the cover on the underside, then unplug the battery and plug it back in firmly before closing everything back up. Make sure that you handle the battery gently and stop right away if anything looks swollen or damaged.
Update the robot vacuum app and firmware
You may have to update your robot vacuum through its app and firmware to rule this out. Open the app and check for any pending updates for both the app and the robot vacuum, and install them. Then, redock it and see if the battery percentage starts moving.
Outdated app or firmware versions can misreport your robot vacuum's charge status or stop it from charging, but manufacturers patch these bugs often enough that an update can clear them.
Replace an aging battery
A worn battery is the most likely reason your robot vacuum is not charging if you've tried the fixes above and it is still not charging. It's also the one problem on this list you can't clean or reset your way out of.
You can look through the next section to see if a battery issue matches what you're dealing with before spending money on a new one.
How to Tell If the Battery Is the Problem
The battery is likely behind your charging problem if the battery percentage in your app never increases past a certain point, or if it jumps to full and then drops within minutes of leaving the dock.
Double-check this by keeping an eye on the dock light right after a clean docking. If the charging light stays steady and the battery percentage keeps climbing as it should, the battery should be working fine, and one of the earlier fixes in this guide might help.
A fading battery shows up in your cleaning sessions, too. You might notice the robot vacuum quitting partway through a room or needing to recharge before it can finish cleaning.
Most robot vacuum batteries last two to five years, or around 300 to 500 charge cycles, before their capacity drops enough to notice. Our deep dive on how long robot vacuum batteries last covers what shortens that lifespan, so you know what to watch for before yours gets there.
When It's Time to Replace Your Robot Vacuum
It makes more sense to get a new robot vacuum if swapping the battery costs nearly as much as a current model, or if your current model is several years old and has started to lag behind in suction power and navigation capabilities.
Getting a battery replacement only makes sense if your robot vacuum is still relatively new, since paying for it only keeps an outdated model running a little longer.
This fix-versus-replace call keeps a new charging problem from showing up again a few months later. Usually, a dirty contact or the robot vacuum landing slightly out of place when you set it back by hand causes more of these problems than anything actually broken inside the robot vacuum itself.
A dock that self-empties and charges the robot vacuum without you touching it removes that daily step, and fewer manual steps mean fewer chances for a robot vacuum not charging to happen at all.
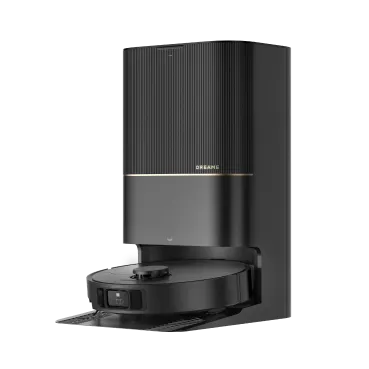
If you're ready to upgrade, the X60 Ultra is a reliable pick. It runs on a 6,400mAh battery built for long, whole-home cleaning sessions, and it empties itself for up to 100 days at a time, refilling its own water and hot air-drying the mop pads without you lifting a finger.
[product handle="x60-ultra-robot-vacuum" slogan="Editor's Pick"]
Get Your Robot Vacuum Cleaning Back On Schedule
If one of the fixes above brought the charge back, you're all set for your robot vacuum handling the floors on its own for a while yet. On the other hand, if the battery turns out to be the main issue, you already know what a fresh one costs against a new model, and which choice gets you further.
Take a look at the robot vacuum collection to compare different models and their capabilities. The latest models come with a dock that empties itself and manages its own charging, so you're not the one keeping contacts clean or redocking it by hand.
Frequently Asked Questions
Why is my robot vacuum not charging?
More often than not, dust and grime collecting on the charging contacts is the reason your robot vacuum isn't charging properly. It's also possible that the battery is worn out and needs a replacement if the common troubleshooting steps aren't working.
How do I reset a robot vacuum that won't charge?
You can reset it by turning the robot vacuum off, waiting about ten seconds, then powering it back on and letting it run through a full charge cycle on the dock. Doing this resolves software glitches that can cause the charge display to freeze or misreport.
How do I know if my robot vacuum is charging?
You can check this by watching the dock light and the battery percentage in your app for a minute or two after setting the robot vacuum down. If the light stays steady and the percentage ticks upward, it's charging the way it should.
How long does a robot vacuum battery last?
A robot vacuum battery lasts two to five years, or about 300 to 500 charge cycles, before it starts losing noticeable capacity. You'll notice a drop in runtime between charges before anything else changes, and that's the earliest sign it's wearing out.
Can I replace a robot vacuum battery myself?
It depends on the model and the manufacturer. Some let you swap in a maker-approved battery using the steps in your manual, while others don't offer replaceable batteries at all. Check your manufacturer's guidance first, and contact their support team before replacing anything rather than doing it on your own.

