








How to Clean a Jute Rug Without Ruining It

How to Clean a Jute Rug Without Ruining It

Dreame Editorial Team |
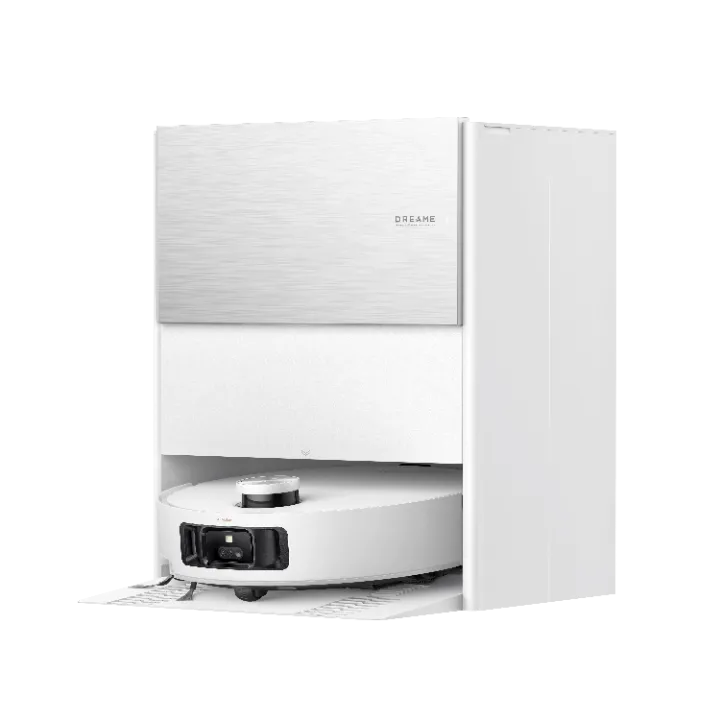
Knowing how to clean a jute rug is all about keeping it dry. Jute is a highly absorbent plant fiber, so it swells when it touches moisture. That swelling can distort your rug's shape and invite mildew. Wet jute also pushes its natural oils to the surface, where they leave permanent brown stains. This guide covers the safe way to vacuum, spot-clean, and deep-clean a jute rug without causing permanent damage. Since water should be avoided when handling jute, every method here uses zero or close-to-zero moisture. How to Vacuum a Jute Rug the Right Way To vacuum a jute rug safely, all you need are two simple steps. Set your vacuum to low, suction-only power. Gentle suction lifts everyday dirt and grit without tugging the weave loose or pulling fibers free. Vacuum in the direction of the weave. Going with the grain instead of against it protects the fibers and clears more of the dust that settles down between the strands. If your vacuum has a motorized brush roll or beater bar, switch it off first. Those bristles are built to dig into carpet pile, and on jute they pull at the fibers and cause fraying over time. Plain suction is all a jute rug needs. Vacuum once or twice a week in busy rooms and less often in quiet ones. Every few weeks, flip the rug and run the vacuum over the back and the floor underneath too, since grit works through the weave and grinds at the fibers from below. If you'd rather automate the weekly pass, a robot vacuum can take it on, as long as it's set to treat the rug gently. The Dreame Matrix10 Ultra detects delicate surfaces and lifts its mop away, so only dry vacuuming touches the jute. [product handle="matrix10-ultra-robot-vacuum"] Dreame Take: A vacuum should adapt to the surface it's cleaning, rather than using one setting on everything. Our robot vacuums have carpet and soft-surface detection that lets them adjust to your rug or carpet's cleaning requirements. How to Get Stain Out of Jute Rug: Spot-Cleaning To spot-clean spills or pet stains on your jute rug, blot the affected area right away and let the cloth soak up the liquid. Speed is everything here. The faster you lift the moisture, the less chance it has of sinking into the fibers and reaching the padding underneath. For a fresh spill, press a clean, dry paper towel or microfiber cloth firmly into the wet spot and let it absorb the liquid. Never rub or scrub, since that pushes the liquid deeper into the weave and frays the natural fibers over time. Work from the edges of the spill inward so you don't spread it into a bigger mark. Pet accidents need a little more care, since urine soaks through to the underside. Lay dry towels over the spot and press down, standing on them if you have to, then flip the rug and blot the back too. Once the moisture is out, treat the smell. Dampen a clean cloth with a mixture of equal parts white vinegar and warm water, then wring it out until it's barely wet, and dab the stain gently. The vinegar neutralizes the ammonia in pet urine and cuts the odor. Finish by pointing a fan straight at the spot so it dries fast, before any moisture settles in. How to Deep Clean and Deodorize Jute Rug Without Soaking The safest way to deep clean a jute rug without soaking is to sprinkle baking soda over the rug, let it sit for 15 to 20 minutes, then vacuum it up with gentle suction. For stubborn spots, work a barely damp cloth over the area, then point a fan at the spot to speed up drying. At every step, use as little moisture as possible and remove it as quickly as you can. Baking soda works the same way on carpet. If you want the full method, see our step-by-step guide on how to clean carpet with baking soda. Mistakes That Ruin a Jute Rug Jute is moisture-sensitive, so a few common cleaning habits can quickly damage it. Here's what to avoid and why. Steam cleaners and carpet shampooers Both force water deep into the fibers, causing browning and shrinkage almost immediately. Machine washing The tumbling action pulls the weave apart and can completely unravel the rug. Hosing it down A soaked jute rug won't dry fast enough to stop mold taking hold, so never take it outside to rinse. Harsh chemicals Bleach, strong detergents, and high-pH cleaners strip jute's natural oils and weaken the weave over time. Humid rooms Bathrooms, damp basements, and poorly ventilated kitchens hold enough moisture to warp and mildew the fibers. Stick To Dry Cleaning Methods For Your Jute Rug Keep your jute rug dry, no matter which cleaning method you use. Vacuum gently once or twice a week, and when you're getting stains from your jute rug, blot instead of soaking or rubbing. For a deeper clean, stick to a dry baking soda refresh. Since a robot vacuum is usually for your whole home, it helps to pick one that adjusts as it moves between carpet, tile, and hardwood. Our guide to multi-surface vacuums breaks down what to look for, from suction control to how well a vacuum handles the transitions between floor types. When you're ready to compare models, browse Dreame's robot vacuums collection to find the right fit for your home. Frequently Asked Questions Can you vacuum a jute rug? Yes. Use gentle suction only with the beater bar turned off. Vacuum in the direction of the weave. Can you use baking soda on a jute rug? Yes. Sprinkle it dry, let it sit for 15 to 20 minutes, then vacuum it up. It deodorizes and removes moisture from your rug. How do you get pet pee out of a jute rug? Blot the top and underside of the rug quickly, then dab the spot with a cloth dampened with diluted white vinegar. Dry quickly with a fan. Speed is the biggest factor in preventing a lasting stain or odor. Can you steam clean or shampoo a jute rug? No. Both methods soak the fibers, and jute browns, warps, and can rot when it absorbs that much water. Use dry methods only. What are the disadvantages of a jute rug? Jute sheds when it's new, is sensitive to moisture, stains more easily than synthetic fibers, and wears faster in heavy-traffic areas. Regular maintenance, like weekly vacuuming and spot-cleaning stains, can help you preserve your rug's quality.
Continue reading
Mopping With Vinegar: What Works and What to Avoid

Mopping With Vinegar: What Works and What to Avoid

Dreame Editorial Team |
Mopping with vinegar is a cheap, natural way to clean hard floors, as long as you use it on the right surfaces. Using vinegar the correct way means knowing how to dilute it so you're not slowly damaging your floors, and knowing how to mop with it so you're not left with sticky residue. The guide below covers the right dilution, which floors are safe to clean with vinegar, and how to avoid any stickiness after cleaning. Does Mopping With Vinegar Actually Work? Vinegar is a great choice for cleaning your sealed hard floors. Diluted white vinegar is mildly acidic, so mopping with vinegar cuts through grease and the chalky hard-water spots left by mineral-heavy tap water. It also neutralizes everyday odors as it dries, leaving no chemical smell behind. That combination makes it a solid pick for the spots that see the most foot traffic, like the kitchen, where oily film builds up near the stove, or an entryway that collects scuffs and grit. Plain water doesn't do much for that film, so a diluted vinegar mix might be a better choice instead. It handles regular upkeep well, though caked-on buildup from months of neglect may need a stronger degreaser first. Bear in mind that vinegar doesn't sanitize surfaces. It lifts grime well but doesn't kill germs, so reach for a proper disinfectant when you need your floors extra clean. Important: Vinegar is meant to be used either on its own or diluted with water as a cleaning agent. Never mix vinegar with bleach or ammonia-based cleaners because the combination releases toxic fumes. The Right Ratio and Mix to Mop with Vinegar Mopping with vinegar uses a simple dilution of white vinegar and warm water, adjusted to your application and the floor's level of greasiness. How much vinegar to use per gallon of water? A standard vinegar mopping solution mix is 1/2 cup of white vinegar per gallon of warm water (roughly 120 ml per 3.8 L), which lands at roughly a 1:32 dilution. That baseline scales up and down depending on what you're doing: For bucket-and-mop cleaning: 1/2 cup of white vinegar per 1 gallon of warm water. For a spray bottle (spot cleaning): 1 tablespoon of vinegar per 16-oz bottle of warm water. For greasy floors (kitchens especially): add a small squirt of dish soap to the bucket mix. Any more than a squirt risks leaving the floor stickier than when you started. Which type of vinegar works best for cleaning? Plain white or distilled vinegar is the right pick for mopping. Both are clear, mild, and rinse away without leaving a color or scent behind on the floor. Darker options like apple cider vinegar can stain grout and leave a lingering smell, so you should keep those for cooking only. Our homemade floor cleaner recipes post walks through other surface-specific mixes and non-vinegar alternatives if you're looking for other cleaning mixes. Pro-tip: Mix your vinegar solution fresh each time you mop. Diluted vinegar loses potency when left in a bucket or spray bottle, so a batch you made last week won't remove grease as effectively as a fresh batch. Which Floors You Can and Can't Mop With Vinegar Diluted vinegar is safe for sealed hard floors like tile, vinyl, and laminate, but you'll want to keep it off hardwood, natural stone, and anything unsealed. Sealed floors have a protective coating that shields the material underneath, so vinegar cleans and rinses away with no lasting effect. Raw wood and porous stone have no such barrier, so vinegar acid slowly etches the surface, causing irreversible damage. Here is a quick reference for floor surfaces that you can clean with vinegar: Floor Safe to mop with vinegar? What to know Sealed ceramic or porcelain tile Yes The non-porous surface rinses clean without holding the acid. Vinyl (sheet or plank) Yes, with a well-wrung mop The sealed wear layer handles diluted vinegar as long as the mop isn't dripping. Laminate Yes, damp mop only Moisture is the risk on the laminate, not the vinegar itself. Sealed grout Occasionally only Frequent use of vinegar can wear down the sealer over time. Hardwood (sealed or unsealed) No Repeated vinegar use dulls the finish. Natural stone (marble, granite, slate) Never The acid etches the surface on contact. Unsealed concrete or terracotta No The porous surface absorbs the vinegar and can stain. Table 1: Which floor types are safe to mop with vinegar You'll need to know that grout sealer wears down with repeated vinegar use, so alternating with a pH-neutral cleaner helps keep your tile seams protected. Our guide on how to mop tile floors covers the step-by-step method and grout care in more depth. You can also clean hardwood floors naturally with pantry-safe ingredients to protect your finish and keep costs down. Just grab your vinegar, baking soda, and oils, and you're ready to go. Why Your Floor Feels Sticky After Mopping With Vinegar Sticky residue after mopping with vinegar comes from too much cleaning solution left on the floor, or from a dirty mop laying old grime back down with every pass. These two small changes to your cleaning routine prevent the post-cleaning stickiness. The two-bucket method to clean dirty mops Setting up two buckets keeps your mop clean throughout your session, so you're not spreading old grime around as you work. Fill one bucket with your vinegar solution. Use the standard 1/2 cup of vinegar per gallon of warm water mix. Fill a second bucket with plain warm water. This is your rinse water, so don't add any cleaner here. Mop a section, then rinse the mop in plain water before dipping it back into the cleaner. Every pass starts with a clean mop head. Change the rinse water when it looks cloudy. Dirty rinse water stops rinsing at some point. A final plain water rinse to remove leftover vinegar After you finish mopping, one more pass with plain water lifts anything the vinegar loosened but didn't carry away. Empty and refill your rinse bucket with fresh warm water only. Wring the mop out well and go over the whole floor once. Light pressure is enough. Any tackiness that lingers after this is usually old buildup from earlier cleaners rather than the vinegar itself. Our guide on why the floor is sticky after mopping covers the five most common causes and how to fix each one. Pro-tip: Finish with a dry microfiber pass to lift any remaining moisture and prevent streaks. The dry pad also picks up any residue the wet mop left behind. Hands-Off Alternative to Mopping With Vinegar Vinegar doesn't have to be your only option. Robot vacuums can use compatible cleaning solutions tailored to different surfaces, so your floors get specialized treatment. If chemicals aren't an option, look for warm-water mopping and thermal pads that can cut through grease easily. Just remember to keep vinegar out of the water tank, since the acidity can damage the seals and pump. For a simpler routine, take a look at our robot vacuum collection that vacuums and mops in one go. Frequently Asked Questions Can you mop with vinegar? Yes, you can mop with vinegar as long as your floors are sealed and non-porous. Sealed tile, vinyl, and laminate are all safe with a diluted mix. Unsealed hardwood and natural stone floors should be cleaned with a different cleaner, as acid will slowly damage the surface. What does mopping with vinegar do? Diluted vinegar loosens greasy film and dissolves the mineral deposits that leave chalky spots on hard floors. It also neutralizes odors as it dries, which is useful in kitchens and mudrooms where cooking smells and shoe grime tend to settle. Is vinegar a good floor cleaner? Vinegar is one of the most cost-effective floor cleaners for sealed hard floors. A single bottle of white vinegar costs a few dollars and lasts through months of weekly mopping. The trade-off is that it's not right for every surface, so hardwood, natural stone, and unsealed floors need a different cleaner. Why is my floor sticky after mopping with vinegar? Sticky floors usually mean the vinegar solution wasn't fully rinsed off, or the mop was carrying old, dirty water back onto the floor between passes. The fastest fix is to redo the last few feet with a mop wrung out in plain warm water. Does mopping with vinegar kill fleas? Vinegar does not kill fleas, and it's not effective as a treatment for an active flea problem. The acidity may disrupt scent trails on the floor after you mop, making treated surfaces slightly less inviting, but it won't eliminate a real infestation. An active flea problem requires proper treatment for both your pet and the environment.
Continue reading
Why Is My Dog Licking the Floor?

Why Is My Dog Licking the Floor?

Dreame Editorial Team |
Most of the time, your dog is licking the floor because they have found a taste or smell you cannot detect. The American Kennel Club notes that surface licking is mostly about scent and residue and is usually not a medical problem. Boredom and the occasional health issue can play a part as well, and this guide covers what is normal, what warrants a closer look, and when to call your vet. 5 Common Reasons Dogs Lick the Floor While a taste or smell is the usual answer, it is not the only one. Boredom and the odd health issue can cause excessive licking as well. The five reasons below outline the common causes of your dog licking the floor. They smell or taste something Dropped food or spilled drinks leave a scent your dog can smell long after you have wiped up. That's why you see your dog licking the kitchen and dining area floors the most. Boredom or anxiety Some dogs lick the floor simply because they are under-stimulated, or as a self-soothing behavior when they feel tense. Giving them more to do during the day, such as a puzzle feeder or a longer walk, keeps their minds occupied, which usually helps reduce excessive licking. Nausea or an upset stomach Licking surfaces is a classic sign of queasiness and often appears right before a dog gets sick. A new food or a recent treat can be enough to unsettle their stomach. A compulsive habit When licking becomes repetitive and hard to interrupt, it can tip into a compulsive pattern known as excessive licking of surfaces. This one is worth raising with your vet. An underlying health issue Dental pain and stomach trouble can both show up as floor licking. If the habit sticks around without a clear trigger, a checkup helps rule out these possibilities. Important: Keep a record of when the licking happens, whether after meals, at night, or near the food bowl. The pattern is often the fastest clue to the cause, and it is exactly what your vet will ask for. Why Is My Dog Suddenly Licking the Floor? When floor licking starts out of nowhere, it usually points more toward nausea or pain than a pre-existing habit. If your dog has suddenly picked this up, the timing itself is your biggest clue. Something that changed recently is often behind it, like a new food or a shift in routine. If the licking comes with drooling or a heaving belly, your dog may be about to throw up, so it helps to know how to clean up vomit from the carpet before it sets. Why Does My Dog Lick the Carpet Specifically? Carpet traps food smells and residue that you can usually wipe right off a hard floor, making it a magnet for licking. The fibers hold onto scent, so your dog can still smell a spill days after it happened. If your dog keeps going back to the same patch, something has likely soaked in and left a smell worth chasing, and a proper clean of that spot usually stops it. It's also not always food, since an old accident leaves a scent your dog can still pick up, so knowing how to get the smell of dog pee out of carpet helps clear the odor that keeps pulling your dog back. When to Call the Vet Call your vet if licking doesn't stop, is accompanied by vomiting, or occurs alongside changes such as weight loss or a reduced appetite. Those are the signs that push licking from a harmless habit into something a professional should see. Here's a recap of what to look out for: Licking paired with repeated vomiting or dry heaving A sudden, constant urge you cannot interrupt Weight loss or a drop in appetite Low energy, hiding, or other shifts in normal behavior Signs of mouth pain, such as pawing at the face or dropping food Excessive drooling can also happen with nausea, and VCA Animal Hospitals explains how it relates to upset stomachs. If you can, note when the licking happens and anything else that's out of the ordinary before your appointment, since that gives your vet a clearer picture to work from. Important: Some signs cannot wait for a regular appointment. If the licking comes with repeated vomiting, a bloated or hard belly, or your dog keeps trying to be sick with nothing coming up, treat it as an emergency and get to a vet as soon as you can. How to Get Your Dog to Stop Licking the Floor Start by ruling out a medical cause, then work on habit and environment once your vet gives the all-clear. There is no point trying to train away a behavior that's actually being caused by a sore tooth or an upset stomach. Boredom and anxiety are the next things to look at. More walks, a puzzle feeder, and steady attention give a restless dog a better outlet than the floor. The part you can control most easily is what is actually on the floor. Food residue and small spills are the most common causes, so quickly wiping up messes and keeping floors clean gives your dog less reason to lick. Consider robot vacuums for pet hair, which take daily upkeep off your plate, so you have more time to spend with your dog. Dreame Take: Taking care of a pet should feel joyful, not like constant cleanup, and that thinking is a Dreame foundation. The spills and crumbs that end up on the floor are dealt with fast, and anti-tangle brushes mean you never have to detangle fur. Keeping an Eye on Your Dog's Floor Licking For most dogs, floor licking is usually caused by something ordinary, like a particularly tasty sauce stain or a bit of boredom. It becomes a cause for worry when something changes out of nowhere, or the licking is followed by vomiting, which is your signal to schedule a vet visit. If shedding is influencing your cleaning routine, begin by consulting our guide to dog breeds that don't shed. This guide explains why no breed is completely shed-free and clarifies what "low-shedding" really means in terms of the hair you'll still find on your floors and furniture. Frequently Asked Questions Should I let my dog lick the floor? Occasional licking is fine and rarely a problem. Step in if it becomes constant or compulsive, or if it shows up with other symptoms like vomiting or low energy. Do dogs lick the floor when their stomach is upset? Yes. Nausea is one of the most common triggers, and floor licking often appears right before a dog is sick. A new food or treat can be enough to unsettle the stomach. What deficiencies cause dogs to lick floors? It's rarely a specific deficiency causing it. The more likely culprits range from nausea to anxiety, so rather than guessing at diet, let a vet test and tell you what is really going on. Why does my dog lick the floor after eating? Usually, it is a leftover taste or smell near the feeding area. This is only worth noting if the licking is accompanied by other signs. Why is my dog licking the floor at night? Licking the floor at night can be caused by boredom or mild anxiety once the house goes quiet. It can also signal nausea, so make a note if it is a new habit rather than something they have always done. When should I worry about floor licking? It's time to worry when it becomes sudden and constant, happens together with vomiting, or occurs with other changes in behavior or appetite. Any of those together is your cue to call the vet.
Continue reading
Vacuum Brush Not Spinning? 8 Fixes That Actually Work

Vacuum Brush Not Spinning? 8 Fixes That Actually Work

Dreame Editorial Team |
A vacuum brush stops spinning when something blocks the roller, and most of the time, you can fix it in minutes with just your hands. No tools or repair shop needed. Here are 8 fixes to work through, starting with the most common. What Makes a Vacuum Brush Stop Spinning From tangled hair to overheating, these are the five most common reasons a vacuum brush stops spinning, ranked by how often they usually happen. Tangled hair and thread The usual culprit. Hair and thread wind around the roller until it can't turn, packing tightly at the end caps where the brush meets the housing. A clog in the airflow path When the bin, hose, or inlet blocks up, the brush loses the airflow it needs to keep turning. The wrong cleaning mode If the roller looks clean but still won't move, check the mode. Many vacuums shut the brush off on purpose for hard floors. A brush that's come loose from the head Sometimes the roller itself is fine, but it's no longer properly connected to the head. If it's just out of line, line it back up until it clicks into place. If the connector is broken, you'll need to replace the brush or the connecting part in the head if that's what failed, before it spins again. A worn belt or overheated motor Less common, but a stretched belt lets the motor spin without turning the roller, and an overheated motor trips a safety switch that shuts the brush down, often right after a jam. A dead motor is rarest and the last thing to suspect. Pro-tip: Noticing a faint burning-rubber smell? Check the belt before anything else. A burnt smell usually points to a slipping belt, not a dead motor. 8 Fixes When a Vacuum Brush Won't Spin If your vacuum brush isn't spinning, here are some quick, easy fixes to try in order. Remember to unplug the vacuum or remove the battery before doing any maintenance. 1. Clear tangled hair Remove the brush roll and cut away any hair or thread wrapped around the bristles. 2. Check the cleaning mode Ensure the vacuum is set to the correct mode. Many vacuums will stop the brush on hard floors to protect the surface. Switch to carpet or auto mode to see if it starts spinning. 3. Empty the bin and clear clogs A full bin or blocked hose can restrict airflow. Empty the bin and check for clogs in the hose. Don't forget to clean the HEPA filter, as a clogged filter can also affect performance. Check the label first to determine whether the filter is washable. Most HEPA filters are made of fibers, and using water might damage them, which are responsible for trapping tiny particles. 4. Reset the brush motor or thermal cutoff A thermal cutoff is a safety switch that shuts the motor down when it overheats, often right after a jam. If that's what happened, let the vacuum rest for 30 minutes, then switch it back on. 5. Inspect the drive belt Look for a belt that's stretched or cracked. A slipping belt means the motor runs, but the roller doesn't turn, while a snapped belt stops movement entirely. 6. Test the roller by hand After clearing the debris, hold the roller and try turning it manually. If it's stiff or won't move, there might be debris jammed in the bearings. Clear any blockages you find. 7. Reassemble the brush back in and close the cover Make sure the brush is correctly seated and that the cover is securely closed. Improper assembly can prevent the roller from functioning. 8. Power cycle or factory reset If none of the other fixes work, try turning the vacuum off and back on. For smart vacuums, a factory reset can often resolve software-related issues that prevent the brush from spinning. What to Check on Cordless and Robot Vacuums On a cordless vacuum, check the battery first. The brush motor often cuts out before the suction does as the charge drops, so dock it and try again at full power. Next, check the metal contacts where the brush head clips onto the vacuum. These carry the signal that drives the roller, so dust or a loose fit can cut it out. If the head has a brushroll lock cap, confirm it's unlocked. For a robot vacuum, start with the app settings. The roller may stop when it detects a surface where it shouldn't brush, so check that carpet and hard-floor detection are set right. Remove any debris caught in the brush guard, then run a quick app reset. If pet hair is a constant issue, this guide to cordless vacuums for pet owners covers what to look for. When to Replace the Brush or Belt Replace the brush roll when the bristles are worn to stubs, and replace the belt once it's cracked or stretched. If both are fresh and the brush still won't turn, the motor is the cause. Frayed bristles can't dig into the carpet pile, and a loose belt can't drive the roller even when the motor runs. The belt is the more likely of the two to fail. Swap it when you see cracks or a stretched loop that no longer grips. A fresh belt can be replaced in minutes. If a new belt and a clean roll still leave the brush dead, the motor is the problem. Weigh the repair cost against the cost of a new vacuum. How to Stop Your Vacuum Brush from Tangling Again Hair wrap is the number one reason brushes stop spinning, so the lasting fix is a brush that clears hair into the bin instead of catching it on the roller. A standard bristle roller grabs every strand and winds it tight around the roller. You end up cutting hair off it every week, especially in homes with pets or long hair. An anti-tangle brush design fixes that by guiding hair off the roller as it cleans, so it ends up in the bin rather than getting tangled. Several Dreame robot vacuums use the HyperStream™ Detangling DuoBrush 2.0, including the Dreame X60 Ultra. It pairs a bristled rubber brush with a TPU rubber brush, so long pet and human hair slides off the roller instead of winding around it. For a closer look at how the brush handles hair, read this guide on how Dreame's HyperStream™ DuoBrush keeps vacuums clean. Dreame Take: Most anti-tangle brushes trade off cleaning power to prevent hair from wrapping. The HyperStream™ Detangling DuoBrush 2.0 pairs two brushes with an air duct that directs hair straight into the suction stream rather than letting it wind around the roller. Detangling and deep cleaning, working together. [product handle="x60-ultra-robot-vacuum"] Keep the Vacuum Brush Spinning Most brushes stop for reasons you can usually sort out yourself, whether it's a clog, a belt, or a setting you didn't know was on. Hair is the one that comes back again and again, so keeping on top of it is what stops you from having to fix the brush all the time. When you want a vacuum that handles hair on its own, browse Dreame's robot vacuums for tangle-free cleaning. Frequently Asked Questions Why is my vacuum brush not spinning? If your vacuum brush isn't spinning, the most common causes are tangled hair or a clog, so start by checking and clearing them. Less frequently, a worn belt or a thermal cutoff due to overheating may be the cause. The possible reasons listed above are arranged from the most likely to the least likely. How do you fix a vacuum brush that doesn't spin? Start by clearing the hair, then check the belt and reset the motor. If it still won't turn, take the roller out and put it back in. Working through the simplest fixes first solves most cases before you reach for a replacement part, and the eight steps higher up walk through the full order. Are vacuum brushes supposed to spin? Yes, on carpet and in most cleaning modes. Some vacuums intentionally stop the roll in hard-floor mode to protect the surface, so check your mode before assuming the brush is broken. How do you know if your vacuum motor is burnt out? A burnt-out motor smells of burning when you switch it on and stays silent instead of humming. If it won't turn after you've cleared every clog and ruled out the belt, the motor is the likely cause. Why is my cordless vacuum brush not spinning? If your cordless vacuum brush is not spinning, there are a few common issues to check. First, ensure that the battery is fully charged. If the battery is okay, inspect the contacts on the brush head for any dust or debris. Also, check the brush roll lock cap and remove any blockage in the end caps. Perform a quick reset, then remove the brush head and securely click it back into place.
Continue reading
Can You Vacuum Cat Litter? What's Safe and What Isn't

Can You Vacuum Cat Litter? What's Safe and What Isn't

Dreame Editorial Team |
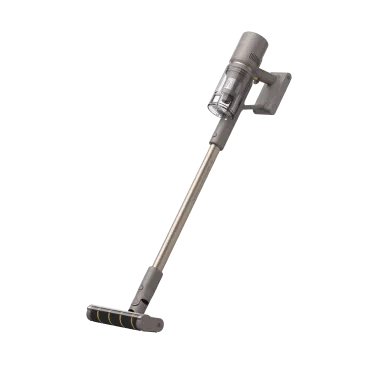
The short answer? Yes, but only for certain types of cat litter. Below, learn which types are safe to vacuum, which aren't, and a technique that lets you vacuum cat litter without wrecking your machine. Can You Vacuum Cat Litter? Yes, With Limits Yes, you can vacuum small amounts of loose, dry litter that has scattered onto the floor. Don't vacuum the clumping type or used wet litter. Pick it up a little at a time, and use the suction function only. Running your vacuum's mopping pads or any wet-cleaning mode over litter soaks it in water, so it swells and clogs the machine. It also helps to stick to a regular vacuuming schedule. Our guide to cleaning tips for a home with pets covers that, plus which litter box designs reduce scattering. Important: Not sure what you're working with? Check the litter bag before you vacuum. If it says "clumping," keep it out of the machine and scoop it instead. Which Cat Litters Are Safe to Vacuum Whether litter is safe to vacuum depends on the type. Loose, dry, low-dust litter is fine in small amounts, while anything that clumps or has gotten wet should be scooped instead. The table below breaks down the common litter types, whether each is safe to vacuum, and the best way to clean it up. Litter type Safe to vacuum? How to handle it Non-clumping clay Yes, small amounts Vacuum the loose scatter, but empty the bin and check the filter often, since clay is dusty. Clumping (clay/bentonite) No Scoop it. It hardens with any moisture inside the machine and clogs it. Crystal / silica gel Yes, small amounts Vacuum loose, dry beads only. Avoid large volumes that strain the motor. Natural (pine, corn, wheat, tofu, paper) Yes Lightweight and low-dust, so loose bits lift easily. Used or wet litter No Scoop and bag it. Moisture makes it stick inside the machine. Pro-tip: Empty the bin and check the filter often. The dust from litter is fine and builds up quickly. How to Safely Vacuum Tracked Cat Litter (Including Off Carpet) Cleaning up litter is simple once you know what you are working with. Check the type and amount first. As mentioned, only loose, dry, safe litter, in small amounts, should go into the vacuum. For a big spill, or anything clumping or wet, sweep or scoop it instead. Sweep up any visible clumps. Vacuum the loose scatter slowly. One pass is usually enough on hard floors. For vacuuming cat litter out of a carpet , slow down and make a couple of passes over the same spot so the grains lift from the pile. Stick to dry vacuuming, and never use a wet function, since moisture soaks into the padding and creates more of a mess. Empty the dustbin while the litter is dry and easy to tip out. Vacuums We Recommend for Cat Litter Robot vacuum for hands-off daily cleaning Running a robot vacuum on a daily schedule can help keep loose scatter under control with minimal effort. The X60 Ultra is a good pick for pet owners. Its 35,000Pa Vormax™ suction lifts dry, loose cat litter from hard floors and along carpet edges efficiently, while its 280+ object recognition helps it avoid obstacles on its path. It also has a PowerDock that clears the bin hands-free for up to 100 days, while its dust-box filter is made of HEPA material that traps fine dust and litter, so less of it drifts back into the air. [product handle="x60-ultra-robot-vacuum" slogan="Editor's Pick"] Another reason we recommend it is that it's a good robot vacuum for pet hair. It's equipped with the HyperStream™ Detangling DuoBrush 2.0, which helps keep cat hair from wrapping around the roller. Dreame Take: Pets and cleaning don't always mix well, especially for nervous ones. Dreame builds with pets in mind, so our robot vacuums run quietly and steer around the spots your pet spends the most time, like the litter box and food bowls, keeping the house clean and your pet calm. Cordless stick for quick, on-demand pickups Not everyone wants a robot vacuum, and that's fair. If you'd rather clean on your own terms, the Z30 is a cordless stick vacuum built for exactly that. Its 310 AW suction pulls loose litter and pet hair off hard floors and out of carpet, and the built-in pet brush head lifts fur from sofas, beds, and stairs. A blue dust-detection light shows you the fine grains you'd otherwise miss, and up to 90 minutes of runtime covers the whole house in one go. Stick to the same rule as always, loose, dry litter only. Keep Cat Litter Off Your Floors Effortlessly Vacuuming litter is fine as long as you stick to loose, dry litter in small amounts and keep the wet stuff out of the machine. If you would rather not think about it at all, browse our self-emptying robot vacuum collection to find the model that suits both your floors and your cat. Living with pets is about more than litter, though. If you are weighing whether a robot vacuum suits a home with animals, our guide on whether robot vacuums are safe for pets covers easing a nervous pet in and prepping your space before the first run. FAQs Is it safe to vacuum cat litter? Yes, as long as it's loose, dry litter vacuumed in small amounts. Avoid vacuuming clumping cat litter or used cat litter. Never vacuum the litter box itself. Can a regular upright or stick vacuum handle cat litter? Yes, it can handle loose scatter if it has strong suction and a sealed filtration system. Just steer clear of dust-heavy clay litter and clumping litter, both of which clog filters and hoses. Will cat litter ruin my vacuum? Not if you're only vacuuming small amounts of dry, loose litter. Problems usually happen when clumping litter comes into contact with moisture inside the vacuum, or when fine clay dust builds up in the filter and restricts airflow. Can you vacuum cat litter out of the carpet? Yes, dry-vacuum slowly so the grains lift out of the pile, and go over the spot more than once. Never run a wet or water function into carpet. Can a robot vacuum keep up with litter tracking? Yes. A robot vacuum on a daily schedule clears the loose litter around the box, and a self-emptying dock means you never have to handle the collected dust.
Continue reading
How to Clean Travertine Floors: A Complete Guide

How to Clean Travertine Floors: A Complete Guide

Dreame Editorial Team |
The right way to clean travertine safely is to lift any loose grit present before you mop and use only pH-neutral cleaners. These two adjustments keep the travertine finish shiny and even. Below, you'll find the steps to clean travertine floors, along with guidance on which cleaners to use to protect the stone throughout the cleaning process. Why Travertine Needs Special Care During Cleaning Travertine needs careful handling because it's a porous natural stone made mostly of calcium carbonate, which reacts to acid and scratches more easily than tiles. Acidic cleaners like vinegar or citrus may work well on other types of tile, but they can be harmful to travertine. The acidity reacts with the calcium in the stone, leaving behind dull etch marks that you can't fix. This type of damage is permanent, so it's crucial to stick to safe cleaners from the start rather than hoping for a deep-cleaning solution later on. Daily foot traffic also tracks in fine grit, which works like sandpaper on stone. If left uncleaned, it gets dragged under a mop or a shoe. These grits wear down travertine's polished top layer over time. You'll also want to avoid harsh scrub pads, since they strip the sealer that protects travertine from stains and moisture. Without that sealer, the stone soaks up spills and marks far more easily. Keeping your travertine floors clean daily is a breeze if you steer clear of acid-based cleaners and abrasive materials. You can preserve that beautiful polished finish for years to come. It helps to maintain the stone's natural beauty without putting it at risk. If you have marble at home, it's just as sensitive to acid, so the same care applies. Our guide on how to clean marble floors also explains how to keep that stone looking new. How to Clean Travertine Floors Step by Step The safest way to clean travertine is to remove any loose grit first, then damp-mop with a pH-neutral cleaner and dry the surface. When you work in this order, nothing abrasive gets ground, reducing the risk of surface scratches while you mop. Step 1: Clear the loose grit and dust You can keep your travertine scratch-free by dry-vacuuming or dust-mopping the floor first, before you start any wet cleaning. This first pass lifts any loose sand and grit that would otherwise get dragged across the stone if you went straight to mopping. Step 2: Dampen your mop with fresh water and a pH-neutral cleaner After preparing your mop or a soft microfiber pad with a pH-neutral cleaner, wring it out well so the water doesn't soak into travertine's open pores, where it lingers and takes longer to dry. You should also rinse and wring the mop or pad between passes so you're wiping with clean water as you go. This same approach works on other sealed hard floors, which our guide on how to clean and mop tile floors covers in more detail. Step 3: Dry and buff to remove moisture You'll want to follow up by wiping the floor dry with a clean microfiber cloth or pad, buffing in small circles so your travertine stays streak-free and water spots don't set in. When left to air-dry, the minerals in puddling water can settle onto the travertine surface as faint spots or streaks, so a quick pass while the stone is still slightly damp keeps it looking even. Pro-tip: You can place a mat at each entrance to keep grit from building up, so your weekly damp clean requires less work and stays gentler on the stone. Alternatively, you can keep travertine clean with a quick daily dust mop. Use a wet/dry vacuum to simplify the routine A cordless wet/dry vacuum like the Dreame Aero Pro lets you vacuum and mop sealed travertine in one single pass, so you don't have to clean the same floor twice with a separate broom and mop. It lifts loose grit and dust as it moves, then wipes the surface with fresh water for a gentle damp pass. Inside the dock, the Aero Pro washes its own roller with hot water, so you can continue mopping with clean water. The heat from self-cleaning stays within its dock only and never reaches your floor, which means that you don't have to worry about heat damage to your travertine surfaces. With that said, you'll want to keep it running in dry-vacuum mode on carpet or rugs, since the damp pass is meant for sealed hard floors only. You can compare Aero Pro alongside other wet and dry vacuum models if you're looking for one with different cleaning capabilities. [product handle="aero-pro-wet-dry-vacuum" slogan="Editor's Pick"] The Best Cleaners for Travertine and What to Avoid The best cleaners for travertine tile are pH-neutral ones, either a stone-safe neutral cleaner or a few drops of mild dish soap in warm water. A neutral cleaner won't react with the calcium in the stone, so it lifts everyday dirt without dulling or etching the finish. If you're buying something new, look for a label that says pH-neutral or stone-safe, since plenty of all-purpose sprays are mildly acidic without saying so. If you prefer to clean travertine naturally, warm water and mild soap are the safest route. You just have to go easy on the soap so it doesn't leave a film you have to rinse off. What you'll want to avoid with travertine is anything acidic or abrasive. Acidic products like vinegar, lemon, and many general-purpose cleaners react with the stone and leave dull etch marks, while harsh or abrasive ones like bleach, ammonia, scouring powders, and stiff pads wear at the sealer and scratch the surface. You'll also have to rule out the most popular homemade mixes, which usually rely on acidic or abrasive ingredients, even though they're fine elsewhere. Using the wrong cleaning product is one of the most common ways stone floors lose their finish. Check out other damaging floor-cleaning mistakes in our guide if you're looking to learn specific tips for hardwood, tile, vinyl, and more. Deep Cleaning and Long-Term Care for Travertine Deep cleaning travertine works best when you let your pH-neutral cleaner sit on any buildup for 3-5 minutes before lifting the softened grime with a soft brush. You'll want to brush gently during each cleaning so you don't wear down the finish layer. How to clean grout on travertine You can use the same neutral cleaner and a soft brush to clean them safely and gently along each line. Grout lines trap dirt faster than the stone around them, so you'll need to clean them more frequently. Our guide on how to clean floor tile grout should come in handy when grout needs more than a light going-over. When to reseal travertine You'll also have to pay attention to how travertine reacts to water. Travertine has a sealer layer that keeps spills from soaking in, but if you notice water sinking into the surface instead of beading on top, it's time to reseal the floor. You can do a quick check by dripping a little water on a well-used spot. As long as you keep up with routine cleaning, you won't have to deep-clean too often. What helps is having a wet/dry vacuum, like the Dreame Aero Pro, which makes that upkeep quick, so grime doesn't settle and harden or cause more cleaning difficulties later on. Dreame Take: We think a mop that spreads dirty water around isn't really cleaning, it's just relocating the mess. Our wet dry vacuums are designed to lift dirty water in a single pass, so your stone dries clean rather than streaked. Keep Your Travertine Floors Looking New Travertine floors require gentle care, which is reassuring if you're worried about damaging them over time. With regular, gentle maintenance, these floors can retain their warm, natural appearance for many years without requiring specialized expertise. Check out our wet and dry vacuum collection for models designed to keep your sealed stone floors clean with less effort. Frequently Asked Questions Can you steam clean travertine floors? Steam cleaning isn't safe for travertine floors, since the heat and pressurized moisture weaken the sealer and force water into the stone's pores. You should clean travertine floors with a damp mop and a pH-neutral cleaner instead. What is the best way to clean travertine floors? The best way to clean travertine floors is to lift the dry grit first, then damp mop with fresh water and a pH-neutral cleaner, and dry the surface afterward. Clearing the grit before any moisture prevents potential scratching from the stones as you mop. Can you use vinegar on travertine? Vinegar is not suitable for travertine because its acidity reacts with the stone's calcium, permanently dulling the polished surface. A pH-neutral cleaner can clean travertine surfaces without damaging the finish layer. How do you clean travertine floors naturally? You can clean travertine naturally with warm water and a few drops of mild, pH-neutral dish soap, which gently loosens dirt and rinses away without leaving residue. Homemade vinegar or baking soda mixes wear away at the stone while cleaning, so you'll want to stick to the dish soap mix. How often should you reseal travertine? You should reseal travertine once water no longer beads on the surface but instead soaks in. You can drip a few drops of water onto a well-used spot to check whether the water droplets bead or sink in.
Continue reading