








Robot Vacuum Not Charging: 7 Fixes That Work

Robot Vacuum Not Charging: 7 Fixes That Work

Dreame Editorial Team |
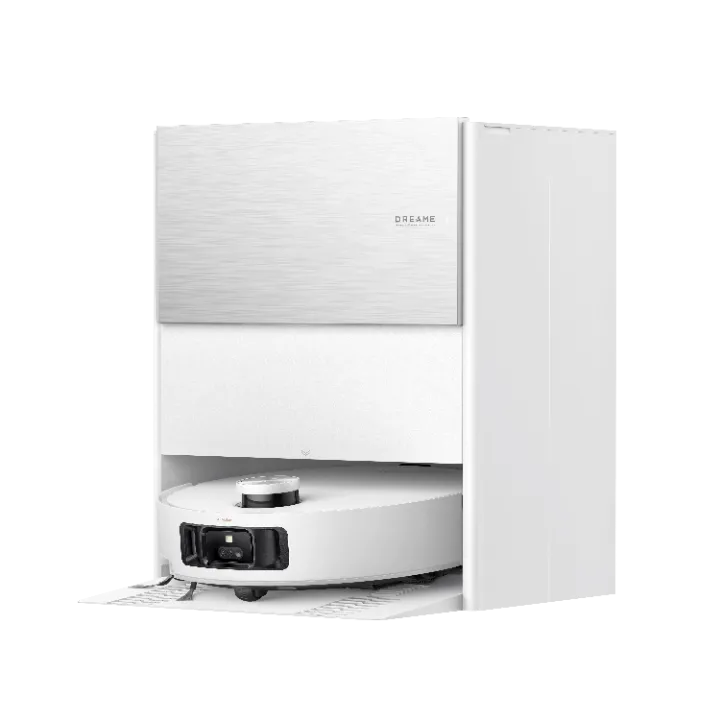
A robot vacuum not charging is usually caused by something quick to fix, like a dirty contact or a dock that's lost power. A worn-out battery is the one exception, and that means replacing it rather than fixing it. This guide runs through seven checks in the order most likely to solve your problem, starting with the one that works most often, so you can get your robot vacuum back on schedule. Why Your Robot Vacuum Stops Charging Your robot vacuum stops charging for a few reasons, and dirty charging contacts are at the top. Grime and dust build up on the metal pads where the robot vacuum meets the dock, and that thin layer blocks the current. These are the other usual causes: A dock with no power A docking spot that keeps the robot vacuum from lining up An app or firmware glitch A worn-out battery If you have wondered why your robot vacuum is not charging, the answer is almost always one of these, and each gets less likely as you move down the list. Start with the contacts and only move on if the light or app still shows no charge. 7 Fixes for a Robot Vacuum That Won't Charge You can resolve most robot vacuum charging issues by ensuring the connection between the robot vacuum and the dock is solid, whether that's due to a dirty contact or a dock that's shifted out of position. The fixes that we recommend below tackle one of these points, working from fastest to slowest, ending with the one where a new battery is the fix. Wipe the charging contacts clean You can try wiping the two metal strips underneath the robot vacuum and the matching pads on the dock, with a clean, dry cloth to remove any dust or grime that's built up on the charging contact area. Once both sides look clear, try setting the robot vacuum back on the dock and see if it picks up the charge again within a few seconds. You can do this every couple of weeks to keep the buildup from coming back. Our guide on cleaning your robot vacuum properly also walks through cleaning the brushes, filters, and sensors if you're looking for a more in-depth maintenance guide. Pro-tip: A dry cloth or a pencil eraser cleans the metal charging contacts well. Sometimes, a damp wipe leaves residue behind instead, which can worsen the charging contact issue. Confirm if the dock has power You can check if your dock has power by making sure that the plug is seated firmly in a working outlet and the cable is connected to the dock. If the dock light still isn't coming on, try flipping any wall switch tied to that outlet, or plug it into a different outlet to see if that changes anything. A tripped power strip or a switched-off outlet is very easy to miss if you haven't moved the dock for some time. Give the dock a clear, level space against a wall Try setting the robot vacuum dock against a wall on level ground, and clearing away cables or thick rug edges within a couple of feet so it has a straight, unobstructed connection to the charging pins. Sometimes, a wobbly or angled dock can leave the robot vacuum parking just short of those pins, which makes it look like you have a dead battery issue on your hands. Restart the robot vacuum Sometimes, all it takes to resolve a technical charging issue is simply restarting the robot vacuum to clear a software hiccup. Power-cycle the robot vacuum by turning it off and waiting about 10 seconds before turning it back on, then place it back on the dock. If the charging status still isn't updating, a full reset usually clears a software-related charging issue. You can also read our walkthrough on resetting a robot vacuum if you don't want to wipe your saved maps with a full reset. Unplug and reconnect the battery If you're comfortable opening the battery cover, try removing the battery and putting it back in again. Power down the robot vacuum first and remove the cover on the underside, then unplug the battery and plug it back in firmly before closing everything back up. Make sure that you handle the battery gently and stop right away if anything looks swollen or damaged. Important: A swollen or damaged battery can leak or catch fire if it's punctured or handled roughly, so never try to push it back into place or open it further. Stop using it right away and contact the manufacturer's support team for a safe replacement. Update the robot vacuum app and firmware You may have to update your robot vacuum through its app and firmware to rule this out. Open the app and check for any pending updates for both the app and the robot vacuum, and install them. Then, redock it and see if the battery percentage starts moving. Outdated app or firmware versions can misreport your robot vacuum's charge status or stop it from charging, but manufacturers patch these bugs often enough that an update can clear them. Replace an aging battery A worn battery is the most likely reason your robot vacuum is not charging if you've tried the fixes above and it is still not charging. It's also the one problem on this list you can't clean or reset your way out of. You can look through the next section to see if a battery issue matches what you're dealing with before spending money on a new one. How to Tell If the Battery Is the Problem The battery is likely behind your charging problem if the battery percentage in your app never increases past a certain point, or if it jumps to full and then drops within minutes of leaving the dock. Double-check this by keeping an eye on the dock light right after a clean docking. If the charging light stays steady and the battery percentage keeps climbing as it should, the battery should be working fine, and one of the earlier fixes in this guide might help. A fading battery shows up in your cleaning sessions, too. You might notice the robot vacuum quitting partway through a room or needing to recharge before it can finish cleaning. Most robot vacuum batteries last two to five years, or around 300 to 500 charge cycles, before their capacity drops enough to notice. Our deep dive on how long robot vacuum batteries last covers what shortens that lifespan, so you know what to watch for before yours gets there. When It's Time to Replace Your Robot Vacuum It makes more sense to get a new robot vacuum if swapping the battery costs nearly as much as a current model, or if your current model is several years old and has started to lag behind in suction power and navigation capabilities. Getting a battery replacement only makes sense if your robot vacuum is still relatively new, since paying for it only keeps an outdated model running a little longer. This fix-versus-replace call keeps a new charging problem from showing up again a few months later. Usually, a dirty contact or the robot vacuum landing slightly out of place when you set it back by hand causes more of these problems than anything actually broken inside the robot vacuum itself. A dock that self-empties and charges the robot vacuum without you touching it removes that daily step, and fewer manual steps mean fewer chances for a robot vacuum not charging to happen at all. If you're ready to upgrade, the X60 Ultra is a reliable pick. It runs on a 6,400mAh battery built for long, whole-home cleaning sessions, and it empties itself for up to 100 days at a time, refilling its own water and hot air-drying the mop pads without you lifting a finger. [product handle="x60-ultra-robot-vacuum" slogan="Editor's Pick"] Dreame Take: Charging problems trace back to a missed step in the daily routine, like a dock that's lost contact overnight or a plug that's come loose. Dreame builds its docks to handle that step automatically, emptying the bin and recharging the robot vacuum on its own, keeping you away from manual handling tasks that can lead to charging problems. Get Your Robot Vacuum Cleaning Back On Schedule If one of the fixes above brought the charge back, you're all set for your robot vacuum handling the floors on its own for a while yet. On the other hand, if the battery turns out to be the main issue, you already know what a fresh one costs against a new model, and which choice gets you further. Take a look at the robot vacuum collection to compare different models and their capabilities. The latest models come with a dock that empties itself and manages its own charging, so you're not the one keeping contacts clean or redocking it by hand. Frequently Asked Questions Why is my robot vacuum not charging? More often than not, dust and grime collecting on the charging contacts is the reason your robot vacuum isn't charging properly. It's also possible that the battery is worn out and needs a replacement if the common troubleshooting steps aren't working. How do I reset a robot vacuum that won't charge? You can reset it by turning the robot vacuum off, waiting about ten seconds, then powering it back on and letting it run through a full charge cycle on the dock. Doing this resolves software glitches that can cause the charge display to freeze or misreport. How do I know if my robot vacuum is charging? You can check this by watching the dock light and the battery percentage in your app for a minute or two after setting the robot vacuum down. If the light stays steady and the percentage ticks upward, it's charging the way it should. How long does a robot vacuum battery last? A robot vacuum battery lasts two to five years, or about 300 to 500 charge cycles, before it starts losing noticeable capacity. You'll notice a drop in runtime between charges before anything else changes, and that's the earliest sign it's wearing out. Can I replace a robot vacuum battery myself? It depends on the model and the manufacturer. Some let you swap in a maker-approved battery using the steps in your manual, while others don't offer replaceable batteries at all. Check your manufacturer's guidance first, and contact their support team before replacing anything rather than doing it on your own.
Continue reading
How to Clean Stone Floors Without Damaging Them

How to Clean Stone Floors Without Damaging Them

Dreame Editorial Team |
To clean stone floors safely, reach for a pH-neutral cleaner with a soft microfiber mop or cloth, and keep acids like vinegar and lemon off the surface. This approach handles everyday dirt without leaving the dull etch marks that harsher products cause on stone such as slate or travertine. Below, we cover the safe method step by step, what to use and avoid, daily care versus deep cleaning, how the approach shifts by stone type, and the easiest tool for everyday upkeep. How to Clean Stone Floors Without Damaging Them To clean stone floors without damaging them, clear the loose grit first, then go over the floor with a well-wrung mop and a pH-neutral cleaner, and dry the surface afterward so it does not streak. Grit is the real issue here. Sand and fine debris act like sandpaper when you walk on them, scratching the polished stone. Start dry Sweep with a soft broom or run a dry-vacuum pass to lift sand and dust off the surface. This is what avoids the scratching mentioned above, so it is worth doing before any water touches the floor. Mix a pH-neutral stone cleaner with warm water Wet a soft microfiber mop and wring it out well, so it is damp rather than dripping. Stone holds water in its pores, so less liquid is always safer. Work in small sections so no area sits wet for long Wipe as you go. Standing water is what leaves the mineral spots and streaks people blame on the cleaner. Dry the floor with a clean microfiber cloth If your room has windows, keep them open until the floor is dry. A quick buff on a polished stone brings back the shine. Pro-tip: To spot a pH-neutral cleaner, look for "safe for natural stone" or "pH neutral" on the bottle. Skip general cleaners, degreasers, and vinegar or citrus formulas, which can dull or etch polished stone. The same care applies to other hard surfaces as well. So, if your home has a mix of materials, the steps for cleaning and mopping tile floors will also work well for those surfaces. What to Use to Clean Stone Floors and What to Avoid Use a pH-neutral stone cleaner, or a few drops of mild dish soap in warm water, applied with a soft microfiber mop or cloth. This lifts everyday dirt without touching the sealant or the stone underneath, and it works as the safe default across stone types. Avoid anything acidic. Acid reacts with calcium-based stone, leaving a permanent dull mark. Vinegar and lemon are the usual acids to avoid, even the 'natural' ones people trust for other floors. General-purpose and bleach cleaners are too harsh for stone as well. The right tools matter as much as the cleaner. Keep to soft microfiber and gentle motion, since abrasive pads and stiff scrub brushes scratch the finish. A steam mop should be used with caution, since the heat can dull unsealed or polished stone. A cordless wet/dry vacuum lifts loose grit and damp-cleans sealed, level stone in one pass, which is why it suits these types of floors. Important: Cleaners and stone finishes vary, so test any new product on a small, out-of-the-way patch first. If the spot dulls or changes color, switch products before it ever reaches the rest of the floor. Daily Care vs. Deep Cleaning Your Stone Floors The best way to clean stone floors is a light routine most days and a deeper clean now and then. A quick dry pass a few times a week keeps grit off the surface, and a damp clean about once a week handles the rest. Deep cleaning and resealing come around only every so often, depending on traffic. How much water your floor can take depends on whether it is sealed. Sealed stone handles a damp mop without trouble, while unsealed or worn stone soaks up liquid and stains faster, so it needs a lighter touch and less water. A simple test helps. Drop a little water on the stone, and if it beads, the seal is holding; if it darkens and sinks in, it is time to reseal. Keep water to a minimum either way. Stone and standing moisture are a poor match, and quick drying prevents the spotting that shows up on darker surfaces. If your rooms run across several materials, the multi-surface cleaning guide covers how to move between them without switching tools. Cleaning by Stone Type: Natural, Artificial, Tile, and Seamless Natural stone splits into two families. Calcareous stone (marble, travertine, limestone) etches on contact with acid, while siliceous stone (granite, slate, quartzite) is harder and more acid-resistant, though still porous. A pH-neutral cleaner is the safe choice for every one of them. Knowing how to clean natural stone floors also means reading the surface, not just the stone. A sealed, flat tile floor with even grout gaps is a different job from a rough, wide-gap patio-style surface, and that difference decides which tools fit. Marble needs the most care of the calcareous stones. The required routine changes depending on its finish, and it stains quickly from spills like coffee or wine. If marble is your floor, the guide to how to clean marble floors covers finish-by-finish care and how to lift those stains before they set. The table below shows how to clean stone tile floors and seamless surfaces, and notes where a wet/dry vacuum fits, since it is the one powered tool that damp-cleans stone safely, though only on sealed, level surfaces. Stone type Surface Recommended cleaning approach Is a wet/dry vacuum safe to use? Marble, travertine, limestone (natural, calcareous) Tile or seamless pH-neutral stone cleaner only; damp mop or microfiber, never acid. Dry to avoid spots. Yes, if sealed and level (gaps 1/8 inch to 1/4 inch) or seamless Granite, slate, quartzite (natural, siliceous) Tile or seamless pH-neutral cleaner or mild dish soap; more acid-tolerant but still seal and avoid harsh cleaners. Yes, if sealed and level or seamless Engineered / artificial stone (quartz, agglomerate tile) Tile pH-neutral cleaner; avoid abrasives; follow the maker's care notes. Yes, on level tile Any natural stone, unsealed or worn Tile or seamless Seal first; damp-clean sparingly with pH-neutral cleaner and keep water minimal. Check sealing first; avoid if unsealed Rough, textured, or wide-gap stone Uneven / wide grout Soft brush plus pH-neutral cleaner by hand for texture and gaps. No, wide gaps and uneven surface Important: A wet/dry vacuum is safe on stone that is sealed and level, with grout gaps between 1/8 inch and 1/4 inch, or on seamless stone. Skip it on wide-gap or uneven stone floors, where the head can't sit flat and water can collect in the gaps. The Easiest Way to Keep Stone Floors Clean For daily upkeep on sealed, level stone, a cordless wet/dry vacuum handles the whole job in one pass. On a sealed tile or seamless stone floor with normal grout gaps, it lifts loose grit that would otherwise scratch the surface, then washes the floor with fresh water. It also rinses its own roller afterward, and that step matters most on stone, since leftover residue is what shows up as streaks. The Aero Pro fits this daily job well. Its slim body lies flat to reach under furniture, and the anti-tangle roller keeps hair and fur from wrapping. The self-cleaning dock then washes the roller so it starts fresh for the next pass. It is easy to store and easy to grab for a quick pass whenever you need it. [product handle="aero-pro-wet-dry-vacuum" slogan="Editor's Pick"] Dreame Take: On stone, leftover residue shows more than on any other floor, since mineral surfaces reveal every water spot and film. That belief shaped a design choice. Dreame builds a hot self-cleaning cycle into the dock, so the roller is washed between passes, ensuring every run is fresh. Cleaner Stone Floors With Less Effort Clean stone floors come down to a gentle cleaner and a light hand with water, matched to the stone you have. Keep acids away and clear the grit before you mop, and the surface stays sealed and free of streaks for years. For sealed, level stone, a cordless wet/dry vacuum turns the daily pass into a quick habit. Browse Dreame's wet and dry vacuum collection to find the model that suits your floors. Frequently Asked Questions What is the best thing to clean stone floors with? A pH-neutral stone cleaner, or mild dish soap in warm water, applied with a soft microfiber mop or cloth. That keeps the finish and sealant intact while lifting everyday dirt. Save abrasive pads and strong cleaners for surfaces that can take them. Can you use vinegar on stone floors? No. Vinegar is acidic, and acid etches natural stone, leaving dull spots that do not buff out. Reach for a pH-neutral cleaner instead, even on sealed stone, since a worn patch in the surface can let the acid reach the stone. Can you steam clean stone floors? Sometimes, on sealed stone, but treat it with caution. Steam can etch or dull unsealed and polished natural stone. On travertine, the natural holes in the stone are filled during finishing, and steam can loosen that filler. Check the sealing and the stone type before you try it, and when in doubt, stick to a pH-neutral damp clean. How often should you clean stone floors? Dry-clean the grit a few times a week, damp-clean about once a week, and deep clean and reseal periodically based on traffic. High-use rooms like kitchens and entryways need the most frequent passes. Staying on top of resealing keeps the rest of the cleaning easy. Is a wet/dry vacuum safe on natural stone floors? Yes, on sealed, level stone or stone tile with normal grout gaps. Skip wide-gap or uneven surfaces where the head cannot sit flat, and seal any unsealed stone before you introduce water. Kept to those surfaces, it is a simple way to handle daily upkeep.
Continue reading
How to Clean Shower Tile and Grout

How to Clean Shower Tile and Grout

Dreame Editorial Team |
Nothing can ruin the pristine look of a shower quite like dirty grout. Even after a thorough scrub, your tiles may still appear dull and grimy, all because of that stubborn buildup. The key to restoring your shower's sparkle is to use effective cleaning techniques for the specific mess at hand, whether it's pesky soap scum or mold lurking deep within the grout. In this guide, we'll dive into methods for tackling mold head-on, explore when to use steam for a deeper clean, and share tips for keeping your grout looking fresh and clean for longer. You can say goodbye to a lackluster shower and hello to a gleaming, inviting space. What You Need for Cleaning You only need a few basic cleaning tools and materials to mix a cleaning paste before you start. Here are the items you likely already have at home: A stiff-bristle grout brush (metal bristles will scratch your tiles, so avoid those) Baking soda 3% hydrogen peroxide White vinegar A spray bottle An old toothbrush Rubber gloves for anything involving bleach It helps to have everything within reach before you start cleaning, so you're not looking for supplies with wet, gloved hands halfway through the job. Important: Never mix bleach and vinegar in the same cleaning session. Even leftover bleach on grout, combined with a vinegar spray, can produce chlorine gas. Rinse the area completely with water before switching between any bleach and acid-based cleaners. How to Clean Shower Grout: A Step-by-Step Guide The most effective method to clean shower grout is by using a paste made from baking soda and hydrogen peroxide, which should be allowed to sit before scrubbing. Follow these steps to clean grout in the shower: Dry the grout first. Wet grout can dilute the paste and weaken its effectiveness before it has a chance to set properly. To remove excess moisture from the grout lines, wipe them down with a dry microfiber cloth or an old towel. If the shower has been unused, you can also run the fan for 15 to 20 minutes to help with air drying. Quickly drying the area with a towel is the fastest way to get started. Important: This method is best for white or light grout. Hydrogen peroxide has a mild bleaching effect, so on colored or dark grout, it can lighten the lines over time. If your grout is dyed or dark, skip the peroxide and use a baking soda and water paste instead, or test the mix on a hidden spot first. Mix the cleaning paste. Combine two parts baking soda with one part 3% hydrogen peroxide, about three tablespoons of baking soda to one of peroxide, until you get a paste roughly as thick as frosting. That's enough for a standard shower. Mix a fresh batch each time rather than a big one, since peroxide loses its strength once it's combined. Apply the paste to the grout lines. Load the paste onto your brush, then work it directly into the seams where soap scum and grime collect, not just across the surface. Use a toothbrush for corners and edges, and a wider grout brush for the long straight seams across the wall or floor, where it covers more ground per stroke. Let the paste sit for 10 to 15 minutes. This duration lets the paste break down the grime built up in the grout pores, so that the scrubbing that follows can lift it. Scrub along the lines. Short strokes that follow the grout direction concentrate the scrubbing on the recessed grout line where the dirt settles. Rinse with warm water. Water lifts the paste and leaves grout residue-free. You can repeat these six steps on stubborn staining, or try an oxygenated commercial grout cleaner (look for "oxygen bleach" on the label) for tougher stains. This baking soda and hydrogen peroxide method works on epoxy, cement, and urethane grout on ceramic or porcelain tile. However, be careful not to apply the paste on natural stone surfaces, which need a gentler, stone-safe cleaner. How to Clean Mold from Shower Grout You can clean shower grout mold with full-strength white vinegar. You'll need to keep a bathroom fan running or a window cracked while you work, and pour it straight onto the moldy grout. Similar to the paste made from baking soda and hydrogen peroxide, let the vinegar sit for about an hour before scrubbing and rinsing the area clean. This gives it enough time to thoroughly kill any mold growing inside the grout pores. Mold that appears darker and doesn't fully lift with vinegar is often more effectively treated with diluted bleach. To do this, mix one part bleach with ten parts water, then apply the solution to the affected areas using a toothbrush. Let it sit for about five minutes before thoroughly rinsing it off. It's important to wear gloves during this process and to keep a fan running to help dissipate any bleach fumes. Although you can eliminate surface mold on tiles, if mold has infiltrated behind the tiles, it will likely require professional intervention. Warning signs of a more serious mold issue include the mold reappearing within a week after cleaning or spreading into the caulk. Pro-tip: The presence of mold might indicate a more significant issue. While cleaning, gently tap nearby tiles. If you detect soft or hollow sounds, it could suggest that moisture has penetrated beyond just the grout. Steam Cleaning Techniques for Shower Tile and Grout Steam cleaning shower tile grout works as long as you're dealing with sealed ceramic or porcelain tile. Hot steam at around 100°C penetrates the grout pores, breaks down soap scum, and kills mold more effectively than scrubbing alone ever could. However, you can't steam clean natural stone tiles. Marble, travertine, and other unsealed stone are porous enough that the same heat and moisture you use on sealed tiles soak directly into the material, causing micro-etching and lasting surface damage. You can find out which type of tile you're working on by looking at its surface. A glossy, smooth tile is almost always ceramic or porcelain, both of which are safe for steam cleaning. A matte, textured, or visually varied surface usually means natural stone, and that's where steam should stay out of your cleaning routine. It's very common to have mixed tile types in the same bathroom, so it's a good idea to do a quick check before you steam-clean any surfaces. If you're unsure, our guide on when steam cleaning is safe for floors covers the broader aspects for the rest of your home. Additionally, you might find our guide on what floors should not be steam mopped helpful, as it goes into specifics regarding what surfaces to avoid. This way, you can ensure you're cleaning safely and effectively without damaging your tiles. Once you've confirmed what type of tile you have, you can then find a suitable steam cleaner for it. The Dreame N20 Steam delivers a 100°C jet of steam through a narrow attachment designed to clean grout lines, break down buildup, and give your sealed tile a full reset in a fraction of the time it takes to scrub. [product handle="n20-steam-portable-carpet-cleaner" rating="5" slogan=""] Dreame Take: Paste cleaners and scrubbing work on what's sitting on the grout. Dreame builds steam into its cleaning tools because hot steam targets what's growing in the grout, addressing a deeper cleaning issue. How to Keep Shower Grout Clean Longer Shower grout stays cleaner for longer when you address standing water and humidity after you shower. You can do this by running a squeegee over the shower walls when you're done and leaving the exhaust fan on for 15 to 20 minutes to remove excess moisture. You can also suppress mold regrowth between cleans by spraying a light mist of equal parts water and white vinegar on the grout weekly after squeegeeing the walls. You'll also want to reseal the tiles annually to close the pores that lead to mold buildup, stretching the time before your next deep clean. Take a look at our complete bathroom cleaning guide if you're looking to deep-clean the rest of your bathroom. Pro-tip: A quick post-shower squeegee of the shower walls can cut your deep-clean schedule from monthly to just a couple of times a year. It removes the standing water where most soap scum and mold buildup starts. Your Shower Grout Stays Cleaner With Less Work Over Time Shower grout is much more manageable once you have the right cleaning process for each tile type and grout buildup, and maintaining daily habits means you'll also deep-clean less often over time. You can use the N20 Steam to handle a deep clean on sealed ceramic tile when cleaning paste isn't enough to completely remove buildup or surface mold. Alternatively, you can browse Dreame's wet dry vacuum collection for other everyday cleaning needs around your home. Frequently Asked Questions Does hydrogen peroxide clean shower grout? Yes, 3% hydrogen peroxide is one of the most effective household options for cleaning shower grout. Its oxidation reaction breaks down the organic matter in soap scum and mildew, and mixing it with baking soda to form a paste helps it penetrate deeper into the grout pores. The 3% concentration found at most drugstores is the right strength, as concentrations above 6% may affect colored or epoxy grout. Should shower grout be sealed, and how often? Most grout types benefit from resealing once a year in a high-use shower. You don't have to reseal if you have epoxy grout, since it's already non-porous. A penetrating sealant works best when applied after the grout is clean and completely dry, and the product label will tell you the cure time, which is usually around 24 hours. If your grout is cracked or crumbling, you'll need to repair it before sealing, so the sealant has a solid surface to bond to. Can you use bleach to clean shower grout? Yes, but only when diluted first. Apply a mix of one part bleach to ten parts water to the grout with a toothbrush and leave it for five minutes before rinsing. This mix works well on stubborn dark mold that vinegar can't clear effectively. Bleach and vinegar react when combined, so you should do a thorough rinse after any vinegar cleanse before switching to bleach. Maintaining good ventilation throughout helps to clear the fumes during cleaning. How long does it take to clean shower grout? A standard shower with moderately discolored grout takes 30 to 45 minutes with the paste method and proper dwell time. Heavy buildup or mold pushes that to 60 to 90 minutes. A steam cleaner covers the same area in about 15 to 20 minutes once it has heated up. What is the black stuff in the shower grout? Black buildup in shower grout is almost always Cladosporium mold, the common bathroom variety that responds well to vinegar and, for stubborn cases, diluted bleach. A one-hour vinegar soak, followed by a scrub, clears it in most cases, and keeping up the squeegee and ventilation habits helps keep it from coming back. Black marks sitting in the caulk usually mean you need to replace the caulk itself as well.
Continue reading
Robot Vacuum Suction Power Chart: How Pa Ratings Compare

Robot Vacuum Suction Power Chart: How Pa Ratings Compare

Dreame Editorial Team |
If you're comparing robot vacuums, you've probably considered their suction power, or how much lifting force the vacuum has. But what does a 13,000 Pa or 35,000 Pa suction power actually mean in practice? Below, you'll find a suction power comparison chart of Dreame's robot vacuums, what those Pa ratings look like in real life, how much suction you actually need, and other important features to consider besides how many Pa. What Does Pa Mean on a Robot Vacuum? Pa, short for Pascals, measures the suction pressure a robot vacuum creates. It measures the vacuum's lifting power. Higher Pa usually means stronger suction, which helps lift dust, dirt, and pet hair embedded in your carpets. On hard floors, though, you don't always need the highest number. Everyday dust comes up much more easily, so even lower Pa ratings can do the job well. The right suction rating depends on the type of floors you have. If you'd like to know more about suction power and what a good rating is across different types of vacuums, check out this guide on good suction power for a vacuum cleaner. Important: Pa measures suction pressure, not airflow. It's the easiest way to compare robot vacuums side by side, though it's not the only rating that counts. Robot Vacuum Suction Power Chart (Pa by Model) Below is a chart comparing the suction power of Dreame robot vacuums, ranked from highest to lowest. [product handle="x60-ultra-robot-vacuum"] Model Suction Best for X60 Ultra 35,000 Pa Deep carpet and heavy pet hair; whole-home cleaning L60 Pro Ultra 35,000 Pa Flagship-level suction at a lower spend Matrix10 Ultra 30,000 Pa Carpet-heavy homes L40 Ultra Gen 2 25,000 Pa Mixed floors and everyday pet hair L50 Ultra 19,500 Pa Hard floors and low-pile carpet D20 Pro Plus 13,000 Pa Hard floors and light daily dust The next section walks through which Pa range makes sense for different floor types. The best choice for you is the Pa that fits your home, not the one with the biggest Pa. Dreame Take: Dreame offers suction power from 13,000Pa to 35,000Pa because every home needs different levels of cleaning performance. The X60 Ultra sits at the top with 35,000Pa, but that doesn't automatically make it the best fit for your home. In some cases, a lower Pa rating is enough. How Much Suction Power Do You Actually Need? The suction power you need depends on your floors. For example, hard floors don't need as much suction power as carpeted floors. Look for the Pa that suits your floors. Here's a guide to help you out: Your floors Suction to look for Hard floors, light daily dust 13,000–19,500 Pa Mixed floors with low-pile carpet 20,000–25,000 Pa Pet hair and medium-pile carpet 30,000 Pa Thick or deep carpet 35,000 Pa For homes with pets, consider pairing a high Pa with an anti-tangle brush. Strong suction helps lift hair, while the brush helps keep it from wrapping around the roller. If you're tired of daily battles with sweeping and vacuuming, see our guide to robot vacuums for pet hair for must-have features. Pro-tip: Higher suction is especially important in homes with carpets and shedding pets. To compare models feature by feature, our robot vacuum comparison tool is a good place to start. Other Features That Matter Besides Suction Power When Choosing a Robot Vacuum When matching a robot vacuum to your floor type, don't focus just on the Pa rating. To get the full picture of its performance, also consider airflow, how well the vacuum seals against carpets, brush agitation, downforce, and pick-up rate. Airflow refers to how well the vacuum gets dust and debris through the hose, wand, and into the bin. A good seal keeps suction concentrated on the floor and prevents it from escaping around the edges. Brush agitation and downforce measure how well the vacuum can free dirt and hair embedded in carpets. Together with suction, they determine the robot vacuum's pick-up rate, or how much dirt it actually removes from the floor in one pass. That's why Dreame looks beyond Pa alone. All these elements get engineered together, from the brush and seal through to the airflow and motor, so real pickup holds up beyond what the Pa figure alone would suggest. Pro-tip: Suction naturally drops as the dustbin fills and the filter clogs. You need to empty the bin and clean the filter regularly to get your vacuum to perform closer to its rated suction. If your robot vacuum doesn't clean as well as it used to, check out this guide on why the vacuum loses suction for solutions to the most common issues and a quick diagnostic test that will instantly tell you which half of the vacuum has the problem. Choose the Suction Power Fits Your Cleaning Needs The best suction rating is the one that matches your floors, not the biggest figure on a chart. Hard floors don't need as much suction, while homes with carpets and pets can benefit from a little more. Browse Dreame robot vacuums and start with the model that fits your home. If you're still weighing all your options, our robot vacuum buying guide covers the other features worth knowing about. FAQs What is a good suction power for a robot vacuum? It depends on the type of flooring you have. For hard floors and light pet hair, 13,000Pa to 19,500Pa is usually plenty. If your home has carpets or you have pets that shed a lot, 30,000Pa or higher may work better. Is a higher Pa always better? No. Besides suction (Pa), brush design, airflow, and how well the vacuum seals against the floor also affect how much dirt a robot vacuum picks up in one pass. Higher suction also tends to be noisier and drains battery faster. Choose a model that matches your floor and unique needs. How much suction do I need for pet hair? Choose a higher Pa rating and pair it with an anti-tangle brush. Strong suction helps lift hair, while the brush helps keep pet hair from wrapping around the roller. Which robot vacuum has the highest suction? The X60 Ultra and X60 Max Ultra Complete both offer 35,000Pa Vormax™ Suction that lifts dust, crumbs, pet hair, and more, making them the highest-suction models in Dreame's full range of robot vacuums. How is the robot vacuum suction measured? In Pascal (Pa). This refers to the pressure the motor generates.
Continue reading
Outdoor Robot Vacuum: Does It Work on a Patio?

Outdoor Robot Vacuum: Does It Work on a Patio?

Dreame Editorial Team |
If you searched for an outdoor robot vacuum hoping to use it on your patio, here's the honest answer. The everyday robot vacuum you'd use indoors isn't built for it. Purpose-built outdoor robots are their own small category, but an indoor machine gets thrown off outside by weather, loose dirt, and open edges it can't map properly. Read on to find out what happens when you try to use it outdoors, and discover a smarter way to keep the floors around your patio clean. Can a Robot Vacuum Clean an Outdoor Patio? Not reliably, and most models are not meant to go outside at all. A robot vacuum is designed to clean enclosed indoor rooms, where it maps walls and reads floor edges to find its way back to a dock. A patio is open on one or more sides, often sits a step down from the house, and adds moisture and loose debris that indoor sensors were never calibrated for. On a covered, dry patio, you might get a partial clean. The moment the surface changes or the light shifts, the vacuum starts misreading what is in front of it and either stops or wanders off course. Why Indoor Robot Vacuums Aren't Built for Outdoor Spaces Indoor robot vacuums fail outside because they navigate through walls and flat floors, and a patio has neither. Without walls to map against, the vacuum struggles to hold a reliable route and can drift toward an open edge or a step down. Its cliff sensors add a second problem. They read a patio edge or a garden step the same way they read the top of a staircase, so the vacuum freezes in place or refuses to cross. If you want the full picture, see how robot vacuums navigate, and why robot vacuums still get stuck on edges they cannot read. Outdoor surfaces and conditions work against it, too. Uneven stone and gaps between pavers catch wheels and brushes, and heavy outdoor dirt is more than an indoor machine can handle. Water is the real risk. Indoor robot vacuums are not sealed against it, so a sudden shower can soak the electronics and cause damage that a warranty is unlikely to cover. Dreame Take: Dreame robot vacuums are built for the spaces where you spend your life, not the ones outside your front door. Patios and driveways aren't part of what they're made for, but your kitchen, living room, bedrooms, and every other indoor floor stay consistently clean, so you come home to fresh floors every day. How to Lower the Risk If You Want to Try It Outdoors Anyway If you still want to test a robot vacuum on your patio, do so as an experiment and accept the risk, since the vacuum is not designed or approved for outdoor use. A few sensible considerations go a long way here. Stay with it the whole time. Outdoor runs are unpredictable, and being right there means you can lift the vacuum out of trouble before it stalls or rolls toward an edge. Make sure it skips anything heavily soiled or covered in thick dust. Caked-on dirt and fine grit clog brushes and filters fast, and an indoor machine is not built to take that on. Do not expect it to deal with leaves or branches. A robot vacuum is not made for twigs and wet leaves, and they jam the rollers rather than feeding through. Bring it indoors the moment rain starts. Water and electronics do not mix, and even light drizzle can cause damage that no warranty will cover. Keep it out of direct sun. Heat can stress the battery and the plastics, so a shaded, cooler time of day is the safer window if you run it at all. Pro-tip: Before an outdoor test, snap a photo of your normal cleaning map on your phone so you can restore it if the patio run scrambles the vacuum's saved layout. Use Robot Vacuum to Clean the Floor Just Inside Your Patio Door The floor just inside your patio door is where a robot vacuum actually helps. Every trip in and out tracks grit and paw prints across the doorway, and that strip of floor picks up more dirt than almost anywhere else in the house. A robot vacuum isn't meant for outdoor patio cleanup, but an indoor model that works the high-traffic zone by the door keeps the mess from spreading inside. The Dreame X60 Ultra suits this job well. It climbs up to 3.47in to cross thresholds and obstacles without getting stuck, so it handles a raised sliding-door track and the uneven floor around the doorway without stalling. Set it to run the entryway more often during pollen season or after muddy days, and the mess stops at the door instead of reaching the living room. For more on this, see how a robot vacuum can cross thresholds and door tracks. [product handle="x60-ultra-robot-vacuum"] What to Use for Your Patio Instead An outdoor robot vacuum is a separate category of machine that Dreame doesn't offer. Instead, let an indoor robot vacuum work the floors inside, starting with the busy strip by your patio door. Do that, and your machine stays safe, while the floors stay clean. Browse Dreame's complete selection of robot vacuums and choose the model that best cleans your floors and can navigate your doorway thresholds. Frequently Asked Questions Can a robot vacuum clean an outdoor patio? It's not recommended, and it is better kept indoors. Dreame robot vacuums are designed for indoor floors. Outdoor use is untested. On a covered, dry patio, you might get a partial clean, but the safer move is to keep it inside where it works reliably. Can a robot vacuum get wet or be left outside? No. If rain starts, bring the vacuum indoors right away, since moisture and weather can damage it. These machines are not rated for wet conditions or for outdoor use. Will using my robot vacuum outside void the warranty? It can void your warranty, since outdoor use falls outside the vacuum's intended use, so it may affect your coverage. Check your manual before running any robot vacuum outdoors. Can a robot vacuum pick up leaves or branches on a patio? No. A robot vacuum is not made for leaves and twigs, and they will jam the brushes rather than feed through. Is there a robot vacuum made for outdoor use? Yes, but they are a separate category of machine, and Dreame doesn't make them. Dreame builds indoor robot vacuums, so for a patio, the safer plan is to clean it by hand and let an indoor model handle the floors inside.
Continue reading
What Is a Hoover?

What Is a Hoover?

Dreame Editorial Team |
A hoover is a vacuum cleaner. The word is British English for any vacuum, borrowed from a brand name that became so dominant in the UK market that it replaced the category term entirely. Americans call the same appliance a vacuum. Below, we discuss how Hoover came to be an everyday household word and what led to this linguistic change. Hoover Is a Brand Name That Became a Word Hoover is originally a brand name for a vacuum cleaner. The Hoover Company was founded in 1908 in North Canton, Ohio, and grew into one of the most dominant vacuum cleaner manufacturers of the twentieth century. Its grip on the market, especially in the UK, was so extensive that "hoover" transitioned from just a brand name to a common term for any vacuum cleaner, regardless of manufacturer. Today, "hoover" in lowercase appears in major English dictionaries as both a noun (a vacuum cleaner) and a verb ("to hoover," meaning to vacuum). The Hoover Company still exists and sells vacuums, though it is no longer the market leader it once was. The word outlasted the company's dominance. For the full origin story, read the history of vacuum cleaners. Important: In British English, "hoover" works as both a noun and a verb. You can do the hoovering, or give the carpet a hoover. However, that sounds unfamiliar in American English. Americans say "vacuum" for both. Both terms refer to the same appliance. Why the UK Says Hoover and the US Says Vacuum British English uses "hoover" because one brand dominated the market there; American English uses "vacuum" because no single brand did that the way Hoover did in the UK. Hoover held the majority of UK vacuum sales for decades after its 1919 launch. If you were a British consumer during that period, one brand name covered virtually every vacuum you ever encountered, so the name became the word for the whole category. In the US, multiple brands competed for the top spot in the vacuum category from the 1920s onward. American consumers were exposed to several names at once, so "vacuum cleaner," as a plain description of what the machine did, became the word that stuck. No single brand ever grew dominant enough to push it aside. Britain went the other way. Hoover took such a large share of the UK market that its name slipped into everyday speech, standing in for the appliance itself and for the act of using it. If you hear "can you hoover the rug?" in the UK, it means the same thing as "can you vacuum the rug?" in the US. Why Some Brand Names Become Words (and Most Don't) Brand names become common words when one company dominates a category so completely that its name fills the vocabulary gap before a neutral term can. Linguists call this a genericized trademark, or a proprietary eponym, and you'll recognize a few from everyday American English: Kleenex for facial tissue, Band-Aid for an adhesive bandage, Jacuzzi for a whirlpool bath, and Google, now a verb for any internet search. A proprietary eponym happens when two conditions are met. The brand needs to be first or near-first in the category, and it needs to hold enough market share that no other generic term can gain traction while it dominates. Hoover met both conditions, particularly in the UK. There is also a legal consequence companies face when their brands become everyday terms. Genericized trademarks can lose their protected trademark status, which is why some companies actively resist their brand names becoming everyday terms. Dreame Take: We think category leadership is earned with every new product generation. The vacuum market has reinvented itself multiple times since Hoover defined the appliance, and that reinvention is still ongoing. The Vacuum Cleaner in 2026: Far Beyond What Hoover Built The original hoover was a bagged upright with a rotating brush and a cloth dust bag. The category today covers robot vacuums that navigate using LiDAR and AI cameras, self-emptying docking stations, wet dry vacuums that vacuum and mop in a single pass, and hot-water sanitization. None of these existed when "hoover" entered the British dictionary, and the word has stayed while the technology moved on entirely. Dreame's robot vacuum collection represents what the category has become today, a long way from the upright that built the word. If you're not sure which type of vacuum suits your home, the vacuum cleaner buying guide is a good starting point. You can also read Dreame's breakdown of types of vacuum cleaners in the market today for a fuller picture. Frequently Asked Questions Is Hoover still a brand or just a word? Hoover is both an active brand and a common word. "Hoover," capitalized, refers to the company and its product line; "hoover," lowercase, appears in British English dictionaries as a common noun and verb for any vacuum cleaner. The brand has changed ownership several times and is no longer the dominant force it once was, but the Hoover Company still manufactures vacuums today. What are other examples of brand names that became common words? Hoover is not unique in this. Kleenex, Jacuzzi, Band-Aid, Velcro, and Google have all followed the same path, where the brand name entered everyday language as the word for the whole category. Linguists call these proprietary eponyms or genericized trademarks, and they tend to appear in categories where one brand got there early enough that the generic term never had a chance to take hold. Do British people say "vacuum" or "hoover"? British people use both, though "hoover" is more common in everyday speech. "I need to do the hoovering" and "can you hoover in here?" are natural British phrasings. "Vacuum" also appears in British English, particularly in formal writing, and younger generations exposed to American media tend to use it more than their parents. The distinction is as generational as it is geographical. When did hoover enter the dictionary? "Hoover" as a lowercase word began appearing in British English during the 1920s and 1930s, as the Hoover Company's UK market dominance grew. Major British dictionaries recorded it through the mid-to-late 20th century. The Oxford English Dictionary lists "hoover" as both a noun and a verb with primarily British English usage. The precise date of first inclusion varies by dictionary. What is the difference between a Hoover and a vacuum cleaner? There is no practical difference. "Hoover" is an informal British English word; "vacuum cleaner" is the technical term used everywhere else. The appliance itself is the same whether you're talking about a robot vacuum, a cordless stick model, or a traditional upright.
Continue reading