Cleaning a cooking oil spill on your kitchen floor can be tricky. Water and oil don't mix, so water-based cleaners won't do the job alone.
But no worries—there are some hacks that make it easy and quick to clean oil spilled on your kitchen floor.
Types of Cooking Oil Spills You Might Face
When oil hits the floor, speed matters most—but knowing what you’re dealing with can make cleanup easier. In a typical kitchen, that spill might be olive, vegetable, sunflower, coconut, peanut, or sesame oil. You might also be looking at melted butter or rendered animal fat. These behave differently: animal fats and butter are high in saturated fat, so they solidify as they cool and cling stubbornly to surfaces.
Plant-based oils stay liquid at room temperature, so they’re generally easier to blot and lift. The real challenge comes from oils exposed to high heat—like deep-fryer oil—which becomes thinner and seeps into the floor more quickly, making stains harder to remove. No matter the type, though, acting fast is the single most important step for preventing long-lasting damage.
First Response: What to Do Right Away
Contain the spill before it spreads:
Immediately use absorbents such as paper towels, corn starch or kitty litter to cover the spill and soak up as much of the oil as possible before it spreads or soaks into the floor.
Allow the absorbent to sit for 10 to 15 minutes.
Use a dustpan and broom or scraper to scoop up the saturated material.
After removing the absorbent material, apply a fine layer of baking soda or flour to the remaining oily patch to draw out any lingering oil.
Deep clean to remove residue once the oil has been absorbed. It's crucial to clean the area completely to remove any remaining substances that could make the floor a slippery hazard:
Degreasers: A simple and effective degreaser can be made with a mixture of dish soap and hot water. You can use a scrub sponge to break down oil molecules.
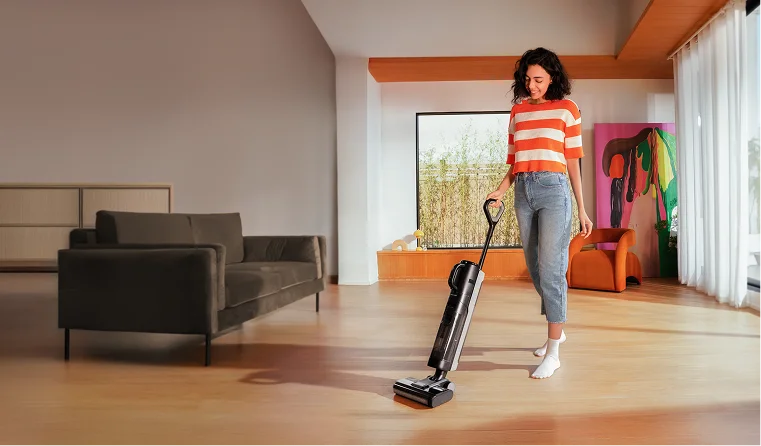
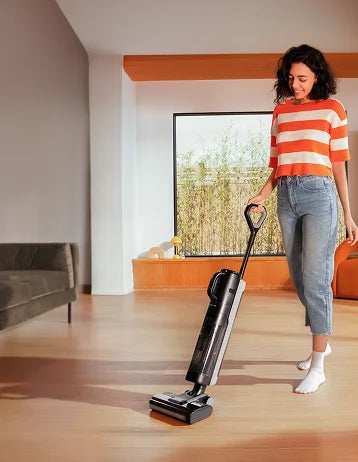
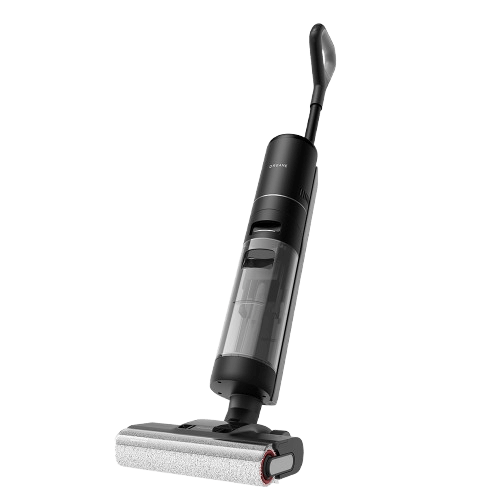
Follow up with advanced help such as the Dreame H15 Pro Wet and Dry Vacuum to lift remaining oil and sanitize with high heat.
Important Do not use water on a large, hot oil spill. This can cause the oil to splatter and create a burn hazard. If you have an oil-soaked cloth or rag, wash it separately to avoid contaminating other clothes.
Why a Wet and Dry Vacuum is a Breakthrough
Cleaning a cooking oil spill on the floor can be challenging, a wet dry vacuum provides a breakthrough. Unlike some appliances that might simply smear the oil around, each model in the Dreame Wet Dry Vacuum Collection uses powerful suction to lift liquid directly off a surface and then gives it a hot wash.
It's a game-changer because it removes the slick, hazardous oil in one pass, leaving you with a clean, non-slip surface with less scrubbing and paper towel waste.
The most effective response needs to consider not just the type of oil spilled, but also the surface it has been spilled on.
Surface-Specific Advice for Spilled Oil
Wood Floor
Blot up the excess oil, then use a wood-safe cleaner or a baking soda and water paste. Gently scrub along the wood grain.
Laminate
Dab the oil with a soft cloth to prevent spreading. A mild solution of dish soap and warm water is effective for a final wipe-down.
Concrete
Cover the spill with an absorbent material like cat litter. After sweeping it up, use a strong degreaser or detergent with water and scrub with a stiff brush.
Kitchen Tiles
Absorb as much oil as possible with paper towels. Use a solution of warm water and dish soap to easily cut through and clean the remaining grease.
Want to see more floor cleaning hacks? Go check our bolgs:
How to clean hardwood floors
How to clean wood floors
How to Clean and Mop Tile Floors
How to Clean Laminate Floors
How to Clean Marble Floors
How to Clean Grout on Tile Floor
How to Clean Linoleum Floors
Choosing Floor Cleaning Solution
Cleaning Options to Reach For
When you're faced with a greasy cooking oil spill on your kitchen floor, dish soap is a go-to for a reason: it is formulated to break down fats and oils, making it easier to rinse them away. It's gentle on most floor types and readily available, so it's a great first line of defense.
Degreasers are heavy-duty cleaners specifically formulated to tackle tough grease and grime. They're more powerful than dish soap and can make quick work of a large spill, but it's wise to check if they're safe for your specific flooring material to avoid any damage.
Vinegar is a popular DIY natural cleaner. Excellent for cutting through mineral deposits and disinfecting, it doesn't have the same fat-breaking power as dish soap or a degreaser. While a fantastic all-purpose cleaner for many things around the house, it's not the best choice for tackling a cooking oil spill. For that, you'll want to stick to a good dish soap or a dedicated degreaser.
The best backup to finish the job is some high tech help such as the Dreame H14 Wet Dry Vacuum that can clear and sanitize the floor in a few quick passes.
Smart Kitchen Habits to Reduce Spill Risk
Keeping cooking oil spills from happening in the first place is all about building some smart kitchen habits. One of the easiest things you can do is to never leave a pan of hot oil unattended. A moment of distraction is all it takes for the oil to overheat and start smoking, increasing the risk of a splash or a fire. Another simple tip is to use a deep pan or pot when you're frying to contain any splatters. And when it's time to dispose of used oil, let it cool completely before carefully pouring it into a sealable container instead of down the drain—which is a whole other mess to avoid. Small changes can make a big difference in keeping your kitchen floor clean and safe.
Pro-tip: Create an Emergency Spill Kit An emergency kit should include a few essentials: a bag of baking soda, cornstarch to soak up the oil; paper towels for initial blotting; degreasing dish soap for breaking down the oil and non-slip rubber gloves. Store everything in a labeled container in an cabinet so you can act quickly.
FAQ
Q: Can oil spills be cleaned fully?
Yes, a cooking oil spill can be fully cleaned from a kitchen floor with the right approach and a little patience. The key is to first absorb as much of the oil as possible with an absorbent material before using a degreaser or dish soap to tackle the remaining residue.
Q: Which cleaner works fastest?
Using an advanced appliance such as the Dreame H14 Pro Wet and Dry Vacuum is a fast and efficient way to clean up cooking oil spilled on the kitchen floor. It can suck up both the liquid oil and any absorbent material you've used in pre-treatment.
Q: Can I use a robot vacuum and mop?
They are no substitute for the hands-on actions described above, but some robot vacuum models can handle fresh spills that are not too greasy.
Shining and Safe
A cooking oil spill might feel like a sudden disaster, but with quick action, the right materials, and the proper tools, your floor can be restored to its clean, safe, and slip-free state in no time.
Dreame’s range of advanced cleaning appliances makes the process easier, delivering powerful, targeted performance to handle even stubborn messes. With the right partner in cleaning, you can keep your home looking beautiful—and safe—day after day.me.
Timber floors are timeless. They’re stylish, durable, and warm underfoot, but they can also lose their charm fast if not cared for properly. From sticky spots and muddy paw prints to dull patches and water damage, we’ve all experienced the pain of cleaning timber the wrong way.
In this guide, you'll learn how to clean timber floors step-by-step, discover the best supplies for each type, and uncover the cleaning mistakes that can do more harm than good. Let’s bring back that beautiful timber glow.
Why Timber Deserves Special Care
Timber floors are often the centerpiece of a home. They’re durable, allergy-friendly, and can last for decades when maintained properly. But unlike tile or vinyl, timber is naturally porous. That means it reacts to moisture, heat, and even cleaning chemicals.
Common risks with timber flooring include:
Warping or buckling from excess water
Surface scratches from debris or harsh bristles
Cloudy residue from the wrong cleaners
Long-term damage from oil spills or glue
In short? Treat it right, and timber will return the favor.
What Kind of Timber Floor Do You Have?
Before you start cleaning, it’s important to know your floor type. Different timber finishes have different needs.
Solid Hardwood: Natural timber planks with long-term durability. Typically sealed with polyurethane.
Engineered Timber: Plywood base topped with real timber. More water-resistant, but still sensitive to excess moisture.
Floating Timber Floors: Installed without nails or glue. Usually click-lock planks with a timber veneer.
We’ll explain how to clean each of these in detail later on.
What’s Best to Clean Timber Floors With?
The good news: You don’t need dozens of fancy tools. A few essentials and a solid routine are all it takes to keep timber gleaming.
1. Mop for Timber Floors
Can you mop timber floors? Yes—if you do it right.
Choose a flat microfiber mop that you can wring nearly dry. Avoid string mops that hold excess water. Always mop in the direction of the wood grain.
Dreame Take Try the Dreame L50 Ultra robot mop for hands-free cleaning. Its smart pathing technology ensures every inch of your timber floor gets cleaned while avoiding over-wetting. Perfect for daily upkeep without lifting a finger.
2. pH-Neutral Timber Floor Cleaner
Skip harsh cleaners or vinegar. Instead, use a pH-neutral cleaner designed for timber surfaces. These remove dirt without eating into the finish.
3. Vacuum for Timber Floors
Vacuuming is often better than sweeping. A quality vacuum, like the Dreame X40 Ultra Robot Vacuum, removes fine dust and grit that causes scratches.
Why it’s ideal for timber floors:
Soft roller brushes gently lift dirt without damaging the finish
Adjustable suction adapts to floor type to avoid wear
Anti-tangle design reduces clogging from pet hair or long debris
It vacuums and mops intelligently, saving you time and effort.
How to Clean Timber Floors: Step-by-Step Guide
Ready to get started? Here’s the best way to clean timber floors:
Step 1: Vacuum Thoroughly
Use a soft-brush vacuum head to lift dust, dirt, and crumbs. Be sure to reach under furniture and along baseboards.
Pro-tip Set robot vacuums like the Dreame L50 Ultra to clean while you’re out. With quiet operation and precise room mapping, it cleans thoroughly without disrupting your routine, making it ideal for busy households or pet owners.
Step 2: Mix Cleaner with Warm Water
Fill a bucket with warm (not hot) water and add a small amount of pH-neutral cleaner. Follow the dilution instructions.
Step 3: Mop Gently Along the Grain
Dip and wring your mop until barely damp. Mop in the direction of the grain to avoid streaks. Rinse and wring often.
Step 4: Spot Clean Stains Carefully
For sticky spots or stains, dampen a cloth with a diluted cleaner. Gently blot (don’t scrub), and always test in a corner first.
Step 5: Dry Immediately
Never leave timber damp. Dry it immediately with a microfiber cloth or dry mop.
Tips for Efficient Cleaning
A few smart tweaks make timber floor cleaning faster and help preserve that fresh, clean look. Here are some useful tips:
Clean up spills right away, especially liquids like oil, coffee, or wine.
Always vacuum before mopping to prevent debris scratching the surface.
Open windows or turn on fans after mopping to speed up drying.
Keep humidity levels at 40–60% to prevent gaps.
Use felt pads under chairs to reduce scratching during movement.
Adopt a shoes-off policy to reduce dirt and scratches.
Set a robot vacuum to clean multiple times per week for maintenance.
Pro-tip For deep cleaning, the Dreame H14 Pro Wet and Dry Vacuum tackles spills without overwetting. It combines powerful suction and controlled water flow to safely lift sticky messes or grime—perfect for preserving your timber floor's finish.
Cleaning by Floor Type
Each type of timber flooring needs slight adjustments during cleaning.
Floating Timber Floors
Avoid soaking the joints, as moisture can seep into the seams and warp the planks.
Use a nearly dry mop and vacuum with soft rollers.
A robot vacuum like the Dreame L50 Ultra is ideal thanks to its no-mop zones. It detects flooring type and avoids moisture-sensitive areas, so you get safe, daily cleaning without risking water damage.
Engineered Timber Floors
These are slightly more water-resistant but still sensitive to heat and chemicals.
Stick with microfiber mops and pH-neutral cleaners. Avoid vinegar, as it dulls the finish.
Use a wet and dry vacuum like the Dreame H14 Pro for deeper maintenance without damage. Its precise water control and reach remove hidden messes safely and efficiently.
Solid Hardwood
This type requires the most care. Water and steam can easily cause damage.
Vacuum daily with a soft-brush head, and mop with minimal moisture.
Refinish every 5–10 years, and use cleaners labeled for hardwood.
For deeper advice, check our full guide: How to Clean Hardwood Floors.
Common Mistakes to Avoid
Even with the right tools, small mistakes can still dull or damage timber floors. Here’s a table of common pitfalls and how to avoid them:
Mistake
Quick Fix
❌ Using too much water
✅ Wring mops until barely damp and dry floors immediately
❌ Skipping the vacuum step
✅ Vacuum first to remove debris that can scratch
❌ Using harsh chemicals or vinegar
✅ Stick to pH-neutral timber floor cleaners
❌ Leaving wet spots to air-dry
✅ Wipe with a microfiber cloth right after mopping
❌ Scrubbing stains aggressively
✅ Blot gently with a damp cloth and test first
❌ Using steam cleaners on timber
✅ Avoid steam entirely to prevent warping
Important Never steam clean timber floors, as moisture and heat can penetrate and damage the wood fibers.
How to Maintain Your Timber Floor
A clean timber floor is great, but long-term maintenance is even better. Here’s how to keep yours shining year-round:
Vacuum regularly with a robot vacuum like the Dreame L50 Ultra.
Avoid high heels or dragging furniture across the floor.
Add furniture pads and rugs in high-traffic areas.
Keep humidity between 40 and 60% to prevent shrinking or warping.
Use doormats at entrances to reduce tracked-in grit.
Dreame Take Want the best all-in-one tool? The Dreame H14 Wet and Dry Vacuum handles wet and dry messes on timber and sealed floors. Ideal for multi-surface homes, it handles sticky spills and daily dust without tool switching or extended dry time.
FAQs
Q: Can you mop timber floors?
A: Yes, but use a microfiber mop that’s barely damp, and dry the surface immediately.
Q: Can you steam clean timber floors?
A: No. Steam can warp or damage timber. Stick to pH-neutral solutions and minimal moisture.
Q: Can a robot vacuum and mop clean timber floors well?
A: Yes, especially if you use one with mop-exclusion zones like the Dreame L50 Ultra or Dreame X40 Ultra. They’re smart enough to vacuum without over-wetting your timber.
Q: What is the best way to clean timber floors?
A: Vacuum regularly, mop with a damp microfiber cloth, dry quickly, and avoid harsh chemicals or excess water. Check our full guide above for a step-by-step routine.
Conclusion
Timber floors can last a lifetime, but only if you treat them with care. With the right vacuum, gentle cleaners, and proper technique, you’ll enjoy a cleaner, brighter, and longer-lasting finish.
Dreame’s robot and wet and dry vacuums take the effort out of floor care, making it easier to protect your timber every day with smarter, safer cleaning.
Explore more of our expert guides for cleaning other floor types:
How to Choose a Robot Vacuum for Hardwood Floor
How to Clean Laminate Floors (and Fake Wood Floors) Without Damage
Choose smarter cleaning. Choose Dreame.
Whether you’re deep-cleaning carpets or trying to remove stubborn pet hair from upholstery, suction power is one of the most important features to consider in a vacuum cleaner. But what exactly is vacuum suction power, and how do you know if a vacuum is powerful enough for your cleaning needs?
In this guide, we’ll break down how suction power works, how it’s measured, what’s considered “good” for different vacuum types, and how to choose the right option for your floors and lifestyle.
Why Suction Power Matters in a Vacuum
Suction power determines how effectively your vacuum picks up debris from surfaces. Higher suction power means more ability to lift dirt, especially from deeper within carpet fibers, cracks in tiles, or textured upholstery.
It’s not the only factor (filters, brush rolls, and airflow design matter too), but it’s a key indicator of cleaning performance.
Suction Power vs. Airflow—What’s the Difference?
These terms are often confused.
Suction power is the force that pulls air into the vacuum.
Airflow, measured in CFM (cubic feet per minute), is how much air moves through the system.
Think of suction as the strength and airflow as the volume. Both are essential for optimal cleaning.
Learn more about must-have vacuum features in our guide: “Choose the Right Dust-Busting Vacuum.”
How Is Vacuum Suction Power Measured?
Vacuum manufacturers use several technical units to quantify suction power. Understanding these can help you compare models more confidently.
1. Watts (W)
Watts are often used on corded vacuums to describe motor power. While not a direct measure of suction, it offers a rough idea of performance.
Most household vacuums range between 500W and 1,500W. A high-watt motor doesn’t always mean better performance, as efficiency matters more.
2. Air Watts (AW)
This is a more accurate measure of suction for cordless vacuums. It tells you how efficiently a vacuum turns electric power into suction, combining airflow and vacuum pressure. Here’s what to look for:
160–180 AW: Powerful for cordless stick vacuums; ideal for quick cleanups.
Over 200 AW: Excellent for deep cleaning and heavy-duty carpets.
Under 100 AW: Better suited for light cleaning or hard floors.
Pro-tip Dreame’s Z30 Cordless Stick Vacuum delivers up to 310 AW, making it ideal for homes with pets or thick carpeting.
3. Pascals (Pa)
Pascals measure static pressure. This is commonly used for robot vacuums and wet and dry models, measuring the pressure difference the vacuum can generate.
2,000–3,000 Pa: Standard for basic robot vacuums
4,000–6,000 Pa: Good for pet hair and mixed flooring
7,000+ Pa: Excellent for carpets and deep cleaning
Pro-tip For example, the Dreame L50 Ultra Robot Vacuum delivers up to 19,500 Pa, making it one of the most powerful RVs in its class.
4. Water Lift (Inches or mm)
Also known as sealed suction, this metric is common for wet and dry vacuums. It measures how high the vacuum can lift water in a tube, indicating how well it handles liquids or dense debris.
Higher numbers (e.g., 100+ inches) indicate strong suction for thick carpets.
What Is a Good Suction Power for Each Type of Vacuum?
Suction needs vary by vacuum type. Here’s a breakdown of what to look for across common categories:
Upright Vacuums
Typically the most powerful, upright vacuums work well for homes with a lot of carpeting.
Good suction: 180–300 AW (approx. 18,000–27,000 Pa)
Ideal use: High-pile carpet, area rugs, and pet-heavy homes
Considering an upright model? Don’t miss our breakdown: "The Pros and Cons of Upright Vacuum Cleaners."
Canister Vacuums
More flexible with higher airflow, canisters are great for multi-surface homes.
Good suction: 200–400 AW (approx. 20,000–36,000 Pa)
Ideal use: Stairs, hardwood, tile, and mixed floors
Cordless Stick Vacuums
Lightweight and portable, but suction depends heavily on the motor and battery.
Good suction: 150–210 AW (approx. 20,000–30,000 Pa)
Ideal use: Everyday messes, light to moderate dirt, hard floors, and light carpets
Dreame Take Try the Dreame R10 Pure Cordless Stick Vacuum for 120 AW of suction power. It’s lightweight, easy to maneuver, and perfect for hard floors and small spaces where quick, efficient cleaning matters.
Handheld Vacuums
Compact and convenient for spot-cleaning.
Good suction: 30–50 AW (approx. 3,000–6,000 Pa)
Ideal use: Car interiors, upholstery, and quick cleanups
Considering an upright model? Don’t miss our breakdown: "How to Choose a Handheld Vcuum"
Robot Vacuums
These self-driving helpers have improved drastically. They use Pascal ratings to indicate suction strength.
Good suction: 3,000–5,000 Pa
High suction: 6,000–8,000 Pa
Ideal use: Automated daily cleaning and mixed floor types
Dreame Take With an exceptional 20,000 Pa, the Dreame X50 Ultra Robot Vacuum far exceeds typical robot vacuum suction levels, offering true deep-cleaning performance.
Wet and Dry Vacuums
Best for liquid spills, garage messes, or whole-floor care.
Good suction: 100+ AW or 80+ inch water lift (approx. 20,000+ Pa)
Ideal use: Kitchen spills, garage messes, and tile cleaning
Vacuum Suction Power Chart
Below is a quick-reference vacuum suction power chart to help you understand what’s ideal by type and environment.
Vacuum Type
Suction Power Range
Ideal For
Upright
180–300 AW / 18,000–27,000 Pa
High-pile carpet and pet hair
Canister
200–400 AW / 20,000–36,000 Pa
Mixed flooring and large homes
Cordless Stick
150–310 AW / 20,000–30,000 Pa
Daily cleaning and hard floors
Handheld
30–50 AW / 3,000–6,000 Pa
Car interiors and furniture
Robot
3,000–8,000+ Pa
Autonomous cleaning, light debris
Wet and Dry
100+ AW / 20,000+ Pa or 80+ in WL
Liquid spills, tile, garages, deep dirt, and whole-home cleaning
Real-World Performance: Vacuum Cleaner Models Compared
Specs are one thing, but how do Dreame vacuums perform in real homes?
Model
Category
Suction Power
Run Time
Standout Feature
Best For
Z30
Cordless Stick Vacuum
310 AW
Up to 90 mins*
Intelligent suction adjustment with LED display
Deep carpet and pet messes
R10 Pure
Cordless Stick Vacuum
120 AW
Up to 60 mins*
Lightweight design for daily spot cleaning
Quick cleanups, hardwood floors, compact spaces
L50 Ultra
Robot Vacuum
19,500 Pa
Up to 200 mins*
Auto-empty base, smart mopping, and 3D navigation
Whole-home hands-free cleaning
X50 Ultra
Robot Vacuum
20,000 Pa
Up to 220 mins*
Powerful 20,000 Pa suction and AI obstacle avoidance
Deep cleaning for carpets and hard floors
H12 Dual
Wet & Dry Vacuum
16,000 Pa
Up to 35 mins*
Self-cleaning brush and edge-to-edge mopping
Multi-surface vacuuming and mopping
Important Run times vary based on mode and usage environment.
Recommended Suction Power by Surface Type
Different surfaces need different levels of suction. Here's a helpful breakdown:
Surface Type
Recommended Suction Power
Hardwood Floors
100–150 AW / 3,000–5,000 Pa
Low-Pile Carpet
150–200 AW / 5,000–6,000 Pa
High-Pile Carpet
200+ AW / 7,000+ Pa
Tile Flooring
100–150 AW
Upholstery/Furniture
50–100 AW
Pet Hair Removal
180–210 AW / 6,000+ Pa
Dreame Take If you have pets, kids, and a mix of floor types, we recommend a vacuum with adjustable suction, like the Dreame Z30 or X50 Ultra, for total control and better battery life.
FAQs: Common Questions About Suction Power
Q: What is a good suction power for a vacuum cleaner in air watts?
A: For cordless models: 160–210 AW. For uprights or canisters: 180–300 AW.
Q: What is a good suction power for a vacuum cleaner in Pascals?
A: 3,000–5,000 Pa is decent; 7,000+ Pa is excellent for deep cleaning.
Q: How do I know if my vacuum has strong suction?
A: If it lifts debris in one pass, holds strong on upholstery, or lifts a rug slightly during cleaning, it’s got strong suction.
Q: Does suction power degrade over time?
A: Yes. Clogged filters, worn motors, and full dustbins reduce performance. Clean filters and empty the bin regularly.
Q: Is high suction bad for hardwood floors?
A: Not necessarily. But too much suction with the wrong brush head can scatter debris or damage finishes. Use adjustable power settings.
Q: Is low suction always bad?
A: Not at all. Low suction is ideal for delicate surfaces like curtains or lightweight rugs.
Still unsure what’s best for your floor type? Check out: “Are Robot Floor Cleaners Worth It in 2025?”
Final Thoughts: Choose the Suction Power That Matches Your Lifestyle
There’s no one-size-fits-all number for vacuum suction power. The “right” choice depends on your home’s size, floor types, and cleaning habits.
Live with pets or capets? Go for 200+ AW or 7,000+ Pa.
Mainly hardwood and tile? 150 AW or 4,000–5,000 Pa will do.
Want tech-savvy convenience? Check out Dreame’s robot vacuum collection.
If you’re ready to power up your cleaning game, browse Dreame’s full range of vacuum cleaners to find the perfect match for your home.m
A clean bathroom helps people feel more relaxed at home. It also supports good health. Water spots, soap scum, and bacteria can build up quickly on surfaces. Over time, this can lead to stains, bad smells, and even mold. Keeping your bathroom clean does not have to be overwhelming. With the right plan, anyone can do it in small, simple steps.
This article introduces a 10-step guide to cleaning all bathroom surfaces the right way. Each step focuses on one task at a time, so no area is missed.
You will also learn about tools that save time and energy, such as wet and dry vacuums, robot mops, and smart cleaning tips.
Supplies for Effective Bathroom Cleaning
Before starting, it helps to gather everything in one place. This saves time and keeps you focused. You won't need to stop and search for anything once the cleaning begins.
Cleaning Tools
Microfiber cloths: These grab dust and wipe surfaces without leaving streaks.
Toilet brush: Used to scrub inside the toilet bowl.
Scrub brush: Useful for sinks, tubs, tiles, and grout.
Squeegee: Helps with mirror and glass door cleaning.
Vacuum: A handheld or wet and dry vacuum removes dust and dirt from tight areas.
Bucket and mop: Used for floors that need water-based cleaning.
Gloves: Protect your hands from chemicals and dirty water.
Cleaning Solutions
All-purpose cleaner: Works on sinks, countertops, and many other surfaces.
Glass cleaner: Leaves mirrors and windows clear.
Toilet cleaner: Designed for deep bowl cleaning and stain removal.
Tile and grout cleaner: Breaks down tough buildup on floors and walls.
White vinegar and baking soda: Great for soap scum and drains.
Disinfectant spray or wipes: Use only on high-touch areas like flush handles, faucets, and doorknobs.
Step-by-Step Guide to Clean Bathroom Surfaces
Now that everything is ready, it's time to move through the bathroom step-by-step.
1. Declutter Your Bathroom
Cleaning becomes easier when surfaces are clear. Start by removing all loose items. These include bottles, razors, tissue boxes, towels, and rugs. Move them to another room or hallway. This gives you full access to every area that needs attention.
Look through baskets, containers, and drawers. Throw away expired products, broken tools, or anything you no longer use. If you have items that are rarely used, put them into a cabinet or storage bin.
2. Dust and Vacuum from Top to Bottom
Begin with the highest spots in the room. Dust light fixtures, shelves, the top edges of mirrors, and the tops of door frames. Use a microfiber cloth or a long-handle duster. Work from the top down, so dust falls to areas that haven't been cleaned yet.
Move to the middle areas next: windowsills, towel racks, and countertop edges. Wipe with a dry cloth to collect hair, lint, and loose dirt.
Finish with the lower sections, including baseboards and floor edges. A vacuum is helpful here. Use one with a narrow attachment to reach along corners and tight spots.
Wet and dry vacuum cleaners can save time during this step. They pick up fine dust, dry hair, and small crumbs from floors, tile edges, and around the toilet base without scattering debris. Take the Dreame H14 Pro Wet and Dry Vacuum as an example. It features 18,000Pa suction and a resilient scraper that lifts embedded hair and dry particles. The dual-edge brush cleans along baseboards, and the 180° lie-flat body fits under cabinets and low furniture. This design helps reach areas where dust often hides and collects.
3. Clean Shower Doors (or Bathtub)
For glass doors, spray a glass cleaner across the entire surface. Let it sit for a minute. Use a squeegee or microfiber cloth to wipe it down. Clean both sides of the door, not just the one you see most often. Don't forget the edges and metal frame.
If your shower door has water spots or soap buildup, use a mix of white vinegar and warm water. Spray the mix, wait 5–10 minutes, then scrub gently with a sponge. Rinse well with clean water.
For bathtubs, apply an all-purpose or bathroom cleaner along the tub walls and bottom. Focus on areas with discoloration or rings. Use a soft scrub brush to go over the surface in small circles. Rinse using warm water. A detachable showerhead or a pitcher works well to rinse fully.
Check around the tub edges and the caulking line. Use a toothbrush or a small scrub brush to clean corners and gaps.
4. Clean the Bathroom Sink and Drain
Bathroom sinks collect toothpaste, soap, and water marks every day. Start by removing any items from around the sink, such as soap dishes, cups, and bottles.
Spray the entire sink, faucet, and surrounding countertop with an all-purpose cleaner. Let the cleaner sit for a few minutes. Then scrub using a soft sponge or brush. Wipe dry with a microfiber cloth for a shiny finish.
Focus on the faucet base and around the drain. These areas often collect grime and water deposits. Use a small brush or toothbrush to scrub around these parts.
For a clogged or smelly drain, pour half a cup of baking soda down the drain. Then pour in half a cup of white vinegar. You will hear fizzing. After 10 minutes, flush the drain with hot water, about 140°F (60°C) works best.
Wipe any remaining water around the sink edges. Place clean, dry items back on the counter, but only if you need them every day.
5. Remove Soap Scum
Soap scum often looks like a white or gray layer. It builds up on tubs, shower walls, and doors. It feels sticky and dulls the surface.
To remove it, spray a mix of equal parts white vinegar and warm water onto the surface. Let it sit for 10–15 minutes. Use a sponge with a rough side or a soft scrub pad to clean gently in circles.
If the scum is thick or stubborn, sprinkle a small amount of baking soda directly on the sponge before scrubbing. The mix of vinegar and baking soda helps lift the buildup.
Do not use steel wool or hard brushes. These can scratch tile or glass. After scrubbing, rinse the area with clean water and dry with a microfiber cloth or towel.
6. Address Bathroom Tiles and Grout
Tiles can look clean from far away, but dirt, mold, and grime often settle in the spaces between them.
How to Clean Bathroom Grout
Grout is a thin, light-colored line between tiles. It absorbs dirt, moisture, and bacteria. Over time, it can turn gray, yellow, or even black.
To clean grout, spray it with a tile or grout cleaner. If you prefer a natural method, mix baking soda and water into a paste and apply it directly to the grout. Let it sit for 10 minutes.
Use a stiff-bristle brush or an old toothbrush to scrub along the lines. Move back and forth gently but firmly. Then rinse with warm water. Dry the area with a cloth.
If stains remain, repeat the process once more. For very old or dark stains, use a grout-specific cleaning solution.
How to Clean Bathroom Tile
Tile surfaces are easier to clean than grout. Spray them with an all-purpose bathroom cleaner. Let the solution sit for 3–5 minutes.
Use a sponge mop or a soft scrub brush to clean the tile surface. Focus on high-traffic zones like the area behind the sink or inside the shower.
The Dreame H15 Pro Heat Wet and Dry Vacuum uses 185°F (85°C) hot water to dissolve stuck-on grime and soap scum. Its resilient scraper lifts greasy debris, while the gap-free cleaning arm reaches near baseboards and wall edges. A liquid separation system keeps dirty water from re-circulating, and after use, the roller dries automatically with 194°F (90°C) hot air to stay clean and odor-free for next time. Once the tiles and grout are clean, the room feels brighter and fresher.
7. Sanitize the Toilet and Surrounding Area
The toilet is one of the most-used areas in any bathroom. It also collects bacteria quickly, so this part needs both cleaning and sanitizing.
Start by flushing once. Then apply toilet cleaner to the inside of the bowl. Aim under the rim and along the waterline. Let the cleaner sit for 5–10 minutes.
While waiting, spray an all-purpose cleaner or disinfectant on the outside of the toilet. Wipe down the handle, tank, lid, seat, and base using a cloth or disinfecting wipe. Use a separate cloth for the toilet so germs don't spread to other parts of the bathroom.
Next, scrub inside the bowl with a toilet brush. Focus on the area under the rim and at the bottom. Once done, flush again.
Check the floor around the toilet base. Spray cleaner and wipe this area too. Hair, dust, and drips often collect here. Keep a small brush for tight areas behind the toilet if needed.
Use gloves during this step. Once finished, wash or replace all cleaning tools used for the toilet.
8. Wipe Down Mirrors and Fixtures
Bathroom mirrors collect water spots, toothpaste spray, and fingerprints. Use a lint-free cloth or microfiber towel to get a clear result.
Spray glass cleaner lightly across the mirror. Let it sit for a few seconds, then wipe in a zigzag motion. Avoid using too much cleaner, as it can drip and cause streaks. Flip the cloth to the dry side to buff and finish.
Next, clean all metal fixtures, such as faucets, handles, and shower hardware. These often show water stains and fingerprints.
Spray an all-purpose cleaner or a mix of vinegar and water onto a soft cloth. Wipe each surface, including behind handles and around joints. Use a small brush for tight spots.
Polish each piece until it reflects light clearly. Doing this keeps your bathroom looking fresh and helps prevent buildup over time.
With mirrors and fixtures shining, the upper half of your bathroom is now complete. Next, it's time to look up and deal with the fan and hidden dust near the ceiling.
9. Clean the Bathroom Fan
Bathroom fans pull out moist air, but they also pull in dust. Over time, dust builds up on the cover and inside the vent. If left too long, the fan becomes noisy and less effective.
Turn off the fan before starting. Remove the vent cover if possible. Wash the cover in warm, soapy water and dry it with a towel.
To clean the fan itself, use a handheld vacuum with a nozzle attachment. This helps you reach dust tucked inside the housing. A soft brush attachment also works well around edges and tight corners.
The Dreame Z30 Cordless Stick Vacuum can be used for this job. It has a strong 310AW suction power and a motor speed of 150,000 RPM, which helps collect fine dust quickly. The lightweight body makes it easy to lift overhead. You can also use the nozzle tool to clean around the ceiling, baseboards, and other tight spots.
Once the fan is dust-free, reinstall the cover. A clean fan keeps air moving well and reduces moisture buildup.
10. Clean Bathroom Floors and Mats
Bathroom floors get wet, dusty, and grimy. Hair collects near corners, and water leaves streaks near the toilet and sink. Different tools help handle each of these problems.
How to Clean a Bathroom Floor with a Wet and Dry Vacuum
You can start by removing any baskets, bins, or obstacles on the floor. If the floor is dusty or has loose debris, use a vacuum first.
Then use a wet and dry vacuum to clean the surface more deeply. These machines lift dirt and also scrub away sticky marks or dried spills.
The Dreame H14 Pro Wet and Dry Vacuum is built for this task. It delivers 18,000Pa suction, a 520 RPM rotating brush, and a resilient scraper that targets stubborn grime. It cleans with 140°F (60°C) hot water to remove stains and grease. Dual-edge brush design allows cleaning along walls and furniture legs. After cleaning, it runs a 5-minute sealed hot air drying cycle, keeping the brush hygienic and ready for the next session.
The method works well on tile, vinyl, and sealed wood floors.
How to Clean a Bathroom Floor with a Robot Vacuum and Mop
Robot vacuums are useful for keeping floors clean every day. Some models can sweep dry dust and also mop wet areas.
Use a robot vacuum with mopping functions to clean after your main session or during the week between deep cleans. This is especially helpful in tight bathrooms where bending and scrubbing are hard.
The Dreame X50 Ultra Robot Vacuum is a powerful option. It comes with 20,000Pa suction and smart pathing for efficient cleaning. The robot can easily sweep dust and debris while mopping with hot water to leave floors streak-free. Set it to clean after showers or during busy mornings to keep floors tidy without effort.
How to Clean Bathroom Mats
Mats often trap hair, dust, and water. Shake them outside to remove loose debris.
Check the label to see if your mat is washable. Most fabric mats can go in the washing machine using cold or warm water. Add a small amount of detergent, and avoid using high heat when drying.
For non-washable mats, use a vacuum or a handheld vacuum to remove debris. Spray with fabric-safe cleaner if needed, then air dry completely before placing it back.
A clean floor improves the feel of the whole bathroom.
How to Keep the Bathroom Clean
A bathroom stays clean longer when small habits are added to the daily routine. You don't need to clean the whole room every day. Instead, focus on high-use spots and build good habits over time.
Tips for Maintaining a Bathroom Cleaning Routine
Wipe the sink and countertop each night. This prevents watermarks and keeps the area clean for the next day.
Sweep or vacuum the floor in the morning or after showers. Hair and dust collect fast, especially in corners.
Put items back in place after each use. This includes soap, brushes, and hair products. A tidy surface is easier to clean.
Keep a cleaning spray and cloth in the bathroom. Quick access helps remove small spills or toothpaste marks right away.
Use a robot vacuum to handle daily dust and hair. Models like the Dreame X50 Ultra move across the floor automatically and can be set to run once a day or several times a week. This helps keep the bathroom fresh without extra effort.
How Often to Clean Your Bathroom?
Some areas need attention every day. Others only need weekly or monthly care.
Daily
Wipe down sinks and counters.
Put away items.
Run the fan after hot showers.
Shake out floor mats.
Weekly
Clean the toilet.
Wipe mirrors and glass.
Mop or vacuum the floor.
Wash towels and replace mats.
Monthly
Deep clean tiles and grout.
Wash shower curtains.
Clean behind the toilet.
Vacuum the fan and vents.
Robot vacuum cleaners are helpful throughout the week. They can be scheduled to run while you're out or busy. This keeps floors free of dust and hair without adding extra tasks.
How to Remove Bathroom Odors?
Bathroom smells often come from the toilet, drain, or damp surfaces. To reduce these smells, open a window or use a fan after each shower. Keep the door slightly open to let air move through the room.
Clean drains with baking soda and vinegar once a month. This helps break down the buildup that can cause bad smells.
An air purifier adds another layer of freshness. It removes airborne particles and odors from the room. Choose one with a HEPA filter and quiet mode for bathroom use.
You can also add a small bowl of baking soda or activated charcoal near the toilet. These help absorb smells without using strong scents or sprays.
A Cleaner Bathroom Starts with Smarter Habits (and Smarter Tools)
A clean bathroom supports your health and brings a sense of calm. Following a clear 10-step process helps cover every surface without stress. Daily habits like wiping the sink and using a robot vacuum can reduce buildup between deep cleans. Smart tools such as the Dreame H14 Pro/H15 Pro Wet and Dry Vacuum, the Dreame Z30 Cordless Stick Vacuum, the Dreame X50 Ultra Robot Vacuum and a compact air purifier help simplify the job. With the right approach and support, keeping a fresh and hygienic bathroom becomes much easier to manage.
Deep cleaning your home is more than just a seasonal task—it's a methodical process that gets into places your regular routine might miss. If you're wondering how to deep clean your house effectively, don’t worry—it’s simpler than it sounds.
While the term may seem daunting, deep house cleaning is really just a series of manageable steps. It's not only about creating sparkling surfaces, but also about building a peaceful and healthy home environment that genuinely boosts your mood and well-being.
While the schedule for optimal deep cleaning varies according to each household and room, there are some general guidelines for tackling the task.
How Often Do You Need to Deep Clean Your House?
How often you really need to deep clean your house depends on a few things. Here's a quick list to help you figure it out:
Generally, aim for every 3–6 months, a good timeframe to keep things really fresh by tackling those hidden grime spots.
Got pets or little ones? You might want to increase that to every 2–3 months. More activity usually means more messes.
Dealing with allergies? If someone in your home has allergies or respiratory issues, more frequent deep cleans can really help reduce dust, pet dander, and other triggers.
Think about high-traffic areas. Of course, your kitchen and bathrooms need a deeper scrub more often. Some people do a mini-deep clean in those zones monthly.
Seasonal spruce-ups are great. A good spring and fall deep clean that gets you ready for changing weather is like giving your house a fresh start.
Ultimately, it's about what’s right for your home and lifestyle. And a little planning makes bigger cleaning tasks seem easier if you gather the right tools and organize the mission.
Prepare Essential Deep Cleaning Tools First
Before you begin scrubbing, you've got to get your arsenal together. Gather some microfiber cloths, a good set of scrub brushes for different surfaces, and some spray cleaning solutions you trust. And don't forget a dustpan, brush, and bucket. Getting these basics on hand will save you countless trips back and forth.
Once you've got your general tools, it's time to think about more specialized items that will tackle those really tough spots. The Dreame H15 Pro Heat Wet Dry Vacuum is a game-changer for sanitizing and breaking down grime without harsh chemicals. The Dreame Z30 Cordless Stick Vacuum has the power, handiness, and attachments to deep clean all those nooks and crannies that like to harbor dirt.
Other go-to helpers include a good squeegee for streak-free windows and mirrors and a long-handled duster for those high, forgotten spots.
Preparation is important, and so is the approach. Taken in smaller steps, a clear process makes the effort less daunting. Here’s a general sequence of actions:
The Process Is the Solution
Preparation is important, and so is the approach. Taken in smaller steps, a clear process makes the effort less daunting. Here’s a general sequence of actions:
Remove clutter: To begin deep cleaning your home, first declutter each area by removing any misplaced items, trash, or unneeded possessions. This initial purge creates clear surfaces and open spaces essential for effective cleaning.
Clean surfaces: After decluttering, use appropriate cleaners, whether all-purpose or specialized for wood, stone, or other materials. Wipe down shelves, furniture, and light fixtures thoroughly, removing all dust, grime, and sticky residues. Finish by polishing or drying surfaces to prevent streaks and ensure a sparkling finish.
Vacuum or mop floors: Floors should be the last area cleaned as you get rid of both existing dirt and the messes left from cleaning above. The Dreame range of wet and dry and cordless stick vacuums are invaluable in dealing with the floors, no matter the surface material.
Pro-tip For the best cleaning results, work from the top down, allow cleaning products to sit and penetrate surfaces before scrubbing, and use appropriate attachments to effectively reach and clean corners.
Of course different rooms serve different purposes, so each has its own cleaning needs. Here are a few guidelines for those high-traffic areas:
Room-by-Room Deep Cleaning Guide
In the Kitchen
When you're deep cleaning your kitchen, you'll want to pay special attention to the microwave, refrigerator, and oven. These tend to gather grime faster than you'd think.
Microwave: Aim to deep clean weekly. Those food splatters are germ havens if not addressed.
Refrigerator: Give your fridge a good deep clean monthly. Take everything out and wipe down the shelves and drawers with an antibacterial cleaner.
Oven: You should deep clean your oven when you start smelling old food or grease when it heats up.
Don't forget other spots like the dishwasher, stovetop, and sink—they need some deep cleaning too.
Sprucing Up the Living Room
How often you deep clean your living room depends on various factors. The frequency can range from weekly to every six months.
Carpets: Deep clean your carpets once or twice a year. If you've got pets or little ones running around, you probably need to do it more often. Deep cleaning carpets can be a big job, but there are awesome deep-cleaning vacuums out there now, like the Dreame T20 Cordless Stick Vacuum, that make deep cleaning your sofa, carpets, and floors a breeze.
Windows and drapes: Deep clean every three to six months. Window glass and frames are straightforward tasks with some readily available cleaning spray, but a professional might be the way to go for removing and cleaning drapes.
Skirting boards: Give your skirting boards a deep clean quarterly. A quick vacuum and wipe will help get rid of all that dust and those pesky dust mites that love to gather there.
Deep Cleaning the Bathroom
Your bathroom is a hot spot for germs, so deep cleaning it is important. You can also check how to clean bathroom in 30 mins if you have limited time.
Bathtubs and showers: Deep clean weekly because they're sites where fungus and bacteria grow, which can lead to skin infections. Be sure to use antibacterial cleaners and really get into every nook and cranny.
Toilets: Clean your toilet daily and give it a good deep clean every week. Just like tubs and showers, use antibacterial agents. Bleach is effective for overall cleansing and stains. A good toilet cleaner also helps with mineral deposits.
Bathmats: Clean weekly because they're another favorite spot for fungus and bacteria. After a sanitizing wash, let them dry outside in direct sunlight.
Showerheads: Deep clean your showerhead once a year to remove mineral buildup and keep your shower running smoothly.
Refreshing the Bedroom
Your bedroom needs occasional deep cleaning too. After all, it's where you sleep.
Pillows: Deep clean your pillows quarterly. They can collect a lot of dead skin, sweat, oil, dust mites and other allergens.
Mattresses, duvets, and blankets: These should be deep cleaned twice a year. Mattresses can harbor everything pillows do, or even bedbugs. Duvets and blankets also collect dust and allergens.
Common Mistakes to Avoid
A big mistake people often make is trying to do everything at once, leading to burnout and a less thorough job. Instead, break it down into smaller, manageable chunks. Focus on one room or even one area within a room at a time.
Another thing to watch out for is neglecting to clean your cleaning tools. Using dirty sponges, mops, or rags just spreads grime around and defeats the purpose of deep cleaning.
Taking your time and being methodical will make a huge difference!
Deep Cleaning Tools to Invest In
For large spaces or homes with pets, a high-suction wet and dry vacuum like the Dreame H15 Pro Heat saves time, effort, and stress. And to make the job even less demanding, routine cleaning beforehand with the L50 Ultra Robot Vacuum lightens the load.
The Dreame Z20 and Z30 cordless stick vacuums are unmatched in getting into hard-to-reach places to eradicate hidden dust and pet hair with the help of specialized attachments.
👉 Extra info:
Check out our guides to house cleaning:
Your Essential Cleaning Supplies Checklist for a Spotless Home
Home Deep Cleaning vs Regular Cleaning: What's the Differences?
How to Keep Your House Clean Before, During & After Vacation: Essential Tips
It’s Worth It
The effort is worth it—that deep clean brings renewal to your living space and state of mind. And the Dreame range of appliances is there to help you maintain that shine and serenity.
Make your first move: Print our Ultimate Cleaning Guide!
Sweeping has been around for centuries. Vacuuming is newer, smarter, and more powerful. But which one should you use to clean your floors, improve air quality, and save time? That answer is no longer so simple.
Today's cleaning tools go beyond basic brooms and standard vacuums. There are robot sweepers, stick vacuums, and wet-dry machines that can mop, scrub, and suction. These modern tools blur the line between sweeping and vacuuming.
So, how do you know what's best for your home?
The Pros and Cons of Each Method
Brooms and vacuums are both common tools in the home. They serve the same goal: getting floors clean. But they do it in very different ways. What works well in one situation might not in another. That's why it helps to weigh the strengths and drawbacks of each method.
Benefits of Sweeping
No electricity needed: You can sweep anywhere, even in cabins, garages, or patios where there's no power.
Lightweight and silent: Brooms are easy to carry, simple to store, and don't disturb sleeping babies or pets.
Great for quick cleanups: Dropped a glass? Spilled dry cereal? A broom and dustpan will handle it fast.
Low cost: A good broom costs very little and lasts a long time.
Drawbacks of Sweeping
Fine dust stays behind: Sweeping often stirs dust into the air instead of removing it, especially in dry indoor areas.
No filtration: Allergens, pet dander, and pollen can linger or float around during sweeping.
Physically demanding: Repetitive bending and twisting can cause back or wrist pain.
Less effective on soft surfaces: Brooms don't work well on rugs or textured floors.
Benefits of Vacuuming
Strong suction: Vacuums can pull up deep dirt, fine dust, and pet hair from rugs, tiles, or hardwood.
Air improvement: Many vacuums include HEPA filters that trap allergens and tiny particles.
Multi-surface tools: With the right attachment, you can clean sofas, stairs, curtains, and even car seats.
Less physical effort: No bending or sweeping motions—just glide and go.
Drawbacks of Vacuuming
Needs power: You can't use a vacuum where there's no electricity or during power cuts.
Noisy operation: Most vacuums generate 65–80 decibels of noise, similar to a shower or blender.
Higher cost: Stick vacuums, robot models, or wet-dry types are more expensive than a broom.
Maintenance needed: Filters, dust bins, and brush rolls all need regular cleaning or replacement.
Still, some vacuums are designed to make these problems easier to live with. For example, the Dreame Z20 Cordless Stick Vacuum offers up to 90 minutes of runtime and includes washable components, so you don't have to buy new filters often. It's also lighter than many other vacuums, with smart suction control that adjusts automatically. If you're worried about constant upkeep, it takes care of most of it for you.
And if noise or storage space is a concern, the Dreame H14 Wet and Dry Vacuum runs efficiently without sounding overwhelming. It even features auto dirt separation and self-cleaning with hot air drying, so you spend less time dealing with the mess after each clean.
What Is the Difference Between a Sweeper and a Vacuum?
A sweeper usually uses brushes to push debris into a container. Some models are manual. Others are powered and use rotating brushes. You'll often find electric sweepers in restaurants, stores, or places that need quick, quiet floor cleaning. They're good for light dirt, crumbs, or hair on hard floors.
A vacuum, on the other hand, pulls dirt in with suction. It captures dust, pollen, and small particles, not just what's easy to see. You'll find several types of vacuums with different features:
Robot Vacuums (RV): Smart, automated, and hands-free.
Cordless Vacuums (CV): Lightweight and portable, easy to use.
Wet-Dry Vacuums (WD): Tackle both wet spills and dry messes in one go.
While sweepers work well for fast cleanups on hard floors, vacuums go deeper. They're better for homes with pets, carpets, or people who have allergies.
Robot Sweeper and Vacuum: The Next Generation of Cleaning Is Already Here
Let's face it: most people don't enjoy daily cleaning. That's where robot sweepers and vacuums step in. These compact machines do the job while you relax, work, or sleep.
Robot sweepers usually use rotating side brushes to pull debris into a dustbin. They're great for basic maintenance between deeper cleans. Most models are quiet and gentle, making them good for small homes with mainly hard floors.
Robot vacuums go a step further—with strong suction, smart mapping, and scheduled cleaning. Some even return to their dock to charge and resume where they left off. And with wet-dry models, you can also mop, sometimes even with hot water.
Take the Dreame X40 Master Robot Vacuum as an example. It features
12,000Pa Suction Power: Effectively lifts dust, hair, debris, and even pet fur from hard floors and low-pile carpets.
Dual Rotary Mops: Provides deep cleaning with customizable mop settings, from dry to wet, ensuring a clean floor every time.
MopExtend™ RoboSwing Technology: Expands the mop for better edge and corner cleaning, reaching under furniture and tight spaces.
Smart Dirt Detection: Adjusts cleaning power based on detected floor grime for a more thorough clean.
Pet-Safe Zone Creation: Let's set no-go zones to protect your pets or avoid specific areas.
3D Mapping: Maps multi-level homes with Smart Pathfinder™ Technology and visualizes the route via the app.
If you want daily cleaning with very little effort, a robot vacuum might be a smart upgrade.
Choose the Right Tool for Your Floors: Every Surface Has Its Match
Whether you have plush carpets or glossy tiles, the right tool makes a big difference in both effort and results.
Carpeted Floors
Carpets trap dust, crumbs, and pet hair deep in the fibers. Sweeping isn't very helpful here. The bristles stay on the surface and often push debris around instead of removing it. A vacuum is much better for carpets. Choose one with strong suction and a rotating brush roll. Cordless vacuums are good for light messes. For deep cleaning, a wet-dry or high-suction stick vacuum works better. The Dreame Z20 Cordless Stick Vacuum offers 250AW suction, a HEPA filtration system, and up to 90 minutes of runtime, perfect for whole-home vacuuming, even on carpet. Its anti-tangle roller helps lift pet hair without getting clogged.
Hard Floors (Wood, Laminate, Vinyl)
Sweeping does okay on smooth floors. It picks up dry debris like cereal or dust bunnies. But it often leaves fine dust behind, especially along baseboards. Vacuums give a deeper clean. You'll want one with a soft roller brush to avoid scratching. Models with edge detection or LED lights also help spot hidden messes. The Dreame H14 Wet and Dry Vacuum is a good option here. It has 18,000Pa suction, dual-edge brushes, and a 60°C (140°F) hot water mopping system. It even self-cleans and dries the brush in just 5 minutes.
Tile or Stone Floors
Grout lines collect dirt and water easily. Sweeping might move debris over the surface, but it won't reach into tiny gaps. A wet-dry vacuum is a better choice. These use rollers, suction, and water to clean deep into grooves. The Dreame H14 includes a resilient scraper and a dual-rotation self-cleaning brush that spins at 520RPM, helping remove stuck-on grime from tile and stone.
Expert Tips: Sweeping and Vacuuming Effectively
Good tools are helpful. But knowing how to use them well makes cleaning faster, easier, and more complete. Whether you sweep or vacuum, the right habits can boost your results.
1. Sweep with a Plan
Start in one corner and move in small, even strokes.
Push dust and debris toward the center, not the edges.
Use a dustpan with a rubber edge to catch fine particles.
Try sweeping daily in high-traffic areas like kitchens or entryways.
On wood floors, use a soft-bristle broom to avoid scratches.
2. Vacuum in Rows, Not Circles
Move slowly to let the suction pull up dirt.
Overlap each pass by a few inches to avoid missed spots.
Begin with low-power mode on rugs, then increase suction if needed.
For corners and edges, use a crevice tool or side-brush attachment.
Don't forget to vacuum under furniture if your model can reach.
3. Use Smart Modes
Models like the Dreame H14 Wet and Dry Vacuum adjust suction power based on what's on the floor. It even shows color-coded lights: red for heavy dirt, orange for medium, and green for light.
4. Maintain Your Equipment
Empty the dustbins after each use. Don't let them get overfilled.
Wash filters and dust cups weekly if they're reusable.
Replace HEPA filters every 3–6 months, depending on use.
Clean hair from rollers, especially if you have pets.
5. Don't Rely on One Tool Alone
Even the best vacuum might miss large debris, and even a good broom won't catch fine dust. Use both tools where they work best:
Sweep first in garages or outdoor areas, then vacuum corners or mats.
Vacuum weekly in bedrooms or living rooms with carpets.
Use robot models for daily dust control while you focus on deeper tasks once a week.
7 FAQs about Floor Cleaning
Q1. Should I sweep or vacuum first?
A: If your floor has large debris, like broken glass, dry leaves, or cereal, sweep first. After that, vacuum to remove fine dust and dirt. For normal cleaning, vacuuming alone is usually enough.
Q2. Can I vacuum without sweeping?
A: Yes. Most modern vacuums can handle both small and large messes. But for heavy debris like sand, it's safer to sweep first to protect the vacuum's motor and filter.
Q3. Sweeping or vacuuming: Which is better for pet hair
A: Vacuuming is better. Pet hair sticks to rugs, furniture, and cracks. Vacuums with anti-tangle brushes or dedicated pet tools remove fur more easily.
Q4. Can sweeping remove allergens?
A: Not very good. Sweeping stirs them up. Vacuums with HEPA filters trap allergens like pollen and dander, which helps reduce allergy symptoms indoors.
Q5. Is it okay to vacuum wet floors?
A: Only use a wet-dry vacuum on wet messes. Standard vacuums can get damaged if they pull in water. The Dreame H14 is made for both wet and dry cleaning and even separates liquids from solids for easier disposal.
Q6. Can I use a vacuum on hardwood floors?
A: Yes, but choose one with a soft roller or adjustable suction. Wet-dry vacuums with mopping functions are ideal for deep cleaning without scratches.
Q7. How often should I clean my floors?
A: For busy homes or households with pets, aim to vacuum 2–3 times a week. Sweep or spot-clean daily in kitchens or entryways. Use a robot vacuum for daily dust pickup if you prefer hands-off cleaning.


 PM Series


 Australia
 中国大陆
中国大陆 日本
日本


 Türkiye


 Italia
 Netherlands
 Belgium
 Greece
 Polska
 Norway
 Sweden
 Finland
 Denmark
 Hungary
 Czechia
 Slovenia
 Croatia
 Switzerland
 United
Kingdom
United
Kingdom
 Canada


