Black Friday Sale Is Live! Best Prices of 2025
00
Days
: 00
Hours
: 00
Mins
: 00
Secs
Shop Now > close button
What Latest Breakthrough Technologies Dreame L10 Pro Brings

What Latest Breakthrough Technologies Dreame L10 Pro Brings

Editorial TeamDreame |
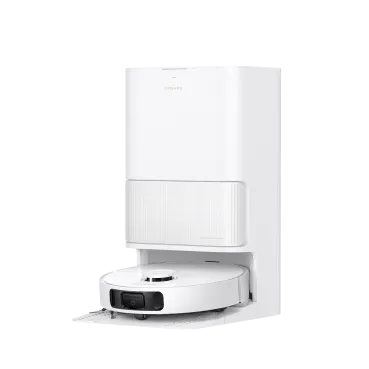
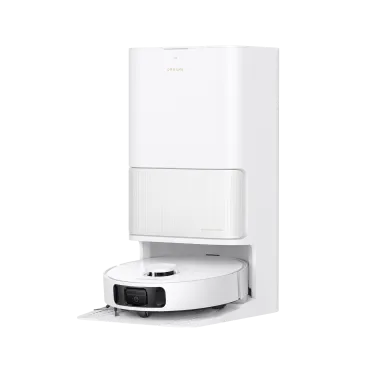
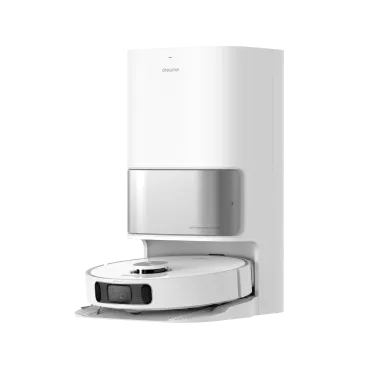
Dreame, a growing innovative company specializing in developing intelligent home cleaning appliances, plans to launch its brand-new AI-powered smart vacuum cleaner, the Dreame L10 Pro robot vacuum. The smart tech vacuum cleaner features double-laser LiDAR sensors, a LiDAR navigation system, 3D obstacle avoidance technology, and a SLAM algorithm. This intelligent vacuum cleaner is the latest advancement in autonomous home cleaning appliances meant to make home cleaning much more manageable than previously imagined. What makes Dreame stand out among other companies developing home-cleaning appliances, and why are people interested in their new Dreame L10 Pro robot vacuum? Dreame: Winner of the AWE 2021 award Dreame won the AWE 2021 award, an exhibition featuring a wide range of interactive activities that introduced new products, technology, and innovation to global audiences. The exhibitions introduced various products like the Dreame L10 Pro robot vacuum. The smart tech vacuum is designed to detect and avoid obstacles while simultaneously rebuilding its 3D environment in real-time. The advanced mapping system that incorporates LiDAR, SLAM technique, and 3D obstacle avoidance tech is meant to make the autonomous intelligent vacuum cleaner more efficient. The Dreame bot has a powerful 4000Pa ultra-powerful suction that can easily clean out dirt and debris. Let’s dive in and explore more on what makes Dreame better than other vacuum cleaners in the industry. Common Problems of Robot Vacuums While the robot vacuum industry is developing rapidly with more innovations being made every day, one thing that remains a significant problem for most robot vacuum cleaning manufacturers is obstacle navigation. The majority of robots available in the market are easily blocked by objects around the house like socks and slippers. This makes the robots somewhat inefficient since they require human assistance to remove the obstacle and keep the cleaning process going. This comes as a challenge, and Dreame chose to tackle the challenge head-on. Dreame dove right in and implemented innovations that one could only see in autonomous vehicles. These innovations were meant to tackle obstacles whether the Dreame L10 Pro robot vacuum is in the dark or faced with different obstacles every day. Dreame implemented live mapping and obstacle detection. This means that the bot can map your home, vacuum, and detect obstacles in real-time, placing the autonomous bot way ahead of Dreame’s competitors. LiDAR Navigation System Brings Dreame L10 Pro to the Next Level LiDAR navigation system LiDAR is an acronym for light detection and ranging. Some self-driving vehicles implemented the technology to help them navigate their real-time environments. There are several advantages to using LiDAR, such as accurate obstacle and depth perception, among others. Dreame implemented LiDAR technology into their smart vacuum cleaners, making them more efficient than ordinary vacuum cleaners in the industry. This technology allows the Dreame Bot L10 Pro to vacuum more efficiently by detecting and avoiding obstacles. 3D obstacle avoidance technology The Dreame L10 Pro robot vacuum is also equipped with an IR (infrared) sensor that helps in obstacle avoidance. 3D obstacle avoidance is different from LiDAR in that, instead of light detection, the sensors emit infrared radiation that bounces off of objects in the room. Infrared light is invisible to the naked eye, and since the intelligent vacuum cleaner emits it, it doesn’t depend on natural or incandescent light. The sensors on Dreame’s smart tech vacuum detect the emitted light and analyze them to help the bot detect the distance of the object and how to navigate it. What makes this type of mapping better than LiDAR is that it allows the robot vacuum cleaner to ‘see’ in the dark. SLAM technique SLAM is an acronym for Simultaneous Localization and Mapping. Just like humans, robots need maps to help them find their way. Bots can’t rely on GPS, especially if they are indoors. SLAM technique was implemented in-home cleaning bots as an easy way for robots to find their way around your home. The technology involves the process of determining a sensor’s position and orientation relating to its surroundings. Doing this helps the Dreame bot, in this case, to map a visual 3D representation of its surroundings. The technology is used to generate maps, and it was integrated with the Dreame L10 Pro robot vacuum to help with autonomous vacuuming. Once the robot has mapped out your home, it gets a better idea of where each room is and the room’s dimensions. This increases the smart vacuum cleaner efficiency. Conclusion With Dreame’s projected growth, the chances are that more innovations are about to come our way. The level of innovation and dedication that Dreame puts in their products, especially in the Dreame L10 Pro robot vacuum, is what makes their products one of a kind. Purchasing this product is a definite plus. If you’ve ever come home and found your autonomous robot vacuum stuck in front of an obstacle unable to complete your cleaning, then you can safely put those experiences behind you. Knowing the amount of innovation implemented and the technology invested in creating the Dreame L10 Pro robot vacuum, you can rest assured that Dreame’s intelligent vacuum cleaner is the most efficient bot for the job.
Continue reading
Easy Household Chores That Teenagers Can Do

Easy Household Chores That Teenagers Can Do

Editorial TeamDreame |
The best thing a parent can do is to start early on household chores for teenagers. Doing so will teach your children about self-reliance, responsibility, and respect. The problem is, you might have no chore ideas for teens. It’s hard to come up with them – and, sometimes, even harder to get a teenage kid to do them! Fortunately, we have the perfect teenage chore list for you to try. These tasks aren’t hard to do and, in due time, your children will add them to their daily routine with no hassle. Chores That Teens Can Do Take out the trash Taking out the trash is a movie cliché at this point – but there’s a reason for that. Making your teenage children do this will make them understand how important it is to pick up after themselves. Not only that, but this chore will teach them that there are things in life that must be done on time. If they fail to take out the trash before the pick-up truck comes through, they failed their task. So, they will have to do a chore – and pay attention to the daily schedule. It’s the perfect character-building task for beginners! Sweep and vacuum Like taking out the trash, sweeping and vacuuming are some of the most important chores your teenage child can do. This chore is all about taking care of the house. If your teenage kid invites friends over or leaves a mess after eating, it’s only right that they clean up. The best part is, they don’t have to grab a broom because it’s not the 1800s anymore. They can use a Dreame vacuum, like Dreame T10 to make the chore more fun and interesting – but they must make sure everything is nice and clean in the end. Do the laundry This final option is by far the most advanced and complicated of them all. It might not seem like much to an adult – but a teenage kid has little to no idea about doing the laundry. While it is recommended that you tell your children to do the laundry eventually, you need to understand that it will take some time for them to understand how to properly do this chore. So, if you’re interested in trying this option, keep in mind you’ll have to teach your children how to do that. Take care of the pets A pet could be your teenage child’s best friend – but it’s also a huge responsibility. Taking care of a pet teaches important lessons. It also teaches how important it is to be responsible when someone else depends on you. If, for example, you have a dog in the house, your son or daughter should walk the dog, feed the dog, groom the dog, and play with the dog. These are all essential parts in taking care of a pet – and an important household chore for your teenage kid to do. The great part about this is that doing something like this doesn’t feel like a chore – because hanging out with the pet is always fun! How Can You Motivate Teenagers to Do Their Chores? Set consequences if they do not do their chores These days, teenagers have too many things going on for them. Social media alone takes hours away from their daily routine. While that’s not a good thing, you can use it to your advantage. For example, if your children fail to do their part in the teenager chore list, you can restrict their internet access, reduce their video game time, or simply add more chores in the future for them to do. The idea here is not to threaten your children with punishment – but to make them understand that, in real life, not doing what you’re supposed to do has consequences. Do chores along with them Even though you’re trying to delegate household tasks and teach your kids about responsibility, sometimes it’s better to do a team effort to show that you care. This article is about chores for teens, but that’s not enough reason for adults not to give a helping hand! When you do chores side by side with your children, you’re teaching them the right way to do things – and why they should do it. And, sure, this isn’t the most entertaining thing an adult can do with his or her time, but it’ll teach the young ones in the family a valuable lesson. Reward them for doing chores Teenagers should face consequences for their actions, both good and bad. Sure, you should take away your teenage child’s cellphone if they don’t take out the trash – but you should also reward him if he does his household chores. You already know what to do if your child fails to do his part. You should also promise to do something good in return if they do all the chores. A weekly allowance is a great reward for a job well done. If an allowance isn’t possible or necessary, you could come up with something else, like buying a new video game or cellphone in a couple of months, if every chore is done before that time. Conclusion At the end of the day, implementing the right chores list for teenagers could be the difference between raising healthy, educated adults and people who don’t know how to pick up after themselves. Taking out the trash or vacuuming might not seem like much, but they are character-building tasks that will teach your children valuable lessons. And, while your kids learn, you’re learning as well! Trying to make your teenage children do chores isn’t easy – but it’s worth the effort. If you’re coming up short and your teenage kids aren’t listening, try to implement the reward system we talked about. That’ll definitely help!
Continue reading
Things You Should Never Do with Your Vacuum

Things You Should Never Do with Your Vacuum

Editorial TeamDreame |
Cleaning up a home is one of the most essential tasks in our everyday lives. We may use various methods, techniques, and vary our timings, but one thing is certain that vacuuming the floor is necessary. The vacuum cleaner is by no means a modern invention. It came about at the start of the 20th century and has since found its way into virtually every home. The efficacy of vacuum cleaners often makes us forget what we can and cannot clean with them. Regardless of its power to sweep up virtually everything, we should be cautious when using vacuum cleaners. Not everything can be swept up and certain things might even damage the machine, thus rendering it useless. In our article, we shall give you a comprehensive guide on what you can and cannot clean up, and why a Dreame vacuum is a device you must have in your home. Things You Cannot Vacuum Now we turn our focus to the topic of the article, which is the things you should not vacuum. This matter is far more significant as it can damage your vacuum, make it inefficient, or even render it useless. We shall look at what things you should avoid when vacuuming the floor, and how you can deal with it instead. Broken Glass Shattered glass can be incredibly painful to clean up and you will get the urge to pull out your vacuum cleaner for this. However, you must resist and ask yourself if you can vacuum glass. Bits of glass can be quite dangerous for your vacuum. For the cleaners with a bag, vacuuming glass can easily tear it and create a huge mess. Even for the vacuum cleaners without a bag, bits, and pieces of glass can still damage their insides. Bigger fragments can get lodged in the pipe and cause it to function irregularly. Instead of using a vacuum, you should first sweep up the bigger pieces and dispose of them carefully. Once you do that, you will be left with microscopic pieces of glass, and you can clean these up by using a damp piece of cloth, paper towel, dough, or bread. Water An important question that readers often ask is, can I vacuum water? The answer is that you should not bring your machine near anything wet at any cost. This is because the vacuum cleaner already houses a ton of dust, dirt, and other impurities. Introducing water to it would be a horrendous idea. It can lead to mildew growth or worse, the water can lead to an electrical failure in the vacuum cleaner. The latter can even render your vacuum unserviceable. The best way to clean up water is by using a microfiber cloth that can soak it up completely. Wet Foods If you have spilled any kind of soup, soggy cereal, wet coffee grounds, and tea leaves, or sauces, avoid using your vacuum at all costs. It will simply create a mess inside the vacuum cleaner and will certainly damage your vacuum. When vacuuming the floor, take extra caution to ensure that there is no spilled food making its way into your vacuum cleaner. What you should do is use a microfiber cloth to absorb it. If the wet food has chunks, you can pick up using your hand or a broom, doing that first is advisable. Ash and Fine Dust Vacuum cleaners might be tough, but they are not designed to handle a particulate matter such as fireplace ash or fine dust. This is because most vacuum cleaners do not come with a filter that can handle speck of such size. It can coat the inside of your vacuum and clog it or worse, it can end up back in the air. A good way to clean up fine matter is by using a broom to sweep it all up. Alternatively, you could use wet material such as used coffee grounds to lump it all together for an easier cleaning method. Makeup Spiling make-up on a carpet is nothing short of a tragedy. It can be a mess to use a vacuum cleaner. The vacuum brush can make the spill worse as it can stain the carpet or floor. In case the makeup gets sucked up into the vacuum cleaner, it can be disastrous for the vacuum bag. It can melt and create a mess that is worse than a makeup spill. You should pick up as much makeup as you can and dispose of it. As for the stains, you can use an easy stain remover for your carpet. Conclusion While the efficiency of a vacuum cleaner may have made us lethargic and utilize it to clean almost everything, we should be aware of what things a vacuum cleaner can handle and what things it cannot.
Continue reading
How to Get Wax out of Carpet with Vacuum

How to Get Wax out of Carpet with Vacuum

Editorial TeamDreame |
Keeping every nook and corner of your house clean can be a really challenging task. Using candle lights during a dinner party or as decorating options in some areas of the house is a good decoration idea. However, there is always a possibility for the wax to drip on to the carpets. Getting the melted wax out of the carpet may look like a tough thing to do. However, if you follow some simple steps you will know how to get wax out of carpet easily. But before you follow the steps, there are certain things that can help you to remove wax out of carpet. Let us find out what these things are. Things You Will Need For removing candle wax out of carpet you will be needing the following few things: Ice Bag or Ice Pack Iron or Hair dryer Paper Towel Carpet Cleaning Solution or Rubbing Alcohol A Butter Knife Vacuum cleaner Each of these things would be required through the various steps involved in removing wax from the carpet. Let us now find out how to get candle wax out of carpet. Steps to Remove Wax Out of Carpet You can easily remove stubborn wax from your carpets if you follow these simple steps. The first thing or the preliminary requirement of course is to get all the materials ready which we discussed in our previous section. Once all the required things are procured and are ready for use, we can start with the process of removing candle wax out of carpet. Let us now look at the steps involved. Step 1: Freezing the Wax on Carpet The candle wax on your carpets needs to be removed immediately as soon as you see or notice it. If you wait longer, it gets harder to clean the wax from your carpets and the stain they leave afterward. You may see that the wax on the carpet is messy and is spread through the carpet. Some of it may be there on the carpet but may not be visible. To make sure all the wax on the carpet is visible properly, you need to do this step. In this step, a bag of ice or an ice pack is placed on the top of the carpet on the spots where candle wax has fallen. This would freeze the wax on the carpet that would make the wax spots more clearly visible, thereby making it easy to clean. Ensure that the carpet does not get wet while the freezing process as moisture would only make the stains worse. Step 2: Scraping the Wax off the Carpet Once the wax on the surface is completely frozen, you may now start scraping off the wax from the carpet gently. Using a butter knife ensures that the carpet does not get torn or cut in the process. Make sure you are not going too rough while removing the wax from the carpet as you do not want to end up cutting the threads of the carpet and damaging it. This process will help you remove most if not all of the wax from the carpet. Once the wax pieces are all removed, you can either vacuum them or simply remove them off the carpet and proceed to the next step. As pointed out in step 2, freezing and then scraping off the wax will only help you to partially remove the wax from the carpet but the wax stains remain with some leftover wax that cannot be removed merely by scraping. In this step, you will need to use a paper towel and the steam iron or hair dryer. Start by placing the paper towel on the top of the wax stains. Heat up the iron at its lowest setting and gently run the iron over the towel to heat up the wax. Keep running the iron over the paper towel until you see the paper towel absorbing the wax from the carpet. Ensure that the heat level is at the minimum or else the paper towel may burn making the stains more rigid and difficult to remove. If you don’t want to use the steam iron, simply run the hot hair dryer over the carpet and then use the paper towels to absorb the resultant wax on the carpet. Once you are done with the heat and absorb process, it is time for the final cleaning step. Step 4: Cleaning the Carpet This step is the final and the most important step. Though every step is equally important, this step gives the desired cleaned look that you are expecting off your carpet after the entire process. This step has two parts. The first part is cleaning the carpet with a cleaning solution and then vacuuming the carpet using a vacuum cleaner. Always ensure to use the best vacuum cleaner while cleaning carpet and the Dreame T20 does the job just right. So, in this step, you will clean the carpet using a carpet solution and see how to remove candle wax from carpet with Dreame vacuum. Gently pour some carpet cleaning solution over the stained areas of the carpet. If there are colored stains of wax all over the carpet, use some rubbing alcohol, dab a small cloth towel with it, and gently remove the stains on the carpet using the cloth. Once the carpet is dried, run your Dreame T20 vacuum cleaner over the carpet, and in no time your carpet will return to its original spot free form and texture. Conclusion To summarize, though removing wax stains and wax from your carpet is an overwhelming task, you can easily remove all the wax and subsequent stains from your carpet without any difficulty by using simple DIY steps at home. So, what are you waiting for? Use this piece as a guide to removing candle wax from carpet and keep your home carpets ready for the next candlelight dinner party.
Continue reading
How to Vacuum Less and Still Keep Your Carpet Clean?

How to Vacuum Less and Still Keep Your Carpet Clean?

Editorial TeamDreame |
Carpets are a great interior decor item that most homes have invested in, but how often they should be cleaned has always been a matter of debate. Some experts recommend at least once a week, but others advise a biweekly cleaning routine. Whichever advice one chooses to follow, the bottom line remains that you can vacuum your carpet less and still keep it clean. There are many advantages of vacuuming less, including increasing the lifespan of the carpet and maintaining carpet fiber. Below are the main reasons why one should adopt a less frequent carpet cleaning routine. Also, get to learn how to choose the right vacuum. Why Do We Need to Vacuum Less for Carpet? Cleanliness has been said to be second to godliness, but that does not mean homeowners have to go overboard in maintaining a clean home. One should vacuum less for carpet because it helps to: Protect the Fiber of the Carpet It has been argued that dirt is likely to wear out a carpet, but even getting rid of it can do a lot of harm. Vacuum cleaners cause wear and tear to these cherished home decor accessories. A beater brush is mainly designed to be used on synthetic fibers, but some people use it on woolen carpets. Wool carpets are made by spinning wool fibers together to make yarn, and when subjected to the rough treatment of beater brushes, such wool carpet fibers pull away from the yarn. Since the beater brush’s bristles are made from nylon, the rubbing action can be too abrasive on the fibers causing them to be pulled and torn. Since vacuum cleaners usually have different settings, it is most likely to damage the carpet at low settings, while at high settings, the cleaning will not be efficient. Vacuuming less, therefore, protects the carpet fibers in the long run. Increase the Lifespan of the Carpet The general lifespan of a carpet is five to fifteen years, depending on the construction, after which it starts aging and fibers begin to wear out. Although that would be natural wear and tear, frequent vacuuming would speed up the aging process. A carpet that would have lasted for five years before its fibers were torn starts aging in three years or less. Limit Chances of Voiding the Warranty Carpets usually come with a warranty, and a manufacturer is confident in its product that will have a texture retention warranty covering the carpet for as long as 20 years. However, each manufacturer has his own exclusions. As a buyer, one is expected to follow a certain cleaning and maintenance routine for the carpet warranty to be valid. For texture retention, which basically covers texture damage, and wears warranty covering deterioration, the carpet has to meet a certain threshold for manufacturers to compensate for the damage. In most cases, manufacturers demand that carpet loses at least 10% of fiber before it can be replaced. Too much vacuuming will have the carpet deteriorating without even reaching the threshold; thus, one is left with a worn-out irreplaceable carpet. How to Vacuum Less and Still Keep Your Carpet Clean? When you vacuum less for carpet, you help protect your carpet from too much wear and tear. There are different ways to still keep the carpet clean without subjecting it to frequent vacuuming. Here are three tips: Take off Your Shoes Shoes carry loads of germs and dirt that can make the house’s inhabitants sick. While germs are invisible, the dirt shoes leave on the carpet is usually unsightly. Besides leaving the carpet dirty and prompting thorough cleaning, the particles also act sandpaper. Consequently, the “sandpaper” wears out the carpet faster. As people step on the particles, they are broken down and ground into the carpet fibers. This causes the fibers to wear out and dull the carpet’s appearance. Encourage visitors to leave shoes at the entrance to avoid tracking mud and dust into the house and onto the carpet. If taking shoes off is not an option, one can opt for a microbial mat at the home entrance. It may not be as effective as removing shoes, but it will reduce the bacteria and amount of dirt entering the home. Clean Carpet Stains Locally Upon spilling tea or wine on the carpet, there is no need to clean the entire carpet. Instead, clean the stains immediately because once it stains, getting rid of it will be a headache. To locally clean a stain increases the lifespan of the carpet by preventing frequent scrubbing of the carpet fibers, which would wear them out. Moreover, each stain demands a different kind of cleaning procedure. Therefore, even if there are different strains, one can protect the carpet from damage using the right products for each spot. Engage Professionals Some manufacturers will declare a warranty void because one did not engage professionals in the maintenance process. Besides keeping the warranty valid, professional cleaning at least twice a year keeps the carpet clean and maintains it for longer. Choose the Right Vacuum for Your Carpet Getting the right cleaning equipment can be hectic given the many vacuum cleaners available. Most vacuum cleaners are designed for cleaning wide areas, but some, like the Dreame D9 robot vacuum, are ideal for small area cleaning. Since different vacuums cater to different needs, always look for one that suits your home, taking into account pets, children, and stairs. Conclusion The general recommendation for cleaning carpets is once a week, but too much of anything has adverse effects. Keeping the carpet clean does not necessarily have to be from frequent vacuuming. Locally cleaning the carpet, taking shoes off, and engaging professionals are a few tips to vacuum less and maintain cleanliness. Additionally, when purchasing a vacuum, always ensure that it can meet the home’s specific needs.
Continue reading
How to Clean Marble Floors: Essential Tips for a Gleaming Finish

How to Clean Marble Floors: Essential Tips for a Gleaming Finish

Editorial TeamDreame |
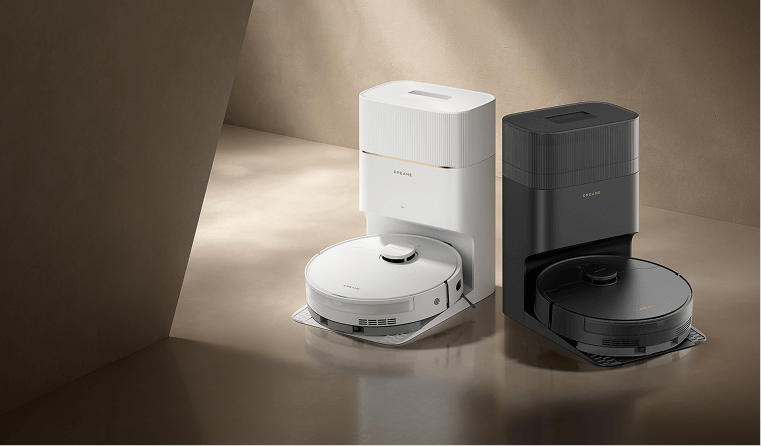
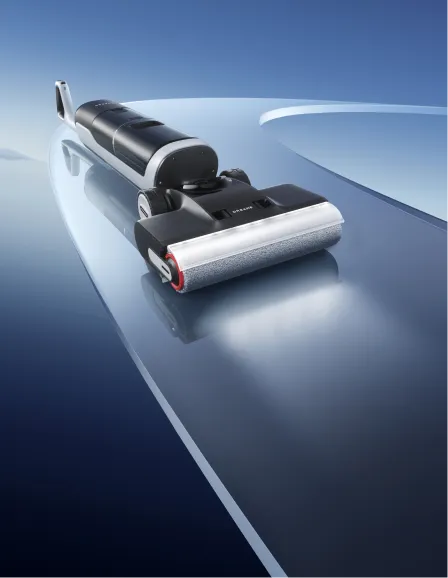
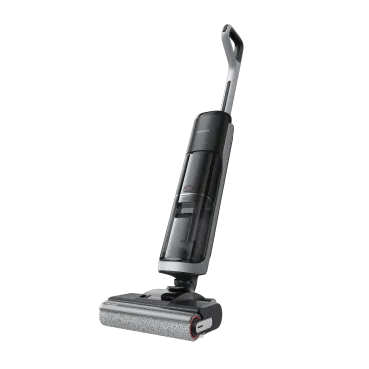
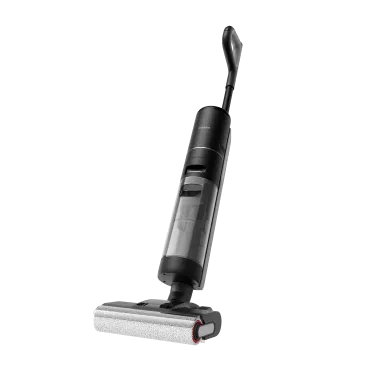
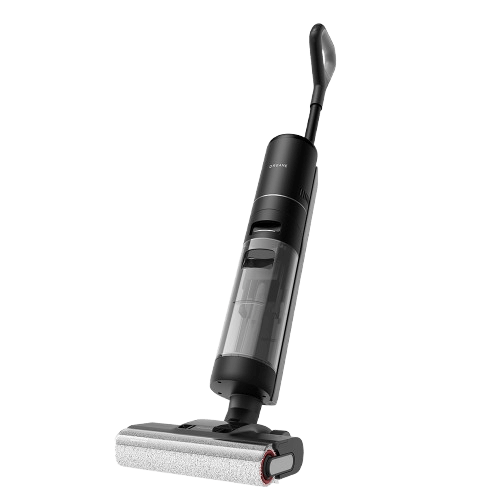
Marble floors add timeless elegance and luxury to any space. From upscale bathrooms to high-end kitchens, their glossy finish and natural veining make them a designer favorite. But maintaining that shine takes care and the right techniques. Marble may be durable, but it’s surprisingly sensitive to acidic cleaners, abrasive tools, and everyday grime. Whether you’re dealing with dullness, stains, or just everyday dust, this guide walks you through how to clean marble floors properly. We’ll cover everything from daily maintenance to deep cleaning, plus smart solutions using modern vacuum tech to help you preserve your floors for years to come. Types of Marble Surfaces: Why They Need Special Care Marble is metamorphic limestone, composed primarily of calcium carbonate. This gives it two vulnerable characteristics: Porosity: It absorbs liquids quickly. Acid sensitivity: Even weak acids like lemon juice or vinegar cause permanent etching. Marble Finish Types & Their Needs Marble comes in several finishes, and each one needs slightly different care: Finish Type Appearance Vulnerability Ideal Locations Polished Glossy, mirror-like shine Shows scratches and etches easily from acidic spills Formal living areas, lobbies, and hallways Honed Soft matte finish Hides scratches better but shows stains more easily Kitchens and bathrooms Tumbled Textured, aged look Most stain-resistant Shower floors, outdoor patios, pool decks Understanding the finish and location of your marble helps you choose the safest and most effective cleaning approach. Pro-tip Always test cleaning products on a small, hidden area first to avoid damage. How to Clean Marble Floors Routine maintenance is the best way to preserve the beauty of your marble floors. Let’s break it down into a few smart categories. Daily Maintenance Dust and debris can cause tiny scratches. Sweep or vacuum daily with a soft-bristle brush or a robot vacuum (like the Dreame X50 Ultra) in hard-floor mode to pick up dirt without damage. Wipe spills immediately, especially acidic liquids like wine, coffee, or citrus juices. For kitchens and bathrooms, a wet and dry vacuum is a safe and effective way to handle spills and splashes. Read this wet and dry vacuum buying guide on how to choose the best one. Weekly Cleaning Pre-treat stains (see stain removal section below). Use a pH-neutral cleaner or mild dish soap mixed with warm water. For effortless debris pickup, pair mopping with the Dreame H12 Dual Wet-Dry Vacuum. Its soft roller won’t scratch marble, and the self-cleaning brushroll prevents tangled hair. For a streak-free shine, dry with a microfiber cloth. Monthly Treatment Grout cleaning using a baking soda paste and a soft brush. Inspect the furniture pads and replace any worn felt protectors. Check the sealant by sprinkling water on it; if the stone darkens, then reseal it. Dreame Take The Dreame X50 Ultra Robot Vacuum is a great pick for daily marble floor cleaning. With its intelligent surface detection and mop-only mode, it gently lifts dust without streaking. How to Clean Marble Floors Naturally Prefer a chemical-free approach? Here’s how to naturally clean marble floors without harsh ingredients: Mix a few drops of mild dish soap with warm water. Use baking soda paste for stains. Use a soft microfiber mop dampened (not soaked!) in the solution. Rinse with clean water and dry with a towel to avoid water spots. Important Avoid vinegar, lemon, ammonia, or any acidic cleaners, because they can etch and dull marble surfaces. How to Clean Grout in Marble Floors Grout can trap grime and mildew and affect the overall look of your floor. Here’s how to refresh it: Use a soft toothbrush or grout brush. Apply a paste of baking soda and water, let it sit for 5–10 minutes, and gently scrub. Rinse with a damp mop and dry the area thoroughly. For larger areas, the Dreame H12 Dual Wet and Dry Vacuum has edge-cleaning capabilities perfect for targeting grout lines and corners. It saves time and reduces the need for harsh scrubbing. How to Remove Stains from Marble Floors Stains can set quickly on marble, especially in bathrooms or kitchens. Here’s how to treat them: Type of Stain Solution Water stains Buff gently with a dry microfiber cloth. Use a pH-neutral marble cleaner if needed. Pet stains (like urine) Clean immediately. Use a damp cloth with mild soap. Avoid ammonia-based products. Oil-based stains Sprinkle cornstarch or baking soda, let it sit overnight, and vacuum. Organic stains (like coffee or wine) Use a poultice paste (baking soda + water) and cover with plastic wrap. Leave for 24 hours. Pro-tip Always do a spot test before applying any solution over a large area. How to Clean a Marble Shower Floor Marble shower floors are exposed to constant moisture, so they need extra care. Here’s how to best clean them: Use a non-slip brush or mop with a pH-neutral cleaner. Rinse thoroughly and dry the area to prevent soap scum or mildew. Keep good airflow in the bathroom with fans or dehumidifiers. What’s the Best Cleaner for Marble Floors? The best marble floor cleaners are pH-neutral, non-abrasive, and made specifically for natural stone. Look for labels that mention: “Safe for marble” “pH-neutral” “No acids or ammonia” You can also use robot mops like the Dreame X50 Ultra, which supports water-only mopping or gentle cleaning solution use. It keeps your floors sparkling without leaving streaks or residues. Check out this “Vacuum Cleaning Solution” article on how to choose the right solution for your floor. Another great option is Dreame’s L10s Ultra Robot Vacuum, which allows auto-mopping with precision control to avoid over-wetting. For households with kids or pets, choosing natural or eco-friendly options can be a safer and healthier choice. How to Deep Clean Marble Floors Even with regular maintenance, marble needs deep cleaning every few weeks or after high traffic. Step-by-Step Deep Cleaning: Vacuum thoroughly using a soft roller head or robot vacuum. Damp mop with a diluted pH-neutral marble cleaner. For stubborn grime, use the Dreame H12 Dual Wet and Dry Vacuum. Its intelligent water control adjusts to marble surfaces without oversaturation. Dry thoroughly. Use a wet and dry vacuum or set up airflow with a fan to prevent water marks. Important In kitchens and bathrooms, always keep marble dry to avoid mildew or water stains. Use mats or rugs near sinks and showers. Marble Floor Cleaning Tips Keep your floors gleaming with these smart habits: Use entry mats to reduce tracked-in dirt. Avoid dragging furniture. Use felt pads under furniture to prevent scratches. Enable scheduling on your Dreame robot vacuum for daily dust control to prevent buildup. Dry spills quickly, especially in kitchens or on marble shower floors. Rotate rugs and mats to prevent uneven wear or discoloration. Use slippers indoors to minimize grit from shoes. Polish every few months using a marble-safe polish to restore shine. Seal marble annually to protect against stains. FAQs How often should I clean marble floors? Dry mop or vacuum weekly. Deep clean monthly or as needed. Can I use vinegar to clean marble floors? No. Vinegar is acidic and can damage marble. Always use pH-neutral cleaners. What’s the best way to clean marble shower floors? Use a non-slip brush and a marble-safe cleaner. Rinse well and dry to avoid soap scum. Are steam mops safe for marble? It’s best to avoid them. The high heat can damage the sealant and lead to dull spots. What if my marble floor has etching? Etching needs professional polishing. Avoid acidic products to prevent further damage. How often should I seal marble floors? Every 6–12 months, depending on traffic. Are robot mops safe for marble? Yes, if they use water-only or marble-safe solutions (like Dreame’s L10s Ultra). Final Thoughts Keeping marble floors clean doesn’t have to be complicated. With the right tools and routines, you can protect your investment and enjoy their stunning finish for years to come. For daily dust, let the Dreame X50 Ultra Robot Vacuum handle the work. For deeper cleaning and grout care, the H12 Dual Wet and Dry Vacuum is your go-to. With Dreame, cleaning floors isn’t just made easier; it’s made smarter. Need help? Explore Dreame’s marble-friendly cleaning tech for effortless maintenance. Master the Art of Floor Care How to clean hardwood floors How to clean wood floors How to Clean and Mop Tile Floors How to Clean Laminate Floors How to Clean Grout on Tile Floor How to Clean Linoleum Floors Choosing Floor Cleaning Solution  
Continue reading