Black Friday Sale Is Live! Best Prices of 2025
00
Days
: 00
Hours
: 00
Mins
: 00
Secs
Shop Now > close button
Does Heat Kill Mold Effectively? The Science Behind Temperature and Spores Revealed

Does Heat Kill Mold Effectively? The Science Behind Temperature and Spor...

Editorial TeamDreame |
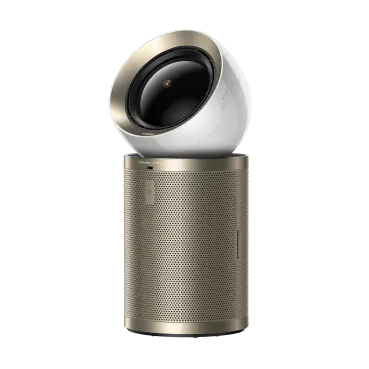
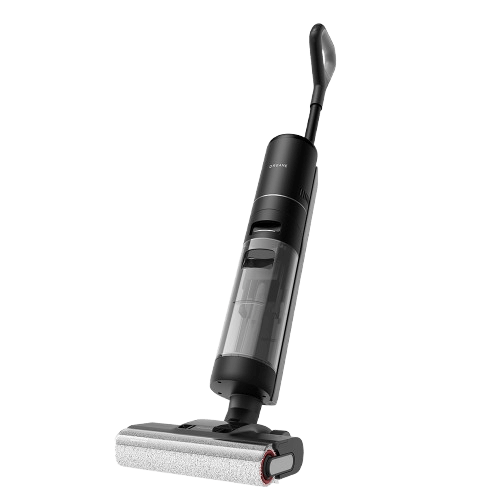
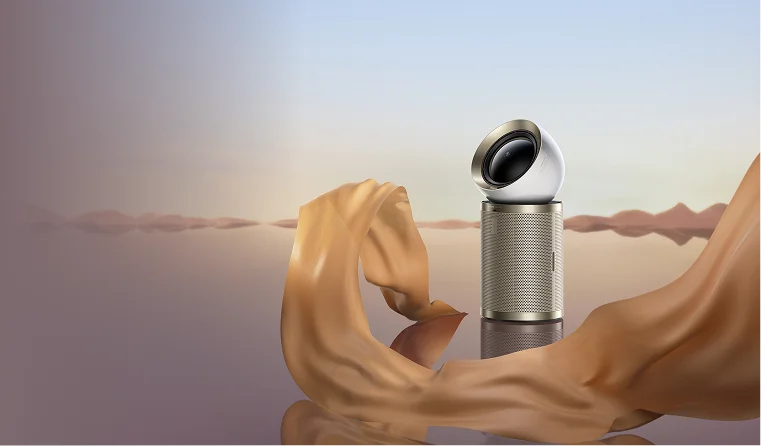
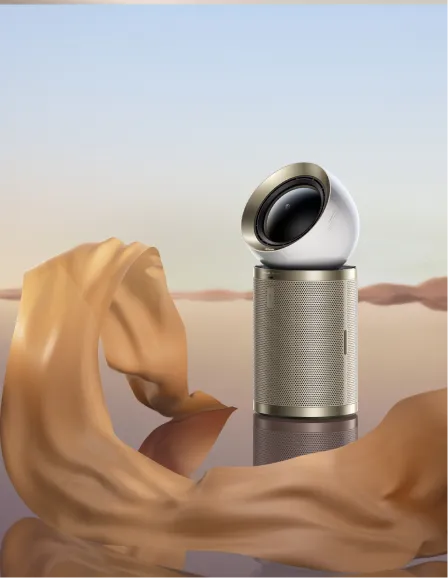
It’s an all-too-common scenario: A homeowner is standing in their basement, flashlight in hand, staring at alarming dark patches spreading across once-pristine walls. The musty odor was the first clue, but seeing fuzzy colonies of mold sends a chill down their spine despite the summer heat outside. Now alert, they notice black mold forming in the corners of other rooms.  Determined to thoroughly understand, the owner goes online to check a tip the neighbor gave: “Does Heat Kill Mold Effectively?” they ask a search site—and find that it does. But heat alone might not be the best solution. How Mold Reacts to Heat Mold thrives in moisture levels above 60% relative humidity amid temperatures between 60-80°F (15-27°C). Limited ventilation and darkness aid its growth as it spreads using seed-like spores so tiny they are undetectable to the unaided human eye.  Spores might sound like a scenario from a science fiction movie, but because they are real they can be eradicated through real actions based on real science. Though ominous to some because it can grow silently and undetected, mold is a manageable organism affected by temperature and other environmental factors. Heat is indeed a crucial component because household mold dies at temperatures above 140°F (60°C). Eliminating spores that spread it is more difficult, requiring temperatures of 160°F (71°C) sustained for several hours. Appliances that scrub the air clean are also important to the effort. Dry Heat vs. Moist Heat: Which Works Better? Boiling water or steam cleaners that reach 212°F (100°C) can kill surface mold, including on walls, while portable heaters can bring the temperature inside a room high enough to have an impact, though professional assistance is advised. Also useful in the fight against mold are HEPA air purifiers such as the heat-enabled Dreame Airpursue PM20 Air Purifier. It dries the air while removing micro-contaminants including airborne mold spores. Such purifiers also help lower the relative humidity to create an environment less hospitable to mold. Warmer, drier air helps keep surfaces dry, deterring condensation that helps mold take hold in the first place. If hot water is used to kill mold, Dreame’s wet and dry vacuum cleaners are excellent for extracting moisture from carpets or floors, either before or after heat treatment. The upright, bagless models offer both dry and wet cleaning with suction power of up to 21,000Pa to remove dirt, debris and micro-organisms from multiple surfaces. Does Heat Kill Black Mold Specifically? Heat can kill black mold along with other types of mold. But ideally it's not the standalone solution. Heat should be used as part of a broader remediation plan that eliminates the sources of moisture that cause mold. A holistic plan also includes manual removal, HEPA filtration and dehumidification. Dreame’s wet dry vacuum cleaners again come in handy, this time for safe removal of moldy water. The advanced technology uses hot water to weaken the organisms while the vacuum removes dead mold and water.  Most indoor heating systems can’t reach the temperatures needed to kill mold and its spores, so multiple portable units can be used to reach the required temperature. But with such high heat involved, professionals should be engaged to assist. Dreame Take Avoid using high heat on large areas or porous materials if you are not a trained professional as it can potentially damage materials or even spread spores if not done correctly. Hands-on techniques for mold removal vary according to the surface. For non-porous surfaces such as tile, glass or sealed wood boiling hot water and scrubbing with a brush or cloth using detergent is effective. Heavily affected porous materials such as drywall, insulation, carpet and fabric might have to be cut out and discarded.  Killing Mold in Hard-to-Reach Places: Spray Bottles and Other Tools Spray bottles with a nozzle can get a cleaning solution into corners and crevices. A microfiber cloth or soft washcloth wrapped around a paint stirrer or toothbrush can also help you scrub tricky spots.  Effective Cleaning Solutions: Bleach: Bleach is effective but should be used with caution due to toxic fumes. Mix one cup of bleach with one gallon of water. Apply the solution to the moldy surface using a sponge or spray bottle. Let it sit for 15-20 minutes, then scrub and rinse thoroughly.   Important NEVER mix bleach with ammonia or other cleaners, as it can create dangerous toxic fumes. White vinegar: Spray undiluted white vinegar directly onto the mold. Let it sit for at least an hour, or even 24 hours for tough spots. Then, scrub with a brush and wipe clean with a damp cloth. Hydrogen peroxide: A 3% solution of hydrogen peroxide is a less harsh alternative to bleach. Spray undiluted 3% hydrogen peroxide directly onto the mold. Let it sit for about 10-30 minutes.   Baking soda: Mix 1/4 teaspoon of baking soda with 2 cups of water in a spray bottle. Spray the moldy area and scrub with a brush.  Afterward: Thorough Cleaning and Drying: After physical removal, clean the entire affected area with a damp cloth and an all-purpose cleaner to pick up any remaining mold particles. Use fans, dehumidifiers and HEPA purifiers for complete drying. HEPA Vacuuming: Once the area is dry, a Dreame wet and dry vacuum can thoroughly remove leftover spores and fine dust.  The advanced appliance captures any residual airborne mold spores and fine dust that traditional vacuums might miss. Clean the canister outdoors to prevent re-releasing spores indoors. Another solution for preventative care is robot vacuums with mops. Unlike traditional robot vacuums that only suck up dirt and dust, these have an integrated mopping system that allows them to handle both dry vacuuming and wet mopping tasks.  They also incorporate advanced navigation systems, sensors, and sometimes AI, to map out homes, avoid obstacles and plan efficient cleaning routes. Dreame Robot Vacuum Cleaners vacuum, mop and navigate with precision to ensure floors are clean and dry. They use powerful suction and rotating brushes (main brush and side brushes) to pick up dust, dirt and other debris from the floor. The mopping action is accomplished using a tank that holds water or a cleaning solution and a microfiber pad or cloth attached to the bottom of the robot that scrubs.  With home floors dust-free, mold re-settlement is discouraged. Why Mold Is So Hard to Eliminate Mold is difficult to eradicate because it's a living organism that only needs moisture and some form of organic material to thrive. It grows rapidly and invisibly in hidden areas, and can cause both property damage and health problems. Effective remediation requires not just cleaning the mold, but thoroughly addressing the causes that enabled it to grow in the first place. Understanding the science behind why mold grows empowers us to eliminate it and ensure it doesn't return. A healthy environment provided by Dreame’s range of indoor air quality and cleaning appliances help eradicate mold, protecting your well-being, property and peace of mind.  
Continue reading
Why Your Vacuum Won't Turn On: Common Reasons and How to Fix Them

Why Your Vacuum Won't Turn On: Common Reasons and How to Fix Them

Editorial TeamDreame |
It can be both surprising and frustrating: You’re motivated to clean your home and vacuum the floor, but when you’re ready to go, the vacuum cleaner simply won’t turn on. Or perhaps you start using it and it shuts off suddenly. The full range of vacuum cleaners—robot vacuums, upright vacuums, wet-dry vacuums, and central vac systems—can have power issues that can catch anyone off guard. This scenario plays out in homes and businesses across the country every day. Vacuum cleaners, despite their seemingly simple operation, can fall victim to numerous issues that halt their performance. Understanding these common problems can save you time, money, and frustration. Common Issues That Cause Vacuums to Stop Working There are many reasons why vacuums won’t turn on or a vacuum cleaner suddenly stops working: Power connection problems Battery issues or low charge Clogged filters, hoses, or rollers Overheating and auto shutoff Full dustbins or water tanks Faulty switches, motors, or internal wiring App or firmware errors  The following guide will help with robot vacuums, upright vacuums, wet dry vacuums, and central vacuum systems. How to Fix a Vacuum Cleaner That Won't Turn On Situation 1: The vacuum's screen is off and the machine is not moving: Ensure the handle is properly installed by unplugging and reinserting it until you hear a “click”. If the vacuum's power is low, fully charge it before use. Situation 2: The screen is on, but the vacuum is not running: Check if the vacuum is in an upright position. Some uprights have a self-stop function, meaning they only operate when tilted. Listen for any voice prompts or error codes, such as “the roller brush is not installed or is entangled" or "the dirty water tank is not installed or is full of water". If a cordless stick is fully charged but cannot turn on: Ensure the vacuum cleaner is unplugged, as it cannot be turned on while charging. Try starting it again after unplugging. Avoid starting and stopping the vacuum repeatedly within a short period.  Check if the metal tube, dust inlet of the brush, filter, or any other parts are blocked. If so, please clean them. If you have recently washed any parts, ensure they are completely dry before using the vacuum cleaner. Restart the vacuum cleaner and then switch between different suction levels to see if the problem is resolved. Robot Vacuum Won’t Turn On or Stay Off Autonomous robot vacuums are a marvel of the modern household, but even they can face challenges. Here are some aspects affecting robot vacuums: 1. Robot Vacuum Shuts Down Shortly After Starting Check sleep mode: Press and hold the power button to wake it up.  Check the battery status: Place the robot back on the charging dock or base station. Use the app to check if the battery is low.  Fully charge the robot: Allow the robot to charge completely before reuse. Observe if it operates normally after cleaning for a period.  2. Why Does a Robot Vacuum Turn Off After Leaving the Station? Manually place the robot back on the charging dock/base station. Check if it powers on after docking and if the app displays the battery level correctly.  Relocate the robot to a different area and press the Power/Clean button to check for a response. 3. Why Won't My Robot Vacuum Turn On? 1. If the power indicator is ON:  Press and hold the "Power/Clean button" to restart the robot. If restarting doesn't work, reset the robot: Open the upper cover, press and hold the reset button for 3 seconds with a tool until you hear the voice prompt "Restore factory settings" . 2. If the power indicator is OFF:  Verify if the robot is turned off due to a low battery. Ensure the charging dock/base station is connected to power and both ends of the power cord are correctly plugged in. Clean the charging contacts of both the charging dock/base station and the robot to ensure a solid connection.  Troubleshooting a Central System Troubleshooting a central vacuum system often begins with identifying the symptom. Is there no suction, weak suction, or is the unit not turning on? Check the circuit breaker. If it trips repeatedly, there might be a short in the wiring or the motor.  Inspect the low-voltage wires at the inlet valves and the power unit for breaks or loose connections. A short in these wires can prevent the system from activating. No suction? Check clogs in the hose or attachments Check each valve one by one—if one has no suction, the blockage is likely nearby. Use a flexible snake or push a tennis ball through the pipe with the system on. Check for air leaks at joints or damaged inlet valves—listen for hissing sounds. Motor running but poor suction? The filter may be clogged, or the motor may be malfunctioning. Maintenance Tips for Preventing Future Issues Some ongoing maintenance is a good idea to keep your vacuum running smoothly:  Clean filters and brushes regularly Empty dustbins and water tanks before they get full Store the vacuum properly Replace worn parts on schedule Avoid overloading the motor with large debris When to Seek Professional Repair Service If you’ve gone through the checklist and your vacuum still won’t start, it might be time to seek expert repair, especially if you notice: Signs of motor burnout Zero response after troubleshooting Broken circuit board or wiring Warranty reminders and repair cost thresholds When replacing, repairing makes more sense Vacuum Toubleshooting Checklist  Is it plugged in? Test the outlet Inspect the power cord Check the circuit breaker Check the battery in cordless units Clear any blockages (hose, brush roll, filters) Empty dustbin or water tank Watch for overheating signs Test the on/off switch Check for motor or belt damage Still Stuck? Contact Dreame Support If you've tried these steps and your Dreame vacuum still isn't working, contact our customer support or a professional repair service. US Hotline (Customer Care): +1 (866) 977-5177 Hours: Monday to Sunday, 9:00 AM - 9:00 PM EDT Email (Canada/USA): support.na@dreame.tech 
Continue reading
How to Get Rid of Bed Bugs: Vacuuming or Steaming?

How to Get Rid of Bed Bugs: Vacuuming or Steaming?

Editorial TeamDreame |
Bed bugs are more common than many people think—and they don’t care how clean your home is. Whether you’ve noticed itchy bites, strange rust-colored spots on your sheets, or tiny bugs hiding in your mattress seams, you may be facing an infestation. The good news? You don’t have to jump straight to toxic chemicals or costly professional treatments. Two of the safest, most effective ways to fight bed bugs are vacuuming and steaming. In this guide, we will describe how each method works, when you should use them, and tips for getting results that last a long time. How to Know If You Have Bed Bugs Bed bugs are small, flat insects that feed on human blood. They hide during the day and come out at night to bite, often leaving clusters of red, itchy marks behind. Signs of Bed Bug Activity Include: Small red bites in a line or cluster, especially on arms, legs, or neck Tiny blood stains or dark fecal spots on bedding or furniture Shedded skins or live bugs around mattress seams, headboards, or baseboards A musty, sweet odor in the case of severe infestations To inspect your space, use a flashlight and look along mattress seams, behind headboards, inside baseboard cracks, and around wall outlets or picture frames. Important Bed bugs are elusive. Even if you don’t see them right away, their signs often appear before the insects themselves. Are Bed Bugs and Dust Mites the Same? People often think bed bugs are dust mites, but they’re very different. Dust mites are minute creatures that require a microscope to be seen, and they live by eating dead skin cells. They don’t bite and aren’t visible to the naked eye, but these critters can cause allergy symptoms like itchy eyes, sneezing, or a runny nose. Bed bugs, on the other hand, are visible and bite humans. If you’re dealing with allergic reactions but no visible bites, the culprit may be dust mites instead. You can learn more in our guide on how to deal with dust mites.  Can Vacuuming Get Rid of Bed Bugs? Yes. Vacuuming is one of the fastest, easiest ways to reduce a bed bug population. It’s especially useful in the early stages of an infestation or when preparing for deeper treatment. Vacuuming removes live bugs, debris, and eggs from surfaces—but it does not kill them. That’s why it should always be paired with additional treatments like steaming or laundering. Pro-tip Vacuuming is an excellent first step, but follow it with steam or heat treatments to fully eliminate hidden pests. How to Vacuum Bed Bugs For best results, follow this step-by-step process. Use a high-powered vacuum with strong suction and a sealed HEPA filter. Attach a narrow crevice tool or brush to help dislodge bugs from tight spaces. Target critical areas like mattress seams, box springs, carpet edges, and behind baseboards or outlets. Learn more with these strategies for vacuuming other tight or hidden areas. Move slowly and carefully to avoid scattering bugs. Dispose of vacuum contents immediately by sealing them in a plastic bag and taking it outside. Wash reusable containers or nozzles in hot, soapy water. Vacuuming should be done regularly until the infestation is completely gone. If you’re using a bagged vacuum, replace the bag after every session. For bagless models, clean the dustbin thoroughly after each use.  Explore Dreame’s full collection of cordless stick vacuums. What Kind of Vacuum Works Best? When selecting a vacuum cleaner to get rid of bed bugs, look for models with multi-layer filtration, strong suction, and tight seals. Lightweight cordless models are convenient for furniture and tight areas, while upright vacuums are better for carpets and large surfaces. Some people find portable “bug vacuum” tools useful for spot treatments, but they shouldn’t be relied on alone.  We recommend a model like the Dreame Z30 Cordless Vacuum Cleaner, which offers high suction power, multi-surface tools, and a HEPA-level filtration system—ideal for targeting hidden pests. Will Vacuuming Kill Bed Bugs? No. Vacuuming doesn’t kill bed bugs or their eggs. It only removes them from surfaces. Some bugs may survive inside the vacuum unless the contents are sealed and disposed of correctly. Important: Never assume vacuuming alone is enough. Always combine it with additional treatments to avoid recurrence. Can Steam Kill Bed Bugs? Yes. High-heat steam is lethal to both adult bed bugs and their eggs on contact. That makes steaming one of the most powerful chemical-free methods for treating infestations. Dreame Take Steaming is one of the most effective eco-friendly treatments, especially when combined with HEPA-level vacuuming. It targets what vacuums can’t reach—eggs in deep crevices and fabric folds. How to Use Steam to Kill Bed Bugs Steam works by delivering intense heat deep into cracks, fabrics, and crevices—areas where bed bugs love to hide. Here’s how to use it safely and effectively: Choose a dry vapor steamer that reaches at least 200°F (93°C). Use nozzle attachments to control steam flow and access tight spaces. Move slowly—about 1 inch per second—to allow heat to penetrate. Focus on key areas like mattress seams, couch cushions, curtain folds, and baseboards. Avoid steaming electronics, outlets, or sensitive surfaces. Pro-tip Use a towel or cloth-covered nozzle to disperse steam evenly and increase fabric penetration. Will Steam Kill Bed Bug Eggs? Yes—if applied directly and at the right temperature. Steam must reach at least 120°F (49°C) to kill eggs. Most commercial-grade bed bug steamers exceed this threshold. For best results, follow up with vacuuming to remove any dislodged or dead bugs after the surface dries. Vacuum vs. Steam for Bed Bugs: Which Is Better? Here’s a quick and simple side-by-side comparison table to help you decide: Feature Vacuuming Steaming Removes live bugs Yes Yes Kills bugs on contact No Yes Kills eggs No Yes Works in tight crevices Yes (with attachments) Yes (with nozzles) Safe for daily use Yes No Chemical-free Yes Yes Pros Vacuuming is fast, non-invasive, and ideal for daily use. Steaming penetrates deep and kills bugs and eggs in one pass. Cons Vacuuming doesn’t kill pests or eggs. Steaming takes time and should be used cautiously around electronics. Dreame Take Use both methods for the best results. Vacuuming removes visible bugs fast, while steam kills hidden eggs and survivors. Together, they form a highly effective, chemical-free strategy. If you opt for a new vacuum or steamer, don’t let your old vacuum gather dust—give it a second life and help someone create a cleaner, healthier home by following this easy donation guide. What to Do After Treating for Bed Bugs After steaming or vacuuming, ongoing maintenance is key to preventing a rebound. Wash all clothes, bedding, and linens in hot water and dry on high heat. Encase your mattress and box spring in certified bed bug-proof covers. Continue vacuuming sleeping areas at least once a week. Install bed bug interceptors under bed and sofa legs. Reduce clutter to eliminate hiding spots. Inspect seams, furniture, and floors regularly for new signs. After getting rid of bed bugs, it’s important to keep a clean house.  Pro-tip Ongoing vigilance for the next 30 days is often the difference between success and relapse. How to Prevent Bed Bugs Long-Term Prevention is easier—and cheaper—than treatment. Stay ahead with these proactive tips: Inspect all secondhand items before bringing them indoors. Use luggage racks in hotels and avoid placing bags on beds or carpets. Vacuum and steam your suitcase after traveling. Seal cracks in baseboards, floorboards, and walls. Use mattress encasements year-round, especially in apartments or dorms. Educate roommates or household members about early warning signs. Important If you live in shared housing, coordinate prevention efforts with neighbors or building management to prevent re-infestation. FAQ Can bed bugs go away on their own? No. Left untreated, infestations grow larger. Active intervention is necessary. Are bed bugs hard to kill with your fingers? Yes. They are small, flat, and excellent at hiding. Manual squishing isn’t a solution. Are bed bug eggs sticky? Yes. They have a glue-like surface that allows them to stick to wood, fabric, and crevices. Can bed bugs live in vacuum-sealed bags? Not for long. Bed bugs need oxygen and will die in airtight conditions, but only if the seal remains intact. Can a clothes steamer kill bed bugs? Most clothes steamers do not maintain the consistent heat required. A dedicated bed bug steamer is more effective. A clean home isn’t just tidy—it’s a sanctuary for your mind, especially when you’ve finally kicked bed bugs to the curb; feel the relief and reclaim your peace with this uplifting guide from Dreame on the mental health benefits of cleaning. Final Note Bed bugs are tough—but not impossible to beat. With a strategy that combines regular vacuuming, targeted steaming, and consistent follow-up, you can get rid of them safely and efficiently. Whether you’re managing a light infestation or preventing a recurrence, the key is consistency and the right tools.
Continue reading
How to Clean Linoleum Floors Like a Pro: Tips and Tricks

How to Clean Linoleum Floors Like a Pro: Tips and Tricks

Editorial TeamDreame |
Linoleum flooring is making a comeback, and for good reason. It’s budget-friendly, eco-friendly, and surprisingly durable. But how do you keep it looking clean and fresh? That takes the right approach. Learning how to clean linoleum floors the right way can protect their finish, extend their lifespan, and help them shine like they were just installed. In this guide, we’ll walk you through the tools, tricks, and routines that make it easy to keep your floors spotless, even if you’re dealing with stubborn stains or ground-in dirt. What Is Linoleum Flooring? Linoleum is a natural floor covering made from renewable materials like linseed oil, cork dust, and wood flour. Unlike vinyl, which is synthetic, linoleum is biodegradable and hypoallergenic. It comes in a range of styles, from muted neutrals to bold patterns, and is commonly found in kitchens, bathrooms, and hallways. There are two common types: Sheet linoleum: Seamless and moisture-resistant Tile linoleum: Easier to install and replace Because of its porous, organic makeup, linoleum needs gentle care. Using the wrong cleaner or too much water can warp or damage the surface over time. That’s why choosing the right method and the right tools matters. What to Clean Linoleum Floors With Before diving into cleaning methods, let’s talk tools. Different cleaning tasks call for different tools. Here's a quick breakdown: Cleaning Task Best Tools Dreame Recommendation Daily dust/hair removal Soft broom, microfiber mop, robot vacuum Dreame L10s Ultra: Hands-free robot vacuum and mop combo with precision mapping and automatic dirt disposal. Perfect for daily maintenance. Weekly mopping Damp microfiber mop, gentle floor cleaner Dreame H14 Pro: Lightweight wet and dry vacuum that scrubs, vacuums, and dries in one go, without leaving streaks. Deep cleaning Soft-bristle scrub brush, mild pH-neutral floor cleaner, baking soda for spot treatment Dreame H14 Pro: Its powerful suction and intelligent water control make it ideal for tackling built-up grime or greasy residue. How to Deep Clean Linoleum Floors Over time, linoleum can trap ground-in dirt, develop yellow stains, or collect greasy buildup. Here’s how to deep clean linoleum floors effectively: Step 1: Clear the Area Remove rugs and furniture so you have a clean workspace. Step 2: Vacuum or Sweep Thoroughly Start by clearing away loose dirt, dust, and crumbs. If you're short on time, set your robot vacuum, like the Dreame L20 Ultra, to do the work while you focus on other tasks. If you need a quick and efficient cleanup, consider a wet and dry vacuum or a cordless stick model. These options offer precise spot cleaning and strong suction where it matters most. Step 3: Apply a Cleaning Solution Mix warm water with a bit of mild dish soap. Avoid vinegar, especially on older linoleum. Mop the floor lightly, avoiding puddles. The surface should stay just damp and not wet. Pro-tip The Dreame H14 Pro intelligently adjusts water usage and suction power based on the floor’s dirt level, so you get a deep clean without overwetting. This is perfect for moisture-sensitive linoleum floors. Step 4: Scrub Problem Spots For yellowing or grease buildup, apply a baking soda paste and scrub gently with a soft brush. Or use a wet and dry vacuum cleaner with strong suction and a rotating brush to lift stubborn grime. Step 5: Rinse and Dry Use a dry microfiber cloth or a wet and dry vacuum to prevent water damage. Make sure no dirty water is left behind. Regular Cleaning Routine (Easy Way to Clean Linoleum Floors) The best way to keep linoleum looking fresh? Follow this simple routine: Daily: Sweep or use a robot vacuum like the Dreame L10s Ultra to remove dust, crumbs, and pet hair. The vacuum’s built-in camera avoids cords, furniture, and rugs, so you don’t have to babysit it. Weekly: Lightly mop with a gentle cleaner or use the H14 Pro, which automatically senses dirt and adjusts suction and water flow to match. It’s perfect for fast refreshes that don’t soak your floors. Monthly: Deep clean with wet dry vacuum or supplement with the Dreame Z30 Cordless Stick Vacuum for edge-to-edge dust pickup before mopping. Its high suction power and precision cleaning attachments are ideal for getting into corners and around furniture. Dreame Take Consistency is key. Combining robot vacuuming with occasional manual mopping keeps linoleum looking spotless without wearing yourself out. How to Clean Stains and Sticky Linoleum Floors Life happens—grease spills, scuff marks, sticky juice spots, and even mold can show up. Here’s how to handle them: Grease Sprinkle baking soda over the greasy area, then mop with warm soapy water. Or let the H14 Pro take care of it. Its edge-cleaning design gets right up against cabinets and baseboards, gently lifting grease with automatic suction adjustments. Mold Use a linoleum-safe antimicrobial cleaner or a diluted 3% hydrogen peroxide solution to treat mold stains. Spray, let sit for 10 minutes, then gently scrub and wipe clean. Follow up with the H12 Dual in Auto Mode. Its robust brush head and suction power pick up spores and rinse residue clean. Scuff Marks Gently rub marks with a melamine sponge. For embedded dust, grab the Dreame Z30 Cordless Stick Vacuum. Its powerful suction and smart adaptive mode make quick work of dirt in corners or around furniture legs. Sticky Spots Spray with a linoleum-safe floor cleaner and let soak for 5–10 minutes. Then use the a wet and dry vacuum to scrub and vacuum simultaneously. If you use Dreame models like H14 Pro, their intelligent mess detection adjusts power precisely, and the dual water tanks keep dirty and clean water separate. For more information on tackling difficult areas, check out the article on “Tricky Spots for Vacuuming.” Dreame Take From sticky spots to tough stains, the H14 Pro combines strong suction, rotating brushes, and drying in one smooth pass, leaving your linoleum clean, dry, and residue-free. What Is the Best Way to Clean Linoleum Floors? The best way to clean linoleum floors combines the right tools and techniques. Here’s a quick summary of what works best: Use a robot vacuum daily to reduce dust buildup (L10s Ultra or L20 Ultra). Mop lightly with a gentle cleaner. Tackle stains with non-abrasive tools. Avoid bleach, harsh scrubbers, or soaking the floor. Important The Dreame wet and dry vacuum feature dual water tanks, so you’re never pushing dirty water around. Maintenance Tips for Longevity Place doormats at entrances to reduce dirt. Use furniture pads to avoid scratching the surface. Clean spills immediately to prevent staining. Avoid direct sunlight to prevent fading (use curtains or blinds). Reseal older linoleum every 1–2 years for extra protection. What to Avoid When Cleaning Linoleum Floors 🚫 Harsh chemicals like bleach or ammonia because they strip the finish. 🚫 Too much water, especially on old or unsealed linoleum; it seeps into seams and warps floors. 🚫 Steam mops: the heat can loosen adhesives over time. 🚫 Abrasive scrubbing tools (steel wool and stiff brushes) because they can scratch or strip the finish. Dreame Take Stick with smart tools like Dreame’s wet and dry vacuums, which use just the right amount of moisture and adjust based on floor condition. This helps prevent water damage while keeping floors spotless. FAQs Q: Can I use vinegar to clean linoleum? A: Avoid it. Vinegar’s acidity can dull the finish over time. Q: What’s the best mop for linoleum floors? A: A microfiber mop, spray mop, or wet and dry vacuum is ideal. Learn more on “How Wet and Dry Vacuums Transform Multi-Surface Cleaning at Home.” Q: How do I restore shine to old linoleum? A: Buff with a floor polish designed for linoleum. Q: Can robot vacuums handle linoleum transitions? A: Yes! Even the beginner models like Dreame’s D9 Max Gen 2 climb 0.8in (20mm) thresholds with ease. Q: What should I do if my linoleum starts curling? A: Dry the area thoroughly (try the wet and dry vacuum in Dry Mode), press small curls flat with adhesive, and consult a pro for major warping. Final Thoughts Learning how to clean linoleum floors isn’t rocket science, but doing it right makes all the difference. With a little daily care and the right cleaning tools, your floors can stay spotless and stunning year-round. Stick to gentle cleaners, avoid excess water, and consider smart tools like Dreame’s robot vacuums and mops for effortless maintenance. Your floors deserve it, and so do you! Master the Art of Floor Care How to clean hardwood floors How to clean wood floors How to Clean and Mop Tile Floors How to Clean Laminate Floors How to Clean Marble Floors How to Clean Grout on Tile Floor Choosing Floor Cleaning Solution
Continue reading
Mattress Vacuum vs. Traditional Vacuum: How to Clean Your Mattresses Better

Mattress Vacuum vs. Traditional Vacuum: How to Clean Your Mattresses Better

Editorial TeamDreame |
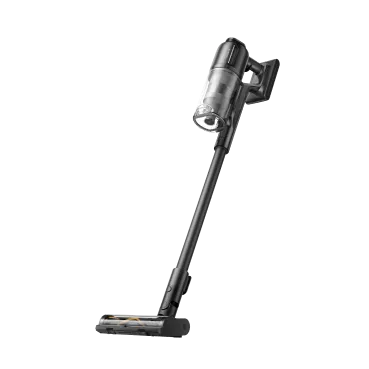
Sheets look fresh, but deep down, mattresses can hide dust mites, allergens, bacteria, and things you can't see. Cleaning your mattress the right way can make a big difference in how you sleep and how you feel. Let's look at what really works. What is a Mattress Vacuum and How Does it Work? A mattress vacuum is a cleaning tool designed to remove fine dust, dust mites, pet allergens, and other particles that settle deep inside a mattress. Unlike regular vacuums, it is built for soft surfaces and can gently lift debris from fabric without damaging the material. Many use strong suction combined with a flat head to press into the mattress and pull out what lies below the surface. Some models go further by adding UV light to help reduce germs or heated air to dry out moisture. Others use vibration to shake loose hidden dirt or include filters that trap tiny particles as small as 0.3 microns. Mattress vacuums are usually small, lightweight, and shaped for easy handling, so they're well-suited for cleaning beds, pillows, and other upholstered areas that collect allergens. Benefits of Regular Mattress Vacuuming Your mattress could be one of the dustiest places in your home. A study by medical researchers from Taiwan and New Zealand found that vacuuming your mattress daily can dramatically reduce this hidden buildup. Here's what the science says: Dust mite allergens reduced by 85.1% The study measured two key allergens, Der p 1 and Der f 1, commonly produced by house dust mites. After 8 weeks of daily vacuuming, their total amount dropped by 85.1%. These allergens are strongly linked to asthma, sneezing, and nighttime coughing, especially for sensitive individuals. Endotoxin levels lowered by 71.0% Endotoxins come from bacteria and can irritate your lungs even if you're not allergic. In the study, the total amount of endotoxin in mattress dust decreased by 71.0%, helping reduce exposure to harmful microbial fragments that may worsen respiratory symptoms. Mold dust (β-Glucan) decreased by 75.7% Mold fragments like β-glucan are often trapped in bedding and linked to breathing issues. The researchers found that daily vacuuming reduced total β-glucan levels in mattress dust by 75.7%, a major win for anyone with mold sensitivity or who lives in humid areas. Total dust weight removed: 77.7% Vacuuming didn't just reduce the bad stuff; it significantly lowered the actual amount of dust in the mattress. After 8 weeks, the total dust weight collected dropped by 77.7%. Less dust means fewer allergens, fewer irritants, and a cleaner sleeping environment overall. Easy, affordable, and highly effective Instead of relying only on expensive mattress covers, this study shows that just 2 minutes of daily vacuuming with a standard household vacuum cleaner can deliver meaningful health benefits without major cost or effort. Pet allergens are likely reduced as well Although the study didn't measure cat and dog allergens, previous research (cited by the authors) shows that regular mattress vacuuming also lowers levels of Fel d 1 (from cats) and Can f 1 (from dogs). Given the sharp reduction in total dust, it's likely these allergens will drop as well. One related study found that allergen levels returned to pre-cleaning levels just 6 weeks after stopping daily vacuuming. That means long-term benefits require long-term habits, but the payoff is a healthier, cleaner bed. How Mattress Vacuums Compare to Traditional Vacuums While mattress vacuums are specially designed to tackle deep allergens, dust mites, and bacteria, many traditional vacuums can still offer effective cleaning. Cleaning Power and Effectiveness Traditional Vacuums: Provide strong suction, typically ranging from 10,000 Pa to 18,000 Pa, which is enough for cleaning the mattress surface and picking up dust, hair, and dirt. Some premium models can exceed 20,000 Pa suction power, more efficient for deeper cleaning and better at lifting debris from deep inside the mattress fabric. Many high-end models feature smart suction adjustment based on the level of dirt, optimizing cleaning efficiency. They are capable of picking up dust, allergens, pet hair, and debris across various surfaces, including mattresses. Mattress Vacuums: Designed with features like UV-C light and vibration technology, mattress vacuums help to kill bacteria and remove deep-seated allergens that traditional vacuums may miss. Specializing in targeting dust mites and allergens that can accumulate in mattress layers, making them a great choice for those with allergies or respiratory concerns. Specialized Features and Attachments Traditional Vacuums: Include motorized brushes that help lift and remove dirt, dust, and hair from mattress surfaces. Equipped with HEPA filters, these vacuums capture very fine dust particles and allergens, improving air quality and reducing exposure to allergens. Some models are designed with advanced brush mechanisms that effectively clean along edges and corners, providing a more thorough clean of the mattress surface. Mattress Vacuums: Mattress vacuums are typically equipped with motorized fabric brushes, vibrating pads, and UV-C sterilizers, providing a deeper clean on fabric surfaces. While high-end traditional vacuums can clean the mattress surface, mattress vacuums are designed to clean seams and deep layers more effectively with specialized attachments and tools. Ease of Use and Handling Traditional Vacuums: These vacuums are generally lightweight, weighing between 3 lbs to 8 lbs, making them easy to handle and maneuver across mattress surfaces. Cordless models offer greater flexibility, allowing you to move freely and clean the entire mattress without restrictions. Some models are low-profile, enabling them to clean under beds and furniture where dust and allergens often accumulate. Mattress Vacuums: Mattress vacuums are compact and designed for one-handed use, making them easy to carry and store. They often feature a slim design that fits perfectly on soft surfaces like mattresses, allowing for precise cleaning without overcomplicating the task. At-a-Glance Comparison of Mattress Vacuums vs. Traditional Vacuums Feature Mattress Vacuums Traditional Vacuums Cleaning Power Designed for deep cleaning of allergens, dust mites, and bacteria using UV-C light and vibration technology Strong suction (10,000 Pa to 18,000 Pa), some premium models exceed 20,000 Pa for deeper cleaning Specialized Features UV-C light, vibration technology, motorized fabric brushes, HEPA filters, sterilizers Motorized brushes, HEPA filters, basic upholstery tools Deep Cleaning Targets dust mites, allergens, and bacteria deep inside the mattress fabric Effective at cleaning the surface of the mattress, but may miss deep allergens Ease of Use Compact, lightweight, and easy to use with one hand Lightweight (3-8 lbs), cordless models for greater flexibility, low-profile designs for cleaning under beds Attachments Motorized fabric brushes, vibrating pads, and UV-C sterilizers Basic upholstery tools, advanced brush mechanisms for edges and corners Suitability for Mattress Designed specifically for mattress cleaning with special tools Can clean mattress surfaces, but is less effective on deep layers and seams Can a Cordless Stick Vacuum Clean a Mattress Well? Yes - for surface-level cleaning. But it cannot clean deeply or remove allergens effectively. These vacuums are designed mainly for floors and large open areas. When used on a mattress, they can remove pet hair, loose dust, and crumbs from the top layer. If you attach an upholstery tool, you may improve pickup. They're lightweight, easy to handle, and useful for quick cleanups. However, a cordless stick vacuum usually cannot reach the deeper layers of a mattress where dust mites, mite waste, fungal particles, and bacteria often settle. It lacks features like UV sterilization and vibrating brushes that are found in many mattress-specific vacuums. Without these, the allergens stay trapped in the fabric. The suction may also be weaker compared to devices made for soft surfaces. In short, the cordless stick vacuum, like the Dreame Z30, is effective for mattress surface cleaning, handling dust, hair, and light debris with its 14000 Pa (310AW) suction and multi-surface brush. However, it may struggle with deep cleaning and allergen removal in the fabric. For thorough cleaning, especially for deep allergens and bacteria, a mattress vacuum with specialized features, such as UV-C light or vibration technology, would be more effective. Choosing the Right Vacuum Cleaner for Your Mattress To choose the right vacuum for your mattress, prioritize features that target allergens and moisture. Here's what to consider: Strong suction power. Look for vacuums with suction between 13,000 and 16,000 Pa. This range is strong enough to pull dust, skin flakes, and mites from deep inside the fabric. HEPA filter system. A true HEPA filter can trap over 99.9% of fine dust and allergens as small as 0.3 microns. This helps stop particles from going back into the air. UV-C light feature. Some vacuums shine UV-C light on the mattress to help kill bacteria and mites. This is helpful for people with allergies or skin sensitivity. High-frequency vibration. A vacuum with a vibrating base shakes the mattress surface. This helps lift dirt and mite waste that sticks to fabric. Heat function for drying. Warm air around 130 to 140°F (54 to 60°C) can reduce moisture and lower the chance of mold or bacteria growing after cleaning. Lightweight body. Choose a vacuum that weighs less than 4 pounds if possible. Lighter models are easier to lift and move across a bed. Easy to clean parts. A vacuum with washable filters and a quick-release dust bin saves time and keeps your tool in good condition. Long battery life. A strong battery lets you finish cleaning in one go. Try to find one that supports at least 10 to 15 minutes of run time per mattress. Are Mattress Vacuums Worth It? Yes, for most households, a mattress vacuum is worth it. It offers better results than general vacuum tools when it comes to cleaning beds. Regular vacuuming with the right tool helps reduce allergy risks. One study showed that daily mattress vacuuming reduced total dust mite allergens by 85.1% over 8 weeks. Unlike general vacuums, mattress vacuums focus on surfaces that collect skin flakes, moisture, and mites. They come with features designed just for mattresses, like UV light, vibration, and strong filters. For people with asthma, allergies, or sensitive skin, this can improve sleep and reduce irritation. Families with pets, small children, or humid bedrooms may also find it useful to have a vacuum meant for soft surfaces. Final Takeaway: Clean Deeper, Sleep Better A clean mattress goes beyond appearances - it's about health. In short, if clean air and a healthier sleep space matter to you, a mattress vacuum is a good investment.
Continue reading
Vacuum Cleaning Solution: How to Choose, Use, and Alternatives

Vacuum Cleaning Solution: How to Choose, Use, and Alternatives

Editorial TeamDreame |
A vacuum cleaner can suck up dirt. But sometimes, it cannot clean everything alone. Sticky messes, old stains, and smelly spots stay behind. That is where a cleaning solution helps. It breaks down grease and stains, leaving floors looking and smelling fresher, all with less effort. You do not need a solution for every job. But when floors are extra dirty or dull, pairing your vacuum with the right solution gives better results in less time. 3 Types of Cleaning Solutions for Vacuums Some people think all cleaning liquids are the same. They are not. Vacuums use different cleaning systems, and each one works best with a specific type of solution. Choosing the right type means your machine can clean better, and your floors stay safe. 1. Robot Vacuum Cleaning Solutions Robot vacuums can mop as they move. Some models use water only. Others let you add a cleaning solution. These solutions must be low-foam and gentle. Strong cleaners may damage the robot's system or leave sticky residue. Dreame Robot Vacuums Multi-surface Cleaning Solution is designed for robot vacuums. It works effectively on various floor types, including wood, tile, marble, and stone, while also helping to remove stains and eliminate odors. This solution is perfect for daily cleaning, leaving your floors fresh without harming your vacuum. It efficiently cleans while minimizing the risk of residue or buildup, making it safe for both your floors and your robot vacuum system. 2. Wet Dry Vacuum Cleaning Solutions Wet dry vacuums spray water, scrub the floor, and suck up the dirty water. These machines often use specially formulated cleaning solutions designed to work with both the wet and dry functions. A good solution should: Clean well, but not foam too much. Mix easily with water. When choosing a solution, look for one that's safe and effective across multiple surfaces like tile, wood, and hard floors. For example, Dreame Multi-surface Cleaning Solution is one such product. After using it, you can enjoy a mild, sweet scent, and your pets do not need to worry. 16.9 fl oz (500ml) bottle takes a little storage space. The formula stays strong and is gentle on floors, but helps you remove deep stains without damaging the machine. Note: Always check whether your vacuum model has a separate solution tank or if the cleaner needs to be mixed into the water tank. 3. Floor and Carpet Cleaning Solutions You can safely use floor cleaning solutions with many vacuums, but it's important to choose one that's compatible with your vacuum's surface type. For carpets, use a carpet-safe cleaner to avoid damaging fibers. Using the wrong solution can cause discoloration or leave sticky residue on both carpets and hard floors.  Always check your vacuum's manual for recommended solutions and dilution instructions. If your vacuum has a spray function or uses pre-treated pads, these cleaning solutions can usually be added directly. Just be sure to follow the guidelines and avoid using harsh chemicals that may damage your vacuum or flooring. Always check if the cleaner is meant for floors, carpets, or both. Use only the amount listed on the label. When unsure, contact the vacuum brand's support team. How to Use Vacuum Cleaning Solutions Effectively But even a great product needs the right steps. Using it the wrong way may cause sticky floors, weird smells, or a broken vacuum. Here's how to get the best results without trouble. Know What Your Vacuum Can Do: Before using any cleaner, open the manual or check the label near the tank. Some vacuums are water-only. Others allow cleaning liquids. Using the wrong kind may cause leaks or stop the vacuum from working. Use Only the Recommended Amount: A little goes a long way. Using too much can leave your floor sticky or streaky. Most bottles give clear instructions. For example, 1 fl oz (about 30ml) is often enough for a full tank. Always follow the label and avoid over-pouring. Empty and Rinse the Tank After Use: Once you finish cleaning, pour out the dirty water. Rinse the tank with clean water. This helps avoid bad smells or bacterial growth. If your vacuum has two tanks, rinse both. Don't Mix with Bleach, Vinegar, or Other Cleaners: Bleach or vinegar may create harmful gas or damage the inside of the vacuum. Only use one type of cleaner at a time, preferably one made for your device. Use Distilled Water in Hard-Water Areas: Tap water with too many minerals can leave white spots on floors or clog the machine. If you live in a hard-water area, use distilled water. It keeps both your floors and vacuum in better shape. Frequently Asked Questions About Vacuum Cleaning Solution Cleaning with a vacuum solution can be simple until you wonder where to put it or what happens if you mix brands. These common questions come up often, and you may find them helpful. Can I Put Cleaning Solution in My Robot Vacuum? Some robot vacuums allow for cleaning liquid in the water tank. Others do not. If your model has no clear mention of solution use, do not add it. Strong cleaners may clog the spray nozzle or leave sticky layers on the floor. Can I Put Cleaning Solution in a Wet-Dry Vacuum? Yes, if your vacuum supports it. Wet-dry vacuums are designed to handle water and clean fluids together. But always follow the tank design. For Dreame wet-dry vacuums: Without a detergent tank: Mix one cup of cleaning solution into the clean water tank. With a detergent tank (like Dreame H14 Pro): Simply fill the solution tank with Dreame Multi-surface Cleaning Solution for H14 / H14 Pro. The vacuum will automatically distribute the solution based on how dirty the floor is. What Kind of Floors Can Vacuum Cleaning Solutions Be Used On? Most solutions are safe for sealed hard floors like tile, vinyl, laminate, and hardwood. Some are also gentle enough for delicate surfaces like engineered wood. Dreame solutions cover a wider range of floors, including wood, tile, marble, stone, and more. They are designed to clean effectively while being gentle on both delicate and robust floor types. How Often Should I Use Cleaning Solution With My Vacuum? The frequency of using cleaning solutions depends on your vacuum type and floor conditions. For homes with high traffic, such as those with kids or pets, wet-dry vacuums or upright vacuums may require cleaning solution once a week or every two weeks. However, robot vacuums with mopping functions may need it more often, such as every few days, depending on how frequently they run. In homes with less foot traffic, you can use cleaning solutions less frequently. Be cautious not to overuse the solution on sensitive floors like hardwood or laminate, as this can lead to buildup or damage. Can Vacuum Cleaning Solutions Remove Odors? Yes, many can. Some formulas help break down organic stains that cause smells, such as food spills or pet messes. But for strong odors from mold or mildew, deep cleaning or extra treatment may be needed. Using a fresh-smelling but safe solution helps improve the overall scent of your home. Should I Dilute Concentrated Cleaning Solutions? If the label says "concentrated," then yes. You must mix it with water before use. The right ratio is often 1:10 (solution to water). Never pour a full-strength formula into the tank unless the instructions say so. Too much concentration may cause residue or blockages. What Should I Do If My Vacuum Foams Too Much During Cleaning? Turn off the machine and empty both tanks. Rinse them with clean water to clear out leftover solution. Then, run the vacuum with plain water to flush out any foam stuck inside. Next time, reduce the amount of solution or switch to a low-foam formula to avoid the same issue. Is It Safe to Mix Cleaning Solutions? No. Mixing two different cleaners can lead to chemical reactions and cause too many bubbles or sticky floors. In some cases, it could damage the inside parts of your vacuum. Stick to one solution. If you switch to a new brand or formula, rinse the tank well before use. Common Mistakes to Avoid You cleaned the floor, but it feels sticky. Or worse, your vacuum stopped working. Many of these problems come from simple mistakes people don't realize. Here's how to clean smarter and avoid costly errors. Using Too Much Solution: More is not better. Using an extra solution often leaves a thin film on your floor. Over time, this makes the surface dull and slippery. Stick to the amount on the label. One small cup is usually enough for a full tank. Adding Dish Soap: Dish soap creates foam. Foam builds up inside the machine and blocks the airflow. Some vacuums can even shut down or leak. Never put dish soap into a vacuum, even if it looks like an easy fix. Ignoring Tank Rinsing: After every cleaning, the dirty water tank holds bacteria, dust, and hair. Leaving it there overnight creates a smell and shortens the machine's life. Always rinse both tanks and let them air dry after each use. Using Essential Oils: Some people like adding oils to make the room smell nice. But oils can clog the system or leave oily stains on the floor. Even a few drops may change how the vacuum sprays water or picks up dirt. Avoid adding any oil-based liquids. Pouring Solution in the Wrong Tank: Robot vacuums usually do not have a cleaning solution tank. If you pour liquid cleaner into the clean water tank of a robot not meant for it, the mop may leave streaks or stop spraying. Always check if your robot vacuum supports cleaning liquids first. Dreame Cleaning Solutions Alternatives Sometimes the original solution is out of stock. Or maybe you are looking for a gentler option. While there are a few alternatives, not all of them are safe. Your vacuum is built to work with a certain formula. Using the wrong one can cause damage or poor cleaning results. Dreame always recommends using our own solution. That is because the formula matches the system inside each vacuum. It creates the right amount of foam, spreads evenly, and protects the inside parts. If you still want to try something else, contact the customer support team before trying something new. Natural or eco-friendly cleaners sound nice. But not all of them are safe for a high-speed motor or a smart sensor. If your vacuum supports third-party solutions, it may say so in the manual. Conclusion A good vacuum cleaner does the hard work. But the right cleaning solution helps it do the job faster, deeper, and with less effort from you. Whether you clean daily or just once a week, picking the right liquid, using it correctly, and avoiding small mistakes makes a big difference. Stick to trusted solutions like Dreame's, follow the simple steps, and your floors will stay clean, fresh, and worry-free. Master the Art of Floor Care How to Clean Hardwood Floors How to Clean Wood Floors How to Clean and Mop Tile Floors How to Clean Laminate Floors How to Clean Marble Floors How to Clean Grout on Tile Floor How to Clean Linoleum Floors
Continue reading