



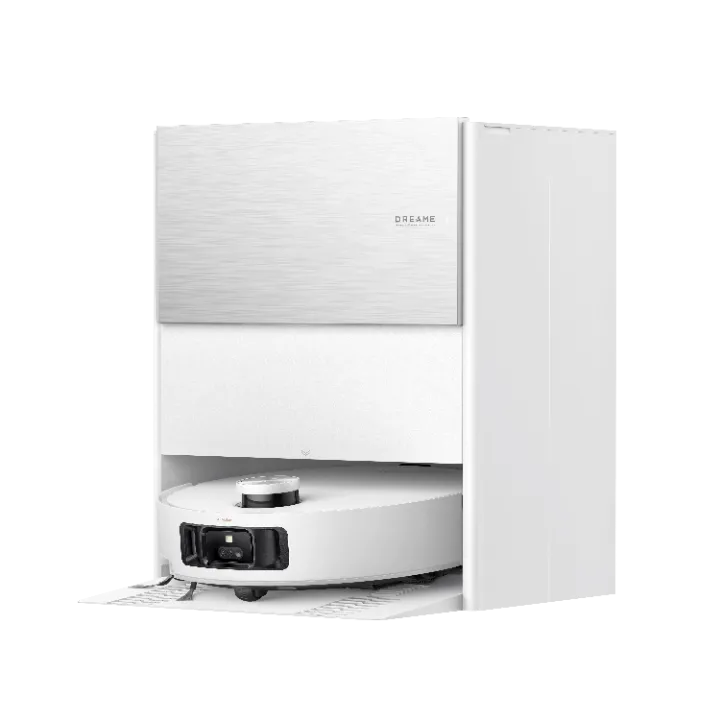









How do robot vacuums move across the floor vacuuming, cleaning, and sweeping? When they were first launched, robot vacuums used basic technology and would move haphazardly when cleaning. They were able to clean large areas but were inefficient as they keep cleaning the same places.
More developed models use an advanced robot vacuum navigation system, which is enabled by algorithms and sensors. The technology allows the vacuum to move in straight lines, covering all areas. The vacuum robot needs to map your home first to be able to clean effectively. It will then store this information and use it when vacuuming in the future.
What is Robot Vacuum Mapping?
Robot vacuum mapping is a process by which robot vacuums map your house during the initial cleaning. Mapping helps the robot understand how the house looks like, making it easier to clean all areas, and the majority of high-end models are capable of cleaning hard surfaces and carpets alike. Even in textures that seem similar, mapping helps it avoid the sections that it has already cleaned.
This map can be saved in a smartphone app using the map saving option, which is especially helpful for larger homes. You can also use the app to pick areas that you want the robot to clean if you prefer zone cleaning. After buying the robot vacuum, stay home when it's cleaning for the first time and monitor the process. Since it's doesn't understand your house, it needs to learn the routes.
Whenever a robot vacuum follows the route, they eventually will have to dock to recharge, but how do robot vacuums find their base? After cleaning or when the robot has run out of charge, infrared signals show where the base is. The robot vacuum navigates to the base. After recharging, it continues to clean the home. Though the process may seem straightforward, there are many different methods that a device can use to map out the home.
The Main Types of Mapping Technology
Vacuums use different technologies to map a house, which may include the 4 following main mapping technologies discussed in this section.
Camera-based mapping
This technology uses a digital camera that maps by taking photos of landmarks around the house. While this technology maps well, it does not work in the dark. But some manufacturers are beginning to add a source of light on some of the devices.
Lidar-based mapping
Lidar is an invisible spinning laser that detects information. It collects data on the room's size and obstacles, such as legs at the laser level, but it starts by mapping the house, cleaning it systematically in straight lines instead of randomly.
Lidar technology is the most precise at mapping and has accurate navigation compared to the others.
Gyroscope or accelerometer mapping
Gyroscope and accelerometer sensors calculate the distance and direction of objects around the house.
The vacuums that use this technology are affordable. But it does not create a precise map and does not navigate as well as vacuum robots that use lidar and camera-based technologies.
Combined technologies
Some vacuum robots combine two or three mapping technologies. These technologies are used together with sensors and the robot vacuum cleaner algorithm to help the device navigate efficiently.
Sensors Help with Robot Vacuum Navigation
Robot vacuums use mapping to form route cleaning, and while they are moving, they use sensors to detect road conditions. Let’s take a look at cliff sensors, obstacle sensors, and other forms of tech that help these devices work.
Cliff sensors
All vacuum robots have cliff sensors as a safety requirement. Cliff sensors use infrared light, which is reflected from objects. The objects then send a signal back to the receiver in the vac.
If the vac does not receive any signal, the receiver detects no object and changes the path. This will prevent your vacuum from falling off the staircase.
Obstacle sensors
When cleaning your home, a vacuum will inevitably come across obstructions from furniture and other things that lie on the floor. Obstacle sensors, which are typically placed on a vacuum's bumpers, will guide it through the obstacles.
When the vacuum comes into contact with an object, the sensor will go off, forcing the vacuum to steer away from it.
Wall sensors
These sensors use infrared light to detect walls and then clean along the boundaries. The robot will do so effectively and without bumping the walls.
Wheel sensors
Light sensors count the wheel rotation to determine the distance it has covered. Although it was common to use these sensors when robot vacuums were new, only low-end models use them.
How Does Dreame Robot Vacuum Navigate Your Home?
The Dreame F9 combines the camera and gyroscope mapping technology to move around your home when cleaning. The device can quickly learn the surroundings that it needs to know for cleaning purposes. This vacuum can capture up to 30,000 data points in the blind of an eye, creating an internal memory of the home so that it misses nothing during cleanup. With automatic room recognition, the Dreame robot vacuum moves effortlessly from one room to the next to clean, knowing exactly where it is at all times.
Even after this robot vacuum maps out its path, it continues to calculate any changes in the path at a rate of 50 times in each second. This constant update of barriers gives it greater navigation skills to prevent damage and sense any fine particles that it needs to clean up.
Dreame F9 has 14 infrared sensors, the device uses 8 of those sensors to check for obstacles in its path to avoid collision. The other sensors are used to map out the direction that the vacuum goes as it transitions from hard floors to carpet or as it nears the steps. Still, that doesn’t mean that the Dreame F9 is ill-prepared for obstacles since it is programmed to cross anything up to 20 mm.
The upgrades in learning and exploration which is called pioneer 2.0 Visual Navigation System allow users to link up the Dreame app with their vacuum, giving the user the power to program wall barriers with ease. And the cleaning route can be further customized by using the app interface to choose which parts of the home are off-limits.
Though the app also gives the user control over where they want it to clean. This app is available in both the Google Play store and the App Store (for Apple), so anyone should have the access to download it.
With all of this advanced technology, the Dreame robot vacuum can continue to clean the home for up to 150 minutes (2 hours and 30 minutes) before it needs to dock and charge. If it runs out of power, it will automatically go to the base station and recharge. The base acts as both a resting and charging station, but there’s no need to go plug it in or order it to go charge. Instead, the smart technology will signal to the vacuum to go charge to eliminate the risk of losing power while cleaning.
The vacuum cleaner is one of the best inventions ever made for more homeowners. Though it's a chore to clean up after the mess left on your floors, vacuuming is easy and flexible. So, how often should you vacuum those floors? We've got all you need to know about regular vacuuming and carpet cleaning.
The Benefits of Vacuuming
Keep Your Home Clean
There are numerous benefits of vacuuming. It's one of the most effective ways to quickly clean your home. No matter the type of flooring in your home, it will get caked with dirt and grime. Clean homes are kept clean with frequent vacuuming. Vacuuming picks up the dirt and dust deep in any flooring or upholstery. The newest models of vacuum cleaners even attack the heavy debris in the grooves of hardwood floors. Vacuum cleaners make it fast and easy to pick up the dirtiest areas of your home. They're portable and much easier to use than they were in the past. You simply run over an area, and all of the tiny particles of dust and dirt are gone in a few seconds.
Increase Your Health
It might be surprising to many people, but vacuuming can increase your health. When you vacuum, you're taking care of everyone in your home. There are tiny microbes and germs floating around in the air of your home. If the tiny mites, mold, and bacteria in your home grow, they can cause sickness and allergies. If you are rid of dust in the flooring, you can help those that have trouble breathing. If you didn't want to take the time to vacuum, you could get down on your hands and knees to sanitize the floor with soap and water daily. That doesn't seem as easy to most people.
Enhance The Air Quality
A good vacuum usually comes with air filters that enhance the air quality as they clean. You also get a fresh look in your home without any dirt on the floors when you quickly vacuum. A vacuum cleaner equipped with a HEPA filter can help improve indoor air quality in all areas, especially those with allergies.
How Many Times a Week Should We Vacuum?
Some people wonder if weekly vacuuming is enough for their home. There are different factors that affect the number of times you vacuum each week. If you have pets, you'll notice hair popping up in a day. If you have kids, you'll notice tiny dropped specks of food that need to come up immediately. This also depends on the type of flooring in your home, whether you have a pet or the space is high-traffic or low-traffic.
Hardwood Floor - Vacuum Weekly
Your hardwood floors need to be vacuumed weekly because wood floors need to be kept dry. If you vacuum the wood floor every day, it will do a lot of damage to the board. So it's important to vacuum weekly to maintain your hardwood floor.
Tile Floor - Vacuum Everyday
Tile floors should step it up a notch with everyday vacuuming. Most tile floors are hard and flat with sealant, but grime can still get caught in the grooves. Vacuuming the tile floor every day can make it look as bright as new.
Carpet Floor - Vacuum Twice Weekly
Carpeting calls for twice a week when you vacuum your home. Dust, mites, and allergens love to live in your carpet. It's also tough to see see the dead skin cells and pieces of hair that fall out deep in your carpet, but they do build up. Vacuuming carpets is not as easy as vacuuming other floors. It takes a lot of time and effort. Vacuuming your carpet twice a week is enough to keep your carpet clean.
Vacuum Daily If You Have Pets
If you have pets, there are thousands of allergens hanging on their fur. Many breeds also shed that fur all over your flooring. It's important to vacuum each day to clean up their dust and hair.
Vacuum High-traffic Spaces Every Day
The areas of high traffic in your home should be vacuumed daily. These are areas where you frequently walk, sit, and hang out. When you walk into your home, you immediately track dirt in from outside. It's important to clean areas like these daily.
Versatile Cordless Vacuum Cleaner
The Dreame V11 Handheld Vacuum Cleaner is a powerful vacuum that keeps all types of floors clean with ten different cleaning methods. With a 90 minute runtime, you can clean your entire house without worry about the battery going out. The five-stage filtration system only releases fresh air, and it can filter particles as small as 0.3 microns. This vacuum cleaner is also high-tech with LED lighting. Dreame V11 can meet the needs of various vacuum frequencies because it is a functional diversity of a vacuum cleaner. Its powerful suction will get into deep carpets, grooves in the floor, and gaps in the wood.
Vacuuming should be a quick, easy process. If you follow these guidelines, you'll keep your home looking nice and free of germs lurking on your floor. A nice vacuum cleaner with today's top technology will help your cleaning go fast so you can get on with your life without worrying about dirt and debris.
Clean your tile floor gently with simple cleaning techniques that will leave the tiles and grout sparkling clean. Learn the challenges faced when cleaning tile floors, how to clean tile flooring, and the best tile floor cleaning solution for easy and faster cleaning.
Most homeowners love tile flooring because of its durability and beauty. However, to maintain this beauty, one needs to know how to clean the tile floors properly. Since most porcelain and ceramic tiles have an impenetrable and durable surface, this type of floor is always easy to clean. Germs, liquids, dirt, and water all clear out easily because the dense tiles cannot absorb them. When it is your time to clean, ensure that you adopt a proper technique for the type of tile you have. Below is a guide on the best ways to clean your tile floor regardless of the materials.
Tile Floors Basics
Tile floors are manufactured using a variety of materials, including metal, stone, clay, quartz, and terrazzo. Every tile flooring has unique characteristics depending on the material used. There are two common types of tile flooring: ceramic and natural stone. Ceramic tiles are made from clay that is manufactured into moulds. These tiles are classified into porcelain and non-porcelain; the former is made from clay and minerals, and about 50% of sand or white dust.
On the other hand, non-porcelain is a traditional ceramic tile made from red, white, or brown clay and other minerals. Natural stone tile flooring is manufactured from natural materials, i.e., stones like marble, limestone, slate, and granite.
Tile floor cleaning is a challenging task. The location of the floor plays a key role in the maintenance task; the closer the floor is to the entrance, the more dirt and debris will be collected. This would mean more wear and tear in high-traffic areas, and regular cleaning will be needed. Most tiles also trap water, dirt, and debris. This means that a sufficient number of water and dirt traps will be needed to maintain the tiles' cleanliness.
How to Clean Ceramic or Porcelain Tile Floors?
Ceramic or porcelain tiles are popular flooring options because of their durability. But just like other tiles, they need cleaning and care. Here is the process of how to clean these tile floors.
Step 1: Remove loose debris
Vacuum or sweep the tile floor to remove debris. Ceramic or porcelain tiles may not attract dirt, but grit and sand can make the glazed surfaces unpleasant and uncomfortable.
Step 2: Select the right mop for cleaning
Porcelain floors should be cleaned using clean water and mild detergent. One should also use a rag or a chamois-type mop instead of a sponge mop. Rags are the best for cleaning because they remove dirty water from the grout lines and leave the floor almost dry immediately. As you clean, ensure you change water frequently to avoid ending up with a cloudy floor.
Step 3: Keep watch of flooring stains
Once you finish cleaning, look around for any discoloration on the floor, and determine the cause of the stain. Consider the appropriate cleaner for the identified stain.
Step 4: Remove soap residue
If you notice haziness on the floor after cleaning, the next step is to remove the soapy residue. Use a non-abrasive all-purpose cleaner to remove the film. Alternatively, use a homemade cleaner with a mild acid like fresh lemon juice to remove soapy residue on the porcelain flooring.
Step 5: Dry the tiles
If ceramic or porcelain flooring tiles air-dry, the lying water might form water spots. This should be avoided by using a clean, lint-free cloth to dry the floor once cleaning is done.
How to Mop Tile Floor?
Before getting started, one should test the cleaning product on a section of the tile to prevent any discoloration or damage to the flooring. While different floors need different cleaning considerations, the basic cleaning method remains the same. Here is how to deep clean tile floors and grout.
Remove loose dirt and dust: Take a broom and dustpan to sweep the floor. Alternatively, use a vacuum that has a soft attached bristled brush to do the cleaning.
Use a cleaning solution: In warm water, dilute the tile cleaner. The cleaning solution selected should depend on the type of tile flooring. Check either with a cleaning product seller or the flooring manufacturer to confirm if the solution is recommended for your floor.
Mop the tile: For the best cleaning results, use a chamois mop or a rag. After dipping the mop in the water, squeeze out excess water. The mop should not be dripping wet, as this will be difficult to dry up. Be thorough in the cleaning process, and don’t ignore the stuck stains.
Change the water bucket: Cleaning tiles with dirty water can leave ugly spots behind. Regularly dump the old water when it gets cloudy, and swap it with a clean one.
Dry the tile: Use a microfiber cloth to dry the floor once you are done washing. This will help prevent any water spots.
Remove soap residue: To have a shiny, nice-looking floor, it is necessary to remove soap residue. If the floor appears cloudy after cleaning, quickly clean it using an all-purpose cleaner. The cleaner should be non-abrasive and be compatible with the tile type. Once again, dry the floor using a microfiber cloth.
Clean the grout: As a final cleaning process, remove grime that may be hiding on the grout lines. Cleaning the grout does not require constant attention, though occasional mopping is the secret to having glazed tile floors. Grout usually absorbs stains and grease, so more effort is needed during cleaning to ensure it remains clean.
For better grout cleaning, make a water and baking soda paste and apply it to the grout. Rub it in and let it stay overnight. The following morning, use a stiff nylon brush to scrub the grout. Repeat this process until the grout becomes clean and retains its original color. In case the floor grout has persistent stains, use a silicone-based sealer.
Tile Floor Cleaning Tips
Here are a few tips for cleaning a tile floor.
Clean regularly: When you clean your tile regularly, the cleaning process becomes easier. Don’t let the floor become a “project.” Mop regularly to make it look great. In fact, it is necessary to sweep frequently to help prevent grit from creating a dull glaze on the tiles. Ensure you sweep or vacuum the floor at least once a week using a soft-bristle vacuum. In the corners, use a hand broom and dustpan to remove the hidden dust or debris. The kitchen tile floor should be wet cleaned at least once a week, while the bathroom tile floor should be cleaned at least twice a week because this area tends to harbor germs.
Remove dust and debris first: You must remove crumbs, debris, and other dirt from the floor before mopping. This can be done either through vacuuming or sweeping.
Mop the tile from the back: Assess the house and follow a cleaning pattern that will ensure the mopping ends at the exit.
Use a chamois mop or a rag: Unlike a sponge mop, which absorbs water into the gout lines, a chamois mop ensures that all the water is dried up, making cleaning easier.
Avoid excess detergent: When you use excess detergent, the tiles may begin to look hazy because of soap residue. Use a mild acid or all-purpose cleaner to remove the film.
Change water as frequently as possible: When a tiled floor is cleaned with dirty water, the floor will remain cloudy and dirty.
Dry the floor after cleaning: To prevent having water spots on the cleaned tile, use a clean cloth to dry it. You can slide a rag around the floor using your feet to make the process easier.
The Best Tile Floor Cleaning Solution - Dreame F9 Robot Vacuum
Cleaning a tile floor can be challenging, as it might demand more time. Ensuring that the grout is clean is even more tiresome. A common question that most people ask is: What is the best cleaning solution for ceramic tile floors? In order to complete your cleaning process, consider using Dreame F9 Robot Vacuum, the best tile floor cleaner solution.
The new Dreame robot comes with a 0.1 mm microfiber roller brush and a high-speed 190 RPM side brush. The microfiber roller brush takes care of all types of dirt and grime. And the side brush covers all corners for thorough cleaning.
The Dreame F9 Robot Vacuum is equipped with the Japanese Nidec brushless motor with 2,500 Pa strong suction, which can help get rid of all kinds of allergens and dirt, including coffee beans, cereals, hair, and even screw on the floor, carpets, and other surfaces. The cleaner solution also has a battery life of 150 minutes. With these strong features, Dreame F9 is the best tile floor cleaner machine for residential tile flooring.
Luxury vinyl plank (LVP) flooring requires different cleaning methods than hardwood or laminate. Using the wrong approach can damage the wear layer or cause the seams between the planks to warp. This guide explains effective cleaning methods and the appropriate tools for maintaining LVP flooring, helping to prevent moisture damage at the seams that could void most manufacturer warranties.
Quick reference: The 5-step LVP cleaning method
Vacuum or sweep daily with a soft-roller brush.
Mix a mild pH-neutral cleaner with warm water.
Mop with a microfiber pad, damp not wet.
Dry the floor immediately with a clean cloth.
Avoid steam, wax, ammonia, and pooled water.
What Is LVP / Vinyl Plank Flooring?
LVP, or luxury vinyl plank, is a multi-layer flooring product designed to look like hardwood but has the cleaning characteristics of vinyl. Each plank consists of a printed wood-grain layer on top, a tough wear layer for protection, and a vinyl core underneath. Luxury vinyl tile (LVT) has the same construction but comes in tile shapes, often designed to resemble stone. Sheet vinyl is an older type of flooring that comes in roll form, commonly seen in older kitchens.
All three types (LVP, LVT, and sheet vinyl) clean in similar ways. However, LVP is distinct due to the seams between the planks. If water collects at these seams, it can seep between the planks, causing the core to swell and the surface to lift over time. That's why the cleaning methods outlined below focus on controlling moisture at the seams. If you also have mixed flooring in your home, you can refer to our guide on how to clean laminate floors, which covers a similar plank-based product that has different moisture tolerances.
How to Clean Vinyl Plank Flooring: The 5-Step Method
The right method for cleaning vinyl plank flooring keeps moisture at the surface and away from seam joints. Here's the step-by-step to clean vinyl plank flooring without risking the seams.
Step 1: Sweep or vacuum
To clean, use a soft-roller brush head, a microfiber dust mop, or a cordless stick vacuum with a hard-floor setting. Avoid using beater-bar vacuums on LVP, as they can scrape the surface and push debris into the seams.
Step 2: Mix your cleaner
Use a pH-neutral floor cleaner diluted with warm water, but never with hot water. Warm water helps lift dirt without warping the planks or damaging the adhesive layer underneath.
If you don't have a specific LVP cleaner, adding a few drops of dish soap to a gallon of warm water can work for routine cleaning. Avoid using vinegar, ammonia, bleach, oil soaps, or any polish-and-shine products, as these can damage the wear layer or leave behind a residue that is difficult to remove.
Step 3: Mop with a damp microfiber pad
Spray the cleaner onto the microfiber pad rather than directly onto the floor. This pad-spray technique is crucial for safely mopping vinyl plank flooring. Pooled liquid at the seams is the leading cause of damage for LVP. Microfiber pads retain enough moisture to lift dirt without soaking the surface. String mops and traditional sponge mops hold too much water, which can seep into the seams.
When mopping, always move in the direction of the planks instead of across them. Mopping against the grain can force moisture into the seam joints. Working along the planks keeps moisture at the surface where you can wipe it up.
Step 4: Dry immediately
Drying right after mopping is non-negotiable on LVP. Even with proper moisture control, residual water on the surface seeps into seams over the next few minutes. A clean dry microfiber cloth across the freshly mopped floor takes 30 seconds and prevents the slow swelling damage that shows up months later. The same approach works whether you're cleaning luxury vinyl plank in a kitchen or in a heavy-traffic entryway.
Step 5: Spot-treat sticky areas
For sticky spills or food residue, place a damp microfiber cloth over the affected area for 30 seconds to soften it before wiping. Avoid scrubbing aggressively. Instead, use a light circular motion with a soft cloth to lift most stuck-on grime without damaging the wear layer. This technique is effective for cleaning vinyl plank floors of any thickness, whether you are maintaining luxury vinyl plank flooring in a high-end installation or budget LVP in a rental property.
Pro-tip: Spray cleaner on the microfiber pad, never on the floor. Pooled liquid at LVP seams is the leading cause of plank lifting and warping. Once warping starts, individual planks need replacement. The pad-spray method controls how much moisture actually contacts the floor.
How to Choose a Cleaner for LVP Flooring
You don't need a fancy LVP-specific product. You need the right kind of product. Five criteria narrow your options when you're looking at an LVP floor cleaner on the shelf.
1. pH-neutral, not alkaline or acidic. The wear layer on LVP is durable but reacts to pH extremes. Acidic cleaners (vinegar-based, citrus-based, or labeled "for grease") slowly etch the protective coating. Strong alkaline cleaners (ammonia-based, "heavy-duty" degreasers) break down the wear layer the same way. Anything labeled pH-neutral is safe.
2. No wax, polish, or shine restorer. LVP comes with a factory wear layer that doesn't need waxing. Wax buildup creates a haze that's nearly impossible to remove without aggressive chemical stripping, which then damages the wear layer. If your LVP looks dull, it needs better cleaning, not polishing.
3. No ammonia or bleach. Both strip the protective layer over time. Even diluted solutions cause cumulative damage that shows up as discoloration and brittleness at high-traffic areas.
4. Vinegar may not be the best cleaning solution. While diluted white vinegar (one cup per gallon of water) is mild enough for occasional use and can effectively remove grease or soap residue, its acidity can etch the wear layer if used regularly, just like other acidic cleaners. It's best to treat vinegar as an occasional spot cleaner rather than a daily mopping solution.
5. Warm water plus a few drops of dish soap. For routine cleaning, mix a gallon of warm water with three or four drops of clear, fragrance-free dish soap. The surfactant in dish soap lifts dirt without leaving residue, and the pH stays neutral. No vinegar needed. Wipe with a damp microfiber pad and dry immediately.
What to skip entirely: Mop and shine products, oil-based wood cleaners, steam-based cleaners, bleach solutions, pine-based cleaners, and carpet cleaners (different chemistry, leaves residue).
Most cleaners marketed as the best cleaner for vinyl plank flooring are pH-neutral surfactant solutions that work no better than diluted dish soap. If you prefer the convenience of a ready-mixed spray, look for the pH-neutral label and skip anything promising added shine.
Best Mops for Vinyl Plank Flooring
The best mops for LVP comes down to how well it controls moisture. It should keep water at the surface where you can wipe it up, not in the seam joints where it causes damage. Here are four common types of mop for vinyl plank flooring.
Microfiber spray mop
The traditional gold standard for LVP. A microfiber pad holds enough water to lift dirt without saturation. The reservoir sprays cleaner onto the pad or floor in controlled bursts, so you decide how much moisture hits the surface.
Best for casual cleaners on a budget. You still have to manually wring or replace the pad as it gets dirty, and the cleaning happens in two motions (wet pickup, then dry pass).
Wet/dry vacuum mop
The modern solution for luxury vinyl plank (LVP) flooring is a wet/dry vacuum mop that dispenses controlled amounts of water through a rotating brush head and immediately suctions the dirty water back up. This design prevents water from pooling at the seams, as the suction follows the water in real time. Additionally, the dock automatically washes and dries the brush head between uses, so you won't have to handle dirty water manually.
The Dreame H15 Pro Heat is a leader in this category for LVP-specific cleaning. Its controlled water dispensing helps prevent moisture damage that can compromise LVP installations. The unit uses hot water at 185°F (85°C) to dissolve stubborn messes, and its 180° lie-flat design allows it to reach under low furniture without losing suction. This versatile device can also pick up dry debris, eliminating the need to switch between a vacuum and a mop for daily cleaning.
[product handle="h15-pro-heat-wet-dry-vacuum" rating="4.7"]
For a higher-end option, the latest Dreame model, Aero Pro, brings the same controlled-water cleaning approach in a slimmer, lighter body. It delivers 25,000 Pa of suction in a 3.88in (9.9cm) slim profile, and the 180° lie-flat reach gets the head flat under low furniture where bulkier mops can't follow. The controlled water dispensing keeps moisture off LVP seams the same way the H15 Pro Heat does, and TangleCut™ 2.0 keeps hair from wrapping the roller.
Which mops to avoid
Steam mop
Heat plus moisture warps planks, lifts the adhesive layer, and voids most flooring manufacturer warranties. The Steam Mop section below covers why in more detail.
Spin mop or string mop
Both carry too much water for safe use on vinyl plank, and the mop heads push water into the seams. They work fine on sealed hardwood or tile but cause the slow swelling damage that LVP is vulnerable to.
Mop
Is it safe for LVP?
Moisture control
Effort
Microfiber spray mop
Safe with care
Manual control
Medium (wring/replace pad)
Wet/dry vacuum mop
Safest option
Automatic suction
Low (self-cleaning dock)
Steam mop
Not safe
Excessive moisture
Avoid entirely
Spin/string mop
Risky
Poor, over-saturates
Medium
Dreame Take: Traditional wet mops were designed for tile and sealed hardwood. LVP doesn't tolerate the same approach because the seams between planks are the weak point. The Dreame H15 Pro Heat dispenses controlled water and immediately suctions it back, preventing the pooling at seams that warps LVP.
For more options at different price points, browse Dreame's wet and dry vacuums collection or the wet and dry vacuum for hardwood floors category.
Best Vacuums for Vinyl Plank Flooring
The biggest challenge that a vacuum poses to LVP is the brush roll. Beater-bar brushes designed for carpet can scuff the wear layer on vinyl plank, especially on cheaper LVP with thinner protective coatings. The best vacuum for vinyl plank flooring uses a soft-roller brush head or has a hard-floor mode that lifts the beater bar off the surface.
Best Cordless Stick Vacuums for LVP
Cordless stick vacuums are the workhorse for daily LVP maintenance. They're light, fast to deploy for quick cleanups, and easy to reach into corners and along baseboards where most LVP installations accumulate dust.
The Dreame Z30 sits at the flagship end of the cordless lineup with 310AW of suction, a 150,000 RPM TurboMotor™, a 90-minute runtime, and HEPA H14 filtration for households with allergies. The CelesTect™ blue light dust detection illuminates fine dust that's invisible under regular lighting, which matters on LVP because grit you can't see is the same grit dulling the wear layer.
The Dreame Z20 covers the mid-level with 250AW of suction and an auto-empty station option, so you're not hand-emptying a dust cup after every cleaning session. It's a serious cordless without flagship pricing.
The Dreame R10 is a budget-friendly option with anti-tangle technology that keeps hair from wrapping around the brush roll.
Browse the Dreame collection of cordless stick vacuums to compare features across the range.
Best Wet/Dry Vacuums for LVP
Wet/dry vacuums combine the dry-pickup function of a stick vacuum with controlled-water mopping in a single pass. For LVP specifically, this matters because daily cleaning becomes a one-step process instead of vacuum-then-mop.
The Dreame H15 Pro Heat is the primary recommendation here for the same reason it leads the mop section: controlled water dispensing keeps moisture off the seams. The Aero Pro is the higher-end alternative, combining the same controlled-water cleaning with 25,000 Pa of suction in a sleeker, lie-flat design.
Vacuum Type
LVP Safety
Wet Cleaning
Best Use
Cordless stick (soft-roller)
Safe
Dry only
Daily dust and debris
Cordless stick (beater bar)
Risky on cheap LVP
Dry only
Not for LVP
Wet/dry vacuum mop
Safest with wet+dry
Yes, controlled
Daily and deeper cleans
Upright traditional
Often risky
Dry only
Not for LVP
If you already own a cordless stick vacuum with a soft-roller mode, you're set for daily dry pickup. If you want one tool for both daily debris and weekly mopping, a wet/dry vacuum like the H15 Pro Heat consolidates two appliances into one.
Best Robot Vacuums for Vinyl Plank Flooring
The best robot vacuum for LVP keeps moisture controlled on the mopping function, uses hard-floor-safe brushes for the vacuuming function, and navigates threshold transitions common in LVP installations without getting stuck.
Premium
The Dreame X60 Ultra leads the lineup for LVP with 35,000 Pa Vormax™ suction and can climb up to 3.47in (8.8cm) to cross thresholds and obstacles without getting stuck. This matters in LVP installations where transitions between rooms often have raised metal strips or thresholds taller than most robot vacuums can climb.
The OmniSight dual AI cameras system identifies 280+ object types and routes around them in real time. The 212°F (100°C) mop self-cleaning at the dock keeps the pads sanitized between cleans without the seam-soaking risk of running hot water across the floor itself.
[product handle="x60-ultra-robot-vacuum" rating="5"]
Best value
For daily LVP upkeep, the Dreame L40 Ultra Gen 2 handles both vacuuming and mopping with 25,000 Pa of suction. Its 0.41in mop lift keeps the pads off rugs and area carpets that sit on LVP, and the extendable side brush and mop reach into corners and along baseboards where dust collects.
Pet and LVP
If you have shedding pets on LVP, the Dreame L60 Pro Ultra is built for the daily challenge. Its DuoBrush system handles hair up to 11.81in (30cm) with zero tangles, so you're not stopping mid-clean to cut hair out of the brush roll. The 35,000 Pa Vormax™ suction pulls embedded pet dander off LVP and out of low-pile rugs.
ProLeap™ Robotic Legs clear 3.47in (8.8cm) thresholds and the 104°F (40°C) hot-water mopping ensures up to 99% bacteria reduction during daily passes (per SGS-CSTC laboratory testing), useful for pet zones near feeding bowls. The 220-minute runtime covers up to 2,200 ft² (205 m²) on a single charge, enough for most multi-room LVP homes in one session.
Budget
The Dreame D10 Plus Gen 2 covers daily debris pickup and basic mopping with 6,000 Pa of suction and a floating brush that adjusts across hard floors. The suction is lower than flagship models, but for LVP with regular maintenance, daily light vacuuming matters more than peak suction power.
Summary table of best robot vacuums for vinyl plank flooring
Model
Suitable For
Suction
Standout Feature
X60 Ultra
Premium daily LVP
35,000 Pa
Climbs up to 3.47in (8.8cm) to cross thresholds and obstacles
L40 Ultra Gen 2
Best value
25,000 Pa
RGB AI + structured-light navigation
L60 Pro Ultra
Pet and LVP households
35,000 Pa
HyperStream™ DuoBrush, 0 tangles up to 30cm
D10 Plus Gen 2
Budget LVP
Entry-level
Daily debris pickup
Browse the full range of Dreame robot vacuums or the robot vacuum for hardwood floors collection, which covers the same hard-surface category LVP falls into. For mixed-flooring homes with rugs and carpet zones, the guide on how robot vacuums clean carpets covers specifics on the carpet-to-LVP transition.
Can You Use a Steam Mop on Vinyl Plank Flooring?
No. Steam mops damage LVP in two ways. Heat warps the adhesive layer that bonds the wear layer to the vinyl core. The moisture from steam pools at seam joints faster than you can wipe it up. The damage shows up as lifted edges, separated planks, and visible warping at high-traffic spots.
Some waterproof LVP products advertise steam-mop tolerance, but the claim usually hides that it's meant to be used briefly and at low-temperature settings only. Even when the wear layer survives, the adhesive layer underneath softens with repeated heat exposure. By the time the warping becomes visible, the damage is permanent.
If you want sanitization without the steam-mop risk, a wet/dry vacuum mop covers the same goal differently. The Dreame H15 Pro Heat dispenses cleaning solution at a controlled rate and immediately suctions it back, so moisture doesn't pool at seams. It cleans deeply without the heat that breaks down LVP construction.
Important: Most LVP manufacturer warranties are voided by steam mop use, even on products marketed as waterproof. Heat affects the adhesive layer differently than moisture alone. When in doubt, check your specific LVP manufacturer's care guide before using any steam-based product. The damage is permanent and individual planks usually need replacement.
Can You Mop / Wax / Polish Vinyl Plank Flooring?
Here are the answers to some of the most common care questions about LVP that come up.
Can you mop vinyl plank flooring?
Yes, but only with controlled moisture. The 5-step method earlier in this guide covers the safe approach: damp microfiber pad, never excess water, and immediate drying. Skip string mops, sponge mops, and any technique that leaves water sitting on the floor.
Can you wax vinyl plank flooring?
No. LVP comes with a factory wear layer that handles daily wear without needing wax. Wax products create a haze that's nearly impossible to remove without chemical stripping, and the stripping process damages the wear layer underneath. If your LVP looks dull, it usually needs better cleaning, not polishing.
Can you polish vinyl plank flooring?
No. Same reasoning as wax. Polish builds up on the surface and dulls the printed wood-grain finish over time. The dullness most people see on older LVP is usually residue from cleaning products, not a worn surface. Try a deep clean with the right pH-neutral product before assuming the floor needs restoration.
Can you vacuum vinyl plank flooring?
Yes, but use a soft-roller brush head or hard-floor mode. Beater-bar brushes can scuff the wear layer, especially on cheaper LVP. Daily vacuuming is one of the most important habits for keeping LVP looking new because grit acts like fine sandpaper under shoes.
Vinyl Plank Flooring Maintenance Schedule
A consistent maintenance schedule can extend your LVP lifespan more than any single product or technique.
Daily
Vacuum or sweep entryways and high-traffic areas using a soft-roller brush
Wipe up spills immediately, especially water, juice, or anything sugary
Use doormats at all entrances to catch grit before it reaches the LVP
Weekly
Damp mop the full floor with a pH-neutral cleaner and microfiber pad
Spot-clean any sticky areas with the soft-cloth dwell technique from Step 5
Check baseboards for moisture trails that indicate over-mopping
Monthly
Run a deeper clean using a wet/dry vacuum or extended microfiber mop session
Inspect seam joints for any visible swelling, lifting, or moisture damage
Wipe baseboards and door trim where cleaning solution sometimes splashes
Move furniture to clean underneath and check for any sun-bleaching patterns
Quarterly
Spot-check warranty-related care if your LVP installation came with specific manufacturer guidance
Inspect high-traffic areas for any wear-layer scuffs or visible dulling
Tighten any furniture feet pads that have come loose
Annually
Assess the overall condition and identify any individual planks that need replacement
Review whether high-traffic zones need extra protection (rugs, transition strips)
Reapply or replace floor pads under heavy furniture
LVP doesn't need refinishing the way hardwood does. A weekly mop with a pH-neutral cleaner does more for longevity than any deep-clean treatment.
How to Deep Clean Vinyl Plank Flooring
Deep cleaning LVP is about giving stuck-on grime more contact time with the right cleaner. The deep-clean approach works on monthly maintenance or after seasonal events that bring more dirt indoors.
Pre-treat sticky or heavily soiled areas
Place a damp microfiber cloth saturated with pH-neutral cleaner over the spot. Let it dwell for 30 to 60 seconds. The dwell time softens stuck-on grime so you don't need to scrub aggressively, which is what damages the wear layer.
Work in sections
Don't try to deep clean the whole floor at once. Work in 4-foot by 4-foot (1.2 m by 1.2 m) sections so you can mop and dry each area before the moisture has time to seep into seams. Larger sections leave moisture sitting too long on the parts you haven't gotten back to yet.
Use a wet/dry vacuum mop for extraction
Wet/dry vacuum mops outperform traditional mopping for deep cleans. The suction pulls dirty water off the floor immediately, so you're not pushing grime around.
Address scuffs carefully
For black heel marks or sticky scuffs, a melamine foam pad (magic eraser) works but you should test this in a hidden area first. Some lower-end LVP can dull under aggressive melamine foam scrubbing. Light circular pressure is enough.
Final clean-water pass
After the deep clean, run a fresh clean-water pass with a clean microfiber pad. This removes any remaining cleaner residue that would otherwise dull the surface.
Mistakes to Avoid When Cleaning LVP Floors
A few cleaning mistakes account for most LVP damage. Here's the essential list of common mistakes to avoid:
1. Never let water pool on the floor
Water that sits for more than a few minutes swells the vinyl core and lifts the surface. This applies to spills and over-saturated mops. Even an overflowing pet bowl can cause damage if not wiped up quickly.
2. Never use wax or polish
LVP doesn't need them and the buildup creates haze that's hard to remove. The protective coating on the wear layer is already built in.
3. Never use abrasive scrubbers or steel wool
The wear layer is durable for foot traffic but can't handle aggressive abrasion. Once you've scratched through it, the printed wood-grain layer underneath is exposed and the damage spreads.
4. Never use ammonia or bleach
Both strip the protective coating over time. Even diluted, repeated use causes discoloration and brittleness in high-traffic areas.
5. Never use beater-bar vacuums on cheap LVP
Higher-end LVP can handle a standard vacuum, but lower-end LVP scuffs easily. A soft-roller brush or hard-floor mode is always safer.
6. Never use steam mops without explicit manufacturer approval
Heat warps the adhesive layer and voids most warranties.
7. Never ignore seam moisture
If you notice planks lifting or warping at the edges, the cause is almost always water seepage at seams from previous cleaning sessions. Once warping starts, individual planks usually need replacement.
8. Never use vinegar as a daily cleaner
Diluted vinegar is fine for occasional use but the acidity etches the wear layer with regular use. Save it for once-in-a-while spot cleaning.
Choosing the Right Cleaning Method for Your LVP
The single most important cleaning habit for LVP is moisture control at the seams. Keep water on the surface, never pooled at the seam joints between planks. Add daily soft-brush vacuuming, a pH-neutral cleaner once a week, and the occasional deep clean each month, and your LVP will hold its finish for years longer compared to an aggressive cleaning routine.
For controlled-water mopping that handles LVP seam safety, browse the Dreame collection of wet and dry vacuums. For daily dry pickup with a soft-roller brush option, the cordless stick vacuums collection covers the full Dreame range. For pet households on LVP, the L60 Pro Ultra's DuoBrush system handles the daily shedding challenge.
And if you're considering a robot vacuum as part of your daily maintenance routine, this complete robot vacuum buying guide helps you match a model to your floor type and household.
Frequently Asked Questions
How often should you clean LVP floors?
Daily light vacuuming, weekly damp mopping, and monthly deep cleans. Light-use areas can stretch to twice-weekly vacuuming and biweekly mopping.
Can you mop LVP with vinegar?
Occasionally, yes. Diluted white vinegar (one cup per gallon of water) is mild enough for monthly spot cleaning. However, pH-neutral cleaners are the safest choice since regular vinegar use will slowly etch the wear layer.
What's the difference between LVP and LVT?
LVP (luxury vinyl plank) and LVT (luxury vinyl tile) are the same product construction in different shapes. LVP is shaped like hardwood planks, usually with a printed wood-grain layer. LVT is shaped like tile, usually styled to look like stone or ceramic. Both can be cleaned using the same products and methods.
How to clean vinyl plank flooring without streaks?
Streaks can come from too much cleaner left on the floor, dirty mop water spread back onto the surface, or hard-water residue from skipping the final dry pass. Use a pH-neutral cleaner at the recommended dilution, replace mop water when it gets cloudy, and always dry the floor with a clean microfiber cloth immediately after mopping.
Are robot vacuums safe for LVP?
Yes. Look for models with hard-floor brush modes or soft-roller heads. Combo models with controlled water mopping are even better for LVP because daily light mopping keeps seams cleaner than weekly heavy mopping.
A clean carpet makes the room look beautiful and protects the health of the people around them. However, not many people are familiar with how to do the job efficiently. The essence of carpet care begins with understanding which tools to use and how to use them well.
But why do people need to clean their carpets in the first place?
The Benefits of Vacuuming Your Carpets
Before one starts brainstorming on how robot vacuum cleaners work, it is more important to understand the benefits that come with making a carpet cleaner. A clean environment does more than only making the space look good.
Vacuuming improves air quality indoors by cleaning dust, often harbored around the carpet. Abrasive materials rub along the carpet fibers, thus causing fraying. Frequent carpet cleaning helps the rugs stay in good condition longer.
Dampness is a source of bad smells. Moisture gets underneath the carpet pad during spill accidents, humidity, rainstorms, prolonged drying, warm water cleaning, or using a carpet shampooer. Continued moisture exposure causes mold and mildew to grow and bring pungent smells.
Pet odors bring bad smells too. Cigarette smoke and fiber breakdown are also common culprits. Frequent use of a carpet cleaner removes these smells easily.
A clean room promotes better sleep. Research by the National Sleep Foundation shows that people who sleep in clean environments rest better. When people sleep, their breathing rate decreases steadily. Whenever the air quality is disturbed, there is less air getting into the lungs, and there are shallow breaths. Resultantly, a lot of stress is put on the respiratory and circulatory systems.
When these systems are not working correctly, one cannot sleep well. Creating a habit of using proper carpet cleaning tips and using a vacuum can save the breathing system.
At the end of the day, everyone has a right to feel comfortable in their spaces, especially at home. A clean carpet significantly contributes to this reality.
How to Deep Clean Carpets with robot vacuum?
Technology has made life easier in so many ways. Remember the times when one had to use a mop and bucket to clean every house’s corner? Today, this is not the case, at least not for many households.
Vacuum cleaning started with heavy and expensive machines, today the technology is getting smaller, more flexible and more efficient. Ultimately, vacuum cleaning does not have to be exhausting. Gone are the days when one had to push a large vacuum cleaner around the carpet to make it clean. While traditional vacuum cleaners were limited in some spaces, this is now not the case.
Robot vacuum cleaners are faster and less involving. Since they are automated, many of them using smartphone applications, one does not need to be in the room when they are working. You simply set the hours you need the carpet cleaner to operate and leave it to perform its duty as you go to work or grocery shopping.
Here is a step to step guide on how to clean disgusting carpet with the robot vacuum.
Choose the right vacuum cleaner for the carpet.
Do a bit of manual cleaning before using a robot vacuum cleaner.
Move all directions to get all specks of dust out.
Bring in the robot vacuum cleaner.
Do a trial run when someone is in the room to monitor the effectiveness of the machine.
Ensure that the lights are on for the vacuum’s sensors to work efficiently.
Take time to allow the brush and rug to suck up all dust bits.
Never let the bags fill up completely to keep them efficient.
For water-soluble stains, you can first soak a cloth in club soda to thoroughly dry the carpet.
When using cleaning chemicals, warm water is more effective than cold water.
Vacuum thoroughly before using a carpet shampooer or a carpet cleaner- this removes surface dirt and grime.
Empty the vacuum's bin, so it is not dragging old dirt on the carpet instead of cleaning it.
Create a throw zone to have effective cleaning cycles.
There should be no obstacles along the way, so users should toss any physical items behind the throw zone before leaving the house. All boundaries should also remain marked accordingly, to keep the vacuum cleaner from going to unrequired areas.
It is important to note that if your carpet is black or any dark color, the cliff sensor will not recognize it. It will therefore be much harder for a robot vacuum cleaner to work on such carpets if it even gets to work at all.
Also, people who have shag carpets might need to look for a better alternative. The long hair on such rugs triggers cliff sensors like a drop would. Since one cannot disable cliff sensors at the moment, currently found in most homes, a robot vacuum cleaner will not be as effective.
A robot cleaner is efficient for any other type of carpet and gives users the flexibility they yearn for when looking for the best way to keep their environment clean. Thanks to its size, it reaches every corner of the house, giving it an exclusive finish. It also can detect obstacles, so users do not necessarily have to direct its every move.
Best Choice: Dreame F9
You have to consider a few factors when buying a robot vacuum cleaner since they come in different shapes and brands. However, no one wants to buy a low-quality product only because it was cheaper. From shapes to the operating mode, always make sure you are looking at what you need to accomplish before purchasing.
While there are many vacuum cleaners one could use with the carpet cleaning tips above, the Dreame F9 is one of the most recommended options. It is one of the most quality products one will find in the market today.
The cleaner works, as illustrated.
Test run
Take the Dreame F9 for a test Run. Depending on the general layout of your home, this machine will sensor all around due to its map memory and 14 sensors that adapt to complex environments. It also has a remarkable mapped memory to master every angle, which makes its performance easier and fast.
Obstacle Crossing
Dreame F9 is an obstacle crossing robot. Obstacles can be bad news for any robot vacuum. Items like screws, plastic bags could damage the internal components and scratch flooring. Dreame F9 has eight sets of infrared sensors that detect obstacles. The dynamic mapping system with a fifty times/ second path calculation presents upgraded learning and exploration. Therefore, in the case of blocks, there is no need to worry.
App Operation
The robot operates using an App by just one press. Never has carpet cleaning been this fun and easy. It is easy to work with compatible devices.
Anti-bacterial function
Bacteria is a huge bother to the immune system of both humans and pets. Dreame F9 has antibacterial microfiber mob control. Therefore, it eliminates 99.9 per cent of bacteria, leaving the room disinfected.
Carpet Climbing Function
Few robots can climb woven rugs. The upgraded learning and exploration function enable this device to treat carpet edges as a stepping stone. It can easily move from a medium pile to the hardwood floor.
Design
The device is small and very portable. It has an ultrathin design of 8cm, which makes navigation easy and steady. It is also admirable to the eye and light on the hands.
Strong Suction
The stronger the suction, the more dust and dirt a vacuum cleaner collects. Dreame F9 has a super-powerful suction of 2500Pa. These robots do not lose their suction often and rarely clog. The Dreame F9 protects the people’s health by ensuring all the particles and allergens are dealt with.
Superior Advantages
With Dream F9, there’s more in one package. From a dynamic mapping management system to 150 mins run time, nothing will be stressful about cleaning your carpet or the house environment in general. Its powerful suction and ultra-thin design ensure that cleaning remains flexible, easy, and fast.
To Wrap It Up
Efficiency should always be the number one factor when looking for an ideal robot cleaner. This will ensure that the user has an easy time keeping their environment clean. In short, efficiency gives value to investment.
Are you looking for the best robot vacuum cleaner for your space? Contact us today for further guidelines.
Cleaning tight spaces can be a headache. Finding the right attachment to clean these spaces takes time. It always involves spending a little bit of extra cash. Furthermore, some spaces may also call for one to lift a vacuum cleaner or hold it in place for prolonged periods, something that can be quite tiring. Luckily, with a few small areas cleaning tips, anyone can be able to overcome most of these challenges.
What Does “Tight Spaces” Include?
Tight spaces are areas that don’t provide enough vacuuming freedom. These spaces may be too high to be easily reached. They may also feature obstacles that make it hard for a vacuum cleaner to fit. Sometimes, it is spaces that are just too narrow or too small for any type of vacuum nozzle or attachment to fit.
The following are the most common types of tight spaces around the home.
The space between the sofa and its cushions
The area between the wall and desks or tables
Crevices in a car’s armrest or seat
The tracks of sliding doors
The area in-between window tracks
Corners that are next to furniture or any other type of fixtures
Why Do We Need to Vacuum in Tight Spaces?
Foodstuffs, dirt, debris and other items can get stuck in narrow spaces and small areas. However, while these areas are typically hard to vacuum, one still needs to vacuum narrow spaces for the following reasons.
To Create a Clean Environment
When food particles, debris, and other items get stuck in places like the area between cushions and the sofa, they create an eyesore. Even if one cleans the rest of the home, the sight of these items will ruin the whole. Getting rid of unwanted particles and items from these spaces will transform the space from an eyesore.
To Improve Air Quality
Dust accumulates in tight spaces. Any kind of activity in these spaces will cause these particles to get airborne and this is something that will ruin air quality. To keep the dust in these spaces from contaminating the air in a home, vacuuming is recommended.
To Prevent Mold Growth
Hard-to-reach areas experience little to no airflow. In areas that experience high levels of humidity, these spaces can be susceptible to developing mold growths. Vacuuming helps to keep mold at bay.
To Prevent Bad Odors
When foodstuffs get stuck in narrow spaces, they can decompose. Any liquid that spills in these spaces can also encourage rotting. Vacuuming removes these particles before they have time to decompose. As a result, it reduces the odds of ending up with a bad odor in a home.
How to Vacuum in Tight Spaces?
Using the Crevice Tool
Most good vacuum cleaners come with attachments that are designed to make it easier to vacuum hard-to-reach spaces. The crevice tool is an attachment that comes with most vacuum cleaners and it typically features a narrow end that can fit in most tight spaces. With a hole that is wide enough to allow dirt to get sucked in, the tool allows for better direction of a vacuum’s suction power and thus allowing for more effective cleaning of hard-to-reach vacuum blind spots.
The Dreame T20 is a good example of a cordless vacuum cleaner that comes with a great crevice tool. This tool, referred to as the Crevice Nozzle, is narrow enough and effective enough to direct the vacuum’s power to the tightest of spots and thus allowing for effective narrow space cleaning.
Taking Advantage of the Vacuum’s Extension Wand
Most vacuum cleaners for small spaces come with a tool that is meant to extend their reach. When this wand is attached to handheld vacuums, reaching spaces that are hard to reach because they are being obstructed by furniture or corners that are just too high, becomes much easier. This is so especially when it is used together with other useful attachments like a good crevice tool.
Moving Furniture
A great way of finding a way to clean areas that are generally hard to reach is to simply get rid of them – although temporarily. For example, the space between a sofa and the wall is considered a tight space. When one moves the sofa to the center of the room, and away from the wall, it ceases to be a tight space and it can thus be vacuumed easily.
Even though this is something that one doesn’t have to do every time they vacuum, doing it once in a while is advisable. And in cases where there isn’t enough room to allow you to fit a vacuum in small crevices by moving furniture to the center of the room, one can still create space by taking some of the furniture or items outside.
Using a Homemade Cardboard Tube
There are times when even the best of attachments are not enough to allow for effective and convenient vacuuming of tight hard-to-reach areas. In such circumstances, using the cardboard hack is a brilliant solution. This is mainly because the cardboard is flexible and nimble enough to fit almost any space, no matter how tight or small. What is even better about this solution is the fact that it is free since all that you need is a used cardboard tube.
To create this DIY solution, get a long cardboard tube and then squish it so that it can fit the end of the vacuum. When squishing it, take care not to block it. Attach it to the end of the vacuum, and then tape it. To get to fit any crevice, all that is needed is to flatten the opposite end. And since the cardboard is flexible, fitting it into any opening should be easy. This includes vent openings, cup holder creases, gear shift area, drawers, window tracks, and door tracks.
Given the potential for air contamination, bacterial growth, and bad odor that poorly cleaned tight spaces present, going the extra mile to ensure that these spaces are free of any food, liquid spills, dirt, and debris is always recommended. Finding a great vacuum cleaner that has the right attachments for tight spaces is a good place to start.






















