Laminate floors can be hard to clean properly if you've never looked into their upkeep. They look like hardwood, so you'd expect to clean them like hardwood.
However, the wear layer protecting the printed wood appearance underneath doesn't handle moisture, heat, or acidic cleaners the way real wood or tile does. If you clean laminate floors the wrong way, you might see warped edges, streaks that won't lift, or worse, permanent dull patches.
This guide covers the 5-step method that keeps laminate looking new and how to pick the right cleaner. We also cover which mops and vacuums work better on this flooring and the tools that have replaced the old bucket-and-mop routine for most laminate homes.
A Quick Overview on How to Clean Laminate Floors
Laminate is moisture-sensitive, so you'll need to remember to use less water and apply the right cleaning agents to prevent damage to your flooring. Below is a quick summary of how to clean laminate floors:
Vacuum or dry sweep first to remove grit before any wet cleaning
Spray pH-neutral cleaner onto a microfiber pad, never directly on the floor
Mop in straight lines along the length of the planks
Dry immediately with a clean microfiber cloth
Skip steam mops, vinegar, oil soaps, and any method that leaves standing water
5 Steps to Clean Laminate Floors
The routine below works for cleaning your laminate floors daily and weekly. It takes about 15 to 20 minutes for an average room and protects the wear layer if you stay consistent with it.
Step 1: Vacuum or dry sweep first
If you skip dry sweeping or vacuuming first, the mop drags grit across the laminate floor surface. Grits such as hair, sand, pet kibble or crumbs act like sandpaper when a wet pad moves over it. Taking a few minutes with a soft-roller vacuum or a microfiber dust mop before any wet cleaning is the single easiest way to protect your floors long-term.
You'll want to look for vacuums with a soft brush roll designed for hard floors for this step. Stiff bristle-only brushes can leave faint scratch lines over time, especially in high-traffic spots near doors and the kitchen.
Step 2: Spray cleaner on the pad, not the floor
This is the step most people get wrong, and it can cause the most damage. Spraying cleaner directly on the laminate surface creates pooled liquid that seeps through the seams, which can lead to permanent warping.
Spray onto your microfiber pad instead before applying it to your flooring. This way, you also get to control exactly how much moisture touches the floor.
Pro-tip: Pooled liquid is the top cause of laminate edge warping. A warped plank can't be fixed without replacing it.
Step 3: Mop in straight lines along the plank grain
Cleaning in a back-and-forth motion across the plank pushes dirt into seam gaps. You'll want to go along the lengths instead to lift the dirt out, and you'll get a cleaner finish with fewer streak lines when light hits the floor at certain angles.
Step 4: Dry immediately
Even a lightly damp pad leaves behind enough moisture to cause streaks or seep into seams if you leave it. Follow each section with a dry microfiber cloth in the same direction you just mopped, and the floor dries clean.
Step 5: Spot-check and address stains
Once the cleaning is done, crouch down and look across the floor with light behind you. Missed spots and streaks show up clearly at that angle. You can use a slightly damp pad with a pH-neutral solution to remove ink, scuff marks, or sticky residue.
Don't use abrasive sponges or magic erasers. While they might look gentle, they can strip the wear layer in patches.
How to Choose a Cleaner for Laminate Floors
You need a pH-neutral cleaner. The wear layer on laminate is only designed to tolerate products in the 6 to 8 pH range. Most common household cleaners sit well outside that, and the damage they cause is slow enough that you won't notice until the floor already looks dull.
What pH-neutral means, and why it matters
The pH scale runs from 0 (acidic) to 14 (alkaline), with 7 being neutral. Laminate's wear layer holds up fine between 6 and 8. Outside that range, your cleaner is slowly breaking down the protective coating with every use.
Most all-purpose cleaners are nowhere near that range. They are mostly formulated for tile, granite, or countertops, and are not suitable for laminate flooring. Make sure to check the label before you use anything on laminate, even if the cleaning product is marketed specifically for hard floors.
Ingredients to avoid
These ingredients show up in cleaners that people use all the time, and each causes a specific type of damage:
Vinegar is mildly acidic. One or two uses won't ruin your floor, but if you use it regularly, it can dull the wear layer permanently.
Oil-based soaps leave a residue that traps dirt and builds into a hazy film. Once it's on laminate, it's hard to get off without damaging the surface.
Ammonia strips the protective coating and breaks down the sealant between seams. It's the main ingredient in most glass and all-purpose cleaners.
Wax-based products are designed for traditional hardwood, not laminate. They build up unevenly and leave a streaky finish after you clean.
Bleach discolors the photo layer underneath the wear coating. Even diluted, it's too harsh for regular use.
The DIY cleaner that works for routine cleaning
A simple home mix handles most regular cleaning without any of the above issues:
1 gallon of warm (not hot) water
A few drops of mild dish soap (the kind labeled gentle or free and clear)
Stir gently and use it on your microfiber pad following the 5-step method. Plain warm water on a pad is often enough on its own for light cleaning.
If you'd rather use a commercial product, look for one labeled specifically "laminate floor cleaner" with a pH of 6 to 8 on the safety data sheet. The label should also state it leaves no residue.
Best Mops for Laminate Floors
A microfiber spray mop keeps moisture controlled and lifts dirt off the laminate flooring. If you choose the wrong mop, it dumps water on the floor and leaves it pooling.
The four types of mops for laminate
Mop Type
How It Works
Best For Laminate?
Microfiber spray mop
Built-in cleaner reservoir, fine spray, flat pad
Yes, the traditional gold standard
Steam mop
Heats water into steam, distributes through pad
No, heat and moisture warp the laminate surface
Wet/dry vacuum mop
Dispenses controlled water and immediately suctions it back
Yes, the modern alternative
Electric spin mop
Motorized rotating pads, manual water control
Sometimes, depends on water control
Table 1: Best Mop Types for Laminate Floors and Which Mops to Avoid
Why wet/dry vacuums are the modern solution for laminate floors
Traditional wet mops were designed for tile and sealed hardwood floors that tolerate water, but laminate floors are not designed for water tolerance over time.
In contrast, a wet/dry vacuum such as the Dreame H15 Pro Heat dispenses controlled water and suctions it back up in the same pass, so moisture never pools on the surface or seeps into the seams. The single-roller design also means you're not dragging dirty water around the way a traditional flat mop does after the first few passes. You get the cleaning benefit of wet mopping with the moisture-protection benefit of dry vacuuming.
[product handle="h15-pro-heat-wet-dry-vacuum" rating="4.7"]
The Dreame H14 Pro provides the same controlled-water approach, with fewer top-end features, but available at a lower price. This model is a suitable option for laminate-only homes that do not need carpet handling.
Dreame Take: Traditional wet mops leave too much water on laminate, which can cause warping over time. Our wet dry vacuums use just the right amount of water and immediately suction it up, so your floors get clean without staying wet. This is the optimal care for laminate floors.
Best Vacuums for Laminate Floors
Grit causes the most long-term wear on laminate. As such, having a good vacuum to remove the grit before it starts to scratch the laminate floor surface is another way you can preserve your floors longer.
You'll want to look for a vacuum with a soft brush roll, strong-enough suction to lift fine dust without scratching, and a design that does not leave scuff marks from rough edges or hard wheels.
Best Cordless Stick Vacuums for Laminate Floors
Cordless stick vacuums are the most convenient and efficient for a daily-use pick. They handle quick passes between mop sessions without needing a full cleaning routine each time. Some of the best cordless stick vacuums for laminate floors include the following:
Dreame Z30 is a premium cordless stick vacuum that delivers 310 AW of suction. It runs for up to 90 minutes on a full charge, and captures fine dust through the HEPA 14 filtration. If you have laminate floors and pets, you'll find that the included pet deshedding tool makes a noticeable difference during shedding seasons.
Dreame Z20 is a mid-range option that still gets the job done well. It offers 250 AW of suction and pairs with an optional auto-empty station that handles the bin between cleans. It doesn't include the pet deshedding tool, but can cover laminate-heavy homes well without flagship pricing.
Smaller homes that only need routine dust pickups will find the Dreame R10 a handy, entry-level option. It works well with laminate dust pickup, but it may not be the right choice if you have heavy shedders or a large floor area to cover.
Best Robot Vacuums for Laminate Floors
For homeowners who want to skip the hassle of pulling out a cordless stick vacuum every other day, you can consider using a robot vacuum to handle the daily grit removal automatically. On laminate flooring, that consistency is what protects the wear layer over time.
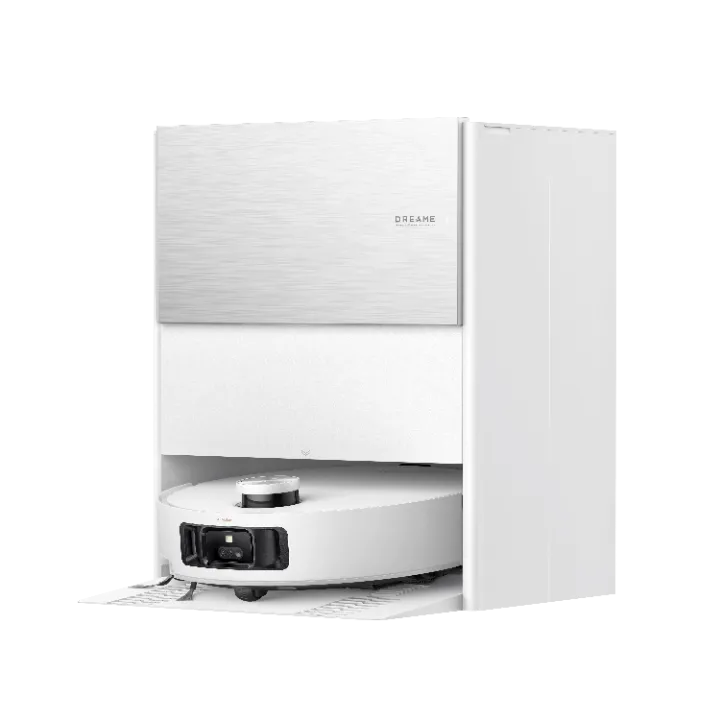
If you're looking for a premium robot vacuum to automatically clean a laminate-heavy home, you can consider the Dreame L60 Pro Ultra. At the time of writing, Vacuum Wars ranked it the second best robot vacuum in 2026, after the Dreame X60 Max Ultra Complete. The L60 Pro Ultra navigates your house with Smart Liftable LiDAR, which means it raises in open areas for precise 360° mapping and lowers automatically to glide under low furniture. This translates to more efficient cleaning paths and fewer missed spots.
The Dreame L50 Ultra is a great pick as well for laminate floors. It features a HyperStream™ Detangling DuoBrush, which handles human hair up to 30cm in length without tangling, eliminating the need to cut hair from brushes. This matters greatly on laminate where long hair tends to wrap around standard brush rolls and drag across the wear layer.
The Dreame L40 Ultra Gen 2 is a solid mid-range pick for mixed-flooring homes where laminate is the main surface. It pairs 25,000 Pa Vormax suction with a 0.41-inch mop lift for carpet cleaning, so the carpet stays dry while the rest of the floor gets cleaned. The all-in-one PowerDock empties the dustbin and self-cleans the mop between runs.
If your home mixes laminate with a few carpeted rooms, this guide on how robot vacuums clean carpets breaks down what to expect and how performance depends on the carpet pile and the vacuum's suction.
Best Wet/Dry Vacuums for Laminate
The Dreame H15 Pro Heat is also a lead pick here. It replaces both your daily vacuum and your traditional mop in a single tool, which makes it the most efficient setup for homes where laminate is the dominant flooring. The Dreame H14 Pro covers the same ground at a lower price point if the H15 Pro Heat is more than you need.
[product handle="h15-pro-heat-wet-dry-vacuum" rating="4.7"]
Check out Dreame's wet dry vacuum collection to decide which model is best for your routine cleaning needs.
Can You Use a Steam Mop on Laminate Floors?
Steam mops are not suitable for laminate floors. They combine the two things laminate handles worst: heat and moisture. Steam penetrates the seams between planks faster than liquid water does, and once it reaches the fiberboard core underneath the wear layer, the planks swell and lift. That damage is permanent and can't be reversed without replacing the affected planks.
Important: Most laminate manufacturer warranties are voided by steam mop use. Even if your laminate is labeled water-resistant, steam is a different test entirely. Check your manufacturer's care guide before using any steam-based product on your floor.
You might notice that some newer sealed laminates claim steam tolerance, but the risk of damage and the replacement costs are probably not worth it. If the seal weakens or the steam setting is too high, you're looking at the same permanent swelling. You can opt for microfiber spray mops which handle the same dirt without putting your floor at risk.
If you want a deeper clean without the warping risk that steam brings, the Dreame H15 Pro Heat dispenses water in controlled volumes and suctions it back immediately, so moisture never sits long enough to reach the seams. It's tough on messes yet gentle enough to protect your laminate floors.
How to Clean Very Dirty Laminate Floors
The method for a deep clean on laminate is the same 5-step routine, but you'll have to apply the routine more carefully and with slightly more cleaning solution. You'll still need to be careful with the moisture control and pH rules so that you don't damage the floor.
Here's how you can work through heavily dirty laminate floors:
Vacuum thoroughly first, and don't rush it. Heavy soil usually means heavy grit underneath. If you skip this and go straight to mopping, you'll scratch the floor during the clean. You may need to run the vacuum twice, including along the edges where dirt tends to collect.
Use a slightly stronger pH-neutral solution than usual. You'll still want to avoid vinegar, ammonia, and oil soaps. Since you're dealing with more dirt, you'll need to increase the dish soap in your DIY mix to about 1 tablespoon per gallon of warm water and use a fresh microfiber pad.
Work in sections and don't let the solution sit. The cleaning agent can leave streaks if it dries before you wipe it. To avoid streaking, you should apply the solution to one section, wipe it down, and move to the next before going back.
Rinse with clean water on a fresh pad after the first pass. This step removes the residue that the cleaning solution loosened. Otherwise, your floor will look hazy once it dries, even if it felt clean during mopping.
Dry each section immediately. A dry microfiber cloth or your wet/dry vacuum's drying mode finishes the job and prevents moisture from sitting in the seams.
Let's say you're working on specific stains on your laminate floors. You may find the tips below helpful without damaging the wear layer:
Ink responds well to rubbing alcohol dabbed on a microfiber cloth. Lift the stain rather than scrubbing it, or you'll spread it further.
Grease comes up with a pH-neutral degreaser diluted in water, applied to the pad and wiped immediately. However, remember that you can't let the degreaser dwell on the surface.
Scuff marks usually rub out with the flatter side of a tennis ball. It sounds odd, but it works without touching the wear layer.
Sticky residue like gum or candy hardens with a few minutes of ice on top, then lifts cleanly with a plastic scraper. You should never use a metal scraper on laminate due to the scratching risks.
How to Clean Fake Wood / Faux Wood Floors
"Fake wood" and "faux wood" usually mean laminate, but they can also describe luxury vinyl plank (LVP) or engineered hardwood. The cleaning method depends on which one you have since each one behaves differently when it gets wet.
Here's how you can tell them apart:
Laminate has a fiberboard core with a photo image of wood covered by a clear wear layer. It might sound slightly hollow when you tap it. You can also look at the cut edges; you'll see a brown fiberboard core rather than actual wood.
Luxury vinyl plank (LVP) is fully synthetic and feels slightly softer underfoot. The edges are usually gray or black rather than brown, and the planks are more flexible than laminate.
Engineered hardwood has a real wood veneer over a plywood core. If you look at the edges, you'll see distinct wood grain layers rather than a uniform core material.
The 5-step method covered earlier is what you need for laminate floors. If you have LVP, the cleaning approach is similar but your floor tolerates slightly more moisture and is less sensitive to pH swings. Products designed for sealed hardwood apply if you have engineered hardwood; these floors tolerate higher moisture levels and oil-based soaps that would damage the laminate's wear layer.
When you're not sure what you have, treat it as laminate. The laminate method is the most conservative of the three and won't cause damage to LVP or engineered hardwood if you apply it to either one by mistake.
7 Mistakes to Avoid When Cleaning Laminate Floors
Most laminate damage builds slowly and stays invisible until it's too late to reverse. By the time you notice the wear layer dulling or the edges lifting, the damage has already been happening for months. Below are the common mistakes that homeowners with laminate floors may not initially know.
1. Spraying cleaner directly on the floor
If you've been spraying cleaner straight onto your laminate, you're not alone. It's the most natural thing to do. The problem is that pooled liquid seeps into the seams between planks and warps the edges from underneath, and that kind of damage shows up long after the habit started. Instead, you should spray the cleaner onto your microfiber pad to get the same clean result without putting the floor at risk.
2. Using vinegar as a regular cleaner
Vinegar is one of those cleaning tips that gets passed around a lot, and it's not completely wrong. A light use here and there won't ruin your floor. However, if you use it regularly over months, the mild acidity slowly dulls the wear layer. You should always use a pH-neutral cleaner for the same streak-free finish without that trade-off.
3. Applying oil-based soaps
Oil-based soaps feel like a natural choice for wood-look floors, but they leave behind a residue that traps dirt and builds into a hazy film over time. Once that film settles into laminate, it's hard to remove without damaging the surface underneath.
4. Using a steam mop without checking first
If you already own a steam mop, check your laminate manufacturer's care guide before you use it on your floors. Heat and moisture together are the hardest combination for laminate to handle, and most manufacturer warranties are voided by steam use, even on floors labeled water-resistant.
5. Leaving water on the surface for too long
Spills happen, and laminate can handle a quick one as long as you wipe it up promptly. If you leave moisture for longer than 10 to 15 minutes, that's enough time for the moisture to seep into the seams. Keeping a dry microfiber cloth nearby makes it easy to deal with spills before they become a problem.
6. Using abrasive scrubbers on tough stains
When a stain won't budge, reaching for a magic eraser or a scrubbing pad feels like a logical next step. They do remove the stain, but they also strip the wear layer in patches that show up as permanent dull spots afterward. A slightly damp microfiber pad with your pH-neutral solution, applied with a bit of patience, handles most tough stains without touching the wear layer.
7. Running a beater brush vacuum on bare laminate
Your vacuum's beater brush is designed to agitate carpet fibers, but it's not suitable for hard floors. On laminate, it leaves faint scratch lines over time that are most visible in high-traffic areas near doors and the kitchen. You can switch to a soft brush roll setting, or use a vacuum designed for hard floors to keep your surface scratch-free.
The Bottom Line on Cleaning Laminate Floors
Laminate floors are more forgiving than most people think, as long as you respect the two things it's sensitive to: moisture and pH. Keep water controlled, use the right cleaner, and your floors will hold up well for years. The right vacuum and mop make both of those things easier to manage consistently.
Browse the Dreame wet and dry vacuum collection to see which model fits your home, or take a closer look at the Dreame H15 Pro Heat. It dispenses water in controlled amounts and suctions it back in the same pass, so you get a mop-style clean without the standing water that warps laminate.
Frequently Asked Questions
How often should you clean laminate floors?
You should vacuum or dry sweep daily in high-traffic areas, especially if you have pets. A damp mop with pH-neutral cleaner once a week works well for most homes. Spills should be wiped up immediately, regardless of your regular schedule.
Can you mop laminate floors with vinegar?
Using vinegar occasionally won't cause immediate damage, but regular use can dull the wear layer over time. A pH-neutral cleaner gets you the same streak-free result without the long-term trade-off.
What's the best way to clean very dirty laminate floors?
Vacuum thoroughly first, then use a slightly stronger pH-neutral solution on a microfiber pad. Work in sections, rinse with clean water on a fresh pad, and dry immediately. Make sure to avoid anything abrasive or acidic regardless of how dirty the floor is.
Can you use a Swiffer on laminate floors?
The dry pads work fine for quick dust pickup between proper cleans. The wet pads release more liquid than laminate prefers, so if you use them, make sure that you also dry the floor immediately after each pass to prevent moisture sitting in the seams.
How to clean laminate floors without streaks?
Spray your cleaner onto the microfiber pad rather than the floor and use a pH-neutral solution. You should also dry each section immediately after mopping. Streaks usually come from the wrong cleaner or moisture that sat too long before drying.
Discover which robot mop technology delivers better real-world cleaning results. Compare dual rotating mop systems versus vibrating flat mops across common household scenarios, from coffee spills to pet messes, and learn which system best matches your home's specific cleaning needs.
Going on vacation should be a time of relaxation and enjoyment. But the thought of returning to a messy house can cast a shadow over your holiday bliss.
That's where pre-vacation cleaning comes in. A clean house before vacation not only ensures a welcoming return but also contributes to home security while you're away. But what about during your vacation, especially if you're enjoying a staycation? And how do you tackle the post-vacation cleanup efficiently?
This guide will provide you with essential house cleaning tips before, during, and after your vacation, helping you maintain a clean and organized home no matter your holiday plans.
Pre-Vacation Cleaning Tips
Preparing your home before vacation is crucial for peace of mind. It ensures you return to a comfortable space. Begin by creating a comprehensive checklist. This helps ensure no crucial tasks are overlooked.
Start with high-traffic areas. Focus on the kitchen and bathroom, as these spaces accumulate the most grime. Addressing these can prevent unwelcome odors and messes.
Don't forget to do your laundry before departure. Fresh clothes and linens await, minimizing stress upon return. Completing these tasks promotes a smooth post-vacation transition.
Make sure to dispose of expired food items and take out the trash. This prevents pests and unpleasant smells from greeting you. Secure your home by locking doors and windows, and set light timers for added security.
Here's a quick list of priority areas to clean before leaving:
Kitchen appliances and counters
Bathrooms
Laundry and linens
Trash and refrigerator
General tidy-up
Declutter Your Space
Decluttering is the first step in pre-vacation cleaning. A tidy home reduces stress, offering a serene space to return to. Start with visible surfaces and work your way to hidden areas.
Sort items into keep, donate, and discard piles. This minimizes clutter and makes your home more organized. A clutter-free environment enhances the overall feel and security of your home.
Deep Clean Tricky Areas
Deep cleaning is an integral part of pre-vacation preparation. Target areas that need extra attention but are often neglected. Focus on kitchen appliances and bathroom tiles, as grime tends to accumulate there.
Remember to dust surfaces and clean floors thoroughly. This reduces dust build-up and creates a more inviting space.
Vacuum carpets and floors
Clean kitchen appliances inside out
Scrub bathroom fixtures and tiles
For deeper cleans before (or even after) your trip, wet and dry vacuums, like the Dreame H15 Pro or H14, are a huge help. They can easily tackle liquid spills, mud, and fine dust on hard floors and carpets. They’re great for homes with kids, pets, or unpredictable messes. Many models now feature self-cleaning brush rolls and drying functions to keep things hygienic with minimal effort.
Secure Your Home
Security is paramount when you're on vacation. A clean exterior conveys that the home is well-maintained, deterring potential burglars.
Here are the tips to follow:
Ensure all doors and windows are locked tightly.
Consider setting light timers to mimic your typical patterns of activity. This makes it seem like someone is home, enhancing security.
Communicate with a neighbor about your absence. They can help watch over your home or collect mail if needed.
Every precaution taken contributes to peace of mind.
Pro-tip: If you use a robotic vacuum, like the Dreame X50 Ultra or X40, you can schedule a full floor clean the morning of your departure. These vacuums come equipped with powerful suction and mop functions to leave your floors spotless, even while you finish packing.
How to Maintain a Clean House During Your Vacation
While enjoying your getaway, you can still ensure cleanliness at home. Utilize tools and planning to maintain order. Smart devices can play a key role here.
Use Automation and Smart Devices
Smart home tech is your best ally while you’re away. Here are the devices that help monitor and maintain your space remotely:
Robotic vacuums will help keep your space tidy. For instance, the Dreame X40 Ultra Complete offers hands-free floor cleaning with automatic dust emptying, mop cleaning, and recharging, so your home stays clean without lifting a finger. Schedule cleanings via the app to maintain dust-free floors while you're away.
Smart air purifiers will help trap dust, pet dander, and odors with a smart purifier. Set cleaning schedules or activate air quality sensors remotely to maintain fresh, allergen-free air while you’re away.
A smart thermostat lets you adjust temperature and humidity from anywhere: great for keeping pets, plants, or wood furniture comfy while saving energy.
Arrange Proper Pet Care
If your pets are staying home, prep their care in advance. A pet sitter is ideal, they can feed, play, and clean up after your furry friends. But if you're going DIY:
Set up an automatic feeder with portion control
Use a self-cleaning litter box or indoor potty system
Schedule your robot vacuum to handle fur and litter scatter
Consider a pet camera with speaker/mic to check in and say hello (but some robot vacuums have this feature too)
Pro-tip: Worried about robot vacuums and pets? Don’t be! Dreame vacuums are designed to navigate around animals and even avoid messes. Want to know more? Check out our guide on how to use robot vacuums in pet-friendly homes.
Don’t Forget Your Plants
For houseplants, use self-watering systems or request a friend to care for them. This prevents wilting and maintains the freshness of your home's air.
Post-Vacation Cleaning Tips
Returning home from vacation often means facing a messy house (especially if you didn't follow the tips above). A structured plan can swiftly restore order. Focus on key areas first to minimize stress and increase efficiency.
Prioritize
Start with a broad overview of your space. Make a priority list to tackle the most critical tasks. This organized approach ensures nothing gets overlooked.
Here's a suggested order to maintain a clean return:
Unpack luggage and sort items
Begin laundry immediately
Wipe down counters and kitchen surfaces
Vacuum or sweep high-traffic areas
Dreame Take: The Dreame X50 Ultra makes post-vacation cleaning easier. Its long battery life and strong brush design help collect dust and debris left behind while you were away.
Tackle the Laundry
One of the most daunting tasks is post-vacation laundry. Begin sorting dirty clothes as soon as you unpack. By quickly starting a load, you'll prevent a laundry pileup.
Separate items into categories to maximize efficiency. Consider washing essentials like towels and bedsheets first, as these items often require immediate use after your return.
Refresh Your Living Space
A fresh environment is key to settling back in comfortably. Open windows to circulate air and reduce stale odors. This simple action invigorates your home with a refreshing breeze.
Final Cleaning Checklist for Before, During, and After Vacation
A checklist is essential for staying organized. It ensures you don't overlook important tasks before leaving. Consider it your go-to guide for a seamless clean-up experience.
To maximize its effectiveness, tailor the checklist to fit your needs. Focus on priorities unique to your home and vacation plans. Regularly updating the list helps in managing unexpected events.
Here's a basic checklist to get you started:
Before Vacation:
Declutter living spaces
Deep clean kitchen and bathrooms
Empty trash and clean refrigerator
Schedule your robot vacuum to clean while away
During Vacation:
Use smart devices for monitoring
Arrange for pet and plant care
Check robot vacuum notifications for completed cleanings
After Vacation:
Tackle laundry promptly
Refresh and air out rooms
Vacuum high-traffic areas
Embracing the Clean Home Mindset
Developing a clean home mindset transforms your living environment. It starts with commitment and consistent practice.
By focusing on efficiency, cleanliness becomes second nature. Smart cleaning tools like Dreame’s robot vacuums can give you time back before, during, and after your vacation, so you can focus on relaxing, not scrubbing.
Can't decide between cordless & corded vacuums? Our guide compares power, features & price to help you find the best vacuum cleaner for your lifestyle & home.























 Robot Lawn Mowers





















 Humidifiers
















 Smart Door Lock


 Australia
 中国大陆
中国大陆 日本
日本


 Türkiye


 Italia
 Netherlands
 Belgium
 Greece
 Polska
 Norway
 Sweden
 Finland
 Denmark
 Hungary
 Czechia
 Slovenia
 Croatia
 Switzerland
 United
Kingdom
United
Kingdom
 Canada


 Colombia


![Carpet Cleaner Solutions for Pets: What Works and Why [2025 Guide]](http://ca.dreametech.com/cdn/shop/articles/0_b7696f3f-f439-4880-ad72-2ee63d725b64_2048x2048.png?v=1752810350)
![Carpet Cleaner Solutions for Pets: What Works and Why [2025 Guide]](http://ca.dreametech.com/cdn/shop/articles/0_b7696f3f-f439-4880-ad72-2ee63d725b64_{width}x.png?v=1752810350)


