Getting a robot vacuum that also mops can feel like a game-changer until you realize there are two very different systems out there: roller mops and mop pads. Both promise sparkling floors, but they work in unique ways. Choosing the wrong one could leave you with streaks on tile, damp carpets, or extra upkeep you weren’t expecting.
In this guide, we’ll break down exactly how each system works, their strengths and trade-offs, and which Dreame models use them best. By the end, you’ll know whether a roller mop or a mop pad robot vacuum is the smarter fit for your home, lifestyle, and floors.
Roller Mop or Mop Pad? The Basics
Before diving deep, let’s clear up what these terms mean.
Roller Mop Robot Vacuum: Uses a continuous roller that spins against the floor. It sprays fresh water, scrubs, squeezes out dirty water, and refreshes as it goes. Think of it as a mini floor-washing machine. Advanced models like the Dreame Aqua10 Ultra Roller use AquaRoll™ mopping—a fresh-water system that sprays, scrubs, squeezes out dirty water, and refreshes the roller in real time, preventing you from mopping with dirty water.
Mop Pad Robot Vacuum: Uses flat pads that wipe the floor. Depending on the model, these pads either vibrate for scrubbing or spin to add pressure. Models like the Dreame X50 Ultra feature dual rotary mops with MopExtend™ RoboSwing Technology to reach tight edges with focused scrubbing power. Many modern pad systems also include smart features like auto-lift to keep carpets dry and edge-extending technology for better coverage.
Both can handle everyday dust and spills. But the differences show up when you look at deep stains, edges, maintenance, and carpets.
How Each Mop System Works (Mechanics 101)
Understanding the mechanics behind each system helps explain their performance differences.
Robot Vacuum with Roller Mop
A roller mop robot vacuum operates like a mini car wash for your floors. The process is continuous and self-cleaning:
Spray: Fresh water mists onto the roller right before it touches the floor.
Scrub: The roller spins at high speed (e.g., 100 RPM on the Dreame Aqua10 Ultra Roller), applying significant pressure (9-11 N) to agitate and loosen stuck-on grime.
Squeeze: A built-in scraper squeegees dirty water out of the roller into a dedicated waste tank.
Refresh: The system immediately soaks the roller with fresh, clean water for the next pass.
This closed-loop system ensures you're never just pushing dirty water around.
Dreame Take We built the Aqua10 Ultra Roller to answer one simple question: why settle for cleaning with dirty water? The world’s first AquaRoll™ mopping system uses a continuous cycle of fresh water. Every inch of your floor is cleaned with pure water, not residue from the last swipe, so you can trust that what feels clean, truly is.
Robot Vacuum Mop Pad Types
Pad systems use a different approach, with two common subtypes:
Vibrating Plate Single Pad: A single, wide pad vibrates at high frequency. This offers broad coverage and is excellent for daily dust and light spills, but it provides less aggressive scrubbing power.
Dual Spinning Pads: Two circular pads rotate rapidly, often in opposite directions. This creates higher local pressure, making them better at tackling scuffs and dried-on spots.
How Well Do They Clean? A Performance Showdown
The real test is on your floors. Here’s how the two systems compare in common scenarios.
Cleaning Scenario
Robot Vacuum with Roller Mop
Robot Vacuum with Mop Pads
Stuck-On, Greasy Messes
Excel. The combination of high-pressure scrubbing, continuous fresh water, and hot-water wash cycles makes rollers unmatched for tackling kitchen grease, dried syrup, or tracked-in mud.
Good. Dual spinning pads can handle many messes but may require multiple passes or more manual pre-soaking for the toughest, dried-on stains.
Edge & Corner Reach
Varies. The cylindrical shape can leave a small, uncleaned gap against the walls. However, many models, like the Aqua10 Ultra Roller, feature Detangling SideReach™ & MopExtend™ Tech for getting exceptionally close (~0.2in (5mm)) to edges.
Excellent (with the right features). Models with advanced software can twist and extend pads into corners. The Dreame X50 Ultra's MopExtend™ RoboSwing Technology allows it to clean up to 1.6in (4cm) into edges and nooks.
Water Control & Floor Safety
Precise. Advanced systems control water spray precisely, and features like Dreame’s AutoSeal™ Roller Guard automatically close over carpets to prevent any moisture transfer.
Generally Safe. Pads are typically damp, not wet. Automatic mop lifting (e.g., ~0.4in (10.5mm on the X50 Ultra) instantly raises the pads when a carpet is detected, ensuring absolute dryness.
Hard Floor Daily Maintenance
Superior. The roller system is designed for a deeper, wash-like clean every time, effectively replacing your traditional mopping routine.
Excellent. Perfect for daily dusting, light spills, and maintaining already-clean floors with quiet efficiency.
Carpet & Rug Safety
Excellent. Features like Dreame’s automatic AutoSeal™ Roller Guard and roller lifting ensure carpets stay completely dry and protected.
Excellent. Automatic mop lifting is a standard and highly reliable feature on most premium pad-based models.
Which Is Easier to Maintain?
Long-term upkeep is a crucial factor in your decision.
Roller Mop Systems
Daily Effort: Low. The dock's hot-wash and hot-air drying cycle does the heavy lifting, sanitizing the roller and preventing mildew and odors automatically. You rarely need to touch the roller itself.
Long-Term Care: The roller is a durable component but may need replacement after extensive use. Dock filters and water lines require occasional rinsing to prevent mineral buildup, especially if you use the optional auto-drain water hookup kit.
Mop Pad Systems
Daily Effort: Moderate. Reusable mop pads need to be rinsed after runs or swapped out for a fresh one. However, docks with 176°F (80°C) hot water washing and drying (like on the Dreame X50 Ultra) keep them fresher longer.
Long-Term Care: Very simple. Pads are machine-washable and typically need replacing every 3–6 months. The overall system has fewer mechanical parts involved in the mopping process.
Docking & Self-Cleaning: The Command Center
The dock is the brain of the operation, and both systems offer impressive automation.
Roller Docks (e.g., Aqua10 Ultra Roller): These are comprehensive cleaning stations. They often feature 212°F (100°C) ThermoHub™ Mop Self-Cleaning for a deep, sanitary scrub; 158°F (70°C) hot air drying; and advanced options like auto-refill, auto-drain, and even dual-solution dosing (e.g., a dedicated pet odor solution).
Pad Docks (e.g., Matrix10 Ultra): Modern pad docks are highly capable. They include hot water washing, hot air drying, auto water refilling, and sometimes even several types of mops being changed automatically based on the type of floor to clean. Features like Dreame’s AceClean™ DryBoard ensure the washboard itself stays clean and dry after every cycle.
Which One Should You Choose? Your Decision Guide
Stop thinking in terms of features and start thinking in terms of your lifestyle. Here’s how to choose.
Choose a Robot Vacuum with Roller Mop If:
Your floors deal with regular, tough messes from kids, pets, or cooking.
You want to replace your traditional mopping fully.
You prefer maximum automation and the lowest daily manual effort.
Your Priority: Deep cleaning power over everything else.
Our Recommendation: The Dreame Aqua10 Ultra Roller is the pinnacle of this technology, designed for whole-home adaptive cleaning. Read our review of Aqua10 Ultra Roller to find out pros and cons of this model.
Choose a Robot Vacuum with Mop Pads If:
You need excellent daily maintenance for dust, light spills, and footprints.
Quiet operation and lower consumable costs are important to you.
Your home has many complex edges, corners, and low-profile furniture to clean under.
Your Priority: Versatility, precision, and value.
Our Recommendation: The Dreame X50 Ultra offers incredible intelligence and cleaning prowess with its dual spinning pads and industry-leading obstacle avoidance.
For more on the value of mopping robots, check out our blog: Are Mopping Robot Vacuums Worth It?
FAQs
Is a robot vacuum with a roller mop better than pads?
It depends. Roller mops are best for grease and heavy messes, while mop pads are great for daily light cleaning.
Should a robot vacuum have a big roller (main brush)?
Yes, a larger roller helps with suction and debris pickup, but for mopping, the cleaning mechanism matters more.
Are reusable mop pads worth it?
Yes, reusable pads save money in the long run, especially if you don’t mind rinsing or machine washing them.
Which is easier to maintain?
Roller mops automate more cleaning but need dock care. Pads are cheaper but require more hands-on washing.
Can either type keep carpets safe automatically?
Yes, roller systems use carpet guards, while mop pads rely on mop-lift tech.
Hardwood floors look beautiful, but they are also unforgiving. Anyone who lives with them knows the three constant worries: tiny scratches from abrasive debris, dust that settles deep into plank seams, and the ever-present risk of water marks if moisture sits too long.
These challenges haven’t changed, but thankfully, the technology we use to care for wood floors has.
In 2026, finding a good vacuum cleaner for hardwood floors matters more than ever. It's not just about power; knowing how to choose a robot vacuum for hardwood floor protection is key. Modern machines come with stronger suction, controlled mopping systems, and AI sensors that recognize delicate surfaces. With the right features, your vacuum can clean efficiently without harming your hardwood’s finish or structure.
The 5 Must-Have Vacuum Features for Hardwood Floors in 2026
To safely clean hardwood floors without scratches, dents, or water damage, a vacuum must meet these five non-negotiable requirements.
1. Soft Roller Brushes
Soft roller brushes are essential if you want to clean hardwood without leaving visible marks or long-term surface damage. Soft, fluffy or velvet rollers lift fine dust while gliding smoothly over the floor, protecting polyurethane and oil finishes—especially matte coatings that show every scratch.
Standard stiff-bristle brushes are not suitable for hardwood. They drag grit across the surface and can create micro-scratches that dull the finish over time, even when used gently.
2. Scratch-Free Rubber Wheels
Rubberized, cushioned wheels prevent track marks and friction damage on hardwood floors. They roll smoothly across the surface and reduce pressure points, making them especially important for softer woods like pine.
Standard rugged plastic wheels create unnecessary risk. Over time, they can leave visible tracks, fine lines, or compression marks—damage that accumulates slowly and is difficult to reverse.
3. Floating Brush Housing
A floating brush assembly adjusts itself to maintain contact with the floor without applying downward pressure. This protects softer species and prevents denting along plank edges. Hardwood floors are rarely perfectly level, so fixed brush housings can dig in or miss spots entirely.
4. Precision Water Control
If you’re shopping for a vacuum mop for hardwood, water control isn’t a nice-to-have, it’s the safety feature. Look for models with a pump-driven, metered water system that keeps the pad consistently damp, not wet, so you can clean without risking swelling or warping.
By contrast, gravity-fed mop systems tend to drip unevenly and can oversaturate certain spots. That inconsistency is risky on wood, where even small moisture imbalances can lead to warping over time.
Important Unsealed or waxed hardwood absorbs water quickly. Always test in an inconspicuous corner before using a wet and dry vacuum on unsealed flooring to ensure the moisture levels are safe.
5. Suction Power ≥ 6,000Pa
Strong suction is critical for actually removing dirt from hardwood floors—not just moving it around. A suction rating of at least 6,000Pa pulls dust, grit, and fine debris out of the narrow gaps between planks, where particles would otherwise remain trapped.
Nice-to-Have Features That Make Hardwood Vacuuming Easier
Now that you’ve got the non-negotiables covered, these nice-to-have features are what make hardwood cleaning feel genuinely easy. They’re not required for safe cleaning, but they reduce daily friction, prevent missed debris, and keep your floors preserved, looking better with less effort.
Auto Surface Detection & Mop Lift
Some robot vacuums and wet-dry mop vacuums can detect transitions from tile to hardwood or carpet and automatically lift the mop pad, typically 10–20 mm (0.4–0.8 in). This prevents unnecessary moisture from touching the wood and eliminates cross-contamination.
Hot-Water Mop Washing at the Dock
High-temperature pad cleaning at the base station—typically 140–194°F (60–90°C)—sanitizes the mop using heat. The mop dries faster, resists odor, and kills bacteria without you needing to add extra moisture to your floors during the cleaning cycle.
Dirt-Detection for Grooved Planks
Many modern vacuums use acoustic or optical sensors to detect dirt density. When passing over deep grooves or hand-scraped planks, the vacuum boosts suction automatically, targeting the spots where dust hides most.
Wood-Grain Following Mode & Edge-Stretch Arms
Some devices adjust their movement pattern to run parallel to the grain, helping the brush head sweep debris along natural grooves. Extendable side brushes help reach baseboard edges where lint gathers.
AI Object Recognition
AI-based object recognition allows a robot vacuum to identify cables, socks, toys, or pet waste before contact. Avoiding these objects helps prevent scratches, smearing, and debris from being dragged across hardwood surfaces, reducing unnecessary wear over time.
Dreame Take We view AI as a way not just to improve cleaning, but to gently protect your floors. By steering clear of hard objects that could harm the finish, our vacuums ensure your investment stays pristine.
Comparison Table
Feature
Upright Vacuum
Cordless Stick
Wet Dry Vacuum (Floor Scrubber)
Robot Vacuum & Mop
Canister Vacuum
Robot Vacuum (Vac-only)
Soft Roller Brushes
Select models support hardwood heads
✓Quite common
✓roller-based washing heads
✓ (rubber/soft rollers)
△ (hard-floor heads)
✓
Scratch-Free Rubber Wheels
Select models
✓
✓
✓
✓
✓
Floating Brush Housing
Select models
△
✓
✓
△
✓
Precision Water Control
✕
✕
✓
✓
✕
✕
Suction Power (range)
~15,000–25,000 PaHigh, corded
~12,000–28,000 PaMid–high
~8,000–22,000 PaBalanced for wash + extract
~2,000–30,000 Pa
~18,000–30,000 PaHigh, corded
~2,000–12,000 Pa
Auto Surface Detection & Mop Lift
✕
✕
✕
✓
✕
✕
Hot-Water Mop Washing at the Dock
✕
✕
✓Select models
✓Select models
✕
✕
Dirt Detection (optical/AI)
✕
Sensor-based
Liquid/soil sensing
✓
✕
✓
Wood-Grain Following Mode
Manual
Manual
Manual
Auto
Manual
Auto
Edge-Stretch Arms
✕
✕
✓Select models
✓Select models
✕
✓Select models
AI Object Recognition
✕
✕
✕
✓
✕
✓
Our Best Vacuums for Hardwood Floors in 2025
Choosing the right vacuum cleaner depends on your home layout, wood floor sensitivity, and daily cleaning habits. Whether you need a powerful robot vacuum and mop or a handheld device, here is how to match the right tool to your home.
Best Value for Everyday Spills: Dreame H12 Pro
If you want something budget-friendly and easy to use, the H12 Pro Wet-Dry Vacuum is the best choice. It provides steady suction and controlled damp cleaning, making it ideal for small homes with sealed hardwood.
[product handle="l50-ultra-robot-vacuum" rating="4.8"]
Best for Pet Owners: L50 Ultra Robot Vacuum
If you have pets that shed daily, the L50 Ultra is a reliable hands-off solution. Its soft brush and strong suction lift hair without scratching, and the AI object avoidance prevents dragging toys or bowls across the floor.
[product handle="l50-ultra-robot-vacuum" rating="4.8"]
Best for Moisture-Sensitive Floors: H15 Pro Heat
For solid hardwood that is sensitive to water, the H15 Pro Heat Wet-Dry Vacuum offers precise water control and fast heat-assisted drying. This protects the planks from swelling or warping.
[product handle="h15-pro-heat-wet-dry-vacuum" rating="4.6"]
Best for Mixed Flooring: H15 Pro CarpetFlex
If your home features both wood and carpet, the H15 Pro CarpetFlex seamlessly switches between the two surfaces without requiring tool changes.
[product handle="h15-pro-carpetflex-wet-dry-vacuum" rating="5"]
Ultimate Daily Care: Matrix10 Ultra
For completely hands-off care, the Matrix10 Ultra automatically vacuums, lifts its mop when needed, and navigates hardwood safely.
[product handle="matrix10-ultra-robot-vacuum" rating="5"]
Everyday Hardwood Floor Care Tips
Hardwood floors stay beautiful only when both the vacuum and the floor are maintained properly. Knowing how to clean hardwood floors correctly prevents long-term damage.
Clean the main brush weekly. Dirt caught in bristles or wheels acts like sandpaper. Removing debris prevents micro-scratches and keeps the vacuum gliding smoothly.
Control the water. Use the lowest water setting for mopping—or disable mopping entirely. Even sealed hardwood should never be exposed to excessive water. A slightly damp mop is safe; a wet one is not.
Ventilate the dock. Keep the charging dock in a ventilated spot. Base stations can trap humidity while pads are drying. Good airflow prevents moisture from accumulating under your flooring over time. For more maintenance advice, check our clean wood floors tips.
Use pH-balanced floor solutions. Acidic substances like vinegar can weaken a floor’s finish. Their low pH can slowly erode the protective coating, reducing shine and potentially dulling the surface over time.
Pro-tip Stick to specialized solutions, like the Dreame Wood Floor Care Solution, which are pH-balanced to clean without etching or dulling the top layer.
Conclusion
Taking care of hardwood floors is a balancing act: you want powerful cleaning without risking scratches or water damage. With the right vacuum—one that uses soft brushes, gentle wheels, controlled water output, and smart AI—you don’t have to compromise.
In 2026, your vacuum should protect your floors as it cleans them. When the technology works with your wood instead of against it, you can enjoy spotless floors without the constant fear of damaging your investment.
Ready to upgrade your floor care routine? Explore our full collection of robot vacuums for hardwood floors and protect your investment today.
FAQ
Will a robot vacuum definitely scratch my hardwood floors?
Not if you choose the right model. A modern robot vacuum is safe for hardwood floors if it uses rubber wheels and soft brushes designed for wood. However, scratches can occur if hard debris (like a small rock) gets stuck in a wheel, so checking your vacuum's wheels weekly is essential.
Is it better to vacuum or sweep hardwood floors?
Vacuuming is generally superior. Sweeping often pushes fine dust into the air or down into the cracks between planks. A vacuum with strong suction lifts this dust out completely, preventing build-up in the seams.
What should you not use on hardwood floors?
Avoid steam cleaners, which force moisture deep into the wood, causing warping. Also, stay away from stiff-bristled brooms, vinegar (which is acidic and dulls the finish), ammonia, and bleach.
Is dish soap ok for wood floors?
We do not recommend it. Dish soap often leaves a sticky residue or film that actually attracts more dirt and makes the floor look dull. It is safer to use a dedicated, pH-neutral wood floor cleaner.
How often should you mop hardwood floors?
For most homes, a damp mop once a week is sufficient. If you have a robot vacuum with precise water control, you can run it more frequently (e.g., every few days) because it uses very little moisture that dries almost instantly.
Why are my floors still dirty even after mopping?
This usually happens for two reasons: using dirty water (redistributing dirt) or using too much detergent (leaving a sticky residue). Systems like the Dreame L50 Ultra or Matrix10 Ultra solve this by washing the mop pads with fresh, hot water at the station, ensuring you never clean with a dirty mop.
You start vacuuming, expecting clean floors, and instead, a puff of dust blows out of the machine. It’s frustrating, right? Not only does it undo your hard work, but it also pollutes your indoor air. Wondering why my vacuum is blowing out dust. When your vacuum blows out dust, it releases fine particles, mold spores, and allergens straight back into your living space, hurting your home’s air quality.
This problem isn’t just about the mess. It’s a sign that your vacuum has lost suction, meaning it’s no longer maintaining proper negative pressure. The cause? A blockage in airflow or a break in the sealed system. In this guide, we’ll pinpoint exactly why your vacuum is spitting stuff back out and show you how to fix it permanently.
Why Is My Vacuum Spitting Stuff Back Out?
If your vacuum has also lost suction, you may want to read our related guide on why your vacuum has lost suction. Here are a few reasons why your vacuum spits out dirt.
An Overfilled Dust Bag or Canister
A packed dust container is the most common culprit. When the bag or bin is full, air can’t move freely through the system. This back pressure forces debris back out through the nozzle, right into your clean space.
The fix is simple: empty or replace the dust in the vacuum cleaner immediately. Make this a habit, especially after vacuuming fine dust such as drywall, flour, or fireplace ash, which fills the canister faster than you might expect.
Improperly Sealed Components
Even a small gap between the canister or dust cup and the body can allow dust to escape. Misaligned seals or loose latches create tiny air leaks, letting debris bypass the filter completely.
Inspect every connection carefully. The canister or bag collar should click firmly into place with no visible gaps. After reattaching, run the vacuum briefly to check for escaping air around seams or joints.
Hose and Duct Clogs
Large debris, tissue, or pet hair can form a dense blockage inside the hose, stopping airflow and causing backflow.
Here’s how to fix a vacuum that spits out dirt:
Always unplug the vacuum.
Use a non-sharp object, like a broom handle, to gently push the clog out. Avoid metal hangers; they can puncture the hose.
If the blockage feels sticky, detach the hose and soak it in warm, soapy water or a vinegar and baking soda mix. Rinse thoroughly and hang it vertically until it’s completely dry.
Pro-tip Hold one end of the hose toward a bright light. If you can clearly see the light through the other end, the hose is clear. If not, there’s still a blockage inside.
Brushroll and Nozzle Impedance
A jammed brushroll can scatter dirt instead of collecting it. Tangled hair or fibers wrap around the brush, stopping it from spinning and blocking suction flow.
Carefully cut away the tangled material with scissors or a seam ripper. Once cleared, spin the brushroll by hand; it should move freely.
Saturated or Missing Filters
Your vacuum’s filters are its lungs. When they’re clogged, air can’t pass through properly, forcing dust out through leaks or the exhaust. If you’ve noticed unpleasant smells too, check our full guide on why your vacuum smells.
What to do:
Replace HEPA filters on schedule (most aren’t washable).
Wash foam or sponge filters with water, but only reinstall them once they’re fully dry.
Make sure filters sit tightly in place to prevent air leaks.
Important Never reinstall a damp filter. Moisture can grow mold, damage the motor, and void your warranty. Let washable filters dry for at least 24 hours before use.
Worn Gaskets and Internal Seals
Rubber gaskets naturally wear out over time from heat and pressure. When this happens, they can’t maintain a tight seal, and fine dust starts escaping from the body seams, even if your filters are new.
If you notice dust leaking directly from the housing, it likely needs professional service to replace internal seals.
Drive Belt and Mechanical Failure
A broken or loose drive belt stops the brushroll from turning, meaning dirt gets sprayed around instead of picked up. Mechanical issues often cause strange noises, if you’ve noticed this, you may want to check our guide on why your vacuum is so loud.
Inspect the belt and replace it if it’s stretched or frayed. Make sure it sits correctly on the pulley and spins smoothly.
Incorrect Mode Selection
Some multifunctional vacuums have both suction and blower modes. Accidentally setting it to “Blower” instead of “Vacuum” can send dust flying out instantly. Double-check your settings before use.
Improper Height Settings
If the nozzle is too high on hard floors or thin carpets, it breaks the floor seal, weakening suction and scattering debris. For best performance:
Use the lowest setting on hard floors.
Match the height to the carpet’s pile level on rugs or carpets.
Using Non-OEM Consumables
Off-brand filters or dust bags may not fit tightly, leading to leakage. Always use OEM or certified compatible replacements to maintain proper seals and suction power.
How to Maintain Your Vacuum
Dust blow-out happens when airflow is blocked or seals fail, but poor maintenance is often the real cause. Regular care keeps your vacuum at peak performance and prevents overheating, a problem we explain in our guide on vacuum overheating.
Follow these steps:
Check filters and containers frequently.
Empty the bin right after every heavy clean.
Wash and dry filters on schedule.
Deep-clean the hose once a year.
If you’ve done all this and the problem continues, it might be a motor or seal failure that needs professional repair. You can also check our guide on why your vacuum does not turn on for related troubleshooting.
For a full walkthrough, read how to clean your vacuum
How Modern Vacuums Prevent Dust Blow-Out
Today’s vacuums fight dust blow-out on three fronts: keep air moving, keep dust contained, and catch the tiniest particles. Here’s how that works in real life.
1. Sealed airflow
Think of the vacuum like a single, airtight “straw.” Modern machines use precision gaskets, locking tanks, and rigid ducts so the only path for air, and dust, is through the filters, not around them.
As you put in a dust bag, or a water tank, you will always here firm “clicks” when the part locks in, and no wisps of air around seams.
2. Multi-stage separation
Before the air hits the fine filter, most debris is removed upstream:
Cyclonic separation: spinning airflow throws larger dust to the bin so it never reaches the HEPA.
Pre-filters like mesh screens, multi-cone filter, sponge filter catch hair and crumbs so suction stays strong.
This way the main filter stays clear longer, which prevents pressure spikes that cause blow-back.
3. Smart sensors
Built-in airflow and pressure sensors watch for clogs, overfilled bins, or missing filters. You’ll see alerts, auto-boost, or safety shut-offs before dust can burp out of the nozzle.
On robot vacuums and mops, docks can detect full bags and prompt a change before performance dips.
[product handle="x50-ultra-robot-vacuum" rating="4.7"]
4. Self-emptying and auto-clean systems
Self-empty docks and stations move dust from the vacuum into a sealed bag using controlled suction. Many uprights and wet/dry models now run auto-clean cycles that rinse/clear the brush path and dry internal parts to stop odor and buildup.
5. Dust-suppression during emptying (wet/dry advantage)
Wet/dry vacs can kick dust when you dump the dirty tank. Newer designs add airflow baffles and mist/dust-suppression features that calm particles during disposal, keeping more debris contained.
Dreame Take Caring for the air you breathe, we developed MistLock, an industrial-grade dust suppression tech. It sprays a light mist that captures dust in the moment, so it can’t float back into the air. The dust becomes heavier, clumpier waste that’s easy to remove, helping cut sneezes and stuffiness while you clean.
Explore our full lineup of Robot Vacuum and Mop systems or our Wet and Dry Vacuums featuring the MistLock™ technology in the H15 Pro CarpetFlex.
[product handle="h15-pro-carpetflex-wet-dry-vacuum" rating="5"]
Conclusion
A vacuum that spits out dust isn’t broken, it’s just asking for attention. The solution lies in keeping the airflow clean and the seals tight. Empty the container often, clear out the hose, and replace filters regularly.
For a cleaner home with zero blow-out worries, consider upgrading to a Dreame self-emptying robot vacuum or Wet/Dry Vacuum for a fully automated clean.
For more troubleshooting tips, read our full guide on ways to solve common vacuum cleaner problems.
Let's be honest: shopping for a robot vacuum on Black Friday can feel overwhelming. You’re bombarded with plenty of specs—powerful suction, AI obstacle avoidance, precise navigation, self-washing docks—and it’s hard to know what’s actually worth your money. That’s where we come in. In this guide, you’ll find our personally vetted picks, a clear breakdown of what those technical features actually mean for your daily life, and the mistakes to avoid. We'll also help you find the perfect robot vacuum for your home this Black Friday.
Mark your calendars: Black Friday is November 28, 2025, with Cyber Monday following on December 1, 2025. But the best deals often start dropping the week before!
Why Buy a Robot Vacuum on Black Friday?
Black Friday is the best time of year to invest in a robot vacuum. While you might see small sales throughout the year, this is when brands pull out all the stops.
You can typically expect deep discounts of 30% to 70% on previous-generation models, and significant savings on the latest releases. The most crucial insider tip? The best selection of high-end, self-emptying models is available between November 21-24, 2025, before the official Black Friday rush. Waiting until the last minute often means the model you really want is sold out.
Our Top 5 Robot Vacuum Recommendations
For the skimmers who want the quick answers, here are our top picks for 2025:
Best Overall: Dreame X50 Ultra (Save $1,100CAD)
Best Value / Sweet Spot: Dreame L40s Ultra (Save $800CAD)
Best for Pet Hair: Dreame L50 Ultra (Save $540CAD)
Best for Hardwood Floors: Dreame Aqua10 Ultra Roller (Save $1,040CAD)
Best for Mixed Floors Deep Cleaning: Matrix10 Ultra (Save $700CAD)
Best Budget Pick: Dreame L10s Ultra Gen2 (Save $410CAD)
To help you compare them side-by-side, here’s a breakdown of their key specs:
Model
Main Brush Type
Mop Type
Mop Lift/Edge Extension
Suction
Navigation
Max Runtime
Used/Clean Water Tank
Dock Type
X50 Ultra
Detangling DuoBrush
Dual Spinning Mops
Yes
20k Pa
VersaLift DToF
220 mins (6,400mAh)
4.5 L / 4.0 L (1.19 / 1.06 gal)
Auto Empty, Wash, Dry
L40s Ultra
Detangling DuoBrush
Dual Spinning Mops
Yes
19k Pa
LDS
200 mins (5,200mAh)
4.5 L / 4.0 L (1.19 / 1.06 gal)
Auto Empty, Wash, Dry
L50 Ultra
Detangling DuoBrush
Dual Spinning Mops
√
19.5k Pa
LDS
200 mins (6,400mAh)
4.5 L / 4.0 L (1.19 / 1.06 gal)
Auto Empty, Wash, Dry
Aqua10 Ultra Roller
Detangling DuoBrush
Roller Mop
√
30k Pa
VersaLift DToF
175 mins (6,400mAh)
4.0 L / 3.5 L (1.06 / 0.92 gal)
Auto Empty & Wash
Matrix10 Ultra
Detangling DuoBrush
3 pairs of switchable mop pads
Dual Spinning Mops
Yes
30k Pa
VersaLift DToF
260 mins (6,400mAh)
5.5 L / 4.0 L (1.45 / 1.06 gal)
Auto Empty, Hot Wash & Dry
L10s Ultra Gen2
Rubber Brush
Dual Spinning Mops
Yes
10k Pa
LDS
240 mins (5,200mAh)
4.5 L / 4.0 L (1.19 / 1.06 gal)
Auto Empty, Mop Self-cleaning & Drying
In-Depth: Our 2025 Black Friday Robot Vacuum Picks
Now, let's get into the why behind each pick. These aren't just random selections; they're models chosen for how they solve real problems in your home.
Best Overall: Dreame X50 Ultra
[product handle="x50-ultra-robot-vacuum" rating="4.7"]
Expert Why: This is our top pick for a reason. Its revolutionary MopExtend™ feature is a game-changer for anyone with a mix of carpets and hard floors. The robot vacuum can actually sense a carpet, lift its mops, and extend them slightly beyond the body to get right up to the edges of your baseboards and into room corners. It’s the closest thing to a truly comprehensive clean, tackling dust, crumbs, and sticky messes with 20,000 Pa of suction and a dock that empties, washes, and even hot-air dries the mop pads so you don’t have to lift a finger for weeks.
Best Value: Dreame L40s Ultra
[product handle="l40s-ultra-robot-vacuum" rating="4.2"]
Expert Why: This model is the sweet spot for most households. It delivers a powerful 19,000 Pa of suction and a reliable, fully-featured self-emptying, self-washing, and self-drying dock—the two most important features for a truly hands-off experience—at a Black Friday price that's incredibly hard to beat. You get flagship-level convenience and smart navigation without the very top-tier price, making it the smartest investment for the long haul.
Best for Pet Hair: Dreame L50 Ultra
[product handle="l50-ultra-robot-vacuum" rating="4.9"]
Expert Why: If you have pets, this is your solution. Its unique tangle-free brush is specifically engineered to inhale fur without it wrapping around the roller, saving you the constant headache of cutting hair free. Combined with 19,500 Pa of suction, it pulls up embedded dander and hair from deep within carpets. The self-emptying bin is the final piece of the puzzle, trapping all those allergens in a sealed bag so you and your pets can breathe easier.
Best for Hardwood Floors: Dreame Aqua10 Ultra Roller
[product handle="aqua10-ultra-roller-robot-vacuum" rating="5"]
Expert Why: If your home is mostly hard floors, your priority is a flawless mopping experience. Aqua10 Ultra Roller mops with real-time fresh water. Grease, spills, and tough stains are scrubbed away instantly, making your floors spotless. The advanced roller guard design separates wet and dry for optimal carpet protection. The dock automatically washes with up to 100°C water and dries the mop pads after every session, preventing smelly, mildewy pads. You get a pristine mop every time, ensuring your beautiful hardwood and tile floors are genuinely clean, not just damp.
Best for Mixed Floors Deep Cleaning: Dreame Matrix10 Ultra
[product handle="matrix10-ultra-robot-vacuum" rating="5"]
Expert Why: If your home mixes hardwood, tile, and carpets, the Dreame Matrix10 Ultra is built to handle it all without cutting corners. The Multi-Mop™ Switching Dock tailors mopping to each room, while 100°C (212°F) ThermoHub™ self-cleaning keeps pads fresh so you’re never dragging yesterday’s grime across today’s floors. A three-solution compartment lets you match cleaning formulas to different surfaces, and 30,000 Pa Vormax™ suction gives you the power to pull debris from gaps and deep inside carpets. ProLeap™ tech climbs obstacles up to 8 cm (3.15 in), so raised entries and room transitions aren’t a problem, ensuring thorough cleaning results throughout your home.
Best Budget Pick: L10s Ultra Gen2
[product handle="l10s-ultra-gen-2-robot-vacuum" rating="4.2"]
Expert Why: If you want the core convenience of a smart, self-emptying robot vacuum but want to keep things simple, the L10s Ultra Gen2 is a fantastic choice. It forgoes the complex mopping systems of higher-end models but offers reliable LiDAR navigation and strong 10,000 Pa suction for a rock-solid price. It’s the perfect "set it and forget it" vac for tackling daily dust and crumbs on a budget, and the self-emptying base lets you enjoy those weeks of hands-off freedom.
3 Black Friday Robot Vacuum Mistakes to Avoid
It’s easy to get swept up in the hype. Avoid these common pitfalls to ensure you’re thrilled with your purchase long after the confetti settles.
Buying Based on Suction Alone. A 6,000 Pa vacuum with poor navigation will miss spots that a 4,000 Pa model with smart mapping won't. Think of it like a car: horsepower (suction) is useless without a good steering wheel (navigation). Always prioritize LiDAR and AI navigation over raw suction power. A smarter robot vacuum is a more effective cleaner.
Skipping the Dock Features. Here’s a little secret: the vacuum itself is only about 30% of the experience. The dock is what makes it truly "hands-free." A self-emptying base means you only need to replace the dust bag every 60 days, rather than daily. A self-washing and drying dock means you never have to handle a dirty, smelly mop pad again. This is the upgrade that genuinely changes your relationship with cleaning.
Ignoring Mopping. Even if you're a "hardcore vacuumer," a mopping function is a game-changer for hard floors. It tackles the fine dust and sticky spots that suction alone can't. For a truly clean floor, you need both. Modern robot vacuums like the ones we’ve featured seamlessly switch between the two, so you don’t have to choose.
What to Look for When Buying a Robot Vacuum
Still feeling unsure? Let's break down the key features based on what you need. For a deep dive, check out our Complete Robot Vacuum Buying Guide.
Self-Emptying & Self-Washing: Is It Worth the Extra Cost?
In a word: yes. This is the feature that transforms your robot from a neat gadget into a genuine life-changer. The convenience of not having to empty the bin after every clean or scrub a dirty mop pad cannot be overstated. It’s the difference between daily maintenance and true automation. We explore this in detail in our article: Are Self-Emptying Robot Vacuums Worth It?
Obstacle Avoidance: AI vs. LiDAR
LiDAR: The gold standard for navigation. It uses a laser to map your home, creating an efficient cleaning path and ensuring it doesn’t miss spots or get lost. It’s excellent at avoiding walls and furniture.
AI Obstacle Avoidance: The next level. Using a camera and AI, the robot can identify and avoid specific objects left on the floor, such as socks, charging cables, and pet waste. For a truly "no-brainer" experience that lets you skip pre-cleaning the floor, look for models with both LiDAR and AI.
Mopping: Do You Really Need It?
If you have any hard-surface floors (tile, hardwood, laminate), the answer is a resounding yes. It elevates your cleanliness from "picked up" to "visibly spotless." The main types are:
Roller Mop: A rotating cylindrical pad to scrub and lift messes in one pass for a streak-free finish.
Dual Spinning: Two rotating mop pads that provide a more thorough, scrubbing action (our preferred method for tougher messes).
Learn more about the differences here: Robot Vacuum: No-Mop vs. Combo.
Suction Power (Pa): What the Numbers Really Mean
Pascal (Pa) measures suction strength. But more isn't always better after a certain point.
~2k-5k Pa: Good for daily dust and crumbs on hard floors.
~6k-9k Pa: Excellent for most homes, capable of cleaning low-pile carpets effectively.
10k+ Pa: Powerful enough for deep cleaning embedded dirt in medium-pile carpets. Beyond this, the returns diminish unless you have very specific, high-pile carpet needs.
Ready to Find Your Perfect Match?
Navigating the world of robot vacuums doesn't have to be confusing. This Black Friday, you’re armed with the knowledge to find a deal that doesn’t just save you money but genuinely saves you time and effort for years to come.
Curious about pricing or timing? Learn more about what to expect in our guides: How Much Does a Robot Vacuum Cost? and The Best Time to Buy a Robot Vacuum.
Shopping for a robot vacuum means scrolling past dozens of models that all look the same and list numbers you can't tell apart. This robot vacuum buying guide focuses on the numbers that actually change how clean your floors get. If you're still weighing whether a robot vacuum is worth it, start there, then come back here for which numbers matter and which ones just look good on the box. Here's the 2026 guide, built around your home first and the feature list second. New to the category? Browse the full robot vacuum collection as you read.
Start With Your Home, Not the Feature List
The best place to start is your floors, your pets, your home size, and whether you have stairs, in that order. Match the model to those four things and most of the feature list sorts itself out.
Hard floors only? Almost any current model mops well, so you can spend less on suction and more on a clean dock. Mostly carpet? Look for strong suction and mop lifting so the pads don't drag wet across your rugs. Mixed floors, which is where most North American homes land, means you want strong suction plus automatic mop lifting that raises the pads when it moves onto carpet.
Pets matter more for the brush than the suction. Home size decides the battery and dock that you need. A 250 m²+ home with multiple rooms will need a large-capacity dock and a vacuum that recharges partway through, then picks up where it left off. A one-bedroom apartment doesn't.
Two-level homes are the one thing a robot vacuum still can't solve on its own, so plan for one unit per floor, or carry it up and down.
Navigation Type: Smart Mapping vs Getting Stuck
Robot vacuums use one of three navigation systems:
Random-path models bounce around with no map and miss spots.
LiDAR/LDS models spin a laser to map your home in minutes and clean in neat, straight lines instead of random loops. LiDAR-plus-AI detection models add object detection on top, so the vacuum also sees and drives around objects in its path.
Visual & AI camera systems use RGB/3D cameras to recognize objects like cords, shoes, and pets.
For most homes, LiDAR is the way to go. It maps fast, lets you set room-by-room cleaning and no-go zones, and runs in the dark since the laser doesn't need light. Some LiDAR systems are also liftable, which solves a common trade-off: a fixed tower does a good job mapping, but stops the robot vacuum from fitting under low furniture, while a liftable scans the room, then lowers to clean under beds and sofas.
Many advanced Dreame models support these features. For instance, Dreame's VersaLift system raises the LiDAR for 360° scanning, then lowers it to clean in hard-to-reach areas, giving you both accurate mapping and low-profile cleaning.
Browse robot vacuums with mapping to compare how each model handles your layout.
Navigation type
Relative cost
Works in the dark
Obstacle detection
Best for
Random path
Lowest
Yes
None
Small, open, single-room spaces
LiDAR
Mid
Yes
Mapping only, limited cleaning capability and object detection in low spaces
Most home, multi-room layouts
LiDAR + AI cameras
Highest
Yes
Maps and steers around objects live
Cluttered homes, pet households
Suction Power: It's Not Just About the Numbers
Here's the rough ladder so you can place any model:
3,000 to 5,000 Pa is entry.
8,000 to 15,000 Pa is mid.
15,000 to 25,000 Pa is premium.
25,000 Pa and up is flagship.
You don't need to chase the highest number. If your floors are mostly hard, premium-band suction is plenty, and your money is better spent on the brush and the dock. A 25,000 Pa robot vacuum cleans almost as well day-to-day as a 35,000 Pa one. The extra suction only really shows on medium-thick carpet, where weaker models leave dirt in the fibers instead of pulling it out.
If you have thick carpet or a pet that sheds a lot, that's when 35,000 Pa is worth paying for. The L40 Ultra Gen 2 already reaches 25,000 Pa, while the flagship X60 Max Ultra Complete, the L60 Pro Ultra, and the L60 Ultra all hit 35,000 Pa.
Important: Don't pick a robot vacuum based on its suction power alone. A model with 25,000 Pa and a good brush cleans better than one with 35,000 Pa and a tangle-prone brush every time. The brush and airflow matter more than the suction number.
Brush Design: Anti-Tangle Is Non-Negotiable for Pet Homes
If you've got a pet that sheds, an anti-tangle brush is the one to get. The designs that work best pair a rubber roller with a bristled one, so hair lifts into the bin instead of winding around the roller. Dreame's HyperStream™ Detangling DuoBrush works this way, handling hair up to 30 cm long without wrapping, with a comb action that clears strands as the rollers turn.
This matters because in a hair-heavy home, the brush fails before anything else does. A tangle-prone roller wraps within a week and starts smearing dirt instead of lifting it. Older single-bristle brushes tangle the fastest, so they're worth skipping in any home with shedding.
If pet hair isn't an issue for you, the brush matters less. Look instead at how well it lifts everyday dust and grit from hard floors and carpet, since that's the job it will be doing most.
Dual-brush systems aren't all the same. Here's what separates them:
Brush type
Hair handling
Floor & carpet pickup
Best for
Two parallel short bristles
Hair clumps before it reaches the bin
Strong everyday pickup
Lighter-shedding homes
Two rubber brushes
Resists wrapping, but long hair can still tangle
Strong, low noise
Mixed floors, some shedding
Rubber brush + bristled rubber brush
Lifts and clears hair into the bin without wrapping
Strong on hard floors and carpet
Pets and long hair
It's the difference in maintenance between cutting tangled hair off the brush every week and just emptying the bin. If pet hair is your main reason for buying, start with the brush, then check suction. Browse the robot vacuums for pet hair collection to see the models built for it.
Mopping: Scrubbing Pads vs Roller Mop
A robot vacuum mop buying guide comes down to two questions: how the mop cleans, and whether you ever have to touch a dirty pad. The first decides whether your floors look streak-free, the second decides how hands-off it really is.
Look for:
Dual rotating or vibrating pads that press down (around 10-15N) to actually scrub your floors, not just wipe. If you have mostly tile floors, a dual mop pad that can tilt ±5° is a nice addition that can reach into grout lines for a better clean.
Or a roller mop that continuously washes and squeezes out dirty water for a fresh pass every time
On mixed floors, the pads should lift automatically over carpet so you're not dragging dirty water across your rugs. If you're still deciding whether mopping is worth it at all, see whether mopping robot vacuums are worth it.
Thermal mop pads are worth weighing too. They hold heat to help lift grease and dried food, where cold water tends to just spread it around. They aren't a must, but they're part of the consideration if you cook a lot or want a deeper clean.
Just as important is what happens after each clean: it's worth making sure the dock can take care of the mop so you don't have to, which is exactly where the next section comes in.
The Dock: How Hands-Off You Can Actually Be
How often you touch the vacuum comes down to the dock, so it's worth matching the dock to how hands-off you want to be. Docks aren't strictly ranked, some do more, some do less, but they tend to fall into a few groups.
A charge-only dock just powers the unit, so you empty the bin yourself. A self-empty dock pulls the dirt into a sealed bag inside the base, so you deal with it every few weeks instead of after every run.
Once mopping enters the picture, the dock has to be all-in-one base station system. To wash the mop pads, it needs a clean-water tank for the pads and a dirty-water tank to collect what it rinses off, and it has to suck that dirty water back up after each wash. That's the real jump from a vacuum-only dock to one that handles a vacuum and mop. The most hands-off version adds hot-air drying on top, so the pads dry out instead of becoming musty between runs.
We recommend choosing a robot vacuum with auto-empty dustbins, automatic mop washing (ideally with hot water), and hot-air drying. Those three together are what make a dock genuinely hands-off.
Obstacle Avoidance and Crossing
These two features make the difference between a vacuum that finishes the job and one that gets stuck in a doorway, and they're the number one reason robot vacuums get returned. Two separate things are going on: seeing obstacles and climbing over them.
Seeing and avoiding obstacles
Obstacle avoidance is what keeps a robot vacuum out of trouble as it cleans, like rolling through a pet accident or wedging itself under a low couch. In homes with pets or clutter on the floor, it's the feature that saves you from coming home to a smeared mess.
Look for AI object recognition that reads a wide range of items, not just a handful. At a minimum, aim for recognition of at least 50 object types to cover everyday hazards like cables and shoes, while the better systems read several hundred. For homes with lots of furniture or busy layouts, pairing LiDAR mapping with that object recognition is what gives you the most reliable clean.
How high it can climb
The other half is how tall a step a robot vacuum can climb, and the right number depends on what's actually on your floor. Start by looking at your own thresholds and rug edges, then match the height to them:
Up to around 2 cm: fine for flat homes with low thresholds and thin rugs
Around 4 cm: handles most standard doorway thresholds
Around 6 cm: clears raised doorways and thicker rug edges
Around 8.8 cm: gets over tall thresholds and the steps between split-level rooms
One thing to check: some taller heights are managed in two steps rather than one, so whether a robot vacuum actually clears your threshold can come down to its exact shape and height. If you have a mix of transitions, measure your tallest one and pick a model that handles it with room to spare.
Battery Life and Charging Speed
At least 90 minutes of robot vacuum's runtime is sufficient for general homes. Charging should take no more than 5 hours. Nothing's more frustrating than coming home to discover your vacuum gave up halfway through the living room.
You need enough power to finish the job, not just start it enthusiastically. The X60 Ultra and X60 Max Ultra Complete can charge their 6,400 mAh battery in just 80 minutes. Both models also feature charge protection, so you can set a cutoff limit between 80% and 100% for optimal battery health.
Smart App and Features
Since most robot vacuums can be controlled through a mobile app, software experience is just as important as hardware performance.
Essential app features include:
Easy map editing
Multi-floor support
Room-specific settings
Alerts and error notifications
Real-time monitoring
Dreame robot vacuums support native voice assistants that can work offline and voice control commands via third-party assistants, including Alexa, Siri, and Google Home, seamlessly integrating with your smart home ecosystem without lifting a finger.
Dreame Robot Vacuums: What You Get at Each Price Point
Your budget lines up with four price ranges, and each one comes with a trade-off.
The basics done well
You get reliable vacuuming and app control, without hot mopping, the tallest obstacle crossing, or the most hands-off docks. The D20 Pro Plus sits here at $749.99 CAD, with 13,000 Pa suction and a self-empty dock. A good fit for smaller, mostly hard-floor homes. For more options, explore Dreame's collection of the best budget robot vacuums.
The value sweet spot
At this price point, you get strong suction and solid navigation, without flagship mop washing or the tallest obstacle crossing. The L40 Ultra Gen 2 lands here at $1,099.99 CAD, with 25,000 Pa suction. It's the most suction you can buy at this price.
Flagship power for less
You get flagship-grade suction and an all-in-one dock. The L60 Ultra fits here at $1,799.99 CAD, with 35,000 Pa and a dock that washes its pads at 100°C. This is the price point that most buyers are comfortable with.
The full package
You get it all: 35,000 Pa, the tallest obstacle crossing, the smartest navigation, and 100°C mop washing. The X60 Max Ultra Complete leads at $2,399.99 CAD and holds the number one overall spot in Vacuum Wars' Best Robot Vacuums in 2026.
The L60 Pro Ultra adds the same ProLeap™ 8.8 cm obstacle climbing at $1,899.99 CAD. See how the two models stack up in the Dreame X60 Max Ultra Complete vs X60 Ultra vs X50 Ultra comparison.
Pros and cons by price point
Entry: Gain low price and the basics. Give up hot mopping and tall obstacle crossing.
Mid: Gain strong suction value. Give up flagship dock features.
Premium: Gain flagship suction and an all-in-one dock. Give up the tallest obstacle crossing.
Flagship: Gain every capability. Give up the lowest price and a smaller dock footprint.
Which Robot Vacuum Is the Best for Your Home?
1. Large Family Home
250 m²+, mixed floors, heavy foot traffic.
If you have a large, busy home with constant mess across multiple floor types, prioritize maximum suction, long runtime, and big-threshold climbing. The X60 Max Ultra Complete is the best fit here thanks to its 35,000 Pa suction, 6,400mAh battery, and 8.8 cm ProLeap legs. That combination helps it keep up with daily debris while moving more easily between rooms and uneven surfaces.
2. Pet-heavy household
Daily pet hair, scattered messes, and frequent obstacles on the floor.
Homes with pets need more than strong suction. Fur, scattered kibble, and everyday obstacles like bowls and toys call for precise edge cleaning and reliable obstacle avoidance. The Aqua10 Ultra Roller stands out here with 30,000 Pa suction, AstroVision™ obstacle intelligence for dodging pets and floor clutter, a self-rinsing FluffRoll™ that helps lift embedded hair, and a natural-ingredient solution that helps neutralize pet odors at the source.
Discover more robot vacuums for pet hair.
3. Busy professionals, mid-size home
120-180 m², more automation and less daily cleaning upkeep.
If you want a premium cleaning experience and a full hot-wash dock without stepping all the way up to flagship pricing, this is the sweet spot. The L50 Ultra combines 19,500 Pa suction with a dock that washes mop pads at 75°C and includes a 4.5L clean-water tank. It's a strong fit for people who want less day-to-day maintenance and more automation.
4. Hard-floor apartment
<100 m², minimal carpets, smaller spaces.
In a smaller apartment, low noise and a manageable dock footprint can matter more than maximum power. The L40 Ultra Gen 2 is a practical option because it runs below 74dB, offers 25,000 Pa suction, and includes a dock that refills water and dries the mop pads. It covers the essentials well without feeling oversized for the space.
5. First-Time Robot Vacuum Buyer on a Budget
Reliable core features at a more accessible price.
If this is your first robot vacuum, reliability matters more than extra bells and whistles. You need reliable LiDAR mapping and auto-empty dust, nothing fancy. The D20 Pro Plus gives you dependable LiDAR mapping, 13,000 Pa suction, and auto-empty support with 5L sealed dust bags. It also clears thresholds up to 20 mm, making it a solid entry point for everyday whole-home cleaning.
6. Smart-home enthusiasts
You care about Matter, on-device voice, and more connected convenience.
You want a robot vacuum that fits naturally into the rest of your smart home, not one that works in isolation. The right model should go beyond cleaning performance. X60 Ultra is a strong fit here with Matter support for cross-platform compatibility, an offline voice assistant, and support for Alexa, Siri, and Google Home. Plus dual 120° AI cameras for remote home monitoring. Features like scheduled cleaning, off-peak charging, Apple Watch support, and launcher widgets make everyday control even more convenient.
7. Allergy-sensitive family
Minimising dust exposure is key.
Sealed, low-contact disposal makes a real difference when dust sets off allergies. The D20 Plus holds up to 150 days of debris in a 5L bag that seals itself as you lift it out, so emptying doesn't kick up a cloud. It pairs that with 13,000 Pa suction and an anti-tangle DuoBrush, making low-fuss, low-contact upkeep its real strength for allergy-sensitive homes.
Summary Table of Robot Vacuums
Model
Suction
Mop tech
Dock functions
Obstacle capabilities
Battery
Navigation
X60 Max Ultra Complete
35,000 Pa
Extendable Dual Rotary Mops
100 days auto-empty, 100°C self-cleaning, hot-air drying
88mm Two-Step
6,400 mAh
Liftable LiDAR + AI Camera x2 + Lateral 3D Structured Light + LED
Aqua10 Ultra Roller
30,000 Pa
Extendable Roller Mop
100 days auto-empty, dust bag drying, 100°C self-cleaning, hot-air drying
80mm Two-step
6,400mAh
AI Camera x2 + Lateral 3D Structured Light
L60 Pro Ultra
35,000 Pa
Extendable Dual Rotary Mops
100 days auto-empty, 100°C self-cleaning, hot-air drying
88mm Two-step
6,400 mAh
Liftable LiDAR + AI 3D
L40 Ultra Gen2
25,000 Pa
Plate Mop, 10.5mm Mop Lifting, Mop Extend
100 days auto-empty, self-cleaning, hot-air drying
20mm
6,400 mAh
LDS + Single-Line Laser
D20 Pro Plus
13,000 Pa
Plate Mop, 2mm Mop Lifting
150 days auto-empty
20mm
5200 mAh
LDS + Single laser
X60 Ultra
35,000 Pa
Dual Omni-Scrub Mops, 10.5mm Mop Lifting, Mop Extend
100 days auto-empty, 40°C Hot-Water Mopping and 100°C Self-Cleaning
88mm Wheeled obstacle course
6,400mAh
Liftable LiDAR + AI Camera x2 + Lateral 3D Structured Light + LED
D30 Ultra
25,000 Pa
10.5mm Mop Lifting
100 days auto-empty
20mm
5,200 mAh / 230 min
LDS + Single laser
Matrix10 Ultra
30,000 Pa
Mop Switching, Mop Removal, Mop Extending
Multi-Mop™ Switching Dock, 100°C self-cleaning
80mm Two-step
6,400 mAh
AI + Dual-Laser 3D Structured Light
L40s Ultra
19,000 Pa
Extendable Dual Rotary Mops
100 days auto-empty, 80°C self-cleaning, hot-air drying
40mm Two-step
5,200 mAh / 180-210 min
LiDAR + AI Action
What Buyers Wish They Knew First
These are the things owners say they'd check before buying if they could do it again, and most get glossed over in the rush to compare numbers.
Judge by suction alone
A high Pa number paired with a tangle-prone brush still wraps with hair. The brush and dock matter more day to day.
How to shop: Look for tests that show what a robot vacuum leaves behind, not just the Pa figure, and favor dual-roller or anti-tangle brushes.
A 5-star vacuum with a 1-star app is a disaster in disguise
If the app is buggy, scheduling fails, maps reset, and the whole point of hands-off cleaning falls apart. Check the app's reviews, not just the hardware's.
How to shop: Scan the most recent reviews, not the lifetime average. A 4-star score means little if last month is full of 1-star updates.
Regular brushes require constant detangling
Hair wraps around a single-roller brush in days and stalls the motor, adding to your to-do list instead of reducing it when you eventually have to detangle.
How to shop: Look for anti-tangle, dual-roller, or TÜV-certified hair-detangling brushes, and check teardown photos to confirm the brush splits into sections.
Mopping needs more than a wipe
Flat or vibrating pads just wipe, so people expecting shiny floors end up disappointed. Dual spinning pads scrub and lift higher over rugs.
How to shop: If half or more of your floors are hard, pick dual-pad or rotating-pad systems with at least 5 mm lift clearance.
Ignoring operation noise levels
Turbo can pass 75 dB, so many owners only run it when they're out, defeating the purpose of scheduled cleaning.
How to shop: Compare decibel ratings in standard mode; anything under ~65 dB is generally TV- and WFH-friendly. Make sure the robot vacuum offers adaptive suction so it ramps up only on carpets.
The dock takes up real space
All-in-one docks are usually bigger than the photos suggest, and most people find that out after it arrives.
How to shop: Measure first. Plan for about 38 cm wide, 43 cm deep, and 56 cm tall, plus docking clearance.
Mapping takes a few runs to settle
The first run is rarely the best one. Be prepared for a few more before cleaning becomes fully efficient.
How to shop: Expect two to three cycles to stabilize, and run the first with lights on and the floor clear.
Accessories add to the cost
Make sure to consider the cost of filters, brushes, mop pads, and dust bags into the price before buying.
How to shop: Budget roughly $80 to $150 a year, and check how often each part needs swapping. Buying bundles upfront or restocking during seasonal robot vacuum sales keeps costs down.
Choosing the Right Robot Vacuum for Your Home
Start from your biggest frustration. For pet hair, the L60 Ultra and its HyperStream™ Detangling DuoBrush are the easiest fix. For mostly hard floors that need real mopping, the Matrix10 Ultra is the pick. For flagship performance that clears the tallest thresholds, the X60 Max Ultra Complete and L60 Pro Ultra sit at the top.
Browse Dreame's full range of robot vacuum collection to choose the right model for your home.
Common Questions When Buying Robot Vacuums
How much should I spend on a robot vacuum?
Most buyers land between $400 and $1,200 USD. Under $400 USD gets you reliable vacuuming and app control; $400 to $800 USD adds strong suction and solid mopping; $800 to $1,200 USD brings flagship suction and an all-in-one dock. Past $1,200 USD, you're paying for the tallest obstacle crossing and the most advanced navigation. Match the spend to your floors and how hands-off you want to be, not to the highest number you can afford.
Is LiDAR worth the extra cost?
For most homes, yes. LiDAR maps your home in minutes, lets you set no-go zones and room-by-room cleaning, and runs in the dark. Random-path models without it miss spots and take longer. The exception is a tiny single-room space, where the mapping advantage shrinks.
Are the LiDAR lasers safe?
Yes. They're Class 1 eye-safe lasers, the same kind used in a CD player, so they're harmless to people and pets. Most pets ignore the vacuum entirely, and Dreame's navigation steers around pet bowls and litter boxes as it maps.
Do I really need a self-emptying dock?
Only if you want truly hands-off cleaning, in which case it's the single best upgrade. A self-empty dock lets you go weeks without touching the bin, and an all-in-one dock also washes and dries the mop. If you don't mind clearing a small bin after each run, a charge-only dock saves you money.
How long should a robot vacuum last?
Five to seven years with regular upkeep. The battery and brushes are the usual replacement parts, and a little routine maintenance keeps it running: empty the dirty-water tank weekly, rinse the filters monthly, and swap the dock dust bag roughly every 90 days. Budget around $80 to $150 a year for accessories, and the dock's self-clean cycle helps extend the mop and filter life.
Can a robot vacuum replace a regular vacuum?
A robot vacuum can replace a large portion of routine cleaning. Running daily or several times a week, it keeps dust, crumbs, and pet hair under control. However, a regular vacuum is still useful for stairs, upholstery, and tight spaces where robot vacuums cannot reach.
What about data privacy?
For most modern robot vacuum models, map data and cleaning history are stored securely in the app and used only for navigation and scheduling. You can disable cameras, delete maps, or restrict cloud access, having full control over what data the vacuum collects and shares. Dreamehome APP supports local-only cleaning and Matter, camera streams stay on-device unless you enable remote monitoring.
What's the best robot vacuum for pet hair?
Look for a detangling brush first, then strong suction. The HyperStream™ Detangling DuoBrush on the L60 Ultra clears hair up to 30 cm without wrapping, which is the real fix for shedding homes. See Dreame's collection of robot vacuums for pet hair.
For your home to be cleaned completely automatically, robot vacuums need to solve one big problem: getting up and down the stairs. While today's robot vacuums are experts at cleaning a single floor on their own, the ability to move between storeys is the next big step for the technology—especially for multi-storey homes, basements, and split-level layouts.
Let's look at where this new technology stands. We will explain how today's robot vacuums keep themselves safe in homes with stairs, and show you the best ways you can get your multi-storey home cleaned right now.
Can You Buy a Stair-Climbing Robot Vacuum Today?
Right now, you can't buy a robot vacuum that can climb a full flight of stairs. It's a difficult problem that engineers are working hard to solve in their labs.
The good news is that we've already seen early models. At the IFA 2025 tech show in Berlin, the first of these concepts was demonstrated to the public. As a result, many experts believe the first robot vacuums that can climb stairs will be available for purchase around 2026. This future ability to climb is a huge jump in technology compared to how even the best robots vacuum today get over small bumps and rugs.
How a Future Robot Vacuum Will Climb Stairs
Robot vacuums can climb stairs in a few fundamentally different ways, each with its own trade-offs. Modular, two-part systems in which a standard vacuum robot docks with a specialized stair-climbing platform, are taking the lead.
Caterpillar-track platforms: The Dreame Cyber X follows this concept. Think of this as a mini construction vehicle. The vacuum rides on a docking platform with large treads that grip the stairs. At the bottom, the treads stay flat so the robot vacuum can roll into place. Then the front treads lift, "feel" the first step, tilt the unit, and pull it smoothly onto the next level. The process repeats step by step, with no extra hardware needed on your stairs. It looks dramatic but works surprisingly fluidly.
Scissor-lift legs: This design, seen in MOVA Zeus 60 demos, uses a platform with compact lifting legs that raise the robot vacuum, slide the front wheels onto the next step, then pull the rest of the body along. It's slower than tracks, but very stable. Some demo units have even tackled curved or spiral staircases, handling step heights up to about 25 cm (10 in).
Beyond these, early concepts include tracked robot vacuums with flippers or bogie suspensions (robust but bulky and loud), tri-star wheel clusters that "step" over risers (simple but vibey on flat floors), and wheel-leg ("wheg") hybrids that roll like wheels yet act like short legs for climbs (promising, still maturing).
In short, stairs are solvable, but every approach balances speed, stability, noise, cost, and home-friendliness.
How Your Robot Vacuum Avoids Falling Down Stairs
While engineers work on the complex problem of climbing up, the issue of falling down the stairs was solved years ago. You can be sure your robot vacuum is safe to approach a staircase because of its built-in cliff sensors.
These sensors work by sending out an invisible light beam towards the floor. The science is simple:
On solid ground, the light bounces off the floor and back to the vacuum robot's sensor.
At the edge of a stair, the light beam goes into the empty space and doesn't bounce back.
When the light doesn't bounce back, it instantly tells the robot vacuum to stop and turn around. This simple, reliable system ensures your robot vacuum can detect stairs and will never fall.
How Today's Robot Vacuums Get Over Bumps and Thresholds
Beyond the major challenge of stairs, your robot vacuum also has to deal with everyday bumps on the floor. To keep it from getting stuck on things like transition strips between rooms, patio door tracks, or the edges of thick rugs, the best robot vacuums have advanced mobility systems.
For example, the Dreame X50 Ultra uses the ProLeap System. This smart system uses small, motorised retractable legs to lift the vacuum's body over obstacles. This system helps you in a few key ways:
Robot vacuums clean without stopping, easily crossing bumps up to a couple of inches high so they can move freely between rooms.
You get a more thorough clean because the robot vacuum can reach every part of a room, rather than being blocked by a high doorway.
You don't have to babysit it—so you can schedule a cleaning and trust that the robot vacuum will finish the job without your help.
How to Clean a Multi-Storey Home Today
That ability to handle thresholds is a key part of the complete cleaning solutions you can use for your multi-level home today. Here are two practical guides for the best options available right now.
Option 1: Use Multi-Floor Mapping with One Robot Vacuum
This is a smart and affordable way to clean your whole house with a single device. Here's how you can set it up:
Step 1: Map Your First Floor. Place the robot vacuum on its dock on your main floor. Clear away small items like shoes or cables, open all doors, and start the initial mapping run in the app. The robot vacuum will use its lasers to create an accurate map.
Step 2: Save the Map. Once the mapping is done, you can name the map in your app (e.g., "Downstairs").
Step 3: Map Your Second Floor. Carry the robot vacuum (without its dock) to your second floor. Place it in a central spot and start a new cleaning cycle. The robot vacuum will recognize it's in a new place and create a second map.
Step 4: Save the Second Map. When it's finished, save and name this map (e.g., "Upstairs").
Step 5: Clean Any Floor, Any Time. Now, you can carry the vacuum robot to the floor you want cleaned. It will automatically recognize where it is, use the correct map, and start cleaning.
Option 2: Use a Separate Robot Vacuum for Each Floor
This method is for those who want the easiest, most hands-off cleaning experience.
Step 1: Pick a Home for Each Dock. Find a good spot on each floor for the robot vacuum's charging dock, preferably with good Wi-Fi coverage.
Step 2: Set Up Each Robot Vacuum. Treat each robot vacuum like it's in a separate home. Have each one create a map for its designated floor.
Step 3: Create Unique Schedules. In the app, you can give each robot vacuum its own cleaning schedule. You could have the "Upstairs" vacuum clean on Mondays and Fridays, and the "Downstairs" vacuum clean on Tuesdays and Saturdays.
Step 4: Enjoy Full Automation. That's it. Your entire home will now be cleaned automatically on a regular schedule, with no need for you to ever move a robot vacuum again.
Frequently Asked Questions
Will stair-climbing robot vacuums be able to clean the stairs?
No. The main goal of this new technology is to let the robot vacuum travel between floors. It is not designed to clean the narrow steps of the stairs. A handheld vacuum is still the best tool for cleaning the stairs themselves.
How high a bump can a normal robot vacuum get over?
Most standard robot vacuums can clear bumps around 1.3–1.9 cm (½–¾ in). Robot vacuums with special features like the ProLeap System can handle much higher bumps, often over 5 cm (2 in).
Do I need Wi-Fi for multi-floor mapping?
You typically need Wi-Fi to create and save the maps for the first time. After a map is saved in the robot vacuum's memory, it can clean that floor without being connected to Wi-Fi.
Will stair-climbing robot vacuums be very expensive?
Like most brand-new technology, the first models that can climb stairs will likely cost more. As the technology gets better and more common, the prices should come down over time.
How do I get a floor ready for the robot vacuum to map it?
Pick up shoes, toys, and cables off the floor. Open doors to all the rooms you want the vacuum to clean. A clear space helps the robot vacuum create a more accurate, efficient map.
Conclusion
The invention of a stair-climbing robot vacuum would be a huge step forward for home cleaning. While that technology is being perfected, you can already get excellent results in multi-storey homes using today’s best features—smart navigation, strong threshold handling, and multi-floor mapping—to keep every level clean, including basements and split-levels.







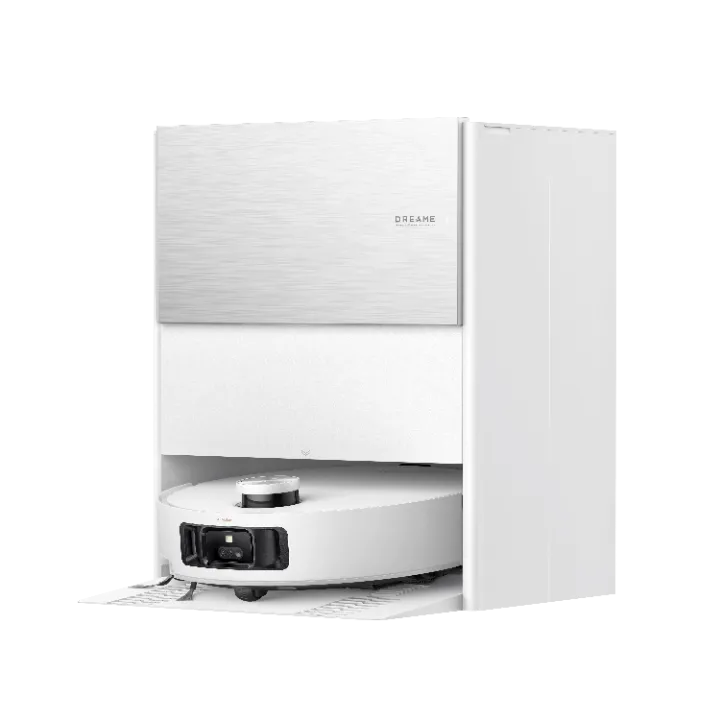
















 Robot Lawn Mowers


































 Humidifiers


 Smart Door Lock


 Australia
 中国大陆
中国大陆 日本
日本


 Türkiye


 Ireland
 Portugal
 Italia
 Netherlands
 Belgium
 Greece
 Polska
 Norway
 Sweden
 Finland
 Denmark
 Hungary
 Czechia
 Slovenia
 Croatia
 Switzerland
 United
Kingdom
United
Kingdom
 Canada


 Colombia


