



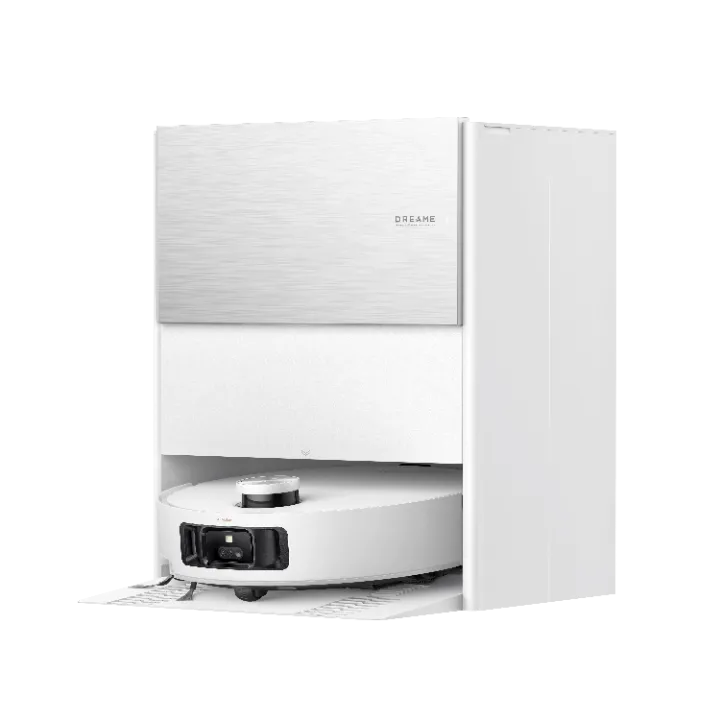









How to Vacuum Your Wool Carpet Without Damaging It

How to Vacuum Your Wool Carpet Without Damaging It

Editorial TeamDreame |
Wool is a comfortable, soft, high-end natural material, and wool carpets can add atmosphere and sophistication to home decor, making them a top choice for many families. But cleaning a wool carpet? It can be quite troublesome or needs extra attention because this natural material may be more easily damaged than some synthetic materials if not properly cared for. But can we just let it be? That might have just left it to gather dust and bacteria. Let's take a look at 4 vacuuming methods for wool carpets. Why Cleaning a Wool Rug is Necessary Your wool rug is just like a natural air filter for your home. Because its long and soft fibers are like experts trapping dust, pollen, and allergens, keeping them out of the air you breathe. The U.S. Environmental Protection Agency (EPA) notes that carpets can hold a large amount of indoor pollutants. In one word, the wool carpet can "absorb" the dirt from the air, and at the same time, become really dirty itself. But my rug looks quite new, should I still clean it? The answer is yes. While it still looks very new outside, deep inside, sharp particles of grit and sand settle into the rug's foundation. Every time you walk on it, this hidden grit grinds against the delicate wool fibers like sandpaper. This may cause your rug to wear out prematurely. So you need a truly deep clean with the right method and right vacuum, that removes the damaging particles, keeping your rug strong and beautiful from the inside out. How to Vacuum Wool Carpets and Rugs You can absolutely vacuum your wool carpets. Vacuuming can remove hidden dirt without damaging your rug, and this helps it last longer. The right method depends on how workers made your rug was made, but once you know your rug type, you can clean it safely. Here's how to care for the most common types. 1. Thick Woven Wool Rugs(Medium Pile) Thick woven rugs include many Persian and Oriental styles, and workers tie wool fibers tightly onto a strong base. This creates a dense, soft surface, but it also creates a hidden problem. This thick pile traps sharp dirt deep inside, and this hidden dirt slowly damages your rug from within. Weak vacuums can't reach this deep dirt, so your rug keeps getting damaged even though it looks clean on top. Safe Steps to Clean: Step 1: Set Up Your Equipment: You need powerful suction without harsh brushes. The Dreame H15 Pro CarpetFlex works perfectly because it switches to carpet mode automatically. Just attach the carpet brush and you're ready. Step 2: Activate Smart Detection: Turn on the machine. The RGB sensor finds hidden dirt for you. It boosts power to 23,000Pa when needed. You don't need to guess where to clean deeper. Step 3: Start Cleaning: Move slowly across your rug. Make overlapping passes. The TangleCut™ 2.0 cuts hair automatically as you clean. This prevents tangles that could damage wool fibers. Step 4: Let Technology Work: The dual-brush adjusts power automatically. It gives consistent results. Your valuable wool stays protected from harsh brushing. This gives you complete confidence that harmful dirt is gone, while protecting your rug's delicate fibers. 2. Thin Woven Rugs (Flat-Weave) Flat-weave rugs like Kilims (traditional Middle Eastern rugs) and Soumaks (decorative flat rugs) have no thick pile, but they have a unique structure. The colored threads you see make up the actual rug structure, and this means every thread is important. The threads that hold the rug together sit on the surface, so spinning brushes can catch and pull these delicate threads. This permanently damages the beautiful pattern, and you can't fix this kind of damage. Safe Steps to Clean Compared to thick woven rugs, these delicate rugs need a much gentler approach, but you can still get excellent results. Follow these steps: Prepare a small handheld tool or a furniture attachment Set your vacuum to low power Move gently across the width of the rug, but don't rush the process Important: Never use spinning brush attachments on thin woven rugs. They will catch and damage the threads and ruin your rug's pattern forever.   3. Tufted Wool Rugs Unlike woven rugs, tufted rugs are made by inserting wool fibers into a backing and using glue to hold them in place. This glue-based construction creates unique challenges. Since glue holds the fibers instead of knots, fibers pull out much more easily. Spinning brushes will yank these fibers out, causing excessive shedding. Over time, this damages the glue backing and makes your rug look thin and worn. Safe Steps to Clean You must avoid the spinning brush, but you can still clean effectively with suction alone. Turn OFF the spinning brush - This step matters most, because the brush will pull out fibers Use suction only - Let air flow lift dust and dirt, while protecting the glued fibers Use simple tools - If you can't turn off the brush, switch to the handheld furniture attachment instead This gentle approach helps your rug keep its thick pile and last much longer, while avoiding costly damage. 4. Shag Wool Rugs Shag rugs have extra-long, loose fibers, and this creates two serious problems that regular vacuums can't handle. Problem 1: Long fibers get caught in spinning brushes and pull out entire clumps, while the brush keeps spinning and causes more damage. Problem 2: Dirt falls so deeply that regular vacuums can't reach it, but the dirt stays there and slowly damages the rug fibers. Safe Steps to Clean You need a different approach, but this method works better than any vacuum alone. Clean Outside: Take your rug outside and beat the back of the rug to shake out deep dirt. This works best to remove heavy dirt, and it's the only way to reach dirt that's deep in the pile. Gentle Surface Clean: Use your vacuum's hose or simple nozzle attachment, and clean carefully between the fiber rows. You don't need a brush because the suction does the work, while keeping your shag rug clean and fluffy without damage. Wool Rug Cleaning at a Glance Rug Type Key Challenge ✅ Recommended Tool ❌ Never Use Woven (Medium Pile) Hides deep, damaging grit Smart Carpet Cleaner (Suction-focused) Weak, surface-level vacuums Woven (Flat-Weave) Delicate, exposed threads Upholstery / Hand Tool Any spinning brush or floor head Tufted Fibers pull out easily Suction-Only Mode or Upholstery Tool An active beater bar Shag Long fibers will tangle Hose / Nozzle Attachment Any spinning brush or floor head Post-Cleaning Care: Don't Forget Your Tool Lifting all that dirt from your wool rug is a great feeling, but the job isn't quite done. A dirty tool can spread old dust, germs, and odors right back into your home. To get a truly fresh clean, you need to make sure your vacuum is clean, too. This usually means: Wiping down the brush head. Cutting away tangled hair. Emptying the dustbin and washing filters. This can be a messy and unpleasant chore. With the Dreame H15 Pro CarpetFlex, you can skip this process entirely. After you finish cleaning, it automatically washes its roller brush with hot water and dries it with hot air. This helps you keep your home and your tools fresh and clean, without any extra work. The Final Word on Wool Rug Care Protecting your wool rug is all about using the right technique for the right rug. Remember that gentle, frequent cleaning with powerful suction is much safer and more effective than harsh, infrequent brushing. By understanding how your rug is made, you can easily choose a cleaning method that keeps it beautiful for years to come. Ready to give your wool carpet the care it deserves? Explore a smarter cleaning solution with Dreame today. FAQs Q1. How often should I vacuum my wool rug? This depends on how much foot traffic it gets. For busy areas, a light vacuuming once or twice a week is a good idea. Try to do a deeper clean every one to two weeks. Q2. Is it normal for a new wool rug to shed? Yes, a little bit of "fluff" coming off a new wool rug is completely normal. However, if it keeps shedding heavily after a few months, it might be a sign that your vacuuming method is too aggressive. Q3. Can I use a vacuum with a spinning brush on my wool rug? It's best to avoid it. Never use a spinning brush on delicate rugs like tufted, shag, or flat-weaves. For a very sturdy woven rug, you might be able to, but only if you can set the brush to a very high setting so it barely touches the fibers. When in doubt, turn it off. Q4. What's the best way to handle pet hair on a wool rug? Regular vacuuming is the best solution. To make it easier, you can use a tool designed to handle hair without clogging. Powerful suction will lift the hair out, while an anti-tangle feature keeps the roller clean.
Continue reading
Wet Dry Vacuum vs. Steam Mop: Which Floor Cleaner Is Right for You?

Wet Dry Vacuum vs. Steam Mop: Which Floor Cleaner Is Right for You?

Editorial TeamDreame |
Tired of the tedious floor cleaning routine? Sweeping, mopping, and waiting for the floor to dry... It can easily take up your whole afternoon. Fortunately, two modern tools can simplify this task: wet/dry vacuums and steam mops. Both look similar but serve different purposes. Wet dry vacuums streamline the cleaning process by combining all your steps into one quick process and handling everyday dirt. On the other hand, steam mops take a different approach and use hot steam to eliminate germs, providing a different yet effective cleaning method. Each one works better for different types of floors and cleaning situations. But which one is right for you? Keep reading to find out. What is a Wet Dry Vacuum? A wet-dry vacuum is a versatile machine that is designed to vacuum and mop your hard and carpeted floors. It eliminates the need for a broom, dustpan, and traditional mop and bucket. How It Works The concept is to combine suction with washing. As you push the machine across the floor, it performs a few actions all at once: It washes: A roller brush, which is constantly wet with fresh water and a bit of cleaning solution from a clean water tank, spins against the floor. This action scrubs the surface, loosening dirt and grime much more effectively than just wiping a mop across it. It vacuums: As the roller scrubs, a powerful vacuum motor sucks up everything in its path. This includes the dry debris like dust and crumbs, any larger spills, and, most importantly, the dirty water that was just used to scrub the floor. The key to its design is its two separate water tanks. One tank holds the fresh water and cleaning solution. The second tank is where all the dirty water and debris get deposited. This is a critical feature because it means you are always cleaning your floors with fresh water. With a traditional mop, you end up dipping it back into dirty water, which can leave behind a grimy film. A wet-dry vacuum avoids this completely. Seeing the tank of dark, dirty water at the end is satisfying proof of how much dirt was actually removed from your floors. Its main purpose is to be a convenient, all-in-one tool that can handle a wide variety of everyday messes, from dust bunnies to spilled soup, in a single pass. What is a Steam Mop? A steam mop is a specialized tool that uses plain hot steam to deep clean and kill germs on floors. It's a popular choice for people who want to sanitize their homes without having to use chemical cleaners like bleach or ammonia. How It Works A steam mop's function is very simple. You fill its small water tank with regular tap water. An internal heating element then boils that water very quickly, typically in under a minute, turning it into hot, high-pressure steam (over 100°C / 212°F). This steam is directed down through a nozzle and into a microfiber cloth pad attached to the mop's head. The intense heat does two things: It loosens grime: The hot, moist steam is excellent at dissolving sticky, stubborn messes that have dried onto the floor, like spilled soda, jelly, or caked-on mud. It sanitizes: The high temperature of the steam kills common household germs and bacteria on contact. This is a huge benefit for anyone concerned about hygiene, especially in kitchens and bathrooms. It's essential to understand that a steam mop has no suction whatsoever. It cannot pick up hair, dust, or any solid debris. Its only job is to sanitize and remove grime already stuck to the surface. For households with crawling babies, pets, or people sensitive to chemicals, this tool offers additional benefits but doesn't replace a vacuum cleaner. Wet-Dry Vacuum vs. Steam Mop: Head-to-Head Comparison Understanding how they work is one thing; knowing how they perform in your own house is what really matters. Let's break down how they stack up in different situations. Which One Saves You More Time? When it comes to getting the job done fast, the wet-dry vacuum is the clear winner. It combines two long chores, vacuuming and mopping, into one quick and easy step. Imagine it's a typical weeknight after dinner. There are crumbs under the dining table, a few stray pieces of rice on the kitchen floor, and a small puddle of water near the sink. Steam mop: You would first need to get a broom or a vacuum to clean up all the loose crumbs and debris. Once that's done, you can plug in the steam mop and wait for it to heat up before you start sanitizing. It's still a two-step process. Wet dry vacuum: You just grab the one machine, turn it on, and clean the entire mess in a minute or two. The crumbs and the water are gone in the same pass. Over the course of a week, the time saved by not having to do that first step of sweeping or vacuuming really adds up. Which Can Clean Up Spills and Accidents? This is perhaps the biggest practical difference between the two tools. A wet-dry vacuum is specifically designed to handle spills and wet messes. It's an emergency cleanup tool and a regular cleaner all in one. If a child drops a full bowl of cereal and milk, or the dog tracks in muddy paw prints from the rain, you can clean it up instantly. It sucks up the liquid (milk, water) and the solids (cereal, mud) without issue. A steam mop is completely unsuitable for these kinds of accidents. Because it has no suction, it cannot pick up the mess. If you tried to use a steam mop on spilled cereal, you would just be pushing around warm, mushy cereal with a cloth pad. If you used it on a raw egg, the heat would start to cook the egg, creating an even bigger, slimier mess to clean up. For any household where spills are a regular occurrence, a wet-dry vacuum is the far more practical and useful machine. Which Is Better at Killing Germs and Sanitizing? This is the one area where the steam mop has a distinct advantage. Its entire purpose is to sanitize. The high temperature of the steam it produces is proven to be effective at killing germs. The CDC, for example, recognizes steam as a reliable method for sterilization. This makes a steam mop an excellent tool for specific tasks, like sanitizing the floor around a toilet, cleaning a pet's eating area, or ensuring a floor is hygienic for a crawling baby. It achieves this without any chemicals, which is a major benefit for many people. A wet-dry vacuum cleans differently. It doesn't use heat to kill germs in contact. Instead, it physically removes germs from the floor by scrubbing them loose and sucking them away with the dirty water. While this leaves your floors extremely clean, it is not the same as the thermal sanitization that a steam mop provides. Which is Safer for Floors? This is a critical consideration. Using the wrong tool on your floor can lead to expensive and irreversible damage. You need to know what your floors are made of. A wet-dry vacuum is generally safe for any type of sealed hard floor. Because it sucks the water right back up, it doesn't leave your floors soaking wet. This makes it a safe choice for: Sealed Hardwood Laminate Vinyl (both plank and sheet) Tile (Ceramic and Porcelain) Sealed Stone A steam mop requires much more caution. The combination of high heat and moisture can be very damaging to certain materials. Tile and Sealed Stone: Generally safe and very effective. Steam can even help clean grout lines. Sealed Hardwood: This is risky. Over time, the heat can break down the polyurethane finish that protects the wood. Moisture can also be forced between the boards, causing them to warp. Laminate and Vinyl: These are also very risky. These floors are made of layers bonded together with adhesive. The heat from a steam mop can weaken that glue, causing the top layer to peel or the edges of the planks to swell and warp. Unsealed Wood: Never use a steam mop here. It will cause immediate damage. Always check what your flooring manufacturer recommends before using a steam mop. Which One is Easier to Maintain? A steam mop is very simple to maintain. After use, you just remove the dirty cloth pad and toss it in the washing machine. A basic wet-dry vacuum requires more effort. You have to empty the dirty water tank and clean the roller brush after each use to prevent smells and mold, which can feel like an extra chore. However, advanced wet-dry vacuums (like those from Dreame) solve this problem with a one-press "self-cleaning" function. At the push of a button, the machine automatically washes its roller brush with clean water and then dries it with hot air. This keeps it clean and odor-free without any hands-on work from you. Summary Table Feature / Use Case Wet Dry Vacuum (The Remover) Steam Mop (The Sanitizer) Winner for Most Homes Time-Saving Vacuums & mops in one step Requires pre-vacuuming Wet Dry Vacuum Spill Handling Excellent for wet & dry messes Not suitable; can spread messes Wet Dry Vacuum Chemical-Free Sanitizing Uses cleaning solution or water Excellent; uses only steam Steam Mop Floor Safety Safe on most hard floors Risk of damage to wood/laminate Wet Dry Vacuum Post-Clean Maintenance Tank/roller cleaning (can be automated) Simple pad washing Wet Dry Vacuum (with self-cleaning) How to Choose the Right Floor Cleaner The best choice is the one that solves your most common cleaning problems. Get a Wet Dry Vacuum if... You have kids or pets. If your life involves cleaning up frequent spills, food messes, and muddy footprints, a wet-dry vacuum will make a huge difference. You want to save time and effort. If your main goal is to get your floors clean as quickly and easily as possible, this is the tool for you. It combines two chores into one. You like having one tool for many jobs. If you want a single, versatile machine that can handle almost any everyday mess on your hard floors, a wet-dry vacuum is a practical choice. [product handle="h15-pro-heat-wet-dry-vacuum" rating="4.7"] Get a Steam Mop if... You already own a reliable vacuum cleaner. A steam mop works well alongside a robot vacuum and mop, which effectively manages your daily cleaning tasks. Your top priority is sanitizing without chemicals. If you are committed to having a germ-free home but want to avoid harsh cleaners, a steam mop is the best tool for that specific job. You have mostly tile or stone floors. If your home has a lot of durable flooring that can handle high heat, you can use a steam mop without worrying about damaging it. You don't mind a multi-step process. If you already vacuum your floors regularly and are just looking for a tool to do a final, deep-cleaning pass, then a steam mop can be a good addition to your routine. FAQs Q1: Do I have to vacuum before using a wet-dry vacuum? No. It's designed to do both jobs at once. That's its biggest time-saving benefit. Q2: Can a steam mop remove old stains? It's very good for breaking down sticky, sugary, or greasy messes. However, for a set-in stain like wine, coffee, or ink that has dyed the floor's surface, it likely won't be effective since it doesn't use a chemical cleaning solution. Q3: Which is safer for my sealed wood floors? The wet-dry vacuum is much safer. A steam mop's high heat and concentrated moisture can damage the wood's protective finish over time. Q4: Can I put vinegar or a cleaning solution in a steam mop? No, you should not. Steam mops are only designed to be used with water. Adding vinegar or other cleaners can corrode the internal parts and break the machine. The Bottom Line When you strip away all the features, the choice is pretty simple: A wet-dry vacuum is a tool for cleaning up messes. A steam mop is a tool for killing germs. If your biggest daily frustration is the time and hassle it takes to clean up dirt, spills, and pet hair, then a wet-dry vacuum is the most practical and useful tool for you. It solves the most common cleaning problems in one simple step. If your main concern is sanitizing your bathroom floors without bleach, and you don't mind vacuuming first, then a steam mop could be what you need. If you think a wet-dry vacuum sounds like the right choice for your home, consider the models Dreame offers. They are designed to make the daily job of keeping floors clean much quicker and easier.
Continue reading
Robot Mop Cleaning Solutions: The Ultimate Guide to a Deeper, Safer Clean

Robot Mop Cleaning Solutions: The Ultimate Guide to a Deeper, Safer Clean

Editorial TeamDreame |
Have you ever done the "white sock test" after your robot vacuum cleaner finishes a cycle? Or just walked barefoot across the kitchen floor? Perhaps too often, the floor appears clean, but it lacks that perfectly smooth, squeaky-clean feel underfoot. It might even feel a little sticky. That's the residue that plain water can't lift. If you're chasing that satisfying, barefoot-on-a-spotless-floor feeling, the secret lies in a better robot, and also a better cleaning solution. Let's talk about how to make your floors look clean and feel great. Is a Robot Mop Cleaning Solution Worth It? Think about washing dishes with just water. Can you clean a greasy plate properly? Probably not. The same thing happens with robot mopping. While your robot vacuum and mop are powerful, using them with only water is like trying to clean with one hand tied behind your back. So yes, a robot mop cleaning solution is definitely worth it. Why Water-Only Cleaning Is Not Enough Water has natural limits that restrain it from cleaning well. Surface tension makes water drops stick together. This causes water to roll around on surfaces instead of spreading out, so it can't get into dirt and lift it. Many everyday messes create extra problems. Kitchen grease, oily paw prints from pets, and food spills actually push water away. When your robot mops with only water, it often just spreads these oily messes around instead of cleaning them up. What's left behind? A dull, streaky mess on your floors. How Cleaning Solutions Work A good robot vacuum cleaning solution uses two key ingredients that work together: surfactants and enzymes. Surfactants Break Down Water's Barriers These special cleaners act like tiny magnets for dirt. Each cleaning molecule has two parts: One end that sticks to water Another end that hates water but loves grease and dirt Using a cleaning solution with your robot vacuum and mop helps break down water's surface tension. This creates molecules that grab onto dirt and grease, lifting them off the floor so the vacuum's mop pad can easily wipe them away. Enzymes Target Specific Stains If regular cleaners handle everyday dirt, these special ingredients are like expert stain-fighting enzymes. These natural proteins speed up cleaning by targeting specific types of messes. According to the American Cleaning Institute, enzymes work by breaking down stains into smaller pieces that surfactants can easily remove. They work like a lock and key: each type is made to break down a particular kind of stain. Cleaner Type What It Is Common Stains Protein fighters Protease Food spills, pet messes, milk, and blood Grease fighters Lipase Kitchen grease, butter, oily marks Starch fighters Amylase Pasta sauce, gravy, potatoes, ice cream By using these specialized enzymes to dismantle big, stuck-on molecules into tiny pieces that dissolve in water, your robot mop can wipe away stubborn stains that would normally require intense scrubbing. 4 Benefits of Using a Robot Vacuum Cleaning Solution Using a quality robot mop cleaning solution gives you several benefits: Deeper Cleaning: It effectively removes germs and sticky residues that water alone cannot tackle. Streak-Free Results: The solution dries quickly, leaving no marks or residue behind. Saved Money: These highly concentrated solutions last for months, providing a low cost per use. Longer Robot Vacuum Lifespan: The low-foam, metal-safe formulas help prevent damage to the robot's pumps, seals, and tubes. In summary, while your robot handles the scrubbing, the cleaning solution does the essential work, together delivering professional results. What is the Best Robot Mop Solution? If you've decided to use a cleaning solution, the next question is which one to choose. The market offers two main types, official and generic, and the difference between them is critical for your robot's health and performance. Official Brand Cleaners: The Safe Pick This is, without question, the safest and smartest choice for your robotic vacuum cleaner. You don't have to worry about compatibility. The same people who built your robot also made these cleaning solutions. They tested them with every part inside your machine: the plastic water tank, rubber pieces, and water pump. Everything works together perfectly, making your cleaner a true robot vacuum and mop combo. You don't have to guess about performance. The cleaner is made specifically for how your vacuum works: how fast water flows and what kind of mop pad it uses. This means you get great cleaning without problems like too much foam (which can break the pump) or streaky floors. You don't have to stress about your warranty. This is the biggest reason to choose official cleaners. If you use anything else and your robot breaks, the company might refuse to fix it for free. Then you're stuck paying hundreds or thousands of dollars for repairs. With official cleaners, your warranty stays safe. Universal Cleaners: Maybe a Gamble These third-party solutions may seem attractive because they often cost less or offer multiple scents, but they can also cause unexpected issues. Universal cleaners claim to work for "all robot vacuums," but that's impossible since different brands use different materials inside. Plus, you're on your own if something goes wrong. If a universal cleaner breaks your vacuum, you may be denied warranty coverage. Important: The official solution is generally your safest bet and your best robot mop solution. Can You Make a DIY Robot Vacuum Solution? No. The internet is full of "hacks" suggesting you can use common household products in your robot mop. It's easy to think, "What's the harm in a little vinegar?" The hard truth is that these DIY solutions can cause damage to your high-tech cleaning vacuum. A Breakdown of the Chemical Dangers Common household products can seriously damage your robot vacuum cleaner: Vinegar: Even diluted, this acid slowly eats away at your robot's rubber seals and metal parts Essential oils & soaps: A few drops of these sticky substances will clog spray nozzles and make your tank brittle Bleach & strong cleaners: Strong often means they are corrosive and will destroy your robot's delicate internal components Regular floor cleaners: Designed for buckets, not robots - they foam up and jam your water pump Cleaning Solutions: What to Use & What to Avoid For a quick reference, use this simple guide to make the right choice every time. Solution Type Our Verdict Risk to Robot Vacuum and Mop Impact on Floors Warranty Status Manufacturer-Approved Solution Gold Standard None - Designed for it Streak-free shine Protected Plain Water Safe Backup None May leave water spots Protected Universal "Robot" Cleaner High Risk Potential for corrosion/clogs Can leave residue/streaks At Risk / Likely Void DIY Vinegar Solution Do Not Use High - Corrodes seals/metal Can dull finishes Void DIY Essential Oils/Soap Do Not Use High - Degrades plastic, clogs tubes Leaves sticky, dirt-attracting film Void Standard Floor Cleaner Do Not Use High - Foaming, residue buildup Leaves sticky residue Void Bleach/Harsh Chemicals Do Not Use Extreme - Severe corrosion Can cause permanent damage/discolouration Void How to Use Cleaning Solution in Your Robot Vacuum? Using the cleaning solution is simple. The exact method depends on whether your robot has a fully automated docking station or a manual-fill tank. For Robots with Auto-Mixing Stations These advanced systems significantly simplify the cleaning process. Locate the solution cartridge: Open your docking station to find the dedicated cartridge or reservoir for the cleaning solution. Fill the cartridge or insert a new one. Use undiluted concentrate. Do not add water. The station is designed to automatically mix the perfect ratio of solution and water for every cleaning and mop-washing cycle. Ensure the cartridge is secured. Close the lid, and you're done. Your robot vacuum will handle the rest. For Robots with Manual-Fill Water Tanks This method requires one simple measurement. Check the golden ratio: Most manufacturers recommend a dilution ratio of 1:200 or 1:300. This usually translates to about one capful of solution for a standard-sized clean-water tank in a docking station. Always check the bottle for the specific recommendation for your product. Fill with water first: This is a crucial pro-tip. Always fill the clean water tank with cool water before adding the solution. Adding the solution first can cause it to foam up excessively when you add water from the tap. Measure and add the solution: Use the bottle's cap as a measuring tool, as intended by the manufacturer, and add the recommended amount to the water-filled tank. Close and start clean: Secure the tank lid, place it back in the dock or robot, and start your cleaning cycle. FAQs Q1: What cleaning solution can I safely use in my robot vacuum? The safest and most effective option is always the cleaning solution specifically made by your robot's manufacturer. If that's not available, using plain, cool water is the only other universally recommended option that will not damage your device or void your warranty. Q2: Can I put vinegar in my robot vacuum? No. This is one of the most common but dangerous DIY mistakes. Vinegar is acidic and will corrode the robot's internal rubber seals and metal parts over time, leading to leaks and permanent damage. Q3: Can I use bleach or other disinfectants in my robot vacuum? Absolutely not. Harsh chemicals such as bleach and ammonia are highly corrosive and will quickly damage the sensitive internal components of your robot. They can also damage your floors. Q4: Which cleaners should be avoided for all types of floors? In general, avoid highly acidic cleaners (such as undiluted vinegar) on natural stone, including marble and granite, as they can cause etching. Also, avoid oily or waxy cleaners (like oil soaps or polishes) as they leave a residue that dulls the finish and can make floors slippery. Always stick to pH-neutral formulas for the broadest safety. Conclusion Water alone can't handle grease because it doesn't spread well. Special cleaners use ingredients that grab dirt and break down tough stains, giving you much better cleaning. For safer use, select cleaning solutions that are made by the manufacturer of your robot vacuum. These products are designed to protect the internal components and help maintain your warranty. Other cleaners may not function properly, and homemade mixtures, such as vinegar or oils, can damage your robot vacuum. Use official cleaning solutions to get the best results and help your vacuum last for many years. Ready to unlock a truly effortless and brilliant clean? Discover Dreame's specially formulated cleaning solution, engineered to bring out the best in your robot and your floors.
Continue reading
Robot Vacuums for Multi-Floor Homes: Complete Guide to Challenges & Solutions

Robot Vacuums for Multi-Floor Homes: Complete Guide to Challenges & Solu...

Dreame Editorial Team |
Robot vacuums can work effectively in multi-floor homes, but they require different considerations than single-level cleaning. While no robot can climb stairs independently (yet), modern models offer advanced mapping, obstacle navigation, and smart features that address most multi-floor challenges. This guide covers the main obstacles you'll face and how current technology solves them, plus practical strategies for getting the most from your robot vacuum across multiple floors. The 5 Major Challenges of Robot Vacuums in Multi-Floor Homes 1. Stair Safety Concerns Modern robot vacuums feature sophisticated cliff sensors that detect sudden height changes and redirect the device away from drops. For example, Dreame's X50 Ultra includes 3DAdapt™ Smart Obstacle Avoidance with dual-laser 3D structured light technology, identifying up to 200 types of obstacles. Users can create virtual barriers and no-go zones through smartphone apps for extra security around stairwells. 2. Manual Carrying Requirements While robot vacuums require manual transport between floors, modern designs balance powerful features with manageable weight. Advanced models include user-friendly features that make floor-to-floor transport practical for most users. 3. Obstacle Navigation When it comes to cleaning across different rooms and surfaces, one of the biggest challenges for robot vacuums is navigating raised thresholds or uneven flooring. To tackle this, Dreame X50 Ultra has introduced the revolutionary ProLeap™ System with robotic retractable legs that can cross obstacles up to 6 cm (2.4 in) (double-layer thresholds). This breakthrough technology uses synchronized or hurdle-style obstacle crossing, automatically adapting to different threshold types – a world-first capability in consumer robot vacuums. 4. Battery Life & Coverage Premium models feature recharge-and-resume capability—when the battery runs low mid-job, the robot returns to its dock, recharges, and continues cleaning from where it left off. Top-tier models offer 180-240 minutes of runtime. Dreame's X50 Ultra features a 6,400 mAh battery with 30% faster charging. 5. Multi-Floor Mapping Modern models support multi-floor mapping with cloud storage of up to 4-5 different floor plans. Dreame's X50 Ultra can automatically recognize which floor it's on using landmark detection and introduces VersaLift Navigation, which elevates the DToF sensor for 360-degree scanning in open areas and lowers it for under-furniture cleaning (89 mm / 3.5 in clearance). Best Strategies for Using Robot Vacuums on Multiple Floors The Single Robot Approach Most homeowners start with one high-quality robot vacuum and transport it between floors as needed. This provides lower initial investment, consistent cleaning performance, and simplified maintenance. Setup: Keep the full multi-functional base station on your highest-traffic floor (typically the main living level). Create floor-specific cleaning routines through smartphone apps and establish regular moving schedules (e.g., every Monday/Thursday for secondary floors). Multiple Robot Strategy For larger homes over 280 m² (3,000 sq. ft.) or households with mobility challenges, multiple robots offer maximum convenience. Use premium models on the main floor and mid-range units on the secondary floors to optimize costs. Key Management Tips Scheduling: Use smartphone apps to create different cleaning schedules for each floor Maintenance Routine: Establish regular patterns for refreshing the robot's base stations on each floor Map Management: Ensure the robot can store and recognize maps for each floor automatically Tips for Optimal Multi-Floor Robot Vacuum Use To get the most out of your robot vacuum in a multi-floor home: Perform Initial Mapping for Each Floor: Take the time to let your robot create a complete map of each level. This is crucial for efficient navigation and future cleaning. Declutter Before Cleaning: While Dreame robots have excellent obstacle avoidance, removing small items, toys, and cables will always ensure the most thorough, uninterrupted cleaning session. Ensure Good Lighting for Optimal Navigation: For robots utilizing visual navigation, good lighting helps them perceive their environment accurately. Regularly Clean Sensors and Brushes: A quick wipe of sensors and periodic cleaning of the brushes will maintain optimal performance. Update Firmware: Keep your robot's firmware updated through the Dreamehome App to access the latest features and performance improvements.   What to Look For In a Robot Vacuum for a Multi-level Home Key Specifications Suction Power: 15,000-20,000 Pa for thorough cleaning on carpet and hard floors Multi-floor mapping: Storage for 4-5 different floor plans with automatic recognition Battery Life: 180+ minutes runtime with recharge-and-resume capability Obstacle Navigation: Dual-sensor systems (LiDAR + camera/structured light) Essential App Features Room-specific scheduling and suction control Virtual boundary creation and modification Remote monitoring and troubleshooting Smart home integration (Alexa, Google Assistant) Budget Guidelines Budget ($300–$600): Basic multi-floor mapping, manual emptying Mid-Range ($600–$1,200): Advanced navigation, some automation Premium ($1,200–$2,000): Full automation, advanced obstacle avoidance, comprehensive base stations Which Dreame Robot Vacuum is Right for Your Multi-Floor Home? Dreame offers a comprehensive range of robot vacuums, each designed to meet different needs and budgets: Dreame D Series (e.g., D10 Plus Gen 2): Entry-point for multi-floor homes with reliable multi-floor mapping and auto-empty dock. Great balance of features and affordability. Dreame L Series (e.g., L10s Ultra, L40 Ultra): Enhanced navigation, powerful vacuuming and mopping, and advanced self-cleaning dock features like automatic mop washing and drying. Dreame X Series (e.g., X40 Ultra, X50 Ultra): Premium flagship models with industry-leading suction, advanced obstacle avoidance, innovative removable/extendable mops, and comprehensive self-cleaning base stations. Feature D10 Plus Gen 2 L10s Ultra L40 Ultra X40 Ultra X50 Ultra Multi-Floor Mapping Yes Yes Yes Yes Yes Cliff Sensors Yes Yes Yes Yes Yes Auto-Empty Dock Yes Yes Yes Yes Yes Mop Lifting No Yes Yes Yes Yes Hot Water Mop Wash No No Yes (65°C/149°F) Yes (70°C/158°F) Yes (80°C/176°F) Suction Power (Pa) 6,000 7,000 11,000 12,000 20,000 Obstacle Avoidance LDS AI RGB + Dual-Laser 3D Structured Light AI RGB + Single-Laser 3D Structured Light +LED Dual-Line Laser+AI Dual-Line Laser+RGB AI+LED Threshold Crossing 20 mm(0.79 in) 20 mm(0.79 in) 22 mm(0.87 in) 22 mm(0.87 in) 60 mm (2.36 in)(ProLeap™) VersaLift Navigation No No No No Yes HyperStream DuoBrush No No No No Yes UV Sterilization No No No No Yes Specific features may vary by model variant and region. Check individual product pages for accurate specifications. Step-by-Step Setup for Robot Vacuum Multi-Floor Cleaning Setting up your robot vacuum for multi-floor cleaning should be straightforward. Let's take Dreame vacuums as an example. While the exact steps can vary slightly by model, the general process through the Dreamehome App is as follows: Ensure the Robot & Base Are Ready: Place your Dreame robot vacuum on its charging base on the first floor to be mapped, ensuring the base is plugged in and charged. Open the Dreamehome App: Launch the app on your smartphone or tablet and go to the device's Map Management section – usually marked with a "map" icon. Enable Multi-Floor Mapping: Toggle on the "Multi-layer map switch" or "Multi-floor Management" feature in the Map Management menu. Create a New Map for the Current Floor: Tap the "+" or "Create Map" button to start mapping the current environment. You can choose full cleaning or "Quick Map/Fast Map" mode. Complete the Mapping Process: Let the robot drive around the floor, map the area, and return to its base. Once it docks, the new map will be saved. Map Additional Floors: Pick up the robot (leave the base on the first floor), move it to the next level, and repeat steps 4–5. You don't need to relocate the dock to the new floor. Rename Maps for Clarity: Return to Map Management and label each saved map (e.g., "First Floor," "Upstairs") to simplify selection later. Switch and Clean the Desired Floor Physically move the robot (and dock if needed) to the floor you want to clean. In the app's Map Management section, select the corresponding map and tap "Apply" or "Use this map". Start the cleaning job. Ensuring the robot is on the correct floor prevents localization errors. Resume or Return to Base: After finishing, the robot will return to its starting location. If it's on a different floor without a dock, you can manually move it back to recharge. Alternatively, if moved mid-job, it can finish mop-washing or resume within 15 minutes. Frequently Asked Questions Q: Should I buy multiple robots or move one between floors? A: For most households, starting with one premium robot and moving it between floors provides the best value. Consider multiple robots only for very large homes or when physical transport becomes impractical. Q: Are stair-climbing robot vacuums available? A: While prototypes exist, no consumer-ready stair-climbing robots are currently available. Focus on advanced threshold-crossing capabilities like Dreame's ProLeap™ system instead. Q: How often should I move my robot vacuum between floors? A: Most users find 2–3 times per week sufficient for secondary floors, with daily cleaning on the primary living floor. Conclusion & Recommendations Robot vacuums have evolved significantly to address multi-floor home challenges. While they cannot climb stairs independently, modern features like advanced obstacle crossing, intelligent mapping, and extended battery life make them increasingly viable for multi-level cleaning. For multi-floor homes, prioritize models with robust multi-floor mapping capabilities, advanced obstacle navigation (like Dreame's ProLeap™ system), extended battery life with recharge-and-resume, and comprehensive app controls for complex scheduling. Investing in a premium robot vacuum with advanced multi-floor features often delivers better long-term value than multiple basic units, especially given the convenience, performance, and technological advancements you receive. Ready to transform your multi-floor cleaning routine? Research models that specifically address these challenges, and remember that the best robot vacuum is one that fits seamlessly into your lifestyle while delivering consistent, reliable performance throughout your home.  


Continue reading
Do Vacuums Kill Spiders or Just Scare Them Away?

Do Vacuums Kill Spiders or Just Scare Them Away?

Editorial TeamDreame |
Spiders are a common sight in many homes. They often evoke fear and curiosity. But what happens when you vacuum them? Do vacuums kill spiders, or do they just scare them away? This question puzzles many homeowners. Understanding the answer can help in managing spider encounters. Spiders can be more than just a spooky presence. For many, they cause real fear. While spiders are key for controlling other pests, their unexpected and constant appearances can be unsettling. Identifying spider species can also influence extermination methods. Some species are more resilient than others. Knowing this can guide your approach. Here, we explore vacuuming’s impact on spiders, considering: Whether vacuums kill spiders Alternative spider control methods Tips for effective spider vacuuming Understanding these aspects will help you decide the best approach for dealing with spiders in your home. How to Get Rid of Spiders Spiders are resilient, but certain methods can eliminate them. Understanding these options helps in choosing the best spider extermination approach. Common methods include: Chemical sprays and insecticides Natural deterrents like peppermint oil and citrus peels Physical removal with vacuums and sticky traps Each method has its pros and cons. Their effectiveness often depends on the spider species and the home's environment. Method Pros Cons Chemical sprays & insecticides Highly effective at killing on contact Can prevent re-infestation if residual Can be toxic to pets/kids  Harsh chemical smell Natural deterrents Eco-friendly. Repels spiders without killing them Easy DIY solution Limited effectiveness Doesn’t remove existing spiders Vacuum cleaners Immediate removal No chemicals involved Vacuums clean dust/debris at the same time Traps only work where placed Spiders may survive weak suction Do Chemical Killers Kill Spiders? Chemical insecticides are designed to kill spiders quickly. They are often effective due to their ability to target and eliminate spiders on contact. These sprays contain active ingredients that interfere with spiders' nervous systems. However, they may pose risks to humans and pets when not used properly. To safely use chemical spider killers: Follow all label instructions carefully. Ensure proper ventilation when spraying indoors. Keep children and pets away from treated areas until dry. While effective, chemical insecticides should be a last resort due to potential health risks. Homeowners should also consider their long-term impact on the environment. Opting for eco-friendly solutions where possible is a wise decision for those who prioritize safety and sustainability. Do Vacuums Kill Spiders? The idea of vacuuming spiders raises questions about its effectiveness. Most vacuums can trap spiders using strong suction. However, it doesn't guarantee immediate death. The impact depends on the vacuum's power and the spider's size. Small or fragile spiders may not survive the process. Larger spiders might endure and escape later. The enclosed dust bag or canister can suffocate or dehydrate spiders over time. It's important to use a vacuum with sufficient suction to increase the chances of spider extermination. For effective vacuuming, consider: Emptying the vacuum right after use to prevent escape. Utilizing vacuums equipped with HEPA filters to trap allergens and spider debris. Inspecting the canister regularly for any surviving spiders. Vacuuming remains a quick, non-chemical option for managing spiders in homes, but proper follow-up is crucial to ensure success. How to Vacuum Spiders Properly Take these steps: Set your vacuum to strong suction. Move slowly to direct the spider into the hose. Immediately dispose of the contents after vacuuming. Slow movement helps to avoid frightening the spider, which may allow for a more effective capture. Don't forget to seal and empty the vacuum's canister quickly to ensure the spider cannot escape back into your home. Steps for Killing Spiders With Robot Vacuum Robot vacuums are great at breaking the web “scaffold” along baseboards and under furniture. The side brush hugs walls, flicks silk and dust into the intake, and regular runs keep those spots too clean for webs to re-anchor. (Ceilings and high corners still need a duster—robots live on the floor.) If it vacuums a spider: Most get roughed up by the brush and airflow; some can survive in the bin/bag. What to Do After Vacuuming a Spider Following vacuuming, a few steps ensure the job is complete. Ignoring post-vacuum measures increases the risk of spider escape. What you should do: Want to release it? Pause the vacuum, seal the canister or bin, take it outside, and tap the spider out. Prefer to dispose of it? Empty into an outdoor trash bag (or swap the sealed dock bag). Not sure what species? Don’t reach in, put gloves on first, keep it sealed, toss it. Immediately clean the canister to remove debris. Cleaning the vacuum ensures no eggs or allergens remain. Outdoor disposal prevents spiders from re-entering the home. Implement these steps to enhance the efficacy of your vacuuming efforts and uphold cleanliness. Pro Tips for Choosing a Time-saving Vacuum Selecting an efficient vacuum saves time and improves spider control. A powerful device optimizes performance and results. Consider these features: Choose a model with strong suction power. Opt for machines with a transparent canister. Look for HEPA filters to trap allergens. A  facilitates quick inspections for surviving spiders. Strong suction ensures they are captured. HEPA filters keep your home environment healthy by trapping microscopic particles. Prioritizing these features helps maintain a spider-free home environment with ease. Click here to see Dreame robot vacuum's top picks. FAQ Do vacuums kill other bugs too? Vacuums often kill smaller bugs like ants and flies due to the powerful suction. However, larger insects may survive if the vacuum's force isn't sufficient. Ensuring regular disposal and cleaning aids in preventing any surviving pests from returning to the home environment. Can spiders survive inside a vacuum? Usually not for long. Even if a spider survives the suction, the vacuum’s dustbin or bag is a hostile environment.  Can a spider crawl out of a vacuum? Spiders could potentially escape from a vacuum if not emptied promptly. Some species, given time, might recover and find their way out. To avoid this, always empty and dispose of the vacuum contents immediately after use, preferably outdoors, to minimize the risk. How to clean my vacuum filter after vacuumed a spider? Cleaning your vacuum filter maintains its performance. Debris and allergens should be routinely removed. Here’s how to clean it: Remove the filter according to the manual. Tap out the debris or wash with water if washable. Let it dry completely before reinstallation. Regular maintenance ensures efficient vacuuming, keeping your home free of both spiders and allergens. Conclusion While vacuums can be effective against small or fragile spiders, survival varies across species. It largely depends on the vacuum's power and the steps you take after vacuuming. Employing vacuums as part of broader pest control methods helps maintain a spider-free environment. For those uneasy with critters at home, regular vacuuming and proper disposal can provide peace of mind. Implementing multiple strategies maximizes spider control, while respecting their ecological role.
Continue reading
Vacuum or Mop First? The Golden Rule for Clean Floors

Vacuum or Mop First? The Golden Rule for Clean Floors

Chris Zhang |
Vacuum or mop first? Vacuum first, always. Mopping a floor that still has dust and grit on it just moves the dirt around, leaving a gritty, streaky film and, in the worst cases, scratching the finish. This guide walks through the rule and why it works, then the handful of times it is fine to mop first. It also covers how the order changes by floor type and the two ways to run a vacuum-then-mop routine. Why You Should Vacuum Before Mopping Dry dirt is made up of sand and grit tracked in on shoes, food crumbs, pet hair, and dust. Add mop water, and it turns into an abrasive paste that grinds against the floor as you push the mop. That grinding does real damage. Fine grit leaves marks too small to notice on their own, but they build up over months into a dull, hazy patch, which can only be fixed by refinishing the floor. The problem is worse on tile. Muddy mop water gets pushed into the grout lines, and grout is porous, so it soaks up the dirty water and can stain dark no matter how much you scrub. By vacuuming first, you clear those dry particles, so the mop has a clean surface and can focus on lifting spills and stains. Pro-tip: Run the crevice tool along the baseboards and corners, which is where a lot of the grit hides, before the main vacuum pass. What Is the Correct Order for Cleaning Floors? The most efficient order for cleaning floors is to dust and wipe surfaces first, then vacuum, then mop. Work from the top of the room down, so the dust you knock loose settles onto the floor you're planning to clean. Dust and wipe high surfaces like ceiling fans, shelves, sills, and skirting, working from the top down. Vacuum the whole floor, including the edges and corners. Mop the hard floors once the dust is gone. Finish vacuuming the entire area before you mop any of it. If you clean room by room and switch between the two, you walk back across the wet floor, carrying fresh dust with you. Vacuum everything, then mop everything. Sweeping or Vacuuming? A Vacuum is Better A vacuum cleans better than a broom for everyday floors. A broom drags fine dust and allergens back into the air, while a vacuum pulls them into the machine and traps them. The American Lung Association makes the same point, noting that a true HEPA filter traps 99.97% of particles and that a sealed system keeps that dust from leaking back out as you clean. So if you are deciding whether to sweep or vacuum first for a routine clean, vacuuming usually handles the whole job on its own. The one time a broom still earns its place is large, hard debris like broken glass or dry leaves. Sweep that up first so it does not jam or scratch the inside of your vacuum, then vacuum the fine dust left behind. Our full guide on whether you should be vacuuming or sweeping goes into more detail. It covers when a broom still makes sense, like quick dry cleanups with no power needed, and how to match the tool to carpet, hard floors, and tile. Are There Exceptions? Should you vacuum before mopping every time? Almost always, but a few messes are better dealt with by hand or a mop before a vacuum comes near them. Liquid spills. Wipe or mop up juice, milk, or water right away. A dry vacuum is not built for liquid, and pulling water into one can wreck the motor. Sticky or dried-on messes. A vacuum slides straight over syrup, dried food, or gum. Soften the spot with a damp cloth and clean it by hand first. Mud and other wet debris. Wet muck can clog and damage the inside of a dry vacuum, so scoop or wipe it up, or let it dry completely before vacuuming. Small bathroom floors. These are usually getting washed and sanitized anyway, so a quick wipe or mop often does the job without a separate vacuum pass. All of these come back to one simple idea. Get the dry dirt off the floor before any water touches it. Mop over dust or pet hair, and you just spread it around and make a bigger mess, which is why the dry pass always comes first. For how the dry and wet steps fit together on each floor type, see wet mopping versus dry mopping. Does the Order Change by Floor Type? The order stays the same on every floor. Vacuum first, then mop. What changes is how much water you use and how careful you need to be. Hardwood and engineered wood Wood shows wear the fastest, since the finish on top is thin and hard to repair once it dulls. Vacuum first so loose grit does not get dragged across it, then mop with a barely damp pad and dry it quickly. Our how to clean hardwood floors guide goes deeper into safe cleaners and keeping water out of the seams. Tile and stone Tile lives in kitchens and bathrooms for a reason, since it sees more water than any other floor. The weak point is the grout between the tiles, so vacuum first anyway to stop a mop pushing grit into those lines. The how to clean floor tile grout guide walks through getting dingy grout clean and keeping it that way. Laminate and vinyl These look like wood but are sealed boards over a core that swells if water reaches it, and that damage does not come back out. Vacuum first, then mop with a well-wrung pad, leaving no puddles behind. Our how to clean laminate floors guide covers how much moisture is safe and what to keep off them. Carpet and rugs Carpet gets vacuumed, never mopped. If your home mixes carpet with hard floors, the best robot vacuum for mixed floors guide covers what to look for in a vacuum that handles both. Important: Never mop carpet. Water sinks into the fibers and padding where a vacuum cannot reach, leaving dampness and grime trapped. Pulling liquid back out is a job for a carpet extractor, a different machine. Two Ways to Vacuum and Mop Your Floors You can clean in two passes with separate tools, or in one pass with a machine that does both. The rule is the same either way. The dry pass comes before the wet one. Here are both approaches and who each one suits. Cleaning Method 1: The Classic Way If you like separate tools and do not mind the extra time, this gives you full control over every step. It also costs the least to get started, since a decent vacuum and a microfiber mop are all you need. Step 1. Vacuum correctly. Pick up small items like toys and shoes first. Run the crevice tool or dusting brush along baseboards and corners. Work from the farthest point toward the door in straight, overlapping rows. Empty the canister when it's about two-thirds full to keep the suction strong. For a deeper walk-through, our how to clean a vacuum cleaner guide covers the filters, brush roll, dustbin, and hose, plus how often each one needs cleaning. Step 2. Mop smartly. Use a microfiber flat mop on hardwood, laminate, and vinyl. Fill two buckets, one for cleaning solution and one for rinse water, so you are not putting dirty water back down. Keep the mop damp, not dripping. On hardwood, mop in the same direction as the planks. If your floors keep drying with streaks, our how to mop without leaving streaks guide covers the usual culprits, like using too much cleaner and mopping with a pad that is too wet. Pros Full control, cheaper tools, good for small spots. Cons More time and effort, easy to miss spots. Cleaning Method 2: The Floor Vacuum and Mop Combo A combo machine vacuums and mops simultaneously, following the correct dry-then-wet sequence on every spot it covers. It costs more up front, but it turns a two-tool, two-bucket job into a single pass. There are two main kinds. The upright wet dry vacuum. You push it like a normal vacuum, and if the category is new to you, our guide on what a wet dry vacuum is breaks down how it works. It vacuums crumbs and debris while a wet roller scrubs, then sucks the dirty water into a separate tank, so you are always cleaning with fresh water. It suits homes with kids or pets where spills and muddy entryways are a daily thing, since you can pull it out and clean one area fast. On carpet, an upright wet dry vacuum dry-vacuums only, since its wet function is built for hard floors. The robot vacuum and mop. For a routine that runs itself, a robot vacuum and mop a spot right before mopping it. Smart navigation. Advanced robot vacuums use a spinning laser system called LIDAR to map your home, so they clean in neat rows and know where they have already been, rather than bumping around. Intelligent mopping. Basic robot vacuums drag a wet pad. Premium models use two mop pads that spin and press down on the floor, scrubbing dried-on spills far better than a simple wipe. Automatic mop lifting. These robot vacuums tell hard floors from carpet, and when one senses a rug, it lifts the mop pads so your carpet stays dry while it keeps vacuuming. A truly automatic base station. For a routine that runs itself, a robot vacuum and mop cleans each spot in the right order, vacuuming then mopping, on a schedule you set and walk away from. Here is how the two combo machines compare. Feature Upright Wet Dry Vacuum Robot Vacuum and Mop Best for Deep cleaning tough messes Daily cleaning without effort How it works You push it to scrub and clean It drives around your home by itself Convenience Faster than two tools, still manual Turn it on and walk away Effort You do the work The robot vacuum does the work for you How to Pick the Best Vacuum and Mop Combo Machine Your choice comes down to two things, how hands-on you want to be and what your floors are made of. A few questions narrow it down. What are your floors like? If you have a lot of rugs and carpet, look for a robot vacuum with reliable mop-lifting so it keeps the carpet dry. Do you have pets or long hair? Look for a tangle-free brush so you don't cut hair off the roller every week. How is your home laid out? Open floors suit a robot vacuum that can map and run on its own, while a place full of tight corners or split levels can be easier to clean with a push machine you steer yourself. How much time do you want back? A robot vacuum with a self-cleaning dock takes the upkeep off your hands, emptying and washing itself between runs. If a one-pass machine is the way you want to go, the Dreame X60 Max Ultra Complete is the one to look at. It vacuums and mops in the same run, lifts the mop away on carpet so rugs stay dry, and washes and dries its own mop pads at the dock, so every pass starts with a clean pad instead of pushing old dirt around. [product handle="x60-max-ultra-complete-robot-vacuum"] Is a combo machine worth it? It is worth it if you clean hard floors often, since it vacuums and mops in one go instead of two separate rounds. It matters less if most of your home is carpet, where a plain vacuum already does the job. After a year of weekly cleans, what you are really paying for is the hours you get back and floors cleaned in the right order every time. Dreame Take: A clean floor shouldn't need you to juggle two tools. That's why we design our robot vacuums to run the dry and wet passes in the right order on their own, so getting it right comes down to the machine, not your routine. Get the Order Right Every Time For clean floors, follow one simple rule. Vacuum first, then mop. It works whether you use two separate tools or one combo machine, and it protects your floors while giving a much cleaner result. If you are weighing a one-pass machine, browse Dreame's robot vacuums and match one to your floors. Frequently Asked Questions Do you have to vacuum before mopping every time? Not always. If you vacuumed yesterday and just need a light touch-up, you can mop straight away. If the floor hasn't been cleaned in a while, vacuum first, or the mop drags yesterday's dust into a gritty film, and you end up cleaning the floor twice. Is it better to mop after vacuuming, or to vacuum and mop in one go? Both work well, and the rule is the same either way. Two separate passes give you more control over a badly soiled floor, while a combo machine runs both steps together for routine upkeep. How often should you vacuum and mop? It depends on the home. High-traffic hard floors and homes with pets do best with vacuuming most days and mopping weekly, while a quieter household can stretch both. Can you vacuum and mop at the same time? Yes, on hard floors, with a wet dry floor washer that suctions and washes in one pass, or a robot vacuum that does both in sequence. It applies to hard floors, not carpet Do mops spread bacteria? A dirty mop can, yes. If it is not rinsed and dried, it moves dirt around instead of lifting it, so rinse the pad or let a machine wash it between uses. Should you use cleaning solution every time you mop? Not always. Too much solution is a common cause of streaks and sticky floors, so plain warm water is enough for routine mopping on most days. Save the cleaner for when the floor is actually dirty. References American Lung Association (2025) Not All Vacuums Are Created Equal: Pick the Best One for Your Health. Available at: https://www.lung.org/blog/vacuum-indoor-air-quality
Continue reading




















