Black Friday Sale Is Live! Best Prices of 2025
00
Days
: 00
Hours
: 00
Mins
: 00
Secs
Shop Now > close button
Why Is My Floor Sticky After Mopping? 5 Common Mistakes & How to Fix Them

Why Is My Floor Sticky After Mopping? 5 Common Mistakes & How to Fix...

Editorial TeamDreame |
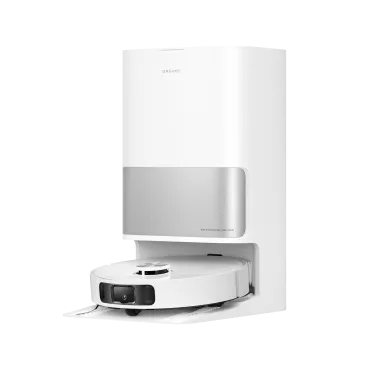
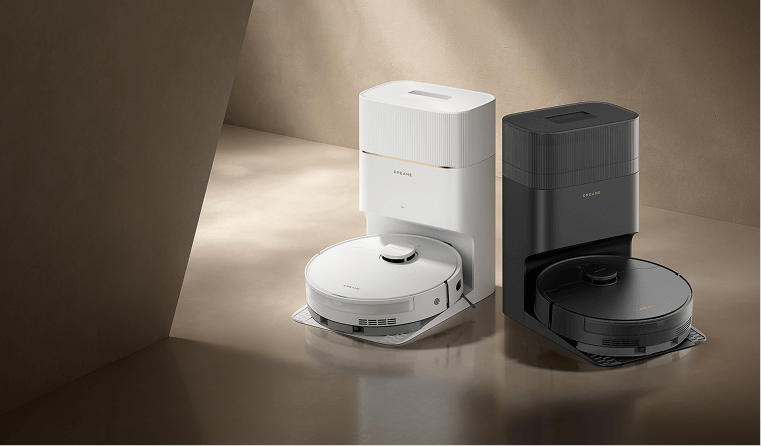
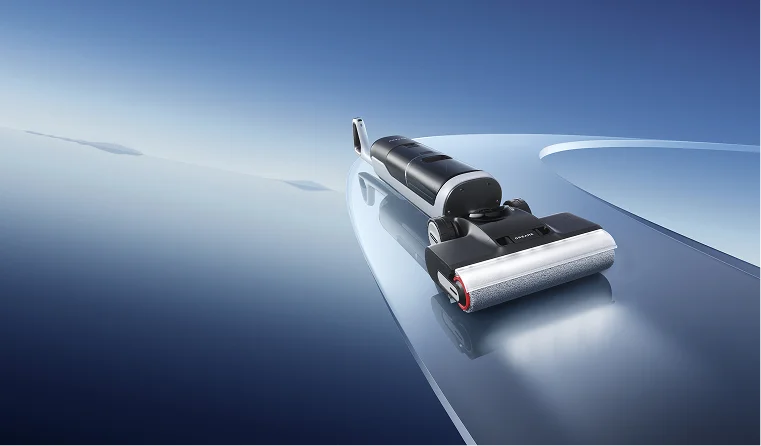
You just spent your time and energy mopping the floor, expecting a smooth, clean shine. Instead, it feels tacky and grimy under your feet. It’s confusing, especially when you followed every step you thought was right. You question yourself, why is my floor sticky after mopping with vinegar? The truth is, sticky floors aren’t caused by laziness or dirt left behind.  They happen because the cleaning process itself goes wrong in small but crucial ways. In this guide, we’ll pinpoint exactly where things go off track and show you how to clean sticky tile floors for a residue-free, professional-level clean every time. The Real Reason: Cleaner Residue on Your Floors Here’s the surprising part: it’s not the dirt you missed; it’s the invisible film left behind. Most cleaning solutions contain surfactants, ingredients that lift grease and grime. These surfactants cling to the floor if not rinsed off completely, creating a thin, sticky layer that attracts new dirt almost instantly.  Even the best cleaner can cause buildup when it’s overused or poorly rinsed. What feels like a dirty floor is often just leftover soap turning into a magnet for dust and footprints. Once you understand that, the problem becomes easy to solve: you’re not battling grime, you’re fighting residue. Pinpoint the Source of Sticky Floors / Pinpoint Your Mopping Mistake Now let’s figure out where things went wrong. These are the five most common causes of post-mop stickiness. You might recognize one or all of them in your own routine. Mistake #1: Using Too Much Cleaning Solution More soap doesn’t mean it's clean. When the cleaner concentration is too high, there isn’t enough water to rinse it away. What’s left behind dries into a slightly tacky film that grabs every speck of dust that touches it. The fix is simple: always check the dilution ratio on the bottle.  A capful in a gallon of water usually does the job. Think of cleaner as seasoning, too much ruins the recipe. If you can see suds, you’ve already gone too far. The right amount leaves the floor smooth, not slippery or sticky. Mistake #2: Using the Wrong Type of Cleaner Some products are simply wrong for the surface. Oil-based soaps or heavy all-purpose cleaners can coat hardwood and tile with residue that doesn’t rinse off easily. What you need instead is a pH-neutral cleaner designed for your specific floor type. It lifts dirt without leaving a trace once wiped away.  For sealed hardwood or laminate, choose a wood-safe, low-residue formula. For vinyl and tile, light vinegar solutions or neutral floor detergents work best. Picking the right product is half the battle in achieving a clean that actually feels clean. If you’re using a vacuum mop, don’t forget that the cleaning solution is important as well. Check out our Vacuum Cleaning Solution Guide: How to Choose, Use, and Alternatives for more info! Mistake #3: Mopping with Dirty Water Once your mop water turns cloudy, it’s not cleaning anymore; it’s spreading dirt evenly across the floor. Each dip of the mop reintroduces grime that’s already been lifted. The result is a dull, sticky finish that feels worse after every pass. Professionals solve this with a two-bucket system: one for the cleaning solution and one for rinsing out the mop.  This simple change prevents “grime redistribution.” Empty and refill your rinse water often, especially when tackling large areas. Clean water means a clean floor, not a recycled mess. Mistake #4: Skipping the Final Rinse Many people stop mopping as soon as the dirt disappears. That’s where the residue begins. The rinse step isn’t optional; it’s essential. After mopping with cleaner, go over the surface once more with clean water and a fresh mop head.  This removes leftover soap and minerals before they dry. It’s a quick extra round that makes all the difference. You’ll notice your floor feels smoother and looks clearer, without that faint film that usually returns hours later. Mistake #5: Starting with a Dirty Mop A dirty mop spreads old residue the moment it touches the floor. Dried cleaner, grease, or bacteria hiding in the fibers mix with your fresh solution and undo your work. Always start with a clean, dry mop head.  Wash microfiber pads after every use, or replace disposable ones right away. When your cleaning tool is spotless, the results finally match your effort. It’s a simple rule that professionals never skip. How to Mop for a Residue-Free Finish Now that you know the cause, here’s the solution for how to clean sticky wood floors. A clean, non-tacky floor comes down to three key habits: Use the Right Amount of the Right Cleaner: Always follow dilution instructions and choose a pH-neutral, residue-free formula suitable for your floor type. Adopt the Two-Bucket Method: Keep one bucket for your cleaning solution and another for rinsing your mop. Never dip a dirty mop into the clean mix. Finish with Fresh Water: Go over the floor once more using clean water only. It clears every trace of detergent or vinegar. For detailed techniques and floor-specific solutions, see our complete guide on How to Clean Sticky Floors. The Ultimate Fix: A Mop That Can't Make Mistakes Even with the best method, human error creeps in. That’s why new technology is built to eliminate these weak points entirely. Wondering how to clean sticky hardwood floors? Consider smarter devices!  Wet Dry Vacuums Wet-dry vacuums combine suction, scrubbing, and rinsing in one step, so the floor never sits under dirty water. Devices like the Dreame H15 Pro Heat Wet Dry Vacuum keep clean and dirty water separate, apply precise amounts of cleaning solution, and dry the floor instantly. The result is spotless, streak-free, and residue-free in a single pass. You get the cleaning power of heat without the risk of warping or damage, just spotless, smooth floors every time. Robot Vacuums and Mops If you’d rather skip mopping altogether, a robot vacuum-mop handles it on its own. The Dreame Aqua10 Ultra Roller Robot Vacuum measures out just enough solution, uses clean water for every pass, and even washes its mop pads after each run. It doesn’t forget to rinse or reuse dirty water, so the sticky floor problem just disappears. Frequently Asked Questions on Why Floors Stay Sticky Why are my floors still sticky after mopping? Most likely, there’s leftover soap or dirty water on the surface. The cleaner dried before it was fully rinsed off. What's the best way to clean sticky floors? Use warm water and a mild cleaning solution, followed by a thorough rinse to remove residue. For easier upkeep, smart cleaning tools like wet and dry vacuums or robot vacuums with mopping functions do the job automatically. Scrubbing, rinsing, and drying in one pass to leave your floors spotless without the extra effort. Why does my floor feel sticky even after using vinegar? Vinegar can help, but too much of it, or no rinse afterward, can leave a faint residue. One cup per gallon of warm water is enough. What kind of floor cleaner won't leave a sticky residue? Look for “pH-neutral” or “residue-free” on the label. You can test it by spraying a little on a mirror; if it dries clear, it’s safe for your floor.
Continue reading
How to Clean Sticky Floors for Good: A Step-by-Step Guide

How to Clean Sticky Floors for Good: A Step-by-Step Guide

Editorial TeamDreame |
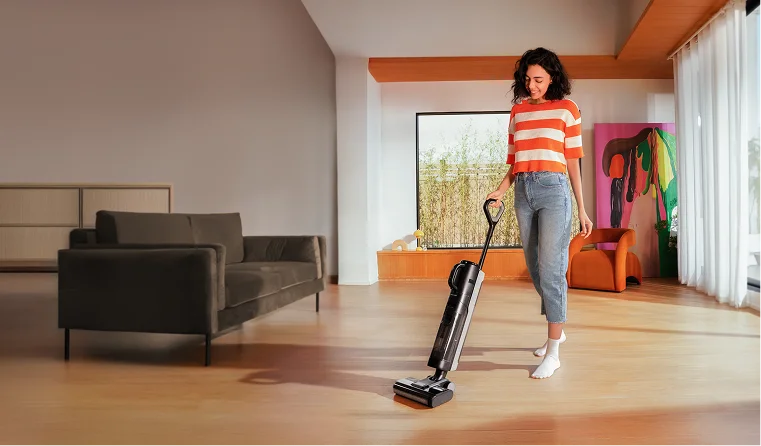
There’s nothing more frustrating than mopping your floors, only to find them feeling tacky or sticky under your feet an hour later. It’s a counterintuitive problem that can make you feel like your hard work was for nothing. You scrubbed, you cleaned, but the floor feels dirtier than when you started. If this sounds familiar, take a breath. The problem isn't your effort—it's a misunderstanding of what actually causes that sticky feeling. The solution isn't to scrub harder; it's to fix the cleaning process itself. This guide will walk you through a clear diagnosis of why your floors get sticky and provide a professional method to strip old residue, clean correctly, and finally maintain that truly clean, non-tacky floor you’ve been after. Why Are Your Floors Sticky? Before you can find the right solution, you have to understand the problem. In almost every case, that sticky feeling comes down to one of a few common culprits that have more to do with your cleaning method than the dirt itself. 4 Most Common Causes of Floor Stickiness Cleaner Residue: Most floor cleaners contain ingredients called surfactants. Their job is to lift dirt, but they are often designed to leave a microscopic film behind. This leftover chemical residue is inherently tacky and acts as a "dirt magnet," attracting new dust and grime and starting the sticky cycle all over again. Using Too Much Product: This is the single biggest mistake. Every cleaner has a recommended dilution rate—the perfect mix of cleaner and water. When you use too much soap, there isn't enough water to rinse it all away, guaranteeing a sticky, soapy residue is left on the floor. Dirty Water and Mops: If you mop your whole floor with a single bucket of water, you’re not really cleaning. After the first few passes, you're just redistributing a thin film of dirty, soapy water across the entire surface, which dries into a tacky layer. Grease and Spills: While cleaning residue causes widespread stickiness, stubborn sticky spots are often from the kitchen. Cooking oils can create a greasy film, and sugary spills from juice or soda will leave a tacky patch if not cleaned up thoroughly. Recommended Method to Deep Clean Any Sticky Floor This is the complete, step-by-step process professionals use to tackle sticky floors. Mastering this technique is more important than the specific brand of cleaner you choose because it removes the root cause of the problem: buildup. Step 1: Always Start with a Dry Prep This is a non-negotiable first step. Following the proper vacuum-first, then-mop cleaning rule, you must remove all loose debris like dust, hair, and crumbs. If you skip this, you’ll just turn that dry dirt into a "muddy slurry" that your mop will spread around, creating streaks and adding to the sticky film. Step 2: Strip Old Residue with a "Reset Rinse" Now, it's time to strip the invisible film of old cleaner that’s causing the stickiness. The best way to do this is with a simple, effective solution that cuts through the buildup without adding more soap. Mop your entire floor with a solution of 1 cup of white vinegar per gallon of warm water. The natural acidity of the vinegar neutralizes and breaks down the alkaline soap residue left behind by old cleaners. For heavy buildup, you may need to repeat this step. Step 3: Mop Correctly with the Two-Bucket System This is the professional secret to stop re-contaminating your floor. Instead of using one bucket that gets progressively filthier, you use two. Bucket One (Solution Bucket): Contains your properly diluted cleaning solution (or just the vinegar/water mix). Bucket Two (Rinse Bucket): Contains clean, plain water. Dip your clean mop in Bucket One and wring it out. Mop a small section of the floor. Then, before getting more cleaner, rinse the dirty mop thoroughly in Bucket Two. Wring it out completely before dipping it back in Bucket One for a fresh solution. This disciplined process ensures dirt is removed from the floor and trapped in the rinse bucket, not spread back onto your floor. Adjusting Your Cleaning for Different Floor Types Using the right technique is critical, but using the right solution for your specific floor is essential to avoid costly damage. What works on tile can permanently ruin natural stone. Floor Type Recommended DIY Solution Sealed Hardwood pH-neutral wood cleaner is safest. (Optional: 1/4 cup white vinegar per gallon of water) Laminate Spray bottle with equal parts water, vinegar, & isopropyl alcohol. Tile, Vinyl, & Linoleum 1 cup of white vinegar per gallon of warm water. Natural Stone (Marble, Granite) A few drops of pH-neutral soap in water, or a dedicated stone cleaner. How to Clean Sealed Hardwood and Laminate Floors The number one rule for these floors is to use minimal water. A mop should always be damp, not wet. Hardwood: The safest choice is a pH-neutral cleaner specifically formulated for wood. If you use the vinegar solution, make sure it’s highly diluted (1/4 cup per gallon) and always perform a spot test in a hidden area first, as the acid can dull some polyurethane finishes over time. Laminate: The fiberboard core of laminate is extremely vulnerable to water damage. A great DIY solution is a spray bottle with equal parts water, vinegar, and isopropyl alcohol—the alcohol helps the solution evaporate very quickly. A properly cleaned laminate floor should dry in a minute or two. And a critical warning: NEVER use a steam mop on laminate. Dreame Take The fear of damaging wood floors with heat and water is valid. It’s why tools like the Dreame H15 Pro Heat Wet Dry Vacuum are designed to solve this specific problem. It can clean with hot water to dissolve stubborn grime while being certified as safe for wooden floors, ensuring no deformation or damage.[1] How to Clean Tile, Vinyl, and Linoleum Floors These resilient surfaces are very durable and respond perfectly to the white vinegar and water solution for stripping residue and general cleaning. While the ceramic or porcelain tile itself is tough, the cement-based grout between them is not. Acidic cleaners like vinegar can slowly eat away at it over time. For targeted cleaning, it’s safer to learn how to clean floor tile grout with a paste of baking soda and water and a stiff brush. For step by step instructions, read our guides:  Clean and Protect Vinyl Plank Flooring Clean and Mop Tile Floors Clean Linoleum Floors  How to Clean Natural Stone (Marble, Granite, Travertine) This is the one floor type where you must be extremely careful. NEVER use vinegar, ammonia, lemon juice, or any other acidic cleaner on natural stone. The acid will react with the minerals in the stone and cause permanent damage called etching, which looks like a dull, cloudy spot. Use a cleaner specifically labeled as pH-neutral and safe for natural stone. In a pinch, a few drops of pH-neutral dish soap in warm water will work. For a complete breakdown, read our essential tips on how to clean marble floors. How to Keep Floors from Getting Sticky Again Now that your floors are truly clean, the goal is to keep them that way. Shifting from reactive deep cleaning to proactive maintenance will save you a world of effort. Set Up a First Line of Defense A huge amount of dirt is tracked in from outside. Use high-quality doormats both outside and inside your entrances. Even better, adopt a "no shoes in the house" policy to stop street grime from ever touching your floors. Use the Right Cleaner (and the Right Amount) Always follow the dilution instructions on your cleaner. And when buying a new one, look for terms like "residue-free." You can perform a "glass test." Spray a little of the cleaner onto a mirror and wipe it clean. If it leaves behind a streak or a hazy film, it will do the same on your floor. Keep Your Cleaning Tools Clean A dirty mop spreads dirt. It’s that simple. Make sure you learn how to clean your mop head and machine wash and dry your microfiber mop pads after every use. Rinse your buckets and let them dry completely to prevent bacteria growth. Make Your Routine Automatic The single mosteffective way to prevent sticky buildup is a consistent cleaning schedule. This is where modern technology can be a game-changer. Here’s how smart vacuums solve the core problems we've discussed: It Automates the "Dry Prep": A robot vacuum running on a daily schedule constantly removes the loose dust and debris that would otherwise turn into a "muddy slurry" during mopping. A top-tier model like the Dreame L50 Ultra, ranked #1 on Vacuum Wars Top 20 Robot Vacuums list [2025], automates this crucial preventative step with powerful suction. It Solves the "Dirty Water" Problem: Unlike manual mopping where water gets progressively dirtier, advanced robotic mops use systems that apply consistent pressure with fresh water, ensuring grime is lifted, not spread around. Some, like the Dreame Matrix10 Ultra, even feature a Multi-Mop™ Switching Dock that can swap out different mop types mid-clean. For example, a bristled mop for a tile kitchen and a soft sponge mop for a bathroom, all for a truly tailored and hygienic clean. It Handles Its Own "Tool Hygiene": The self-cleaning dock automates the final crucial step. It washes and dries the mop pads after each cleaning run, ensuring the device always starts with a perfectly clean tool. Frequently Asked Questions Why are my floors still sticky after mopping? This is almost always caused by residue. The most likely reasons are that you used too much cleaning solution and didn't rinse it away, or you used a dirty mop and bucket, which just spread a thin layer of grime across the floor. How do you get sticky residue off the floor? The best way is to mop with a solution of one cup of white vinegar in a gallon of warm water. The acid in the vinegar is excellent at breaking down and dissolving the soapy or greasy film that causes stickiness. Just be sure not to use it on natural stone. Does vinegar get rid of sticky floors? Yes, it’s highly effective for most floor types. Vinegar is an acetic acid that naturally cuts through the alkaline residue left by many soaps and cleaners. It cleans without leaving a new film behind, which is key to breaking the sticky cycle. How do you clean a dirty, sticky floor? Start with a dry prep by thoroughly sweeping or vacuuming. Then, perform a "reset rinse" with a warm water and vinegar solution to strip the sticky residue. For future cleans, adopt the two-bucket method to ensure you're always cleaning with a clean mop.
Continue reading
The Best Robot Vacuum for Mixed Floors: Your Complete Guide

The Best Robot Vacuum for Mixed Floors: Your Complete Guide

Editorial TeamDreame |
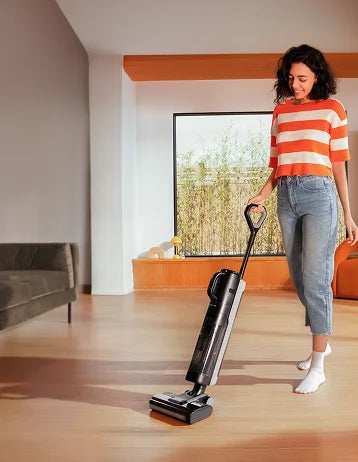
How many cleaning tools sit in your closet? You've got the vacuum cleaner for carpets, the mop for tiles, a steam cleaner for tough spots, and all different kinds of brushes for various surfaces... Mixed floors make you constantly stop, switch equipment, and restart in each room. What if one smart robot vacuum could handle it all? Why Your Mixed Floors Are Hard to Clean? Most homes aren't just one type of floor. You might have hardwood in the living room, carpet in the bedrooms, and tile in the kitchen. It looks great, but it can be a real headache to clean properly. Hardwood scratches easily. When you use rough brushes, you leave permanent marks. Too much power also blows dust around your room instead of picking it up. Tile has grooves where dirt hides. The spaces between your tiles collect grime that surface cleaning can't reach. You need real scrubbing power to get it out. Laminate warps when wet. Even a little extra water makes your boards bubble up and ruins your floor forever. Carpet holds onto everything. Dirt, hair, and dust sink deep into the fibers. When you do light cleaning, you only get surface stuff, leaving your floor looking dirty. A regular vacuum cleaner uses the same power everywhere. It either hurts your delicate floors or doesn't clean your tough ones well enough. Even the best cordless stick vacuum can't match the convenience and consistency of a robot vacuum and mop combo for mixed floors. What Each of Your Floors Really Needs Your Floor Type Main Problem You Face What Actually Works Best Solution Hardwood Scratches from rough cleaning Soft brushes, gentle power Robot vacuum for hardwood floors with sensors Tile Dirt stuck between tiles Strong suction, scrubbing action Floor cleaner with scrubbing mops Laminate Water damage from wet mopping Light, controlled water use Self-emptying robot vacuum with water control Carpet Deep dirt and hair you can't reach Strong suction, hair-resistant brushes Best robot vacuum for carpet with anti-tangle tech What are the Must-Have Robot Vacuum Features for Mixed Floors? Smart robot vacuums fix mixed floor problems with four key features. These work together to clean every surface the right way without any help from you. 1. Adaptive Suction Power Think of this as cruise control for cleaning. The robot uses sensors to detect when it moves from a hard floor onto a rug or carpet, and it automatically kicks the suction into high gear. This is critical for pulling out the dust, dander, and allergens trapped deep in carpet fibers. Once it moves back onto a hard floor, it dials the power down. This intelligent adjustment isn't just for a better clean; it also conserves battery life, allowing the robot to cover more ground on a single charge and operate more quietly on your hard surfaces. 2. Multi-Surface Brushes and Rollers If you've ever had to stop and untangle a brush roller clogged with hair, you know how frustrating it can be. The design of the brush is fundamental to good performance on mixed floors. A basic, stiff-bristled brush just doesn't cut it. The best robot vacuum for pet hair and the best vacuum cleaner for pet hair both use smarter systems, often a bristleless, all-rubber design that resists tangles, or a combination that uses soft silicone fins to sweep hard floors gently while still agitating carpet fibers. Look for models that specifically mention "anti-tangle" features, as this will dramatically reduce the amount of maintenance you have to perform. 3. Advanced Navigation Systems An effective robot vacuum doesn't just bump its way around. It "sees" and maps your home using smart mapping technology, most commonly LiDAR, which works like a mini GPS for your house. This is what separates a truly "smart" vacuum from a basic one. The real win here is efficiency and total control. Because it knows your floor plan, it cleans in neat, methodical rows so it doesn't miss spots. More importantly, it gives you powerful tools in the app: you can set virtual walls to keep it out of a room, create no-go zones around a pet's food bowls, tell it to clean only the kitchen after dinner, and even save maps for multiple floors of your home. 4. Mop-Lifting and Water-Level Adjustment This is probably the single biggest upgrade for anyone with both hard floors and rugs. Mop-lifting technology solves the age-old problem of soggy carpets and makes robot mop and vacuum combos truly effective. A self-emptying robot vacuum with this feature can mop your hard floors, and the moment its sensors detect a rug, it will automatically lift the wet mop pads completely clear of the carpet. Without this, you would have to manually remove the mop attachment or create cumbersome "no-mop zones" in the app around every rug. Mop-lifting enables true, unattended, whole-home cleaning. Paired with adjustable water levels, it gives you the confidence to clean delicate laminate and scrub durable tile in the same cleaning run. What Are Some of The Best Robot Vacuums for Mixed Floors? Want one robot for wood, tile, and carpet? Choose models with carpet boost, rubber multi-surface brush, and auto mop-lift, so it vacuums hard floors, deep-cleans rugs, and never wets them. You can consider the models below. X50 Ultra: Climbs 2-Inch Obstacles Handles 5 carpet types automatically. Thick rugs, bathroom mats, yoga mats - each gets the right treatment without your input. Never gets stuck at door frames. The robotic legs lift over barriers that trap other vacuums. Your cleaning actually finishes instead of stopping halfway. Reaches impossible spaces. Height adjusts to clean under beds and couches where dust builds up for months. Two specialized brushes handle hardwood and carpets properly - no more choosing between floors. L40s Ultra: Zero Hair Tangles Guaranteed Three cleaning modes: Vacuum-only for carpets, mop-only for spills, or both together. Stop compromising and start getting results. End brush maintenance forever. Handles pet hair and human hair (up to 11.8 inches (30cm)) without clogging. Your cleaning time goes to actual cleaning, not cutting hair out of brushes. Solves pet hair problems completely. Long dog fur, cat hair, shedding - all picked up without jamming. No more avoiding rooms where pets spend time. D20 Plus: Set-and-Forget Cleaning Work on all your floors perfectly. Changes power by itself when moving between hardwood, tile, and carpet. Each surface gets exactly what it needs. Cleans for months without help. The big dust bag means you don't empty it for 150 days. Your cleaning happens automatically while you focus on other things. Never miss spots or get lost. Smart mapping creates the best cleaning path through your home. Every room gets cleaned completely, every time. The Real Differences What Matters Most X50 Ultra L40s Ultra D20 Plus Getting unstuck Climbs 2" barriers Crosses thresholds Smart PathFinder Navigation Pet hair solved ✓HyperStream Detangling DuoBrush ✓HyperStream Detangling DuoBrush ✓HyperStream Detangling DuoBrush Reaches everywhere Extendable mop and side brush Extendable mop and side brush Careful edge cleaning Hard floor protection 20,000Pa Suction Bristled Rubber Brush designed for full floor contact 19,000PaSuctionDelicate rubber brush 13,000Pa Suction, deep cleaning into floor gaps Carpet protection 5 smart modes Removable mops Surface detection Less work for you Full automation No brush cleaning 150-day hands-free These three robot vacuums actually solve mixed floor problems. Making Your Choice Work You don't need multiple tools or complicated routines to clean your mixed floors. One smart robot vacuum adjusts to every surface in your house automatically. Look for power that changes by itself, smart navigation, mop lifting, and tangle-free brushes. These four features ensure your robot cleans every floor type properly without damage or missed spots. With the right robot vacuum, you easily turn your daily floor cleaning into something that just happens in the background. Your floors are clean every day without switching tools, changing settings, or doing any maintenance work. FAQs Q1: Which robot vacuum can do multiple floors? For multiple floors: If you mean different floor types (hardwood, tile, carpet), all three Dreame models handle mixed surfaces perfectly. If you mean multiple building levels, robot vacuums cannot move between floors by themselves. All of them need to be carried between levels. But the X50 Ultra has retractable legs that can climb over door thresholds easily, making it move better between rooms. The L40s Ultra and D20 Plus also work well on multiple floors. All of them create separate maps for each level. Q2: Can robot vacuums be used on different surfaces? Yes, but only if they have appropriate surface detection. These three recommended models will switch cleaning modes automatically when going from hardwood to carpets, raising the mops to prevent wetting, then lowering them for hard floor surfaces. Lower-end or older designs have difficulty making passes and may lug around wet mops on carpets or apply improper suction power, harming floors. Q3: Are robot vacuums good for uneven floors? They struggle most on uneven surfaces and become stuck on raised changes. The X50 Ultra and L50 Ultra are equipped with robotic legs that raise them over surfaces that are up to 2.36 inches high. The L40s Ultra and D20 Plus work well on slight bumps but can struggle with taller transitions. For big height changes, you need the more advanced model's ability to climb.
Continue reading
How to Vacuum Your Wool Carpet Without Damaging It

How to Vacuum Your Wool Carpet Without Damaging It

Editorial TeamDreame |
Wool is a comfortable, soft, high-end natural material, and wool carpets can add atmosphere and sophistication to home decor, making them a top choice for many families. But cleaning a wool carpet? It can be quite troublesome or needs extra attention because this natural material may be more easily damaged than some synthetic materials if not properly cared for. But can we just let it be? That might have just left it to gather dust and bacteria. Let's take a look at 4 vacuuming methods for wool carpets. Why Cleaning a Wool Rug is Necessary Your wool rug is just like a natural air filter for your home. Because its long and soft fibers are like experts trapping dust, pollen, and allergens, keeping them out of the air you breathe. The U.S. Environmental Protection Agency (EPA) notes that carpets can hold a large amount of indoor pollutants. In one word, the wool carpet can "absorb" the dirt from the air, and at the same time, become really dirty itself. But my rug looks quite new, should I still clean it? The answer is yes. While it still looks very new outside, deep inside, sharp particles of grit and sand settle into the rug's foundation. Every time you walk on it, this hidden grit grinds against the delicate wool fibers like sandpaper. This may cause your rug to wear out prematurely. So you need a truly deep clean with the right method and right vacuum, that removes the damaging particles, keeping your rug strong and beautiful from the inside out. How to Vacuum Wool Carpets and Rugs You can absolutely vacuum your wool carpets. Vacuuming can remove hidden dirt without damaging your rug, and this helps it last longer. The right method depends on how workers made your rug was made, but once you know your rug type, you can clean it safely. Here's how to care for the most common types. 1. Thick Woven Wool Rugs(Medium Pile) Thick woven rugs include many Persian and Oriental styles, and workers tie wool fibers tightly onto a strong base. This creates a dense, soft surface, but it also creates a hidden problem. This thick pile traps sharp dirt deep inside, and this hidden dirt slowly damages your rug from within. Weak vacuums can't reach this deep dirt, so your rug keeps getting damaged even though it looks clean on top. Safe Steps to Clean: Step 1: Set Up Your Equipment: You need powerful suction without harsh brushes. The Dreame H15 Pro CarpetFlex works perfectly because it switches to carpet mode automatically. Just attach the carpet brush and you're ready. Step 2: Activate Smart Detection: Turn on the machine. The RGB sensor finds hidden dirt for you. It boosts power to 23,000Pa when needed. You don't need to guess where to clean deeper. Step 3: Start Cleaning: Move slowly across your rug. Make overlapping passes. The TangleCut™ 2.0 cuts hair automatically as you clean. This prevents tangles that could damage wool fibers. Step 4: Let Technology Work: The dual-brush adjusts power automatically. It gives consistent results. Your valuable wool stays protected from harsh brushing. This gives you complete confidence that harmful dirt is gone, while protecting your rug's delicate fibers. 2. Thin Woven Rugs (Flat-Weave) Flat-weave rugs like Kilims (traditional Middle Eastern rugs) and Soumaks (decorative flat rugs) have no thick pile, but they have a unique structure. The colored threads you see make up the actual rug structure, and this means every thread is important. The threads that hold the rug together sit on the surface, so spinning brushes can catch and pull these delicate threads. This permanently damages the beautiful pattern, and you can't fix this kind of damage. Safe Steps to Clean Compared to thick woven rugs, these delicate rugs need a much gentler approach, but you can still get excellent results. Follow these steps: Prepare a small handheld tool or a furniture attachment Set your vacuum to low power Move gently across the width of the rug, but don't rush the process Important: Never use spinning brush attachments on thin woven rugs. They will catch and damage the threads and ruin your rug's pattern forever.   3. Tufted Wool Rugs Unlike woven rugs, tufted rugs are made by inserting wool fibers into a backing and using glue to hold them in place. This glue-based construction creates unique challenges. Since glue holds the fibers instead of knots, fibers pull out much more easily. Spinning brushes will yank these fibers out, causing excessive shedding. Over time, this damages the glue backing and makes your rug look thin and worn. Safe Steps to Clean You must avoid the spinning brush, but you can still clean effectively with suction alone. Turn OFF the spinning brush - This step matters most, because the brush will pull out fibers Use suction only - Let air flow lift dust and dirt, while protecting the glued fibers Use simple tools - If you can't turn off the brush, switch to the handheld furniture attachment instead This gentle approach helps your rug keep its thick pile and last much longer, while avoiding costly damage. 4. Shag Wool Rugs Shag rugs have extra-long, loose fibers, and this creates two serious problems that regular vacuums can't handle. Problem 1: Long fibers get caught in spinning brushes and pull out entire clumps, while the brush keeps spinning and causes more damage. Problem 2: Dirt falls so deeply that regular vacuums can't reach it, but the dirt stays there and slowly damages the rug fibers. Safe Steps to Clean You need a different approach, but this method works better than any vacuum alone. Clean Outside: Take your rug outside and beat the back of the rug to shake out deep dirt. This works best to remove heavy dirt, and it's the only way to reach dirt that's deep in the pile. Gentle Surface Clean: Use your vacuum's hose or simple nozzle attachment, and clean carefully between the fiber rows. You don't need a brush because the suction does the work, while keeping your shag rug clean and fluffy without damage. Wool Rug Cleaning at a Glance Rug Type Key Challenge ✅ Recommended Tool ❌ Never Use Woven (Medium Pile) Hides deep, damaging grit Smart Carpet Cleaner (Suction-focused) Weak, surface-level vacuums Woven (Flat-Weave) Delicate, exposed threads Upholstery / Hand Tool Any spinning brush or floor head Tufted Fibers pull out easily Suction-Only Mode or Upholstery Tool An active beater bar Shag Long fibers will tangle Hose / Nozzle Attachment Any spinning brush or floor head Post-Cleaning Care: Don't Forget Your Tool Lifting all that dirt from your wool rug is a great feeling, but the job isn't quite done. A dirty tool can spread old dust, germs, and odors right back into your home. To get a truly fresh clean, you need to make sure your vacuum is clean, too. This usually means: Wiping down the brush head. Cutting away tangled hair. Emptying the dustbin and washing filters. This can be a messy and unpleasant chore. With the Dreame H15 Pro CarpetFlex, you can skip this process entirely. After you finish cleaning, it automatically washes its roller brush with hot water and dries it with hot air. This helps you keep your home and your tools fresh and clean, without any extra work. The Final Word on Wool Rug Care Protecting your wool rug is all about using the right technique for the right rug. Remember that gentle, frequent cleaning with powerful suction is much safer and more effective than harsh, infrequent brushing. By understanding how your rug is made, you can easily choose a cleaning method that keeps it beautiful for years to come. Ready to give your wool carpet the care it deserves? Explore a smarter cleaning solution with Dreame today. FAQs Q1. How often should I vacuum my wool rug? This depends on how much foot traffic it gets. For busy areas, a light vacuuming once or twice a week is a good idea. Try to do a deeper clean every one to two weeks. Q2. Is it normal for a new wool rug to shed? Yes, a little bit of "fluff" coming off a new wool rug is completely normal. However, if it keeps shedding heavily after a few months, it might be a sign that your vacuuming method is too aggressive. Q3. Can I use a vacuum with a spinning brush on my wool rug? It's best to avoid it. Never use a spinning brush on delicate rugs like tufted, shag, or flat-weaves. For a very sturdy woven rug, you might be able to, but only if you can set the brush to a very high setting so it barely touches the fibers. When in doubt, turn it off. Q4. What's the best way to handle pet hair on a wool rug? Regular vacuuming is the best solution. To make it easier, you can use a tool designed to handle hair without clogging. Powerful suction will lift the hair out, while an anti-tangle feature keeps the roller clean.
Continue reading
Wet Dry Vacuum vs. Steam Mop: Which Floor Cleaner Is Right for You?

Wet Dry Vacuum vs. Steam Mop: Which Floor Cleaner Is Right for You?

Editorial TeamDreame |
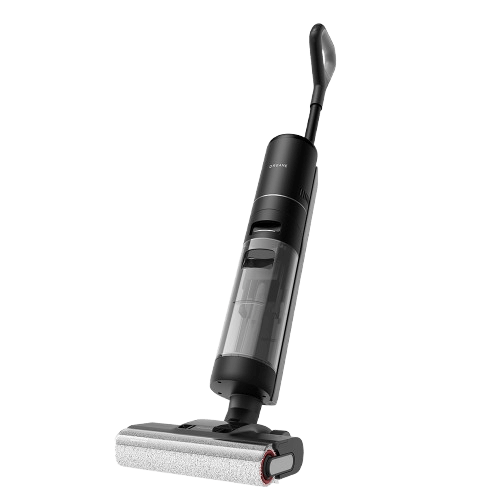
Tired of the tedious floor cleaning routine? Sweeping, mopping, and waiting for the floor to dry... It can easily take up your whole afternoon. Fortunately, two modern tools can simplify this task: wet/dry vacuums and steam mops. Both look similar but serve different purposes. Wet dry vacuums streamline the cleaning process by combining all your steps into one quick process and handling everyday dirt. On the other hand, steam mops take a different approach and use hot steam to eliminate germs, providing a different yet effective cleaning method. Each one works better for different types of floors and cleaning situations. But which one is right for you? Keep reading to find out. What is a Wet Dry Vacuum? A wet-dry vacuum is a versatile machine that is designed to vacuum and mop your hard and carpeted floors. It eliminates the need for a broom, dustpan, and traditional mop and bucket. How It Works The concept is to combine suction with washing. As you push the machine across the floor, it performs a few actions all at once: It washes: A roller brush, which is constantly wet with fresh water and a bit of cleaning solution from a clean water tank, spins against the floor. This action scrubs the surface, loosening dirt and grime much more effectively than just wiping a mop across it. It vacuums: As the roller scrubs, a powerful vacuum motor sucks up everything in its path. This includes the dry debris like dust and crumbs, any larger spills, and, most importantly, the dirty water that was just used to scrub the floor. The key to its design is that it has two separate water tanks. One tank holds the fresh water and cleaning solution. The second tank is where all the dirty water and debris get deposited. This is a critical feature because it means you are always cleaning your floors with fresh water. With a traditional mop, you end up dipping it back into dirty water, which can leave behind a grimy film. A wet-dry vacuum avoids this completely. Seeing the tank of dark, dirty water at the end is satisfying proof of how much dirt was actually removed from your floors. Its main purpose is to be a convenient, all-in-one tool that can handle a wide variety of everyday messes, from dust bunnies to spilled soup, in a single pass. What is a Steam Mop? A steam mop is a specialized tool that uses plain hot steam to deep clean and kill germs on floors. It's a popular choice for people who want to sanitize their homes without having to use chemical cleaners like bleach or ammonia. How It Works A steam mop's function is very simple. You fill its small water tank with regular tap water. An internal heating element then boils that water very quickly, typically in under a minute, turning it into hot, high-pressure steam (over 212°F / 100°C). This steam is directed down through a nozzle and into a microfiber cloth pad attached to the mop's head. The intense heat does two things: It loosens grime: The hot, moist steam is excellent at dissolving sticky, stubborn messes that have dried onto the floor, like spilled soda, jelly, or caked-on mud. It sanitizes: The high temperature of the steam kills common household germs and bacteria on contact. This is a huge benefit for anyone concerned about hygiene, especially in kitchens and bathrooms. It's essential to understand that a steam mop has no suction whatsoever. It cannot pick up hair, dust, or any solid debris. Its only job is to sanitize and break down grime that is already stuck to the surface. For households with babies crawling on the floor, pets, or people with allergies sensitive to chemicals, this tool offers extra benefits, but doesn't replace a vacuum cleaner. Wet-Dry Vacuum vs. Steam Mop: Head-to-Head Comparison Understanding how they work is one thing; knowing how they perform in your own house is what really matters. Let's break down how they stack up in different situations. Which One Saves You More Time? When it comes to getting the job done fast, the wet-dry vacuum is the clear winner. It combines two long chores, vacuuming and mopping, into one quick and easy step. Imagine it's a typical weeknight after dinner. There are crumbs under the dining table, a few stray pieces of rice on the kitchen floor, and a small puddle of water near the sink. Steam mop: You would first need to get a broom or a vacuum to clean up all the loose crumbs and debris. Once that's done, you can plug in the steam mop and wait for it to heat up before you start sanitizing. It's still a two-step process. Wet dry vacuum: You just grab the one machine, turn it on, and clean the entire mess in a minute or two. The crumbs and the water are gone in the same pass. Over the course of a week, the time saved by not having to do that first step of sweeping or vacuuming really adds up. Which Can Clean Up Spills and Accidents? This is perhaps the biggest practical difference between the two tools. A wet-dry vacuum is specifically designed to handle spills and wet messes. It's an emergency cleanup tool and a regular cleaner all in one. If a child drops a full bowl of cereal and milk, or the dog tracks in muddy paw prints from the rain, you can clean it up instantly. It sucks up the liquid (milk, water) and the solids (cereal, mud) without issue. A steam mop is completely unsuitable for these kinds of accidents. Because it has no suction, it cannot pick up the mess. If you tried to use a steam mop on spilled cereal, you would just be pushing around warm, mushy cereal with a cloth pad. If you used it on a raw egg, the heat would start to cook the egg, creating an even bigger, slimier mess to clean up. For any household where spills are a regular occurrence, a wet-dry vacuum is the far more practical and useful machine. Which Is Better at Killing Germs and Sanitizing? This is the one area where the steam mop has a distinct advantage. Its entire purpose is to sanitize. The high temperature of the steam it produces is proven to be effective at killing germs. The CDC, for example, recognizes steam as a reliable method for sterilization. This makes a steam mop an excellent tool for specific tasks, like sanitizing the floor around a toilet, cleaning a pet's eating area, or ensuring a floor is hygienic for a crawling baby. It achieves this without any chemicals, which is a major benefit for many people. A wet-dry vacuum cleans differently. It doesn't use heat to kill germs in contact. Instead, it physically removes germs from the floor by scrubbing them loose and sucking them away with the dirty water. While this leaves your floors extremely clean, it is not the same as the thermal sanitization that a steam mop provides. Which is Safer for Floors? This is a critical consideration. Using the wrong tool on your floor can lead to expensive and irreversible damage. You need to know what your floors are made of. A wet-dry vacuum is generally safe for any type of sealed hard floor. Because it sucks the water right back up, it doesn't leave your floors soaking wet. This makes it a safe choice for: Sealed Hardwood Laminate Vinyl (both plank and sheet) Tile (Ceramic and Porcelain) Sealed Stone A steam mop requires much more caution. The combination of high heat and moisture can be very damaging to certain materials. Tile and Sealed Stone: Generally safe and very effective. Steam can even help clean grout lines. Sealed Hardwood: This is risky. Over time, the heat can break down the polyurethane finish that protects the wood. Moisture can also be forced between the boards, causing them to warp. Laminate and Vinyl: These are also very risky. These floors are made of layers bonded together with adhesive. The heat from a steam mop can weaken that glue, causing the top layer to peel or the edges of the planks to swell and warp. Unsealed Wood: Never use a steam mop here. It will cause immediate damage. Always check what your flooring manufacturer recommends before using a steam mop. Which One is Easier to Maintain? A steam mop is very simple to maintain. After use, you just remove the dirty cloth pad and toss it in the washing machine. A basic wet-dry vacuum requires more effort. You have to empty the dirty water tank and clean the roller brush after each use to prevent smells and mold, which can feel like an extra chore. However, advanced wet-dry vacuums (like those from Dreame) solve this problem with a one-press "self-cleaning" function. At the push of a button, the machine automatically washes its roller brush with clean water and then dries it with hot air. This keeps it clean and odor-free without any hands-on work from you. Summary Table Feature / Use Case Wet Dry Vacuum (The Remover) Steam Mop (The Sanitizer) Winner for Most Homes Time-Saving Vacuums & mops in one step Requires pre-vacuuming Wet Dry Vacuum Spill Handling Excellent for wet & dry messes Not suitable; can spread messes Wet Dry Vacuum Chemical-Free Sanitizing Uses cleaning solution or water Excellent; uses only steam Steam Mop Floor Safety Safe on most hard floors Risk of damage to wood/laminate Wet Dry Vacuum Post-Clean Maintenance Tank/roller cleaning (can be automated) Simple pad washing Wet Dry Vacuum (with self-cleaning) How to Choose the Right Floor Cleaner The best choice is the one that solves your most common cleaning problems. Get a Wet Dry Vacuum if... You have kids or pets. If your life involves cleaning up frequent spills, food messes, and muddy footprints, a wet-dry vacuum will make a huge difference. You want to save time and effort. If your main goal is to get your floors clean as quickly and easily as possible, this is the tool for you. It combines two chores into one. You like having one tool for many jobs. If you want a single, versatile machine that can handle almost any everyday mess on your hard floors, a wet-dry vacuum is a practical choice. [product handle="h15-pro-heat-wet-dry-vacuum" rating="4.7"] Get a Steam Mop if... You already own a reliable vacuum cleaner. A steam mop works well alongside a robot vacuum and mop, which effectively manages your daily cleaning tasks. Your top priority is sanitizing without chemicals. If you are committed to having a germ-free home but want to avoid harsh cleaners, a steam mop is the best tool for that specific job. You have mostly tile or stone floors. If your home has a lot of durable flooring that can handle high heat, you can use a steam mop without worrying about damaging it. You don't mind a multi-step process. If you already vacuum your floors regularly and are just looking for a tool to do a final, deep-cleaning pass, then a steam mop can be a good addition to your routine. FAQs Q1: Do I have to vacuum before using a wet-dry vacuum? No. It's designed to do both jobs at once. That's its biggest time-saving benefit. Q2: Can a steam mop remove old stains? It's very good for breaking down sticky, sugary, or greasy messes. However, for a set-in stain like wine, coffee, or ink that has dyed the floor's surface, it likely won't be effective since it doesn't use a chemical cleaning solution. Q3: Which is safer for my sealed wood floors? The wet-dry vacuum is much safer. A steam mop's high heat and concentrated moisture can damage the wood's protective finish over time. Q4: Can I put vinegar or a cleaning solution in a steam mop? No, you should not. Steam mops are only designed to be used with water. Adding vinegar or other cleaners can corrode the internal parts and break the machine. The Bottom Line When you strip away all the features, the choice is pretty simple: A wet-dry vacuum is a tool for cleaning up messes. A steam mop is a tool for killing germs. If your biggest daily frustration is the time and hassle it takes to clean up dirt, spills, and pet hair, then a wet-dry vacuum is the most practical and useful tool for you. It solves the most common cleaning problems in one simple step. If your main concern is sanitizing your bathroom floors without bleach, and you don't mind vacuuming first, then a steam mop could be what you need. If you think a wet-dry vacuum sounds like the right choice for your home, consider the models Dreame offers. They are designed to make the daily job of keeping floors clean much quicker and easier.
Continue reading
Robot Mop Cleaning Solutions: The Ultimate Guide to a Deeper, Safer Clean

Robot Mop Cleaning Solutions: The Ultimate Guide to a Deeper, Safer Clean

Editorial TeamDreame |
Have you ever done the "white sock test" after your robot vacuum cleaner finishes a cycle? Or just walked barefoot across the kitchen floor? Perhaps too often, the floor appears clean, but it lacks that perfectly smooth, squeaky-clean feel underfoot. It might even feel a little sticky. That's the residue that plain water can't lift. If you're chasing that satisfying, barefoot-on-a-spotless-floor feeling, the secret lies in a better robot, and also a better cleaning solution. Let's talk about how to make your floors look clean and feel great. Is a Robot Mop Cleaning Solution Worth It? Think about washing dishes with just water. Can you clean a greasy plate properly? Probably not. The same thing happens with robot mopping. While your robot vacuum and mop are powerful, using them with only water is like trying to clean with one hand tied behind your back. So yes, a robot mop cleaning solution is definitely worth it. Why Water-Only Cleaning Is Not Enough Water has natural limits that restrain it from cleaning well. Surface tension makes water drops stick together. This causes water to roll around on surfaces instead of spreading out, so it can't get into dirt and lift it. Many everyday messes create extra problems. Kitchen grease, oily paw prints from pets, and food spills actually push water away. When your robot mops with only water, it often just spreads these oily messes around instead of cleaning them up. What's left behind? A dull, streaky mess on your floors. How Cleaning Solutions Work A good robot vacuum cleaning solution uses two key ingredients that work together: surfactants and enzymes. Surfactants Break Down Water's Barriers These special cleaners act like tiny magnets for dirt. Each cleaning molecule has two parts: One end that sticks to water Another end that hates water but loves grease and dirt When you use a cleaning solution with your robot vacuum and mop, it helps break down water's surface tension. This creates molecules that grab onto dirt and grease, lifting them off the floor so the vacuum's mop pad can easily wipe them away. Enzymes Target Specific Stains If regular cleaners handle everyday dirt, these special ingredients are like expert stain fighters called enzymes. These natural proteins speed up cleaning by targeting specific types of messes. According to the American Cleaning Institute, enzymes work by breaking down stains into smaller pieces that surfactants can easily remove. They work like a lock and key: each type is made to break down a particular kind of stain. Cleaner Type What It Is Common Stains Protein fighters Protease Food spills, pet messes, milk, and blood Grease fighters Lipase Kitchen grease, butter, oily marks Starch fighters Amylase Pasta sauce, gravy, potatoes, ice cream By using these specialized enzymes to dismantle big, stuck-on molecules into tiny pieces that dissolve in water, your robot mop can wipe away stubborn stains that would normally require intense scrubbing. 4 Benefits of Using a Robot Vacuum Cleaning Solution Using a quality robot mop cleaning solution gives you several benefits: Deeper Cleaning: It effectively removes germs and sticky residues that water alone cannot tackle. Streak-Free Results: The solution dries quickly, leaving no marks or residue behind. Saved Money: These highly concentrated solutions last for months, providing a low cost per use. Longer Robot Vacuum Lifespan: The low-foam, metal-safe formulas help prevent damage to the robot's pumps, seals, and tubes. In summary, while your robot handles the scrubbing, the cleaning solution does the essential work, together delivering professional results. What is the Best Robot Mop Solution? If you've decided to use a cleaning solution, the next question is which one to choose. The market offers two main types, official and generic, and the difference between them is critical for your robot's health and performance. Official Brand Cleaners: The Safe Pick This is, without question, the safest and smartest choice for your robotic vacuum cleaner. You don't have to worry about compatibility. The same people who built your robot also made these cleaning solutions. They tested them with every part inside your machine: the plastic water tank, rubber pieces, and water pump. Everything works together perfectly, making your cleaner a true robot vacuum and mop combo. You don't have to guess about performance. The cleaner is made specifically for how your vacuum works: how fast water flows and what kind of mop pad it uses. This means you get great cleaning without problems like too much foam (which can break the pump) or streaky floors. You don't have to stress about your warranty. This is the biggest reason to choose official cleaners. If you use anything else and your robot breaks, the company might refuse to fix it for free. Then you're stuck paying hundreds or thousands of dollars for repairs. With official cleaners, your warranty stays safe. Universal Cleaners: Maybe a Gamble These third-party solutions look attractive because they usually cost less or provide various scents, but at the same time, they may cause problems you don't expect. Universal cleaners claim to work for "all robot vacuums," but that's impossible since different brands use different materials inside. Plus, you're on your own if something goes wrong. If a universal cleaner breaks your vacuum, you might be denied warranty coverage. Important The official solution is generally your safest bet and your best robot mop solution. Can You Make a DIY Robot Vacuum Solution? No. The internet is full of "hacks" suggesting you can use common household products in your robot mop. It's easy to think, "What's the harm in a little vinegar?" The hard truth is that these DIY solutions can cause damage to your high-tech cleaning vacuum. A Breakdown of the Chemical Dangers Common household products can seriously damage your robot vacuum cleaner: Vinegar: Even diluted, this acid slowly eats away at your robot's rubber seals and metal parts Essential oils & soaps: A few drops of these sticky substances will clog spray nozzles and make your tank brittle Bleach & strong cleaners: Strong often means they are corrosive and will destroy your robot's delicate internal components Regular floor cleaners: Designed for buckets, not robots - they foam up and jam your water pump Cleaning Solutions: What to Use & What to Avoid For a quick reference, use this simple guide to make the right choice every time. Solution Type Our Verdict Risk to Robot Vacuum and Mop Impact on Floors Warranty Status Manufacturer-Approved Solution Gold Standard None - Designed for it Streak-free shine Protected Plain Water Safe Backup None May leave water spots Protected Universal "Robot" Cleaner High Risk Potential for corrosion/clogs Can leave residue/streaks At Risk / Likely Void DIY Vinegar Solution Do Not Use High - Corrodes seals/metal Can dull finishes VOID DIY Essential Oils/Soap Do Not Use High - Degrades plastic, clogs tubes Leaves sticky, dirt-attracting film VOID Standard Floor Cleaner Do Not Use High - Foaming, residue buildup Leaves sticky residue VOID Bleach/Harsh Chemicals Do Not Use Extreme - Severe corrosion Can cause permanent damage/discoloration VOID How to Use Cleaning Solution in Your Robot Vacuum? Using the cleaning solution is simple. The exact method depends on whether your robot has a fully automated docking station or a manual-fill tank. For Robots with Auto-Mixing Stations These advanced systems significantly simplify the cleaning process. Locate the solution cartridge: Open your docking station to find the dedicated cartridge or reservoir for the cleaning solution. Fill the cartridge or insert a new one. Use undiluted concentrate. Do not add water. The station is designed to automatically mix the perfect ratio of solution and water for every cleaning and mop-washing cycle. Ensure the cartridge is secured. Close the lid, and you're done. Your robot vacuum will handle the rest. For Robots with Manual-Fill Water Tanks This method requires one simple measurement. Check the golden ratio: Most manufacturers recommend a dilution ratio of 1:200 or 1:300. This usually translates to about one capful of solution for a standard-sized clean water tank in a docking station. Always check the bottle for the specific recommendation for your product. Fill with water first: This is a crucial pro-tip. Always fill the clean water tank with cool water before adding the solution. Adding the solution first can cause it to foam up excessively when you add water from the tap. Measure and add the solution: Use the bottle's cap as a measuring tool, as intended by the manufacturer, and add the recommended amount to the water-filled tank. Close and start clean: Secure the tank lid, place it back in the dock or robot, and start your cleaning cycle. FAQs Q1: What cleaning solution can I safely use in my robot vacuum? The safest and most effective option is always the cleaning solution specifically made by your robot's manufacturer. If that's not available, using plain, cool water is the only other universally recommended option that will not damage your device or void your warranty. Q2: Can I put vinegar in my robot vacuum? No. This is one of the most common but dangerous DIY mistakes. Vinegar is acidic and will corrode the robot's internal rubber seals and metal parts over time, leading to leaks and permanent damage. Q3: Can I use bleach or other disinfectants in my robot vacuum? Absolutely not. Harsh chemicals like bleach and ammonia are highly corrosive and will quickly destroy the sensitive internal components of your robot. They can also damage your floors. Q4: Which cleaners should be avoided for all types of floors? In general, avoid highly acidic cleaners (like undiluted vinegar) on natural stone like marble or granite, as they can cause etching. Also, avoid oily or waxy cleaners (like oil soaps or polishes) as they leave a residue that dulls the finish and can make floors slippery. Always stick to pH-neutral formulas for the broadest safety. Conclusion Water alone can't handle grease because it doesn't spread well. Special cleaners use ingredients that grab dirt and break down tough stains, giving you much better cleaning. For safer use, select cleaning solutions that are made by the manufacturer of your robot vacuum. These products are designed to protect the internal components and help maintain your warranty. Other cleaners may not function properly, and homemade mixtures, such as vinegar or oils, can damage your robot vacuum. Use official cleaning solutions to get the best results and help your vacuum last for many years. Ready to unlock a truly effortless and brilliant clean? Discover Dreame's specially formulated cleaning solution, engineered to bring out the best in your robot and your floors.
Continue reading