Black Friday Sale Is Live! Best Prices of 2025
00
Days
: 00
Hours
: 00
Mins
: 00
Secs
Shop Now > close button
Can You Vacuum a Wet Carpet? Why You Shouldn't (And What to Do Instead)

Can You Vacuum a Wet Carpet? Why You Shouldn't (And What to Do Instead)

Editorial TeamDreame |
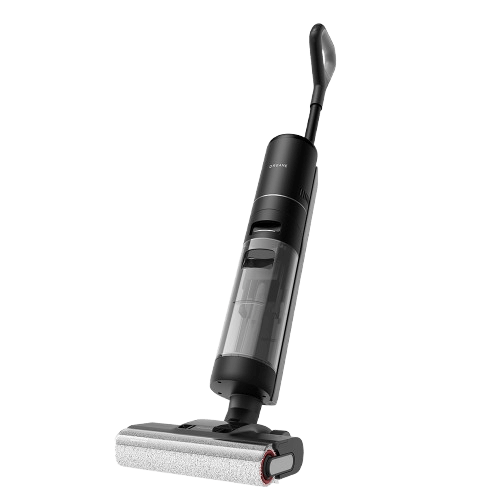
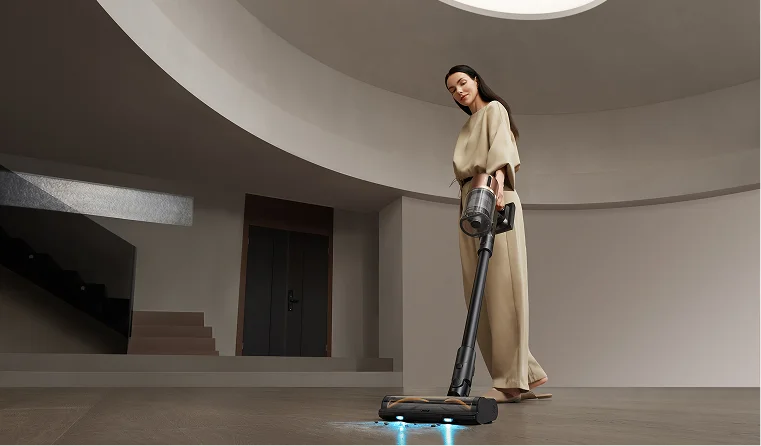
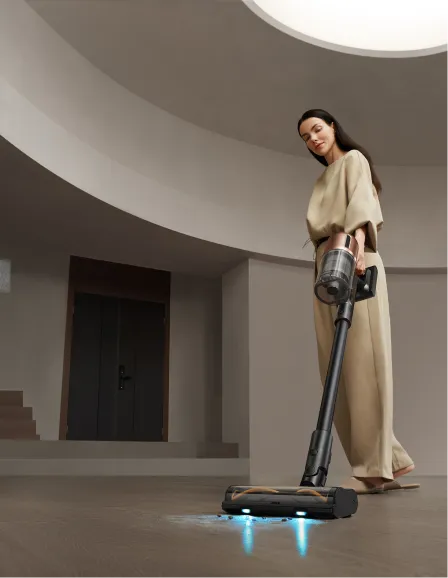
Picture this: your child tips over a cup of juice, or a storm blows in through an open window, leaving your carpet soaked. The first reaction is often panic. The second is to grab the vacuum cleaner, thinking it will be the quickest way to save the carpet. But here’s the truth: using a vacuum on wet carpet is one of the worst things you can do. It doesn’t just fail to solve the problem; it can make it much worse. In this guide, we’ll break down whether you can vacuum wet carpet, why vacuums and water never mix, and give you a step-by-step plan to rescue your carpet safely. Why You Can’t Use a Regular Vacuum on a Wet Carpet It’s tempting to think that powerful suction can solve a water problem, but vacuums are designed for dry debris, not liquids, whether it’s a regular vacuum, a wet/dry shop vacuum, or even a robot vacuum. None of them will fix the issue, and each comes with its own set of risks. Here’s why: Water and electricity don’t mix: A standard vacuum, like canister or cordless stick, is built for dry dust, not liquid. When water gets inside, it can short-circuit the motor, cause electric shock, or permanently damage the unit.This is not just ineffective, it’s dangerous. If you use a Wet/Dry Vacuum, water will stay trapped deep below the surface. You might think these are made for this, but the reality is different. “Wet mode” doesn’t remove deep moisture from carpets: These machines can spray water out, but carpets are too absorbent. Instead of pulling dirty water up, it leaves moisture trapped deeper in the fibers. “Dry mode” risks mold inside the vacuum: Forcing suction pulls damp air and water droplets into the ducts and dustbin, creating the perfect environment for mold inside the vacuum itself. Trapped moisture leads to long-term carpet damage: Moisture sinks into the carpet padding. This creates complications for the drying process and allows for mold growth. A minor spillage would lead to a stink and an expense in no time.   Dreame Take At Dreame, we design vacuums that know the difference between wet and dry, and handle both safely. Our wet dry vacuums are engineered to handle liquid spills on hard surfaces, using sealed channels, intelligent suction, and self-cleaning rollers.   The Right Way to Save a Wet Carpet: A 4-Step DIY Emergency Guide What can you do? Skip the wrong tool. Try these four steps to save your carpet. Step 1: Act Quickly & Blot Timing is everything. While a carpet will tolerate moisture for some time, from 24 to 48 hours, it will be a very serious risk for mold growth. First, lay dry towels or some thick paper towels on the wet area. Press down firmly, or even stand on them to push the water out. Replace with fresh ones until no more wetness transfers. Step 2: Create Airflow Once surface water is controlled, help it breathe. Open windows for cross-ventilation or aim a fan directly at the wet area.   Pro-tip Set up a "wind tunnel" for maximum drying efficiency. Position one fan blowing air across the wet spot and another fan in a doorway or window facing out to pull the moist air out of the room.   Step 3: Dehumidify for a Deep Dry Surface drying is inadequate. A dehumidifier does indeed take in moisture from the air to draw such remaining water deep from the carpet padding itself. Therefore, if you want to stop mold in its progression, this step should really be done. Step 4: Be Patient and Confirm It's Completely Dry The top may look dry, but the bottom can still be wet. Press your hand down. If it feels cold or damp, keep drying before you clean.   Important Mold and mildew can begin to grow within 24-48 hours of a carpet getting wet. Acting quickly and drying the area thoroughly is your best defense against long-term damage and musty odors.   After the Carpet is Dry: How to Restore and Maintain It Getting the carpet dry is just the beginning. Once the water’s gone, the fibers often look flattened and dull. This is where the right cleaning tools come in. Restoring Fluffiness and Deep Cleaning For deep cleaning and fluff restoration, the Dreame H15 Pro CarpetFlex is a standout. Attach the dedicated Carpet Brush, and its powerful suction will pull out any dust or residue left behind while also lifting the fibers. That way, the carpet regains its softness and bounce. Automating Daily Maintenance A smart robot vacuum is the best companion for everyday cleaning. Models like Dreame X50 Ultra or Aqua 10 Ultra Roller are engineered to treat carpets gently. Carpet detection features and automatic suction boost make maintenance worry-free. Cleaning dust, crumbs, and pet hair day in and day out, the robot keeps carpets fresh and extends their life without the interference of extra efforts from you. The entire wet carpet incident is a horrible experience, but with a good recovery plan and smart aftercare tools, the carpet may actually look better than before. What If It's Too Late? How to Deal with Carpet Mold Sometimes you don’t catch the spill in time. If mold appears on a small patch (no bigger than your hand), you can try this DIY fix: Step-by-Step Guide: Wear gloves, goggles, and an N95 mask. Ventilate the room. Mix white vinegar and water in equal parts, and spray lightly on the area. Let it sit for one hour. Scrub with a stiff brush and blot dry with clean towels. Run fans and a dehumidifier until it’s bone-dry. Finish with a vacuum session using the H15 Pro to capture any spores. For larger areas, don’t hesitate, call a professional.   Dreame Take Maintaining clean carpets is a science. For more expert tips on keeping your floors in top condition, explore our in-depth guides on everything from the best Carpet Cleaning Solutions to a routine to Show Your Carpets Some Love and a detailed walkthrough on How to Clean Carpet with a Vacuum Cleaner. FAQs: Answers for Your Wet Carpet Concerns What is the time limit within which mold will grow upon a wet carpet? Mold can begin to grow on a wet carpet in as little as 24 to 48 hours, especially in warm or humid conditions. What is the best way to dry a wet carpet fast? The fastest method is a combination of blotting up excess water immediately, followed by creating constant airflow with fans and using a dehumidifier to pull out deep moisture. Will the smell from damp carpets go away? The smell will only go away if the carpet and the padding underneath are completely dry. If the odor persists, it may be a sign of mold or mildew growth. How long for a fan to dry carpet? Depending on the spill's size and room humidity, it can take a fan 12 to 24 hours to dry a carpet. Using a dehumidifier along with the fan will significantly speed up the process. How to tell if the carpet has developed mold? The most common signs are a persistent musty or earthy smell, visible discoloration (like black, green, or white spots), or fuzzy growth on the surface. The smell is often the first and most reliable indicator. Can water-damaged carpet be salvaged? Yes, most of the time. If you address a small spill within 24-48 hours, the carpet can almost always be saved. For major floods, especially with contaminated water, you may need professional help. If carpets are wet, do they need replacement? Not usually. Replacement is only necessary for severe cases, such as widespread mold, permanent damage to the carpet padding, or if the backing has separated from the fibers. Quick action is the key to saving it. Conclusion A soaked carpet can feel like a nightmare, and grabbing the vacuum seems like the fastest fix. Sadly, it just creates bigger headaches. What really works is slowing down: blot, let the air move, and use a dehumidifier until it’s truly dry. Only then is it safe to clean it up and bring back the fluff with a solid vacuum for your carpets, like the H15 Pro or a robot vacuum that takes care of things day to day.
Continue reading
Why Has My Vacuum Lost Suction? A Step-by-Step Guide to Fix It Fast

Why Has My Vacuum Lost Suction? A Step-by-Step Guide to Fix It Fast

Editorial TeamDreame |
It’s one of the most common household frustrations. You’re in the middle of cleaning, and you suddenly realize your vacuum is just pushing dirt around. There’s a loud motor noise, but the machine simply isn't picking anything up. When your vacuum is not sucking, it can bring your entire cleaning routine to a halt. But here’s the good news: you almost certainly don’t need an expensive repair or a new machine. No matter what kind of vacuum you have—a classic upright, a convenient cordless stick, or a smart robot vacuum—it works on a very simple principle: a sealed airway. A loss of suction is almost always caused by one of two things: a blockage somewhere in that path or a leak that's breaking the seal. For a deeper dive into the mechanics, you can learn more about how vacuum cleaners work. This guide will walk you through a simple, step-by-step process to find that problem and fix it. Together, we’ll figure out why your vacuum is not sucking and restore its full cleaning power. The First Step: A 2-Minute Test to Pinpoint the Problem Before we start taking things apart, let's perform a quick diagnostic test that will instantly tell us which half of the vacuum has the problem. This will save you a huge amount of time and effort. How to Perform the Test: Safety First: Unplug your vacuum from the wall or remove the battery pack. Following proper safety tips for using a vacuum cleaner is crucial. Detach the Main Airway: For an upright or canister vacuum, detach the main flexible hose from the port on the vacuum's body. For a cordless stick vacuum, detach the long metal wand from the handheld motor and dustbin unit. For robot vacuums: This test isn't needed. Since robot vacuums don't have long hoses or wands, any suction problem is located in the main unit itself. You can skip the rest of this test and move directly to the next section: "If the Problem Is in the Main Unit (Weak Suction)." Test the Suction: Plug the vacuum back in or reattach the battery. Turn it on and place your hand over the port where you just removed the hose or wand. What the Result Tells You: Now, assess the feeling on your palm. This one simple step tells you exactly where to look next. If suction is STRONG at the port: Congratulations, your motor and filters are likely fine! The problem is a clog or leak in your attachments (the hose, wand, or floor head). You can skip down to the "Troubleshooting Your Attachments" section. If suction is WEAK or there's NO SUCTION at the port: The problem lies within the main unit of your vacuum. This means the issue is almost certainly a full dustbin or a clogged filter. Start with the steps immediately below. If the Problem Is in the Main Unit (Weak Suction) If you have weak suction at the main port, you're likely just minutes away from a fix. These are the easiest and most common solutions. Fix #1: Empty the Dustbin or Replace the Bag This might seem obvious, but a full container is the single most common reason why a vacuum is not picking up. Air needs to flow through the bin to create suction; if it’s packed with dirt, the air has nowhere to go. For Bagless Vacuums: Empty the dustbin, even if it’s not completely full. Tap out any stubborn debris and wipe the inside with a dry cloth. For Bagged Vacuums: Replace the bag. A bag that is more than two-thirds full can severely restrict airflow long before it looks stuffed. If you're unsure which is right for you, see this bagged vs. bagless vacuum comparison. Fix #2: Clean the Filters (The Lungs of Your Machine) Filters are your vacuum's defense system. They trap fine dust to protect the motor and clean the air, but when they get clogged, they suffocate the machine and kill its suction power. Locate Your Filters: Most vacuums have at least two: a pre-motor filter (often foam or felt, near the dustbin) and a post-motor or exhaust filter (often a pleated HEPA filter). Clean Them Correctly: Many filters today are washable. If so, rinse them under cool water until the water runs clear. For detailed steps, follow this guide on how to clean vacuum filters. Important After washing any filters, you must let them air dry for a minimum of 24 hours. Reinstalling a damp filter can cause permanent damage to your vacuum's motor. Model-Specific Nuance: Check your vacuum’s manual. On most models, filters are placed for quick, tool-free access right next to or inside the dustbin. For example, Dreame wet and dry vacuums, like the H15 Pro CarpetFlex, use a removable multi-layer filtration system, installed above the used water tank cover. Dreame robot vacuums, including the X50 Ultra, L40s Ultra, and Aqua10 Ultra, feature high-efficiency, removable filters positioned behind the dustbox for easy maintenance and continuous airflow. No matter the model, just remember the 100% drying rule before reinstalling. If the Problem Is in the Attachments (Strong Suction) If your test showed strong suction at the main unit, the blockage is hiding somewhere between your hand and the floor. Let's find it. Fix #3: Find and Clear Blockages in the Hose and Wand This is the primary highway for dirt, and it's a common spot for a traffic jam. Detach all attachments: Separate the hose, the wand, and the floor head. Visual Inspection: Look through each piece. Often, you'll spot the clog immediately. Clear it Safely: Use a blunt, rigid tool like a broom handle to gently push the clog out. Never use a sharp object, as it could puncture the hose and create a leak. Pro-tip: Can't see a clog in your hose? Drop a coin in one end. If it doesn't come out the other side, you've found the blockage. Fix #4: Unclog and Service the Floor Head The floor head is the final chokepoint where debris can get stuck, especially in the narrow turn where it connects to the wand. Clear the Airway: Disconnect the floor head and look into the "neck." This is a common spot for larger objects like socks, pet toys, or paper to get lodged. Clean the Brush Roll: Sometimes the issue isn't a clog, but a stalled brush roll. If the brush is completely wrapped in hair and string, it can't spin to agitate dirt and kick it up into the airstream. This makes it seem like there is no suction. Unplug the vacuum, turn the head over, and use scissors to carefully cut away any tangled debris. For a complete walkthrough, see our guide to cleaning your vacuum brush. Dreame Take To make this easier, many modern vacuums like the Dreame’s are designed for quick, tool-free maintenance and near-zero clogging. Our robot vacuums and mops feature Detangling DuoBrush technology that prevents hair wrap and helps the vacuums maintain powerful, consistent suction, while their optimized airflow paths move debris smoothly from floor to dust box. Still Having Trouble? Let's Check These Final Few Things If you've checked the main unit and the attachments and your suction is still weak, don't give up. The cause could be one of these often-overlooked issues. Fix #5: Hunt for Air Leaks Remember, your vacuum relies on a sealed system. A crack or a bad seal provides a shortcut for air, killing the suction power at the floor. Listen Closely: A high-pitched whistling or hissing sound is the tell-tale sign of an air leak. Check the Hose: Carefully inspect the entire length of the flexible hose for any splits or cracks. Check the Seals: Make sure the dustbin is clicked securely into place and that any filter compartment doors are fully latched. A poor seal here is a major source of suction loss. Fix #6: Check Your Settings Sometimes the fix is as simple as a button or a dial. Height Adjustment: On many upright vacuums, if the height setting is too high for the floor surface, it creates a gap that lets suction escape. If it's too low, it can seal itself off and choke the airflow. Adjust it until you can push the vacuum with reasonable ease. Variable Suction: Check if your vacuum has a power dial or slide that may have been accidentally set to a low-power mode for curtains or delicate surfaces. When It Might Be Time to Call a Professional While this guide on how to fix a vacuum cleaner with no suction will solve the problem over 95% of the time, there are rare instances of a true motor or electrical failure. You should stop troubleshooting and seek professional service if you notice any of these red flags: A strong, acrid burning smell. This is different from a typical dusty odor and can be a serious issue. If you're wondering why your vacuum smells, a burning odor is the one to act on immediately. Loud grinding, screeching, or rattling noises from the motor housing. Visible sparks through the motor vents. The vacuum shuts off by itself repeatedly. This could be a sign of the vacuum overheating due to an internal issue. A Simple Routine to Keep Your Vacuum at Peak Power The best way to fix a loss of suction is to prevent it from happening in the first place. Adopting this simple routine will keep your vacuum running like new. After Every Use: Empty the dustbin. It’s the single best habit you can have. Once a Month: Take 5 minutes to rinse your washable filters and tap out the non-washable ones. Once a Quarter: Flip the floor head over and clear any hair or string from the brush roll. This is especially important for robot vacuums dealing with long hair. Frequently Asked Questions (FAQ) 1. What is the first thing to check if a vacuum loses suction?  The very first and most common thing to check is the dustbin or bag. A container that is full or overfilled physically blocks the machine's airway, preventing it from creating suction. Emptying the bagless canister or replacing the vacuum bag will resolve the issue in a majority of cases. 2. Why is my vacuum not picking up?  There are four main reasons your vacuum isn't picking up debris, usually in this order of likelihood: The dustbin is full: This is the most common cause. Air must flow through the bin; if it's full, there's no room for more dirt. The filters are clogged: Dirty filters prevent air from moving through the vacuum, which kills its suction power. There is a blockage: A clog in the hose, wand, or floor head is physically stopping the debris from reaching the bin. The brush roll isn't spinning: On carpets, the brush agitates dirt to be picked up. If it's tangled with hair and not spinning, it can't lift the debris, even if the vacuum has suction. 3. How do you unclog a vacuum cleaner?  To unclog a vacuum, you need to check the main airways. Start by detaching the hose and wand; look through them to spot the blockage and use a blunt object like a broom handle to push it out. If those are clear, inspect the intake point on the floor head and the port where the hose connects to the main body, as these are common chokepoints. 4. Can a dirty filter cause a vacuum to lose suction?  Yes, absolutely. A dirty, clogged filter is one of the top two reasons for weak suction. The filter's job is to trap dust, but when it becomes saturated, it "suffocates" the motor and drastically restricts the airflow needed to create suction. Cleaning your vacuum's filters regularly is critical for maintaining performance. 5. What are the signs of a bad vacuum motor?  A bad vacuum motor has very distinct signs that go beyond a simple loss of suction. The key indicators are a strong, acrid burning smell (like melting plastic), loud mechanical grinding or screeching noises, or visible sparks coming from the motor housing. If you notice any of these symptoms, the issue is more serious than a simple clog.
Continue reading
Why Is My Vacuum So Loud? A Guide to Fixing Any Type

Why Is My Vacuum So Loud? A Guide to Fixing Any Type

Editorial TeamDreame |
That new, loud noise from your vacuum cleaner—the sudden grinding, high-pitched whining, or rattling—is more than just annoying. It's a sign that your machine needs a quick check-up. Whether you have a powerful upright, a lightweight cordless stick, or a smart robot vacuum, this guide will help you identify the source of the noise and resolve the issue. This is a simple, step-by-step guide to get your vacuum running quietly and efficiently again. Learn Your Vacuum's Normal Sounds The sound your vacuum makes depends on its design. A big upright vacuum will sound very different from a small robot vacuum. Let's cover what's normal. Uprights & Canisters: These traditional vacuums have a deep, mighty motor roar. You’ll also hear the loud, rumbling sound of the "beater bar" brush spinning on carpets. Cordless Sticks: These are known for their higher-pitched whine, which is produced by small, fast-spinning motors. Robot Vacuums: These have a lower, more consistent hum. Many models will utilize a "Carpet Boost" feature to intelligently increase volume on carpets for a deeper clean, which is normal. The Roar of a Self-Empty Station: If your robot or cordless vacuum has a self-emptying dock, you will hear a very loud roar for 15-30 seconds during the emptying process. This is entirely normal. The station uses a second, powerful motor to pull debris from the vacuum's dustbin. While it's the loudest sound the system makes, it's a clear sign that it's working correctly. Before You Start: A 60-Second Prep Finding and fixing a noise issue is typically a fast and easy process. Let's get set up first. Safety First: Power Down. Before inspecting any parts, ensure the vacuum is completely off. These 8 safety tips for using a vacuum cleaner are good practices to keep in mind. Unplug corded vacuums from the wall. For cordless and robot models, press and hold the power button to shut them down entirely. Gather Your Simple Tools. You likely already have everything you need. Grab a trash bin, a dry cloth, and a pair of tweezers for pulling out tangled hair. How to Fix Common Vacuum Noises Here’s how to identify the source of the noise and resolve it based on the type of vacuum you own. Use this table for an at-a-glance diagnosis. Find the sound you're hearing to see the likely cause and where to start looking. Sound Signature Likely Cause Primary Area to Inspect High-Pitched Whine Airflow Blockage Filter & Dustbin Grinding / Clicking Hard Debris Obstruction Main Brush & Wheels Squeaking / Squealing Friction from Hair/Dust Wheel Axles & Brush Ends Rattling Loose Component Dustbin & Brush Guard If You Hear a High-Pitched Whine (Airflow Blockage) An airflow blockage almost always causes this sound. The motor is working too hard because the air can't get through. For Uprights/Canisters: Check if the dust bag is full or if the canister needs to be emptied. Inspect all filters; they may be caked with fine dust. Learning how to clean vacuum filters properly is a key skill. Important: Disconnect the hose and inspect its entire length for any blockages. For Cordless Sticks: Empty the dustbin and clean the filters. Remove the long wand and look through it to ensure it’s clear. For Robot Vacuums: Empty the dustbin. Remove the filter and tap it against the inside of a trash can to clear out fine dust. If You Hear Grinding or Rumbling (Brush Roll Obstruction) This harsh sound means the brush has picked up a hard object or is jammed with hair. For Uprights/Sticks: Unplug the vacuum and lay it down to access the large brush roll. Use scissors to cut away tightly wound hair and string carefully. Inspect the brush area for complex objects, such as a coin, pebble, or small toy. For Robot Vacuums: Power off the robot and flip it over. Remove the brush guard, lift out the main brush, and follow this guide to thoroughly clean the brush caps.  Thoughtful engineering, such as the anti-tangle brush designs found in Dreame vacuums, helps reduce the frequency of this need. If You Hear Squeaking or Squealing (Friction or Belt Issue) This is a rubbing noise, typically caused by the friction of fine dust and hair in moving parts or from a worn-out component. For Uprights/Canisters: Unplug the unit and remove the bottom plate to inspect the drive belt that connects the motor to the brush. If the rubber belt is cracked, stretched, or broken, it will need to be replaced. For Robots/Sticks: Remove the main brush and clean any hair or dust from the end caps/bearings. For robot vacuums, the front caster wheel is a common source of squeaking. Firmly pull the wheel straight out of its socket, then pull the wheel itself off its metal axle. Clean any hair and dust from both the axle and inside the socket where debris accumulates. Dreame Take Tired of constantly cleaning tangled hair from your brush roll? Dreame TriCut Brush features built-in blades that safely and automatically cut hair during cleaning, preventing the tangles that cause friction and noise. Upgrading to a specialized brush like this is a direct way to ensure a quieter, more effective, and lower-maintenance clean. What to Do If Cleaning Doesn't Fix the Vacuum Noise So, you've done a thorough cleaning of the filters, hoses, and brushes, but a loud, abnormal noise persists. This usually means the issue has moved beyond a simple clog and is related to the physical condition of the vacuum's components. Are You Using Authentic Parts? Before diagnosing a major problem, consider whether you recently replaced any vacuum cleaner’s parts. Using non-brand ("third-party") brushes, belts, or filters can sometimes be the source of the noise. These parts may not be manufactured to the exact specifications of the original, leading to: Improper Fit: Even a millimeter of looseness in a brush can cause it to rattle inside its housing. Vibration: Different materials or weight can cause an imbalance, creating vibrations and new noises. Accelerated Wear: An ill-fitting part can put extra strain on the motor. Sticking to genuine, OEM (Original Equipment Manufacturer) parts is the best way to ensure all components work together quietly and effectively. Identify Critical Warning Signs If you are using genuine parts and a deep clean hasn't solved the problem, it's time to look for signs of a more serious mechanical issue. Do not attempt to disassemble your vacuum's motor housing. Instead, look for these definitive symptoms: A Loud, Persistent Grinding: A harsh grinding noise that persists even after cleaning the brush roll often indicates failing bearings or a stripped gear in the motor. A Distinct Burning Smell: This is a critical warning sign. An electrical, burning odor indicates that a motor is overheating and may be on the verge of failing. A Sudden Loss of Function: If the noise is accompanied by a key function stopping—like the brush roll no longer spinning or a wheel refusing to turn—it signals a component failure. If your vacuum exhibits any of these signs, power it down immediately and unplug it. This indicates a problem beyond simple maintenance, and the safest course of action is to contact the manufacturer's customer support for professional service. How to Prevent Future Noises You've fixed the noise. Here's how to stop it from coming back with a maintenance checklist: After every use: Empty the dustbin or canister and check if the bag needs replacing. Monthly: Clean your filters. If they are washable, rinse them and let them air dry completely. Monthly: Flip your vacuum over and clean all brushes and wheels of tangled hair. Using Smart Features to Control Your Vacuum’s Noise While a traditional vacuum has only an on/off switch, modern vacuums offer more options for managing sound. The most significant advantage of a smart robot vacuum is control. You can schedule it to do its loudest, most powerful cleaning when you’re not at home. When you are home, you can use an app, like the Dreamehome app, to select a "Quiet" mode for touch-ups. This level of control is something older vacuum technology simply doesn't offer. Frequently Asked Questions About Vacuum Noise Why are vacuums so loud in the first place? Vacuums are loud because they use powerful motors to spin a fan at high speeds. This creates the strong suction needed to pull up dirt, but moving that much air naturally produces a loud noise. On traditional vacuums, noise also comes from the beater bar hitting the carpet and air rushing through long hoses. How loud is a typical vacuum cleaner? Noise levels, measured in decibels (dB), vary by type: Traditional Uprights: Can reach 75-85 dB, comparable to the sound of a garbage disposal. Cordless Sticks: Typically operate at around 70-80 dB, similar to the sound of a running shower. Robot Vacuums: Often run between 60-70 dB, similar to an everyday conversation. Many robot vacuums also offer "Quiet" modes that can drop as low as 55 dB, like a refrigerator. How can I make my vacuum quieter? Perform Regular Maintenance: This is the most effective method. A clean filter, an empty dustbin/bag, and a tangle-free brush roll allow the motor to work efficiently and quietly. Check for Worn Parts: On upright vacuums, a worn or slipping drive belt is a common cause of loud squealing. Use Lower Power Settings: If your stick or robot vacuum has adjustable suction, using a lower mode will significantly reduce noise. Schedule Intelligently: The best way to manage noise from a robot vacuum is to use its app to schedule deep cleaning sessions for when you're not home.
Continue reading
How to Reset a Robot Vacuum: A Complete Troubleshooting Guide

How to Reset a Robot Vacuum: A Complete Troubleshooting Guide

Editorial TeamDreame |
Robot vacuums make cleaning effortless, but sometimes they act up. They may stop connecting to Wi-Fi, spin in circles, or display error messages that don’t go away. In many cases, a reset solves the problem.  This guide explains why a reset helps, the types of resets available, and how to reset a robot vacuum confidently. By the end, you will understand the best approach for your device, whether it is a Dreame robot or another smart vacuum. When to Reset Your Robot Vacuum You should consider a reset if your vacuum shows any of these issues: Poor Navigation: The vacuum bumps into furniture, gets stuck, or misses sections of the floor. Connectivity Issues: The vacuum cannot connect to Wi-Fi, the app, or loses connection frequently. Keep in mind that Dreame vacuums, like many smart devices, require a 2.4 GHz Wi-Fi band. Make sure your phone is on the 2.4 GHz network during setup to avoid issues. Unusual Behavior: The device spins in circles, fails to dock, or moves erratically. Error Messages: Persistent alerts that remain even after basic troubleshooting. Performance Decline: Reduced cleaning efficiency, even after emptying the dustbin and cleaning brushes. Selling or Gifting: To remove all personal settings, maps, and Wi-Fi connections before transferring ownership. Important A Reset Can't Fix a Physical Problem. A reset only fixes software glitches. If the issue is physical, like tangled brushes, dirty sensors, or a full dustbin, a reset won't help. Always give your vacuum a thorough cleaning and inspection before you perform a reset. Otherwise, the problem will just come back. Before You Reset: Basic Checks Sometimes, a reset is unnecessary. Try these steps first: Clear Obstructions: Remove debris from brushes, wheels, and sensors. Clean Sensors: Wipe sensors with a dry cloth to ensure accurate navigation. Check the Dustbin: Empty the bin and clean or replace the filter. Restart (Power Cycle): Turn the vacuum off, wait a minute, then turn it back on. This often resolves minor glitches. 3 Types of Resets Robot vacuums generally offer three types of resets: Soft Reset (Restart): Clears temporary glitches without deleting settings. Factory Reset (Hard Reset): Restores the vacuum to its original state, erasing all custom maps, schedules, and Wi-Fi data. Module Reset (Specific Component Reset): Resets particular functions like mapping without affecting other settings. 1. How to Perform a Soft Reset (Power Cycle) A soft reset is the simplest form of troubleshooting. When to Use: Minor glitches, frozen controls, or unresponsive movement. Steps: Locate Power Button: Usually on the top or side of the vacuum. Press and Hold: Hold the button for three seconds until the lights turn off. Wait: Pause 30 seconds to a minute. Power On: Press the button again to restart the device. Test: Check if the vacuum works normally. 2. How to Perform a Factory Reset (Hard Reset) A factory reset restores the vacuum to its original settings. You will need to set it up from scratch afterward.  Note: Methods vary by model. Always consult your vacuum’s user manual. Using the Physical Button(s) Locate Reset Button: Some models have a hidden pinhole; others require pressing a button combination (like Power + Home). Power On/Off: Depending on the model, the vacuum may need to be on or off before pressing reset. Press and Hold: Use a paperclip for pinholes or hold the button combination for 10–20 seconds. Confirmation: The vacuum usually signals completion with lights, sounds, or an announcement. Re-setup: Connect the vacuum to Wi-Fi and the app again. Using the Mobile App Some robot vacuums allow a factory reset to be performed through their companion app. For example, in the Dreamehome app, you would navigate to your device’s settings menu. Look for an option labeled “Factory Reset”, “Restore Defaults”, or even “Delete Device”, as removing the device from the app often triggers a factory reset. When to Use: Persistent errors, major navigation problems, or when you’re selling or gifting the vacuum. Open App: Launch the robot vacuum's official mobile application. Select Vacuum: Choose your specific vacuum from the list of devices. Navigate to Settings: Look for "Settings," "More Settings," "About Device," or a similar option. Find Reset Option: Within the settings, search for "Factory Reset," "Restore Defaults," or "Delete Device." Confirm: You'll likely be asked to confirm your decision. Proceed with caution as this action is irreversible. For Dreame robot vacuums, follow this support article: Easy Guide to Resetting Your Robot 3. How to Perform a Module Reset (Specific Component Reset) Some advanced vacuums allow resetting only a specific module, like maps. When to Use: If maps are corrupted, inaccurate, or navigation struggles in familiar areas. Steps: Open the robot vacuum's mobile application. Select your vacuum. Go to Map Settings → Map Management. Delete or reset the map. Confirm your choice. Run a cleaning cycle to create a new map of your home. After a Factory Reset: What to Do Next Re-Pair with App: Connect to Wi-Fi and the app again. Re-Map Your Home: If your vacuum uses smart mapping, run a full cleaning cycle. Reconfigure Settings: Restore schedules, cleaning preferences, and virtual boundaries. When to Call for Support If problems persist after a reset: Consult the user manual for model-specific instructions. Check online forums for similar issues. Contact customer support for advanced diagnostics or repairs. Conclusion Resetting a robot vacuum can solve many issues, but it is not a substitute for maintenance. To reduce the need for resets: Regular Maintenance: Clean brushes, sensors, and filters frequently. Keep Firmware Updated: Check the app for software updates. By understanding how to reset a robot vacuum, you can troubleshoot confidently and keep your device performing at its best. Frequently Asked Questions Is unbinding the same as a reset? Not exactly, but they are closely related and often happen together. Unbinding refers to removing the robot vacuum from your account in the mobile app. It breaks the link between your phone and the device. A Factory Reset erases all data from the vacuum itself, including maps, schedules, and settings, returning it to its original state. In most cases, unbinding your vacuum from the app will automatically trigger a factory reset. This is a security feature to ensure your personal data, like your Wi-Fi password and home map, is wiped clean before a new owner can use it. Because of this, you should treat both actions as a final step that will require you to set up the device again from scratch. How do I reset the Wi-Fi on my robot vacuum? Resetting just the Wi-Fi is an excellent step for fixing connectivity issues without erasing your maps or schedules. While the exact method varies by model, it usually involves pressing a specific combination of buttons on the vacuum itself (for example, holding the Power and Home buttons simultaneously for three seconds) until you hear a voice prompt or see a light flashing, indicating it has entered network pairing mode. You can then go into the app to reconnect it to your Wi-Fi network. For a detailed walkthrough, see our complete guide on How to Connect Your Robot Vacuum to Wi-Fi. What should I do if the reset button doesn’t work? It can be frustrating when a reset doesn't seem to work. Before assuming it's a major problem, try these steps: Double-Check the Method: Consult your user manual to confirm you are pressing the correct button or combination of buttons for the required amount of time (it can be as long as 10-15 seconds). Ensure It Has Power: The vacuum must have sufficient battery charge to perform a reset. Place it on its charging dock for at least 30 minutes before trying again. Perform a Power Cycle: If you haven't already, turn the vacuum completely off, remove it from the dock, wait a full minute, then power it back on and attempt the reset procedure one more time. If the reset function still fails after these checks, it may point to a more serious hardware or firmware issue. At that point, your best course of action is to contact the manufacturer's customer support for further assistance.
Continue reading
Robot Vacuum Costume Ideas: How to Decorate Your Robot Vacuum Creatively & Safely

Robot Vacuum Costume Ideas: How to Decorate Your Robot Vacuum Creatively...

Editorial TeamDreame |
Have you ever watched your robot vacuum beavering away as it cleans the floor and thought “this little helper deserves a worthy identity”? Whether you want to turn it into a party guest, a tech-savvy pet, or the star of a household parade, decorating your robot vacuum is a playful way to bring a dash of personality to your daily cleaning routine. But before you break out the Lady GaGa hairdo, let’s explore how to safely dress up your robotic companion without compromising its clever cleaning abilities. Get to Know Your Robot Vacuum Before You Decorate It You should consider important safety factors before you start transforming your robot vacuum into a household celebrity: never cover sensors, cameras, docking contacts, or other critical components. Remember that adding anything too heavy or bulky could hinder movement or interfere with charging and cleaning. Robot Vacuum Decoration Safety Checklist Do not block key features such as LDS, front cameras, 3D sensors, cliff sensors, bumpers, vents, side/main brush or mop extend paths, charging contacts or auto-empty ports. Keep all decorations lightweight and confined to the top surface only. Avoid using dangling fabrics or strings, and steer clear of any flammable materials near warm components or docks. After decorating, recheck the under-sofa clearance and confirm the robot can still align and dock properly. Check whether decorative add-ons are approved by the manufacturer. Possible Types of Decorations Personalizing a robot vacuum is fun and popular with some owners. The key is to use safe, lightweight materials that don't obstruct any sensors, vents or moving parts. Robot vacuum stickers, skins, and decals The simplest way to give your robot vacuum a fresh look is with vinyl stickers or custom skins. They come in endless designs, from minimalist patterns to funny faces, and can transform your vacuum look in minutes. Pros: Adds a protective layer; Easy to apply and remove without residue; Thin and lightweight; Many designs available. Cons: Can be difficult to align perfectly; Designs might not fit all models. Adhesive Felt or Fabric   For something softer and more tactile, felt or fabric patches add a cozy, handcrafted feel. They work especially well for themed or seasonal decorations. Pros: Soft, adds a tactile element; Easy to cut and customize. Cons: Can collect dust and hair; Could obstruct sensors if not carefully placed. 3D Prints and Shells If you have access to a 3D printer, small decorative panels or emblems can personalize your robot vacuum in creative ways, just keep them light and flat. You can even design a whole 3D-printed shells to personalize you robot vacuum and match your home's decor. Pros: Highly customizable; Can create unique, personalized elements. Cons: Requires careful placement to not interfere with sensors; Can detach and cause a jam. Materials (such as PLA or ABS) might not be durable or impact-resistant. Clip-on / Strap-on Costumes These turn your robot vacuum into instant entertainment. Great for parties, holidays, or social media fun. Pros: Colorful and entertaining Cons: Can obstruct sensors or interfere with docking; Can cause entanglement and hinder performance. The DIY For craft lovers, nothing beats a handmade touch. Paint, paper, foam, or repurposed materials can make your robot vacuum one of a kind. Pros: Unlimited creativity and personal expression; Turns the vacuum into a fun part of your home decor. Cons: Could impede the vacuum’s navigation and performance by obstructing sensors or vents. Type of decoration Pros Cons Stickers, skins, decals Easy to apply, many designs available Can be difficult to align perfectly Adhesive felt or fabric Soft, easy to cut and customize Could collect dust or obstruct sensors 3D prints, shells Customize with personality Requires careful placement Clip-on, strap-on Playful and entertaining Could hinder sensors or performance DIY Unlimited expression Could impede navigation and performance How to Decorate Your Robot Vacuum Safely (Step-by-Step) Get the Right Fit Before you grab your decorations, you need to know your robot vacuum's measurements. It’s like a custom-fitted outfit for your little helper. Measure your robot vacuum carefully, noting its shape and size—use a ruler or measuring tape for accuracy. Be sure to watch out for the sensors. Avoid covering any sensors or buttons. Check your model for the exact locations of these components: Top: LiDAR/LDS Front: camera/3D structured-light window; IR sensors Edges: bumper seam, side vents Arcs: leave room above side brush swing Rear/Top: charging area or manual buttons Dressing the Robot Vacuum With measurements in hand, you can now begin to outfit your mighty mite. Clean the top so it's dust-free for better adhesion. Make and mark the template for the diameter and all cutouts. Dry fit with painter’s tape, then verify the sensors and bumpers are fully clear. Apply stickers or skins from the center outward, then pop any bubbles with a pin. Add low-profile accents, such as Velcro tabs for seasonal add-ons. Test run to check its edge-following, under-sofa pass, and dock approach elements are all clear and fully functional. Adjust anything that rubs or blocks. Top 9 Robot Vacuum Costume Ideas Based on popular ideas found online, here are 9 safe decoration ideas for a robot vacuum. Some include fun names. The key is to use low-profile, lightweight, and easily removable decorations that won't interfere with the vacuum's sensors and mechanisms. Fun: A popular choice is to give the vacuum a themed look, such as a shark, ladybug or turtle. Cat-themed: Some pet owners have opted for a "Cat Taxi" decal, showing a cartoon cat riding the vacuum. Googly eyes: A classic way to add personality is to put a pair of vinyl or lightweight plastic eyes on the front of the vacuum, making it look like it's "looking" as it cleans, adding a bit of humor to your home. Seasonal stickers: Decorate your vacuum for the holidays with removable decals. Think a pumpkin or ghost for Halloween, a reindeer for Christmas or a bunny for Easter. Character faces: Give your vacuum a face with a vinyl decal kit that includes eyes, a nose, and a mouth. Decorative bumper strips: Some users apply thin, adhesive strips of decorative material to the vacuum's bumper, adding a touch of color without adding bulk or blocking sensors. Team sports decal: Showcase your team spirit by adding a decal with your favorite sports team's logo or mascot.  Minimalist designs: For a more subtle look, opt for a solid-color wrap or a geometric pattern, giving it a sleek and modern appearance. Custom name decal: Personalize it with a custom decal that gives your robot friend an official name. Pro tip: If you want guests or kids to remember and engage with your device, give it a name that gets a chuckle. Pet & Kid Safety Notes If you have children or pets, safety comes first—use this checklist for safe robot vacuum costumes. Avoid choking hazards: Use costumes without small elements that could detach and be ingested. Use non-toxic materials: Ensure all materials used, including adhesives, paints and fabrics, are certified as non-toxic and pet-safe. Secure attachments: All costume elements should be securely attached to the vacuum with strong, pet-safe adhesives or low-profile fasteners. Rounded edges: The costume should have rounded edges to prevent scratches or injuries to curious kids or animals that may interact with the robot. No interference with sensors: The costume must not cover or block any of the robot's sensors, cameras, or wheels. Don’t tempt chewers: Avoid using materials or designs such as plush fabrics or dangly parts that might look like a toy or something tempting to chew on. Lightweight materials: Use only lightweight materials that won't add significant weight to the robot. Fire safety: Do not use any materials that could pose a fire risk or trap heat. How to Remove Robot Vacuum Decorations To remove vinyl decals, gently lift an edge with your fingernail or a plastic card, then slowly peel the sticker away. After removing any type of decorations, wipe down the robot vacuum's exterior with a dry or slightly damp microfiber cloth to remove any residue or dust. Be sure to check the wheels, brushes, and sensors for any lingering adhesive or debris. FAQ What is the best decoration for a robot vacuum?  A simple pair of googly eyes is a common decoration. A possibility in pet homes is a small shark fin or other playful animal accessory. Are robot vacuum stickers safe for daily cleaning?  Yes. Most robot vacuum stickers are made from durable, waterproof vinyl that can handle daily use. They won’t peel easily and can be wiped clean with a damp cloth without affecting performance. Just be sure they don’t cover any sensors or vents. Do robot vacuum skins and decals affect navigation?  Skins and decals generally do not affect navigation as long as they do not cover or obstruct the robot's LiDAR, cameras, or infrared sensors. Do robot vacuum costumes protect against scratches and dirt? A little. Soft fabrics or clip-on covers can offer light protection from scuffs and dust buildup, especially on glossy surfaces. However, they’re mostly decorative. Avoid thick materials that could block sensors or restrict the vacuum’s movement. Can I use a costumed robot vacuum during mopping?  A costume during mopping is not recommended because it could absorb water, get tangled in the brushes, or interfere with the robot's cleaning functionality. Will decorations void my warranty?  Intentional cosmetic modifications or decorations that impact the machine's usability or restoration could void the limited warranty, according to some manufacturers. Final Thoughts Decorating your robot vacuum is a fun way to bring personality to your cleaning routine—but safety comes first. Stick to lightweight, removable decorations, keep sensors clear, and always test performance after decorating.With the right balance of creativity and care, your vacuum can be both a powerful cleaning helper and the star of your home.
Continue reading
Can Robot Vacuums Go Over Thresholds? The Complete 2025 Guide

Can Robot Vacuums Go Over Thresholds? The Complete 2025 Guide

Editorial TeamDreame |
You’ve set your robot vacuum loose, only to find it stalled, staring helplessly at a doorway threshold that might as well be a mountain. What should have been a seamless clean across your home turns into a one-room job. So, can robot vacuums actually go over thresholds? The short answer is yes, but only if the robot’s technology allows it. The ability to climb is not universal; it depends entirely on how the machine is built. In this guide, you’ll learn exactly what separates a frustrating, limited clean from a truly autonomous, whole-home solution. We’ll answer: Can robot vacuums climb thresholds? How high can most robot vacuums climb? Why do they get stuck? What innovations are powering next-generation robots? And what practical fixes are available to homeowners right now? How High Can Most Robot Vacuums Climb? The industry standard is clear: most robot vacuums can climb obstacles up to 2 cm (0.8 inches). This is enough for basic thresholds and low transitions, but not enough for homes with taller steps or sliding door tracks. Here’s what that 2 cm clearance translates to in your home: Single-step transitions – such as doorway strips between hardwood and tile. Double-layer tracks – common with sliding glass doors. Rug edges – especially medium-pile carpets that create a noticeable lip. For each of these, width matters. Narrow thresholds are easier to cross; wider transitions require sustained grip and motor strength.  Why Robot Vacuums Get Stuck Most robot vacuums get stuck at thresholds for two primary reasons: a physical design limitation and a software safety feature that misinterprets the obstacle. The Physical Design Limit (The "2-Centimeter Plateau"): This is not an accident; it’s a design compromise. Robot vacuums must remain low-profile enough to clean under furniture. Increasing their ground clearance to climb higher would make them too tall, preventing them from doing a key part of their job. The Software Safety Feature (The "Cliff Sensor Problem"): Cliff sensors are designed to prevent the robot vacuum from falling down stairs. However, these sensors often misinterpret dark or high-contrast thresholds as a dangerous drop. Even if the robot vacuum is physically capable of making the climb, its software will refuse to proceed as a safety precaution. To truly clean an entire home, a robot vacuum must move beyond these limitations. That’s where next-generation climbing technology comes in. How Robot Vacuums Go Over Thresholds: From Basic to Next-Gen To move beyond these limitations, we need to look at how robot vacuums are engineered to climb, starting with the basics and leading up to the breakthrough technologies that redefine what whole-home cleaning really means. The Foundational Mechanics of the Climb A robot vacuum's ability to physically climb over an obstacle comes down to three core design elements working in concert: Wheels for Leverage and Grip: Large, rubberized wheels with deep treads are crucial. They provide the leverage needed to lift the vacuum's body and the grip required to prevent slipping on the threshold's edge. Motor for Sustained Power: A strong motor delivers the torque (rotational power) needed to push the robot upward without stalling. This sustained power is what keeps the wheels moving against the resistance of the climb. Clearance to Avoid Getting Stuck: Ground clearance is the space between the floor and the robot vacuum's underbelly. Sufficient clearance ensures it can pass over the peak of the threshold without its body snagging or getting "high-centered" (stuck with its wheels off the ground). The Evolution of Climbing: From Standard Performers to Active Traversal A robot vacuum’s climbing ability falls into different categories based on its underlying technology. Here’s a table to help you identify which tier best matches your home. Climbing Tier Best For This Type of Home... Key Robot Vacuum Technology Standard Homes with low, simple thresholds (under 2cm / 0.8 in) and transitions to low-pile carpet. Basic wheel and motor power. Enhanced Homes with thicker, medium-pile carpets or slightly higher, rounded thresholds. Optimized passive mechanics (larger wheels, stronger motors). Active Traversal Homes with challenging high thresholds, sunken rooms, or complex obstacles like sliding door tracks. Actively adapts its body to the obstacle. The leading example is the Dreame Pro Leap™ System, with its Robotic Retractable Legs. Here’s what these tiers mean:  Standard Performers: Reliable for basic layouts, but the 0.8in (2cm) limit remains. Enhanced Robot Vacuums: A better choice for homes with layered flooring or medium rugs. Active Traversal Technology: The breakthrough. By physically adapting to obstacles, these robot vacuums achieve the holy grail of home cleaning: seamless, uninterrupted coverage across every room. The Dreame Pro Leap™ System is the prime example. Its Robotic Retractable Legs actively lift the vacuum’s body to cross higher thresholds and then retract for low-profile cleaning under furniture.  This prevents the robot vacuum from getting stuck. It represents a leap beyond passive mechanics into active, intelligent mobility. The Dreame Pro Leap™ System features an impressive shock absorption system, which prevents collisions and keeps noise levels low.  Solutions for Homes with High Thresholds Not every homeowner is ready to invest in next-gen technology right away. Here are the best solutions based on your situation: Option 1: Assist the Robot Vacuum You Already Own If your robot struggles with thresholds, you can help it along: Ramps: Off-the-shelf rubber ramps offer grip, while wooden ramps blend with flooring. DIY fixes: A plywood strip or low-pile mat can create a smoother transition. These solutions are affordable but require setup in multiple spots. Option 2: Choose a More Capable 'Standard' Robot Vacuum For budget-conscious buyers or homes with modest thresholds: Measure first: Find your highest threshold and add a margin before shopping. Check specs: Look at “maximum obstacle clearance” in product descriptions. Prioritize wheels: Larger, rubberized wheels give your robot the best chance at climbing. This ensures your purchase matches your home’s needs. Option 3: Invest in a True "Set-it-and-Forget-it" Solution For homeowners with complex layouts or high thresholds, the only true solution is to go fully autonomous. Robot vacuums featuring Active Traversal technology, like Dreame’s Pro Leap™ System, eliminate the need for ramps or manual intervention. With adaptive legs and advanced mobility, these robots transform the cleaning experience into what it was always meant to be: effortless and complete. Our Threshold-crossing Picks X50 Ultra. Being the world’s first robot with Robotic Retractable Legs, the X50 Ultra glides over obstacles up to 2.36 inches (6 cm) high. Its shock absorption system minimizes noise and prevents harsh impacts, letting it climb over door tracks, double-layer thresholds, or U-shaped furniture smoothly and quietly. Aqua10 Ultra Roller. It introduces the Triple-Wheel AgiLift™ chassis, which adapts its three wheels to lift and shift across obstacles. It climbs up to 3.15 inches (8 cm) high while effortlessly transitioning through carpets as deep as 1.18 inches (3 cm), delivering continuous cleaning no matter the flooring. Ideal for homes with plush carpets or thicker flooring transitions. L50 Ultra. It reliably clears obstacles up to 2.36 inches (6 cm) and single vertical steps up to 1.65 inches (4.2 cm). Its retractable legs are engineered for durability, tested for over 30,000 cleaning cycles, and its shock-absorbing design ensures bump-free, whisper-quiet operation. Dreame Take Instead of working around limitations with ramps or manual resets, webelieve mobility should be built into the machine itself. Pro Leap™ reflects that philosophy: engineering robot vacuums that climb, adapt, and cross thresholds on their own. Conclusion: Crossing the Threshold to a Truly Clean Home A robot vacuum’s climbing ability is not a minor detail; it’s the difference between a one-room novelty and a whole-home cleaning solution. While most models manage basic thresholds, advanced technology is required for homes with taller transitions. The single most important step? Measure your home’s highest threshold. From there, you can decide whether a simple ramp, a capable standard model, or a next-gen solution like Dreame’s Pro Leap™ is right for you. With the right choice, you can finally enjoy a set-it-and-forget-it clean; no interruptions, no stuck robots, no unfinished jobs.  FAQ Can robot vacuums go over rugs and carpets?Yes, most can handle low- to medium-pile rugs, but shag or thick carpets may be an issue unless the robot has enhanced or active climbing features. Can robot vacuums go over cords?Not reliably. Thin cords may be crossed, but tangling is common. Cable organizers are the safest fix. Do robot vacuums go over transition strips?Yes, if they fall under the 2 cm (0.8 in) standard. Wider or higher strips may require an enhanced or active traversal model. Can robot vacuums climb stairs? No, not yet commercially. While stairs remain outside the immediate capabilities of robot vacuums currently on the market, advanced prototypes and systems, such as Dreame’s Bionic Quad Track Stair Climbing System, have been announced and demonstrated. These innovations aim to make multi-story autonomous cleaning a reality in the near future.
Continue reading