How to Clean a Vacuum Cleaner Hose (and Why It Might Be Time to Upgrade)

How to Clean a Vacuum Cleaner Hose (and Why It Might Be Time to Upgrade)

Dreame Editorial Team |
Let's be honest: there is nothing more annoying than dragging a vacuum around only to realize it's just pushing dirt around instead of picking it up. You've checked the bag, you've shaken out the filters, but the crumbs are still there. The likely culprit? A clogged hose. It happens to the best of us. Over time, hair, dust bunnies, and random debris get stuck in the ridges of those traditional vacuum hoses. This chokes off the airflow and, worse, starts to smell. But don't call a repairman just yet. Learning how to clean a vacuum cleaner hose is actually a quick fix that can bring your machine back to life instantly. Here is the no-nonsense guide to unclogging, washing, and deodorizing your vacuum hose—plus a reality check on why modern vacuums don't have this headache. Signs Your Vacuum Hose Needs Cleaning Before you start taking things apart, look for these dead giveaways: Zero Suction: The motor is roaring, but the dirt isn't moving. Weird Whistling: If your vacuum sounds like it's straining or whistling, air is trying to squeeze past a blockage. The "Old Dust" Smell: That musty, stale odor coming from the exhaust usually indicates rotting grime or mold inside the tube. Visual Clumps: Sometimes you can actually see a hairball or a wrapper stuck right near the opening. Step-by-Step: How to Clean a Vacuum Cleaner Hose Ready to get your hands dirty? Follow this routine to clear the airway and sanitize the hose. Step 1: Detach and Inspect First, turn off the power. Unplug the vacuum and immediately detach the hose. You need to be safe and have leverage. Lay the hose flat on the floor and shine a light through one end. No light coming out the other side? You've got a solid blockage that needs to go. Step 2: Remove Physical Blockages Grab a broom handle or a long wooden dowel and gently slide it through. Gravity rarely works on sticky messes, so you need to mechanically push that clump of pet hair or stuck sock out of the tube. Mistake to Avoid: Don't get aggressive with wire hangers. Those plastic hoses are flimsier than they look. If you poke too hard with a sharp metal wire, you'll puncture the airtight seal and permanently lose suction. Step 3: Soak and Wash Dunk the whole hose in a bathtub filled with warm water and dish soap. A broomstick can't clean the sidewalls. Soaking allows the soapy water to reach every ridge, breaking down the fine dust and sticky residue that's been building up for months. Swirl it to ensure the water reaches every inch. Mistake to Avoid: Skip the boiling water and bleach. Super hot water can warp the plastic connectors, and bleach is way too harsh for the rubber seals. Stick to mild soap. Step 4: Dry Completely Hang it up and walk away. Drape the hose vertically over a shower rod or a door in an airy room. Gravity is your best friend here—it pulls the water out while the air dries the rest. Mistake to Avoid: Put the hair dryer away. It's tempting to speed things up, but focused heat can melt or warp the plastic.   Important Never reattach a wet hose. We mean it. Even a few drops of trapped moisture can ruin the vacuum's motor or turn your machine into a mold factory. Give it a full 24 hours to be bone dry.   Why Your Vacuum Hoses Get Clogged It really comes down to bad design. Traditional vacuum hoses use a classic ribbed, accordion-style design that allows them to bend and stretch. The problem? Those ridges are dirt magnets. Friction and static electricity cause dust to adhere to the uneven surface rather than fly into the bin. Layer by layer, grime builds up until one day a stray wrapper or a coin gets stuck, and airflow drops to zero. The reason you are dealing with this mess is that your cleaning tool is outdated. How to Avoid the Vacuum Hose from Getting Clogged You can't prevent every clog, but you can lower the odds. Pick up the big stuff: Don't be lazy—pick up socks, large paper scraps, or coins by hand. Don't force your vacuum to eat them. Empty the bin often: A full dust cup reduces airflow, making it easier for dirt to settle in the hose. Ditch the hose entirely: Since ribbed hoses are designed to clog over time, the only permanent fix is to switch to a modern robot vacuum, wet/dry vacuum cleaner, or cordless stick vacuum that doesn't use them.   Dreame Take Traditional canister and upright vacuums rely on long, ribbed, flexible hoses that naturally trap dirt and require messy manual maintenance. Dreame’s straight air duct and self-cleaning technologies permanently eliminate these traps.   Upgrade to Smart Vacuum Cleaners If you are tired of the mess, the soaking, and the drying times, maybe it's time to let technology handle it. 
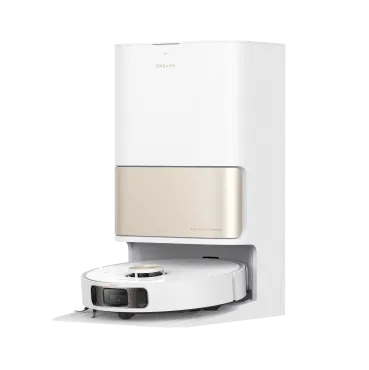
For Complete Automation: The Dreame X60 Max Ultra Complete takes you out of the equation. This robot vacuum's fully automated base station does it all: automatically empties the dustbin, washes the mop pads with hot water, and refills the solution. You literally never touch the dirt. For Odor Elimination: The Dreame H15 Pro Heat is the cure for smelly vacuums. Unlike manual washing, this vacuum and mop uses 212°F (100°C) hot water to scrub its own internals and 194°F (90°C) hot air to dry them instantly. Bacteria and odors don't stand a chance. For Deep Carpet Cleaning: Traditional uprights are notorious for hose clogs. The Dreame H15 Pro CarpetFlex changes the game. It deep-cleans carpets with 212°F (100°C) hot-water self-cleaning technology and lies flat (180°) to slide under furniture—no corrugated tubes required. Maintenance Tips for a Clog-Free Home A little attention goes a long way. Eyeball it monthly: Take a peek inside the hose once a month. Catching a small hairball now is way easier than fighting a solid clog later. Don't ignore filters: Wash your HEPA filters on schedule. A dirty filter chokes the airflow just as badly as a clogged hose, putting unnecessary strain on your motor. Listen to the engine: If your vacuum starts whining (high-pitched sound), stop immediately. That's the machine screaming for air before it loses suction completely. FAQs About Vacuum Hose Cleaning How often should I clean my vacuum cleaner hose? Aim for once a month. A regular rinse keeps odors away and suction high. But don't wait if you smell something funky or lose power—clean it right away. Can I use bleach to clean a vacuum hose? Definitely not. Bleach is too harsh and can crack the plastic or ruin the rubber seals over time. Stick to dish soap or vinegar—they are safe and effective. How do I quickly dry a vacuum hose? Patience and gravity. Hang it vertically to allow the water to drain. Do not use a hair dryer or put it on a radiator—high heat will warp the plastic faster than you think. Do all vacuums have hoses that clog easily? Nope. Modern stick vacuums use straight metal tubes instead of those flimsy ribbed hoses. Debris flies straight through, so clogs are rare. How to deodorize a vacuum hose? Baking soda and vinegar are your best friends. Fill the hose with warm water, dump in half a cup of baking soda and a cup of white vinegar, and let it fizz for 20 minutes. The chemical reaction lifts the stuck-on grime, while the soda neutralizes the smell and the vinegar kills the bacteria. Conclusion Let's face it: cleaning a vacuum hose is a gross job. But for traditional vacuums, it's the price you pay for suction power. By following these steps—detach, unclog, wash, and dry—you can get things running smoothly again. But if you're done with the hassle? Take it as a sign. Modern vacuum technology has advanced, and you can too. Get a machine that cleans itself so you don't have to.
Continue reading
Why Is My Vacuum Blowing Out Dust? Ultimate Diagnosis, Fixes, and Prevention Guide

Why Is My Vacuum Blowing Out Dust? Ultimate Diagnosis, Fixes, and Preven...

Dreame Editorial Team |
You start vacuuming, expecting clean floors, and instead, a puff of dust blows out of the machine. It’s frustrating, right? Not only does it undo your hard work, but it also pollutes your indoor air. Wondering why my vacuum is blowing out dust. When your vacuum blows out dust, it releases fine particles, mold spores, and allergens straight back into your living space, hurting your home’s air quality. This problem isn’t just about the mess. It’s a sign that your vacuum has lost suction, meaning it’s no longer maintaining proper negative pressure. The cause? A blockage in airflow or a break in the sealed system. In this guide, we’ll pinpoint exactly why your vacuum is spitting stuff back out and show you how to fix it permanently. Why Is My Vacuum Spitting Stuff Back Out? If your vacuum has also lost suction, you may want to read our related guide on why your vacuum has lost suction. Here are a few reasons why your vacuum spits out dirt.  An Overfilled Dust Bag or Canister A packed dust container is the most common culprit. When the bag or bin is full, air can’t move freely through the system. This back pressure forces debris back out through the nozzle, right into your clean space. The fix is simple: empty or replace the dust in the vacuum cleaner immediately. Make this a habit, especially after vacuuming fine dust such as drywall, flour, or fireplace ash, which fills the canister faster than you might expect. Improperly Sealed Components Even a small gap between the canister or dust cup and the body can allow dust to escape. Misaligned seals or loose latches create tiny air leaks, letting debris bypass the filter completely. Inspect every connection carefully. The canister or bag collar should click firmly into place with no visible gaps. After reattaching, run the vacuum briefly to check for escaping air around seams or joints. Hose and Duct Clogs Large debris, tissue, or pet hair can form a dense blockage inside the hose, stopping airflow and causing backflow. Here’s how to fix a vacuum that spits out dirt: Always unplug the vacuum. Use a non-sharp object, like a broom handle, to gently push the clog out. Avoid metal hangers; they can puncture the hose. If the blockage feels sticky, detach the hose and soak it in warm, soapy water or a vinegar and baking soda mix. Rinse thoroughly and hang it vertically until it’s completely dry.   Pro-tip Hold one end of the hose toward a bright light. If you can clearly see the light through the other end, the hose is clear. If not, there’s still a blockage inside.   Brushroll and Nozzle Impedance A jammed brushroll can scatter dirt instead of collecting it. Tangled hair or fibers wrap around the brush, stopping it from spinning and blocking suction flow. Carefully cut away the tangled material with scissors or a seam ripper. Once cleared, spin the brushroll by hand; it should move freely. Saturated or Missing Filters Your vacuum’s filters are its lungs. When they’re clogged, air can’t pass through properly, forcing dust out through leaks or the exhaust. If you’ve noticed unpleasant smells too, check our full guide on why your vacuum smells. What to do: Replace HEPA filters on schedule (most aren’t washable). Wash foam or sponge filters with water, but only reinstall them once they’re fully dry. Make sure filters sit tightly in place to prevent air leaks.   Important Never reinstall a damp filter. Moisture can grow mold, damage the motor, and void your warranty. Let washable filters dry for at least 24 hours before use.   Worn Gaskets and Internal Seals Rubber gaskets naturally wear out over time from heat and pressure. When this happens, they can’t maintain a tight seal, and fine dust starts escaping from the body seams, even if your filters are new. If you notice dust leaking directly from the housing, it likely needs professional service to replace internal seals. Drive Belt and Mechanical Failure A broken or loose drive belt stops the brushroll from turning, meaning dirt gets sprayed around instead of picked up. Mechanical issues often cause strange noises, if you’ve noticed this, you may want to check our guide on why your vacuum is so loud. Inspect the belt and replace it if it’s stretched or frayed. Make sure it sits correctly on the pulley and spins smoothly. Incorrect Mode Selection Some multifunctional vacuums have both suction and blower modes. Accidentally setting it to “Blower” instead of “Vacuum” can send dust flying out instantly. Double-check your settings before use. Improper Height Settings If the nozzle is too high on hard floors or thin carpets, it breaks the floor seal, weakening suction and scattering debris. For best performance: Use the lowest setting on hard floors. Match the height to the carpet’s pile level on rugs or carpets. Using Non-OEM Consumables Off-brand filters or dust bags may not fit tightly, leading to leakage. Always use OEM or certified compatible replacements to maintain proper seals and suction power. How to Maintain Your Vacuum Dust blow-out happens when airflow is blocked or seals fail, but poor maintenance is often the real cause. Regular care keeps your vacuum at peak performance and prevents overheating, a problem we explain in our guide on vacuum overheating. Follow these steps: Check filters and containers frequently. Empty the bin right after every heavy clean. Wash and dry filters on schedule. Deep-clean the hose once a year. If you’ve done all this and the problem continues, it might be a motor or seal failure that needs professional repair. You can also check our guide on why your vacuum does not turn on for related troubleshooting. For a full walkthrough, read how to clean your vacuum How Modern Vacuums Prevent Dust Blow-Out Today’s vacuums fight dust blow-out on three fronts: keep air moving, keep dust contained, and catch the tiniest particles. Here’s how that works in real life. 1. Sealed airflow Think of the vacuum like a single, airtight “straw.” Modern machines use precision gaskets, locking tanks, and rigid ducts so the only path for air, and dust, is through the filters, not around them. As you put in a dust bag, or a water tank, you will always here firm “clicks” when the part locks in, and no wisps of air around seams. 2. Multi-stage separation Before the air hits the fine filter, most debris is removed upstream: Cyclonic separation: spinning airflow throws larger dust to the bin so it never reaches the HEPA. Pre-filters like mesh screens, multi-cone filter, sponge filter catch hair and crumbs so suction stays strong. This way the main filter stays clear longer, which prevents pressure spikes that cause blow-back. 3. Smart sensors  Built-in airflow and pressure sensors watch for clogs, overfilled bins, or missing filters. You’ll see alerts, auto-boost, or safety shut-offs before dust can burp out of the nozzle. On robot vacuums and mops, docks can detect full bags and prompt a change before performance dips. [product handle="x50-ultra-robot-vacuum" rating="4.7"] 4. Self-emptying and auto-clean systems Self-empty docks and stations move dust from the vacuum into a sealed bag using controlled suction. Many uprights and wet/dry models now run auto-clean cycles that rinse/clear the brush path and dry internal parts to stop odor and buildup. 5. Dust-suppression during emptying (wet/dry advantage) Wet/dry vacs can kick dust when you dump the dirty tank. Newer designs add airflow baffles and mist/dust-suppression features that calm particles during disposal, keeping more debris contained.   Dreame Take Caring for the air you breathe, we developed MistLock, an industrial-grade dust suppression tech. It sprays a light mist that captures dust in the moment, so it can’t float back into the air. The dust becomes heavier, clumpier waste that’s easy to remove, helping cut sneezes and stuffiness while you clean.   Explore our full lineup of Robot Vacuum and Mop systems or our Wet and Dry Vacuums featuring the MistLock™ technology in the H15 Pro CarpetFlex. [product handle="h15-pro-carpetflex-wet-dry-vacuum" rating="5"] Conclusion A vacuum that spits out dust isn’t broken, it’s just asking for attention. The solution lies in keeping the airflow clean and the seals tight. Empty the container often, clear out the hose, and replace filters regularly. For a cleaner home with zero blow-out worries, consider upgrading to a Dreame self-emptying robot vacuum or Wet/Dry Vacuum for a fully automated clean. For more troubleshooting tips, read our full guide on ways to solve common vacuum cleaner problems.
Continue reading
How to Clean Your Robot Vacuum Brushes for Peak Performance

How to Clean Your Robot Vacuum Brushes for Peak Performance

Editorial TeamDreame |
Your robot vacuum is a great help in keeping your home clean. It moves quietly across the floors to pick up dust, crumbs, and pet hair. If you’ve noticed streaks, louder noise, or uneven cleaning, the culprit is often a tangled brush roll. Hair and debris wrapped around the brush can stop it from picking up dirt effectively, turning an effortless clean into extra work. The good news? Restoring performance is easy. With just a few simple steps, you can clean the brushes and get your robot vacuum running like new. We’ll also show you our latest technology that makes brush maintenance practically hands-free. Why Bother Cleaning Your Robot Vacuum Brush? This basic maintenance activity is well worth the time it takes. A clean brush is important for more than just how it looks. It also works better and lasts longer. Restores Suction Power: Tangles and obstructions slow down airflow, which greatly lowers the vacuum's capacity to pick up and suck up dirt. Improves Cleaning Efficiency: A clean brush stirs up carpets and sweeps hard floors better, making sure that the cleaning is deeper and more complete. Prevents Damage: A brush that is full of hair and dirt puts more stress on the motor, which can cause it to overheat and break down over time, costing you money. Regular brush cleaning is just one part of routine care; for more easy maintenance wins, check out our lazy person's guide to keeping your robot vacuum in top shape. Reduces Noise: A clean, balanced brush spins smoothly and quietly, just like it did when you first got it.   Dreame Take We design our robot vacuums for durability, but consistent care is the key to a long and productive life. Simple, regular maintenance not only prevents common issues but can significantly extend your vacuum's lifespan, ensuring you get the most out of your investment. Discover more simple tips to improve your robot vacuum cleaner's lifespan.   A Step-by-Step Guide: How to Clean Your Robot Vacuum Brushes Ready to restore your robot's cleaning power? Let's get started. Step 1: Gather Your Tools You won't need much. Most of what you need is likely already around your house: A pair of scissors or a seam ripper A small brush or an old toothbrush A microfiber cloth (slightly damp) A trash bin   Pro-tip Many robot vacuums, including those from Dreame, come with a handy multi-tool that often includes a shielded blade for safely cutting hair and a brush for clearing away fine dust. Check your original packaging!   Step 2: Power Off and Remove the Brush Safety first! Always power down your robot vacuum completely before performing any maintenance. Once off, flip it over on a soft surface to avoid scratches. Locate the brush guard—usually a plastic frame held in by two tabs. Unclip it and lift it away, then gently pull the main brush out. Step 3: Cut Away Hair and Detangle Debris This is the most crucial step. Lay the brush down and use your scissors or seam ripper to carefully cut through the tangled hair, threads, and fibers. Cut along the length of the brush, then pull the loosened clumps of hair out. Be careful not to snip the bristles themselves.   Pro-tip To prevent accidentally cutting the bristles, always pull the hair taut and cut in a straight line away from the bristle base. A seam ripper can be particularly effective for getting under tight tangles without risking damage.   Step 4: Deep Clean the Brush and Its Compartment Once the major tangles are gone, use your small brush to dislodge any remaining dust and fine debris from between the bristles. Wipe the brush itself and its end caps with the damp microfiber cloth. Don't forget to wipe out the brush compartment on the robot vacuum, as dust and hair often accumulate there as well. Step 5: Reassemble and Test Ensure the brush is completely dry before placing it back into its compartment. Re-attach the brush guard, making sure it clicks securely into place. Flip your robot vacuum over, power it on, and let it run for a moment to ensure everything sounds right. How Often Should You Clean the Brushes? For optimal performance, a quick check every two weeks is a good habit. However, you may need to adjust based on your home environment. Homes with pets or long-haired family members: Plan to clean the brush weekly. Homes with mostly hard floors and minimal shedding: A monthly cleaning might be sufficient. Many modern robot vacuums also have companion apps, like the Dreamehome app, that will send you maintenance reminders when it's time to check your brushes and filters.   Dreame Take We believe true automation means eliminating tedious chores like cleaning brushes. That’s why we created the HyperStream™ Detangling DuoBrush. Its innovative dual-brush system and powerful air duct capture and remove hair before it tangles, offering a genuinely hands-free cleaning experience. This is how we turn advanced engineering into effortless living, saving you time and hassle on maintenance.   FAQ About Robot Vacuum Brush Maintenance What happens if I don't clean my robot vacuum brush? If you don't take care of your brush, it won't clean well since the vacuum will have trouble picking up debris. It can also make the motor work harder, which could limit the life of your robot vacuum. Plus, it often makes the vacuum sound louder. Can I wash the robot vacuum brush with water? This is totally up to the manufacturer's instructions. You shouldn't put most brushes in water. Instead, it's safer to wipe them down with a cloth that is only a little damp. Always make sure the brush is completely dry before putting it back on. This will keep mold from growing and the inside parts from getting damaged. Does an anti-tangle brush really work? Yes, current systems that keep things from tangling work really well. The Dreame's HyperStream™ Detangling DuoBrush is an advanced design that is specifically made to handle long hair and pet fur. This greatly reduces, and in many cases eliminates, the need for manual cleaning. A Cleaner Home, a Simpler Life Keeping your robot vacuum's brushes clean is a simple but essential step to ensure your floors get the best possible clean. By following this easy guide, you can keep your automated helper running like new for years to come. And if you’re ready to upgrade to a truly hands-off cleaning experience, explore our innovative lineup of Robotic Vacuums. Discover how Dreame technology can give you a cleaner home with less effort.
Continue reading
How to Clean a Vacuum Cleaner: Complete Step-by-Step Guide

How to Clean a Vacuum Cleaner: Complete Step-by-Step Guide

Editorial TeamDreame |
Is your vacuum not cleaning as well as it should be? It could be dirty. If it needs cleaning, your vacuum might not work as designed, leaving behind dust and allergens that compromise the health of your home. It can also mean a waste of your valuable time. The good news is that the advanced vacuums of today have self-cleaning functions, but every vacuum benefits from a periodic deep clean. Start by knowing what type you own and what’s washable. What Type of Vacuum Cleaner Do You Have? While some vacuum models offer automatic cleaning, others need to be buffed-out manually. You are likely already aware of the type of vacuum they have, but if in doubt, check your user manual. The cleaning process varies according to type: Upright and stick vacuums: Empty bag/dustbin, clean or replace filters, and remove hair from the brush roll.  Canister vacuums: Empty bag/bin, clean filters and canister, check/clear hose and wand. Robot vacuums (with/without docks): Such as the Dreame L40s Ultra, offer self-cleaning functions, but still require occasional hands-on maintenance to empty the bin and clean sensors. Wet-dry vacs: Empty/winse the tank and clean/replace filters; advanced models are largely self cleaning, using a scraper to eliminate tangled hair or threads and automatically sanitizing the brush head and fittings with hot water.  Tools and Prep for Cleaning Your Vacuum To unlock your vacuum cleaner’s full potential, gather essentials for a seamless refresh. You'll need: A small brush or crevice tool (often found right on your vacuum itself)  A pair of scissors to snip away tangled hair A canister of compressed air to blast dust away  A microfiber cloth for a sparkling finish.  Mild soap and water for washable parts.  Prep first: Unplug or power off. Empty the bin outdoors to keep dust/allergens out of the room Identify washable vs. dry-wipe parts (never wet electronics or sensors) How to Clean Your Vacuum Cleaner Properly Giving your vacuum a thorough cleaning can make a world of difference. When you're ready to restore its suction and extend its lifespan, follow these simple steps. Step 1: Empty the dustbin, water tank, or replace the bag A full bag or canister restricts airflow, and that makes your vacuum work harder and clean less effectively. For bagless models, empty the contents into a trash can outside. Step 2: Clean the filters Your vacuum’s filter is a hero in the saga as it traps fine dust and allergens. A clogged filter also chokes the motor and kills suction power. To keep it in top running order, be sure to clean or replace your vacuum’s dirty filters. By following the steps below, you'll ensure your vacuum is ready to tackle any mess,ensuring you a truly pristine home and a healthy living environment.  For a bagless vacuum with a reusable filter: Remove the filter and tap it gently over a trash can to dislodge caked-on dust. If it’s a washable filter, use cool water to rinse away the dirt. Make sure it's completely dry before reinserting it—this can take up to 24 hours. For a bagged vacuum with a filter: Most bagged vacuums have a filter you can replace. Refer to your owner’s manual for the correct replacement part. High-efficiency particulate air filters (HEPA) are used in advanced vacuums so they can trap very tiny particles. Clean them with cool water according to guidelines in the user manual. Step 3: Clean the vacuum cleaner brush and roller A brush roll tangled with hair and string can't pick up debris. If your vacuum is not self-cleaning and clearing, use a pair of scissors or a seam ripper to carefully cut and remove any tangled fibers. You can also wipe the brush with a damp cloth to remove any caked-on dirt.   Dreame Take We design our vacuums to cut down manual cleanup, so this step becomes the exception, not the rule. We engineer anti-tangle brushes to stop hair wraps before they start, and our dock hot-washes and dries the mop so you’re not hand-scrubbing pads.   Step 4: Clean the hose and attachments A blocked hose or attachment can be a major cause of lost suction. Use a broom handle or another long, slender object to push out any clogs. For more thorough cleaning, a gentle rinse with warm water can do the trick. Make sure everything is completely dry before reattaching it to the vacuum. Step 5: Clean the vacuum's body and sensors Use a soft, dry cloth to wipe down the exterior of the vacuum. If you have a bagless vacuum, use the crevice tool to gently clean the sensors on the dustbin and the body of the vacuum. This ensures that the vacuum can accurately detect how full the dustbin is and continue to function properly. How Often Should You Clean a Vacuum Cleaner? Regular cleaning of your vacuum cleaner is crucial to maintaining its power and effectiveness. It's not hard to do and makes a world of difference! Maintenance schedule Action Frequency Empty the dustbin or bag After every use or when it's two-thirds full. For pet owners or during allergy season, it's best to empty it after every cleaning. Clean the filter Washable filters: Every 1-3 months. Non-washable filters: Check monthly and replace as needed, or every 6-12 months depending on usage. Clean the brush and roller Once a month for most homes. If you have pets or long hair, you may need to clean it every two weeks.  Clear the hose and attachments Once a month or as needed if you notice a drop in suction or a clog. Clean the body and sensors Sensors: Once a week for robot vacuums to ensure accurate navigation. Choose Vacuum Cleaners That Save You the Work Today’s high-tech appliances have transformed home cleaning and routine chores by even cleaning themselves. Here are a some vacuums that truly save you the work: The Dreame L40s Ultra robot vacuum and mop elevates your cleaning experience with its advanced auto mop washing and drying system. This feature ensures the mop is always fresh and ready, delivering a superior, hands-free clean that leaves your floors sparkling. The Dreame H14 Pro wet-dry vacuum redefines hygiene with its automated self-cleaning cycle. It uses hot water to rinse the brush and internal pipes and then uses hot air drying, guaranteeing a pristine, odor-free device after every use. Another advanced design that makes your life easier is the Dreame Z30 cordless stick vacuum. Cleaning it is an absolute breeze! FAQ Is a self-cleaning vacuum worth it? If you value low upkeep, yes. A self-cleaning vacuum offers unparalleled convenience, saving you valuable time and effort on maintenance.  What vacuums self-clean? Some high-end robot vacuums and certain upright vacuums feature self-cleaning brushes, auto-empty docks, detangling brushes, and hot-wash/dry maintenance. Check the feature list for your exact model. How to clean a vacuum cleaner that smells? To eliminate unpleasant odors, start by thoroughly emptying the dustbin and washing or replacing the filters. For a refreshing scent, sprinkle a small amount of baking soda inside the empty dustbin before your next use. Can I use my vacuum right after cleaning it? No. Before using your vacuum again, you must ensure all washed components, such as filters and dustbins, are completely dry. This simple step prevents mold growth and protects the motor, ensuring your vacuum performs flawlessly for years to come. What is the difference between a stick and wet-dry vacuum? A stick vacuum is lightweight and best for quick cleanups on hard floors, while a wet-dry vacuum is larger and designed for both liquid spills and heavy debris. Choose based on your floors and routines. Conclusion A consistent cleaning routine is the simplest way to extend the life and performance of your vacuum cleaner. To keep your home pristine, enjoy the convenience of auto-cleaning vacuums. These revolutionary devices offer unparalleled ease in floor care, ensuring you always have a fresh, tidy living environment.
Continue reading