























 Robot Lawn Mowers


































 Humidifiers


 Smart Door Lock


 Australia
 中国大陆
中国大陆 日本
日本


 Türkiye


 Ireland
 Portugal
 Italia
 Netherlands
 Belgium
 Greece
 Polska
 Norway
 Sweden
 Finland
 Denmark
 Hungary
 Czechia
 Slovenia
 Croatia
 Switzerland
 United
Kingdom
United
Kingdom
 Canada


 Colombia

In this article
A vacuum that's losing suction may simply need a good clean. Dust and debris can build up in various parts of the vacuum, causing clogs even when the dustbin or bag isn't full. Clearing away that buildup can help your vacuum pick up dirt better. Below, we break down how to clean a vacuum properly and when it may be time for a deeper cleaning.

What You Need Before Cleaning Your Vacuum
Find a spot where you don't mind getting a little dusty, then gather a few simple tools to make the job easier. You'll need:
- A bin liner for the dust and debris you clear out
- A soft brush or a canister of compressed air to loosen dust in tight spots
- A microfiber cloth for wiping down the vacuum
- Scissors or a seam ripper if you need to remove tangled hair
- A warm place to leave the filter until it's completely dry
- A replacement filter or dust bag, if yours is already due for a change
Before you start, unplug your vacuum or switch it off. Check the manual to see which parts can be rinsed, since some filters aren't washable and water can ruin them.

How to Clean Your Vacuum Cleaner Properly
Start with the loose dust and debris, emptying the bin or bag first, then work outward to the parts that need a more thorough clean. Handling one area at a time keeps you from missing anything. These six steps take you through it, from the bin to the sensors.
Not every step applies to every machine, so we've noted the parts that are specific to a robot or wet/dry vacuum.
Step 1: Empty the dustbin or bag
For vacuums with a dustbin, tip the dirt into a bin liner to keep loose dust from spreading around the room. If your vacuum uses a bag, replace it once it's full.
Robot vacuums work a little differently, especially with a self-emptying dock. Instead of emptying a bin after each run, the dock pulls the dust into a larger bag you empty every few weeks. Our guide on how to empty a robot vacuum walks you through what to do based on your setup.
Step 2: Wash and wipe down the water tanks
Water tanks need more than a quick empty to stay clean. For a wet-dry vacuum, pour out the dirty water after every use, then rinse the tank and wipe away any grime inside or on the lid. Leave it open until it's fully dry before putting it back.
Robot vacuum docks with water tanks need some care too. Give the tanks a rinse and wipe around the openings where dirt tends to collect.
Step 3: Clean the filters
Some filters are removable and made to be rinsed and reused, while others are sealed in and meant to be replaced rather than washed. HEPA filters vary, so the material decides whether you can use water to clean it or if it requires just gentle brushing.
- Bagless vacuums with reusable filters: These lift out for easier cleaning. Use a soft brush to loosen any remaining dust, then make sure the filter is washable, and rinse it with cool water. Leave it to dry completely for at least 24 hours before putting it back.
- Bagged vacuums with filters: These are usually sealed into a cartridge, so they're swapped rather than washed. Check your manual to see when the filter needs replacing and which one to use.
- Vacuums with HEPA filters: Some are washable and some aren't; it all depends on the filter material. If you're not sure which type you have, our guide to what a HEPA filter is explains how to care for yours and when to replace it.

Need more detailed care tips? We show you how to clean a vacuum filter and when it may be time to replace it.
Step 4: Clean the vacuum cleaner brush and roller
Take out any hair or string wrapped around the brush roll. If you're using scissors, carefully cut through the tangle in small sections, then wipe away any dirt stuck to the brush with a damp cloth. Stubborn debris might need a little more work, and this guide on how to clean a vacuum brush can help you clear it safely.
For robot vacuums: the side brushes also pick up hair over time. If yours needs attention, these tips for cleaning robot vacuum brushes show you how to clean them without damaging the bristles.
Step 5: Clean the hose and attachments
Test the hose for a hidden clog by dropping a small object like a coin through one end to see if it comes out the other. If it stops partway, you've found the blockage. Work it loose gently with something long and flexible, like a bottle brush or a straightened wire hanger, and go slowly so you don't push it deeper or tear the hose.
For a deeper clean, give the hose a gentle rinse with warm water, then let it dry completely before reattaching it to the vacuum. Dealing with something harder to reach? See how to clean a vacuum cleaner hose to safely loosen anything stuck inside.

Step 6: Clean the vacuum's body and sensors
Use a soft, dry cloth to wipe down the outside of your vacuum. On bagless models, gently clean the sensors on the dustbin or body so they can tell when the bin is full.
For robot vacuums: use a dry microfiber cloth around the sensors, and skip water or cleaning products. Those windows are how your robot vacuum sees where it's going, so any moisture or residue can blur them and throw off its navigation.
Don't forget the cliff sensors underneath, which help it detect drops and avoid stairs. Our guide to cleaning a robot vacuum's cliff sensor shows the safest way to clean them. Once that's done, our full process for cleaning a robot vacuum properly covers the dock and how often each part needs cleaning.

Step 7: Clean the base plate and underside
Turn the vacuum over and wipe down the base plate to remove any dirt stuck underneath and around the wheels. While you're there, look at the intake opening for anything that could be causing a blockage. Pull out what you can reach without pushing it further inside.
How to Clean Different Types of Vacuums
The parts you need to clean depend on the type of vacuum you have. Here's what to focus on for each one.
Robot vacuums
Remove tangled hair from the brushes and wipe the dust off the sensors. If your robot vacuum has a dock, remember to clean that too. Empty the dust bag or bin, then wipe the charging contacts and the tray where the vacuum sits. If the dock washes and dries the mop pads, rinse out the water tanks and the base to prevent grime from building up.
Wet-dry vacuums
The dirty-water tank needs to be emptied after every use. Leaving dirty water sitting inside can cause unpleasant smells, so don't leave this job until your next clean. Rinse any washable parts and make sure they're fully dry before putting them back.
If you want the full rundown on how these machines work, our guide to what a wet dry vacuum is covers the tanks, modes, and where they clean best.
Cordless stick vacuums
Empty the bag or dustbin when it's full and follow your vacuum's instructions for cleaning the filter. Hair can also wrap around the brush roll, so remove anything caught in it to help your vacuum pick up dirt properly.
Upright vacuums
Clear any hair wrapped around the brush roll, then look through the hose for anything that could be causing a clog. If your upright vacuum has a dustbin, empty it when it's full. For bagged models, replace the bag when needed.
Canister vacuums
Look through the hose for anything stuck inside, especially if you've noticed weaker suction. Wipe around the canister and its seal to remove any fine dust that has settled there. Empty the canister or replace the bag when needed.
Handheld vacuums
Tip the dirt out of the dustbin before it gets too full, then remove anything caught around the intake. Follow your vacuum's instructions for cleaning the filter, since not every filter can be rinsed.
How to Deep Clean a Vacuum
A deep clean gets to dirt that can be easy to miss during your usual vacuum maintenance. Focus on the inside of the vacuum and any harder-to-reach areas where dust or debris may be hiding. Homes with pets may need it more often, especially when there's a lot of carpet to trap hair and dirt.
-
Wipe the inside of the vacuum and canister
Take out the canister and wipe the inside with a damp microfiber cloth. Dirt can collect around the seal too, so gently wipe along the edges where the canister closes. Once you're done, leave the canister open until it's completely dry, then put it back in the vacuum.
-
Find and clear hidden clogs
A hidden clog can sit deeper in the vacuum, even when the hose is clear. Look underneath the vacuum and around the opening where dirt gets pulled in to see if anything is stuck. Shine a light inside to get a better view, then carefully remove anything you can reach without pushing it deeper.
Once you've cleared the blockage, test the vacuum again. If the suction is still weak, our blog on why your vacuum has lost suction can help identify other possible causes.
When does your vacuum need a deep clean?
Deep clean your vacuum about once every three months, depending on how often you use it and how quickly it gets dirty. You may need to do it sooner if the suction feels weaker and a routine clean doesn't improve it. A smell that keeps coming back or dust getting past the filter can also mean there's buildup inside.
What Vacuum Parts to Clean and Replace
Replace a filter or brush when it still looks dirty or worn even after you've cleaned it. Cleaning might prolong an accessory's lifespan, but eventually some will need to be swapped out. The table below shows how often to clean each part and what to look for when it's time for a new one.
| Part | When to clean or replace | Replace it when |
|---|---|---|
| Washable filter | Every 1–3 months | It still looks gray or dirty after washing |
| Non-washable filter | Every 6–12 months | Dust remains packed into the filter after you've brushed off the loose dirt |
| Dust bag | When it's about two-thirds full | It starts to smell or your vacuum indicates it needs changing |
| Brush or roller | Monthly, or every two weeks if you have pets or long hair | The bristles have worn down and no longer pick up dirt well |
| Mop pad | Regularly, based on use | It stays dirty or stained after washing |
When you need a new part, you can browse our replacement filters and brushes to find one that fits your vacuum.
How Often Should You Clean a Vacuum Cleaner?
Most vacuums need the dustbin cleared after each use and the filter checked monthly. A full clean is usually only needed a few times a year. Your routine may change depending on your household and how quickly dirt builds up.
| Action | Frequency |
|---|---|
| Empty the dustbin or bag | After every use or when it's two-thirds full. With pets or allergies, you may need to do this after every cleaning. |
| Clear the hose and attachments | Once a month, or sooner if you notice a clog or weaker suction. |
| Clean the body and sensors | Wipe the vacuum body and sensors once a week to keep them clear of dust and dirt. |
Your home can also change how often your vacuum needs cleaning. Pet hair and long hair can build up around the brush more quickly, especially during shedding seasons. Homes with mostly hard floors may not need cleaning as often as homes with lots of carpet.
Choose Vacuums That Need Less Cleaning
No vacuum is completely maintenance-free, but the right one does more of the upkeep for you. Here are two of our picks that make it easier, one a robot vacuum and one a wet dry:
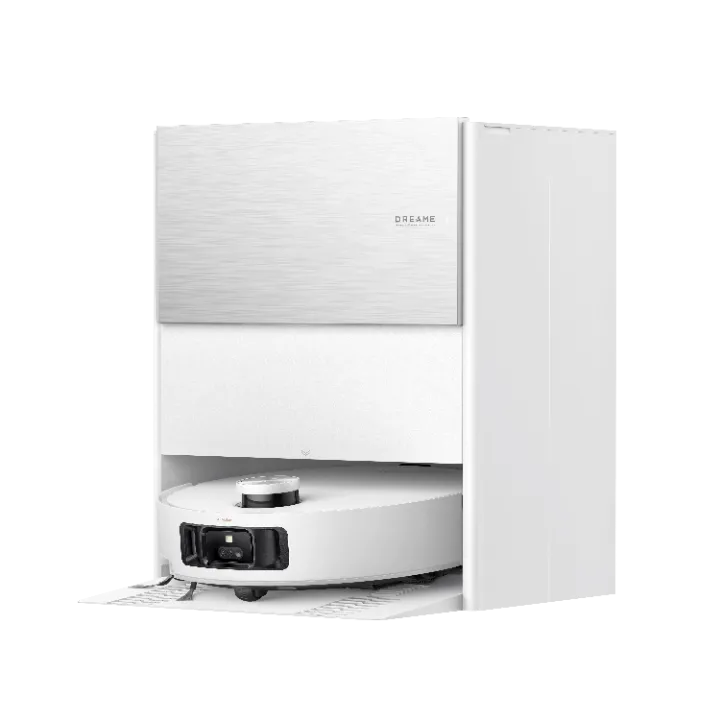
- Matrix10 Ultra - the dock empties the bin and refills the vacuum's own clean-water tank between runs. It hot-washes the mop pads on a self-cleaning washboard, then dries them and the dust bag with hot air. It even re-washes the mop mid-clean when it spots a dirty patch, and an anti-tangle brush keeps hair off the roller.
- Aero Ultra Steam - its self-cleaning cycle uses steam and hot water to wash the brush, followed by high-heat drying. The dual-scraper system also helps reduce hair tangles.
Deciding between machine types can be overwhelming sometimes, but this guide to how wet dry vacuums compare to robot vacuums helps you weigh which one suits your floors and routine.
Get the Most From Your Vacuum
Regular cleaning helps keep your vacuum from losing suction, and most of the time, that means keeping the filter and brush free of buildup. When a routine clean doesn't fix the problem, your vacuum may need a deeper clean.
If you've done all that and your vacuum still isn't keeping up, it may be time for one that asks less of you. Our robot vacuums handle everyday floors on their own, with docks that empty the bin and wash the mop pads, so you're not doing it by hand.
For hard floors and messier spills, our wet dry vacuums vacuum and mop in one pass and clean themselves afterward, so they're always ready to go.
Frequently Asked Questions
How do you sanitize a vacuum cleaner?
Wipe hard surfaces with a mild disinfectant, keeping it away from the filter. Rinse only the parts that can be washed. Let everything dry completely before putting the vacuum back together.
How do you deep clean a vacuum cleaner?
Deep clean your vacuum by cleaning the canister and checking for clogs that routine cleaning may miss. Pay attention to the seal around the canister too.
How to clean a vacuum cleaner that smells?
Clear out the dustbin, then clean the filter. Dirt trapped in the hose or brush can cause bad smells too. If the problem keeps coming back, see our tips on why your vacuum smells to help find the cause and get rid of it.
Can I use my vacuum right after cleaning it?
No. Give a washed filter at least 24 hours to dry completely before putting it back. Leaving it damp can lead to mold growth inside your vacuum.
Is a self-cleaning vacuum worth it?
Yes, if you want to spend less time on routine maintenance. A self-maintaining robot vacuum can empty its dustbin and wash its mop pads, but you'll still need to clean the filter and brushes yourself.
How often should you replace a vacuum filter?
Non-washable filters may need replacing every 6–12 months, depending on how often you use your vacuum. Washable filters just need a rinse, but replace yours if it stays dirty even after. For HEPA filters, our guide on HEPA filter replacement can help you figure out when it's time for a new one.

