Black Friday Sale Is Live! Best Prices of 2025
00
Days
: 00
Hours
: 00
Mins
: 00
Secs
Shop Now > close button
Robot Vacuum Costume Ideas: How to Decorate Your Robot Vacuum Creatively & Safely

Robot Vacuum Costume Ideas: How to Decorate Your Robot Vacuum Creatively...

Editorial TeamDreame |
Have you ever watched your robot vacuum beavering away as it cleans the floor and thought “this little helper deserves a worthy identity”? Whether you want to turn it into a party guest, a tech-savvy pet, or the star of a household parade, decorating your robot vacuum is a playful way to bring a dash of personality to your daily cleaning routine. But before you break out the Lady GaGa hairdo, let’s explore how to safely dress up your robotic companion without compromising its clever cleaning abilities. Get to Know Your Robot Vacuum Before You Decorate It You should consider important safety factors before you start transforming your robot vacuum into a household celebrity: never cover sensors, cameras, docking contacts, or other critical components. Remember that adding anything too heavy or bulky could hinder movement or interfere with charging and cleaning. Robot Vacuum Decoration Safety Checklist Do not block key features such as LDS, front cameras, 3D sensors, cliff sensors, bumpers, vents, side/main brush or mop extend paths, charging contacts or auto-empty ports. Keep all decorations lightweight and confined to the top surface only. Avoid using dangling fabrics or strings, and steer clear of any flammable materials near warm components or docks. After decorating, recheck the under-sofa clearance and confirm the robot can still align and dock properly. Check whether decorative add-ons are approved by the manufacturer. Possible Types of Decorations Personalizing a robot vacuum is fun and popular with some owners. The key is to use safe, lightweight materials that don't obstruct any sensors, vents or moving parts. Robot vacuum stickers, skins, and decals The simplest way to give your robot vacuum a fresh look is with vinyl stickers or custom skins. They come in endless designs, from minimalist patterns to funny faces, and can transform your vacuum look in minutes. Pros: Adds a protective layer; Easy to apply and remove without residue; Thin and lightweight; Many designs available. Cons: Can be difficult to align perfectly; Designs might not fit all models. Adhesive Felt or Fabric   For something softer and more tactile, felt or fabric patches add a cozy, handcrafted feel. They work especially well for themed or seasonal decorations. Pros: Soft, adds a tactile element; Easy to cut and customize. Cons: Can collect dust and hair; Could obstruct sensors if not carefully placed. 3D Prints and Shells If you have access to a 3D printer, small decorative panels or emblems can personalize your robot vacuum in creative ways, just keep them light and flat. You can even design a whole 3D-printed shells to personalize you robot vacuum and match your home's decor. Pros: Highly customizable; Can create unique, personalized elements. Cons: Requires careful placement to not interfere with sensors; Can detach and cause a jam. Materials (such as PLA or ABS) might not be durable or impact-resistant. Clip-on / Strap-on Costumes These turn your robot vacuum into instant entertainment. Great for parties, holidays, or social media fun. Pros: Colorful and entertaining Cons: Can obstruct sensors or interfere with docking; Can cause entanglement and hinder performance. The DIY For craft lovers, nothing beats a handmade touch. Paint, paper, foam, or repurposed materials can make your robot vacuum one of a kind. Pros: Unlimited creativity and personal expression; Turns the vacuum into a fun part of your home decor. Cons: Could impede the vacuum’s navigation and performance by obstructing sensors or vents. Type of decoration Pros Cons Stickers, skins, decals Easy to apply, many designs available Can be difficult to align perfectly Adhesive felt or fabric Soft, easy to cut and customize Could collect dust or obstruct sensors 3D prints, shells Customize with personality Requires careful placement Clip-on, strap-on Playful and entertaining Could hinder sensors or performance DIY Unlimited expression Could impede navigation and performance How to Decorate Your Robot Vacuum Safely (Step-by-Step) Get the Right Fit Before you grab your decorations, you need to know your robot vacuum's measurements. It’s like a custom-fitted outfit for your little helper. Measure your robot vacuum carefully, noting its shape and size—use a ruler or measuring tape for accuracy. Be sure to watch out for the sensors. Avoid covering any sensors or buttons. Check your model for the exact locations of these components: Top: LiDAR/LDS Front: camera/3D structured-light window; IR sensors Edges: bumper seam, side vents Arcs: leave room above side brush swing Rear/Top: charging area or manual buttons Dressing the Robot Vacuum With measurements in hand, you can now begin to outfit your mighty mite. Clean the top so it's dust-free for better adhesion. Make and mark the template for the diameter and all cutouts. Dry fit with painter’s tape, then verify the sensors and bumpers are fully clear. Apply stickers or skins from the center outward, then pop any bubbles with a pin. Add low-profile accents, such as Velcro tabs for seasonal add-ons. Test run to check its edge-following, under-sofa pass, and dock approach elements are all clear and fully functional. Adjust anything that rubs or blocks. Top 9 Robot Vacuum Costume Ideas Based on popular ideas found online, here are 9 safe decoration ideas for a robot vacuum. Some include fun names. The key is to use low-profile, lightweight, and easily removable decorations that won't interfere with the vacuum's sensors and mechanisms. Fun: A popular choice is to give the vacuum a themed look, such as a shark, ladybug or turtle. Cat-themed: Some pet owners have opted for a "Cat Taxi" decal, showing a cartoon cat riding the vacuum. Googly eyes: A classic way to add personality is to put a pair of vinyl or lightweight plastic eyes on the front of the vacuum, making it look like it's "looking" as it cleans, adding a bit of humor to your home. Seasonal stickers: Decorate your vacuum for the holidays with removable decals. Think a pumpkin or ghost for Halloween, a reindeer for Christmas or a bunny for Easter. Character faces: Give your vacuum a face with a vinyl decal kit that includes eyes, a nose, and a mouth. Decorative bumper strips: Some users apply thin, adhesive strips of decorative material to the vacuum's bumper, adding a touch of color without adding bulk or blocking sensors. Team sports decal: Showcase your team spirit by adding a decal with your favorite sports team's logo or mascot.  Minimalist designs: For a more subtle look, opt for a solid-color wrap or a geometric pattern, giving it a sleek and modern appearance. Custom name decal: Personalize it with a custom decal that gives your robot friend an official name. Pro tip: If you want guests or kids to remember and engage with your device, give it a name that gets a chuckle. Pet & Kid Safety Notes If you have children or pets, safety comes first—use this checklist for safe robot vacuum costumes. Avoid choking hazards: Use costumes without small elements that could detach and be ingested. Use non-toxic materials: Ensure all materials used, including adhesives, paints and fabrics, are certified as non-toxic and pet-safe. Secure attachments: All costume elements should be securely attached to the vacuum with strong, pet-safe adhesives or low-profile fasteners. Rounded edges: The costume should have rounded edges to prevent scratches or injuries to curious kids or animals that may interact with the robot. No interference with sensors: The costume must not cover or block any of the robot's sensors, cameras, or wheels. Don’t tempt chewers: Avoid using materials or designs such as plush fabrics or dangly parts that might look like a toy or something tempting to chew on. Lightweight materials: Use only lightweight materials that won't add significant weight to the robot. Fire safety: Do not use any materials that could pose a fire risk or trap heat. How to Remove Robot Vacuum Decorations To remove vinyl decals, gently lift an edge with your fingernail or a plastic card, then slowly peel the sticker away. After removing any type of decorations, wipe down the robot vacuum's exterior with a dry or slightly damp microfiber cloth to remove any residue or dust. Be sure to check the wheels, brushes, and sensors for any lingering adhesive or debris. FAQ What is the best decoration for a robot vacuum?  A simple pair of googly eyes is a common decoration. A possibility in pet homes is a small shark fin or other playful animal accessory. Are robot vacuum stickers safe for daily cleaning?  Yes. Most robot vacuum stickers are made from durable, waterproof vinyl that can handle daily use. They won’t peel easily and can be wiped clean with a damp cloth without affecting performance. Just be sure they don’t cover any sensors or vents. Do robot vacuum skins and decals affect navigation?  Skins and decals generally do not affect navigation as long as they do not cover or obstruct the robot's LiDAR, cameras, or infrared sensors. Do robot vacuum costumes protect against scratches and dirt? A little. Soft fabrics or clip-on covers can offer light protection from scuffs and dust buildup, especially on glossy surfaces. However, they’re mostly decorative. Avoid thick materials that could block sensors or restrict the vacuum’s movement. Can I use a costumed robot vacuum during mopping?  A costume during mopping is not recommended because it could absorb water, get tangled in the brushes, or interfere with the robot's cleaning functionality. Will decorations void my warranty?  Intentional cosmetic modifications or decorations that impact the machine's usability or restoration could void the limited warranty, according to some manufacturers. Final Thoughts Decorating your robot vacuum is a fun way to bring personality to your cleaning routine—but safety comes first. Stick to lightweight, removable decorations, keep sensors clear, and always test performance after decorating.With the right balance of creativity and care, your vacuum can be both a powerful cleaning helper and the star of your home.
Continue reading
How to Clean a Vacuum Cleaner: Complete Step-by-Step Guide

How to Clean a Vacuum Cleaner: Complete Step-by-Step Guide

Editorial TeamDreame |
Is your vacuum not cleaning as well as it should be? It could be dirty. If it needs cleaning, your vacuum might not work as designed, leaving behind dust and allergens that compromise the health of your home. It can also mean a waste of your valuable time. The good news is that the advanced vacuums of today have self-cleaning functions, but every vacuum benefits from a periodic deep clean. Start by knowing what type you own and what’s washable. What Type of Vacuum Cleaner Do You Have? While some vacuum models offer automatic cleaning, others need to be buffed-out manually. You are likely already aware of the type of vacuum they have, but if in doubt, check your user manual. The cleaning process varies according to type: Upright and stick vacuums: Empty bag/dustbin, clean or replace filters, and remove hair from the brush roll.  Canister vacuums: Empty bag/bin, clean filters and canister, check/clear hose and wand. Robot vacuums (with/without docks): Such as the Dreame L40s Ultra, offer self-cleaning functions, but still require occasional hands-on maintenance to empty the bin and clean sensors. Wet-dry vacs: Empty/winse the tank and clean/replace filters; advanced models are largely self cleaning, using a scraper to eliminate tangled hair or threads and automatically sanitizing the brush head and fittings with hot water.  Tools and Prep for Cleaning Your Vacuum To unlock your vacuum cleaner’s full potential, gather essentials for a seamless refresh. You'll need: A small brush or crevice tool (often found right on your vacuum itself)  A pair of scissors to snip away tangled hair A canister of compressed air to blast dust away  A microfiber cloth for a sparkling finish.  Mild soap and water for washable parts.  Prep first: Unplug or power off. Empty the bin outdoors to keep dust/allergens out of the room Identify washable vs. dry-wipe parts (never wet electronics or sensors) How to Clean Your Vacuum Cleaner Properly Giving your vacuum a thorough cleaning can make a world of difference. When you're ready to restore its suction and extend its lifespan, follow these simple steps. Step 1: Empty the dustbin, water tank, or replace the bag A full bag or canister restricts airflow, and that makes your vacuum work harder and clean less effectively. For bagless models, empty the contents into a trash can outside. Step 2: Clean the filters Your vacuum’s filter is a hero in the saga as it traps fine dust and allergens. A clogged filter also chokes the motor and kills suction power. To keep it in top running order, be sure to clean or replace your vacuum’s dirty filters. By following the steps below, you'll ensure your vacuum is ready to tackle any mess,ensuring you a truly pristine home and a healthy living environment.  For a bagless vacuum with a reusable filter: Remove the filter and tap it gently over a trash can to dislodge caked-on dust. If it’s a washable filter, use cool water to rinse away the dirt. Make sure it's completely dry before reinserting it—this can take up to 24 hours. For a bagged vacuum with a filter: Most bagged vacuums have a filter you can replace. Refer to your owner’s manual for the correct replacement part. High-efficiency particulate air filters (HEPA) are used in advanced vacuums so they can trap very tiny particles. Clean them with cool water according to guidelines in the user manual. Step 3: Clean the vacuum cleaner brush and roller A brush roll tangled with hair and string can't pick up debris. If your vacuum is not self-cleaning and clearing, use a pair of scissors or a seam ripper to carefully cut and remove any tangled fibers. You can also wipe the brush with a damp cloth to remove any caked-on dirt.   Dreame Take We design our vacuums to cut down manual cleanup, so this step becomes the exception, not the rule. We engineer anti-tangle brushes to stop hair wraps before they start, and our dock hot-washes and dries the mop so you’re not hand-scrubbing pads.   Step 4: Clean the hose and attachments A blocked hose or attachment can be a major cause of lost suction. Use a broom handle or another long, slender object to push out any clogs. For more thorough cleaning, a gentle rinse with warm water can do the trick. Make sure everything is completely dry before reattaching it to the vacuum. Step 5: Clean the vacuum's body and sensors Use a soft, dry cloth to wipe down the exterior of the vacuum. If you have a bagless vacuum, use the crevice tool to gently clean the sensors on the dustbin and the body of the vacuum. This ensures that the vacuum can accurately detect how full the dustbin is and continue to function properly. How Often Should You Clean a Vacuum Cleaner? Regular cleaning of your vacuum cleaner is crucial to maintaining its power and effectiveness. It's not hard to do and makes a world of difference! Maintenance schedule Action Frequency Empty the dustbin or bag After every use or when it's two-thirds full. For pet owners or during allergy season, it's best to empty it after every cleaning. Clean the filter Washable filters: Every 1-3 months. Non-washable filters: Check monthly and replace as needed, or every 6-12 months depending on usage. Clean the brush and roller Once a month for most homes. If you have pets or long hair, you may need to clean it every two weeks.  Clear the hose and attachments Once a month or as needed if you notice a drop in suction or a clog. Clean the body and sensors Sensors: Once a week for robot vacuums to ensure accurate navigation. Choose Vacuum Cleaners That Save You the Work Today’s high-tech appliances have transformed home cleaning and routine chores by even cleaning themselves. Here are a some vacuums that truly save you the work: The Dreame L40s Ultra robot vacuum and mop elevates your cleaning experience with its advanced auto mop washing and drying system. This feature ensures the mop is always fresh and ready, delivering a superior, hands-free clean that leaves your floors sparkling. The Dreame H14 Pro wet-dry vacuum redefines hygiene with its automated self-cleaning cycle. It uses hot water to rinse the brush and internal pipes and then uses hot air drying, guaranteeing a pristine, odor-free device after every use. Another advanced design that makes your life easier is the Dreame Z30 cordless stick vacuum. Cleaning it is an absolute breeze! FAQ Is a self-cleaning vacuum worth it? If you value low upkeep, yes. A self-cleaning vacuum offers unparalleled convenience, saving you valuable time and effort on maintenance.  What vacuums self-clean? Some high-end robot vacuums and certain upright vacuums feature self-cleaning brushes, auto-empty docks, detangling brushes, and hot-wash/dry maintenance. Check the feature list for your exact model. How to clean a vacuum cleaner that smells? To eliminate unpleasant odors, start by thoroughly emptying the dustbin and washing or replacing the filters. For a refreshing scent, sprinkle a small amount of baking soda inside the empty dustbin before your next use. Can I use my vacuum right after cleaning it? No. Before using your vacuum again, you must ensure all washed components, such as filters and dustbins, are completely dry. This simple step prevents mold growth and protects the motor, ensuring your vacuum performs flawlessly for years to come. What is the difference between a stick and wet-dry vacuum? A stick vacuum is lightweight and best for quick cleanups on hard floors, while a wet-dry vacuum is larger and designed for both liquid spills and heavy debris. Choose based on your floors and routines. Conclusion A consistent cleaning routine is the simplest way to extend the life and performance of your vacuum cleaner. To keep your home pristine, enjoy the convenience of auto-cleaning vacuums. These revolutionary devices offer unparalleled ease in floor care, ensuring you always have a fresh, tidy living environment.
Continue reading
How to Vacuum Your Wool Carpet Without Damaging It

How to Vacuum Your Wool Carpet Without Damaging It

Editorial TeamDreame |
Wool is a comfortable, soft, high-end natural material, and wool carpets can add atmosphere and sophistication to home decor, making them a top choice for many families. But cleaning a wool carpet? It can be quite troublesome or needs extra attention because this natural material may be more easily damaged than some synthetic materials if not properly cared for. But can we just let it be? That might have just left it to gather dust and bacteria. Let's take a look at 4 vacuuming methods for wool carpets. Why Cleaning a Wool Rug is Necessary Your wool rug is just like a natural air filter for your home. Because its long and soft fibers are like experts trapping dust, pollen, and allergens, keeping them out of the air you breathe. The U.S. Environmental Protection Agency (EPA) notes that carpets can hold a large amount of indoor pollutants. In one word, the wool carpet can "absorb" the dirt from the air, and at the same time, become really dirty itself. But my rug looks quite new, should I still clean it? The answer is yes. While it still looks very new outside, deep inside, sharp particles of grit and sand settle into the rug's foundation. Every time you walk on it, this hidden grit grinds against the delicate wool fibers like sandpaper. This may cause your rug to wear out prematurely. So you need a truly deep clean with the right method and right vacuum, that removes the damaging particles, keeping your rug strong and beautiful from the inside out. How to Vacuum Wool Carpets and Rugs You can absolutely vacuum your wool carpets. Vacuuming can remove hidden dirt without damaging your rug, and this helps it last longer. The right method depends on how workers made your rug was made, but once you know your rug type, you can clean it safely. Here's how to care for the most common types. 1. Thick Woven Wool Rugs(Medium Pile) Thick woven rugs include many Persian and Oriental styles, and workers tie wool fibers tightly onto a strong base. This creates a dense, soft surface, but it also creates a hidden problem. This thick pile traps sharp dirt deep inside, and this hidden dirt slowly damages your rug from within. Weak vacuums can't reach this deep dirt, so your rug keeps getting damaged even though it looks clean on top. Safe Steps to Clean: Step 1: Set Up Your Equipment: You need powerful suction without harsh brushes. The Dreame H15 Pro CarpetFlex works perfectly because it switches to carpet mode automatically. Just attach the carpet brush and you're ready. Step 2: Activate Smart Detection: Turn on the machine. The RGB sensor finds hidden dirt for you. It boosts power to 23,000Pa when needed. You don't need to guess where to clean deeper. Step 3: Start Cleaning: Move slowly across your rug. Make overlapping passes. The TangleCut™ 2.0 cuts hair automatically as you clean. This prevents tangles that could damage wool fibers. Step 4: Let Technology Work: The dual-brush adjusts power automatically. It gives consistent results. Your valuable wool stays protected from harsh brushing. This gives you complete confidence that harmful dirt is gone, while protecting your rug's delicate fibers. 2. Thin Woven Rugs (Flat-Weave) Flat-weave rugs like Kilims (traditional Middle Eastern rugs) and Soumaks (decorative flat rugs) have no thick pile, but they have a unique structure. The colored threads you see make up the actual rug structure, and this means every thread is important. The threads that hold the rug together sit on the surface, so spinning brushes can catch and pull these delicate threads. This permanently damages the beautiful pattern, and you can't fix this kind of damage. Safe Steps to Clean Compared to thick woven rugs, these delicate rugs need a much gentler approach, but you can still get excellent results. Follow these steps: Prepare a small handheld tool or a furniture attachment Set your vacuum to low power Move gently across the width of the rug, but don't rush the process Important: Never use spinning brush attachments on thin woven rugs. They will catch and damage the threads and ruin your rug's pattern forever.   3. Tufted Wool Rugs Unlike woven rugs, tufted rugs are made by inserting wool fibers into a backing and using glue to hold them in place. This glue-based construction creates unique challenges. Since glue holds the fibers instead of knots, fibers pull out much more easily. Spinning brushes will yank these fibers out, causing excessive shedding. Over time, this damages the glue backing and makes your rug look thin and worn. Safe Steps to Clean You must avoid the spinning brush, but you can still clean effectively with suction alone. Turn OFF the spinning brush - This step matters most, because the brush will pull out fibers Use suction only - Let air flow lift dust and dirt, while protecting the glued fibers Use simple tools - If you can't turn off the brush, switch to the handheld furniture attachment instead This gentle approach helps your rug keep its thick pile and last much longer, while avoiding costly damage. 4. Shag Wool Rugs Shag rugs have extra-long, loose fibers, and this creates two serious problems that regular vacuums can't handle. Problem 1: Long fibers get caught in spinning brushes and pull out entire clumps, while the brush keeps spinning and causes more damage. Problem 2: Dirt falls so deeply that regular vacuums can't reach it, but the dirt stays there and slowly damages the rug fibers. Safe Steps to Clean You need a different approach, but this method works better than any vacuum alone. Clean Outside: Take your rug outside and beat the back of the rug to shake out deep dirt. This works best to remove heavy dirt, and it's the only way to reach dirt that's deep in the pile. Gentle Surface Clean: Use your vacuum's hose or simple nozzle attachment, and clean carefully between the fiber rows. You don't need a brush because the suction does the work, while keeping your shag rug clean and fluffy without damage. Wool Rug Cleaning at a Glance Rug Type Key Challenge ✅ Recommended Tool ❌ Never Use Woven (Medium Pile) Hides deep, damaging grit Smart Carpet Cleaner (Suction-focused) Weak, surface-level vacuums Woven (Flat-Weave) Delicate, exposed threads Upholstery / Hand Tool Any spinning brush or floor head Tufted Fibers pull out easily Suction-Only Mode or Upholstery Tool An active beater bar Shag Long fibers will tangle Hose / Nozzle Attachment Any spinning brush or floor head Post-Cleaning Care: Don't Forget Your Tool Lifting all that dirt from your wool rug is a great feeling, but the job isn't quite done. A dirty tool can spread old dust, germs, and odors right back into your home. To get a truly fresh clean, you need to make sure your vacuum is clean, too. This usually means: Wiping down the brush head. Cutting away tangled hair. Emptying the dustbin and washing filters. This can be a messy and unpleasant chore. With the Dreame H15 Pro CarpetFlex, you can skip this process entirely. After you finish cleaning, it automatically washes its roller brush with hot water and dries it with hot air. This helps you keep your home and your tools fresh and clean, without any extra work. The Final Word on Wool Rug Care Protecting your wool rug is all about using the right technique for the right rug. Remember that gentle, frequent cleaning with powerful suction is much safer and more effective than harsh, infrequent brushing. By understanding how your rug is made, you can easily choose a cleaning method that keeps it beautiful for years to come. Ready to give your wool carpet the care it deserves? Explore a smarter cleaning solution with Dreame today. FAQs Q1. How often should I vacuum my wool rug? This depends on how much foot traffic it gets. For busy areas, a light vacuuming once or twice a week is a good idea. Try to do a deeper clean every one to two weeks. Q2. Is it normal for a new wool rug to shed? Yes, a little bit of "fluff" coming off a new wool rug is completely normal. However, if it keeps shedding heavily after a few months, it might be a sign that your vacuuming method is too aggressive. Q3. Can I use a vacuum with a spinning brush on my wool rug? It's best to avoid it. Never use a spinning brush on delicate rugs like tufted, shag, or flat-weaves. For a very sturdy woven rug, you might be able to, but only if you can set the brush to a very high setting so it barely touches the fibers. When in doubt, turn it off. Q4. What's the best way to handle pet hair on a wool rug? Regular vacuuming is the best solution. To make it easier, you can use a tool designed to handle hair without clogging. Powerful suction will lift the hair out, while an anti-tangle feature keeps the roller clean.
Continue reading
Wet Dry Vacuum vs. Steam Mop: Which Floor Cleaner Is Right for You?

Wet Dry Vacuum vs. Steam Mop: Which Floor Cleaner Is Right for You?

Editorial TeamDreame |
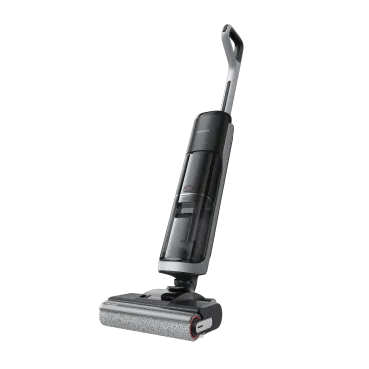
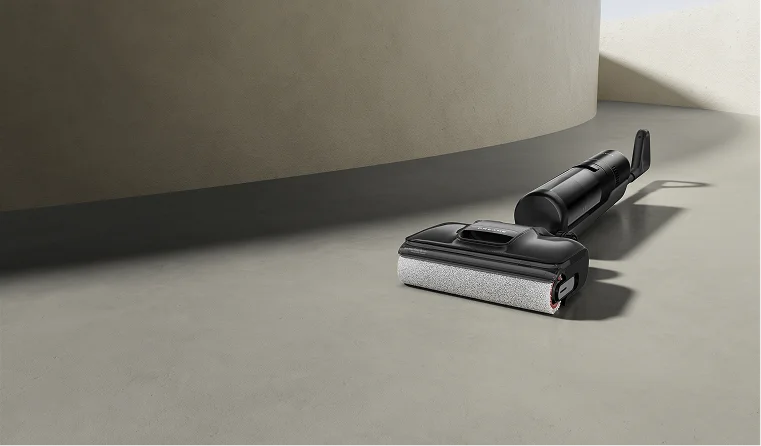
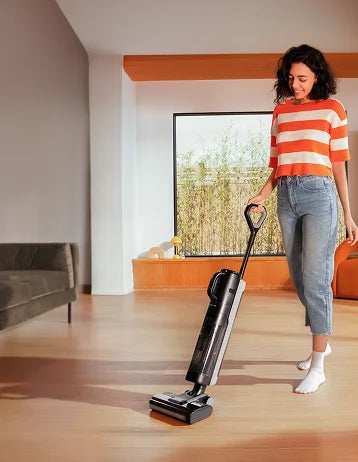
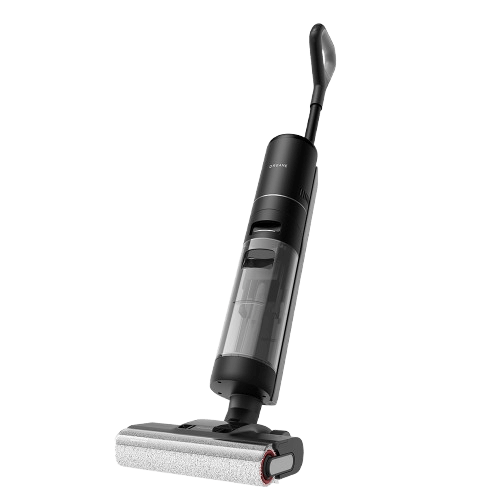
Tired of the tedious floor cleaning routine? Sweeping, mopping, and waiting for the floor to dry... It can easily take up your whole afternoon. Fortunately, two modern tools can simplify this task: wet/dry vacuums and steam mops. Both look similar but serve different purposes. Wet dry vacuums streamline the cleaning process by combining all your steps into one quick process and handling everyday dirt. On the other hand, steam mops take a different approach and use hot steam to eliminate germs, providing a different yet effective cleaning method. Each one works better for different types of floors and cleaning situations. But which one is right for you? Keep reading to find out. What is a Wet Dry Vacuum? A wet-dry vacuum is a versatile machine that is designed to vacuum and mop your hard and carpeted floors. It eliminates the need for a broom, dustpan, and traditional mop and bucket. How It Works The concept is to combine suction with washing. As you push the machine across the floor, it performs a few actions all at once: It washes: A roller brush, which is constantly wet with fresh water and a bit of cleaning solution from a clean water tank, spins against the floor. This action scrubs the surface, loosening dirt and grime much more effectively than just wiping a mop across it. It vacuums: As the roller scrubs, a powerful vacuum motor sucks up everything in its path. This includes the dry debris like dust and crumbs, any larger spills, and, most importantly, the dirty water that was just used to scrub the floor. The key to its design is that it has two separate water tanks. One tank holds the fresh water and cleaning solution. The second tank is where all the dirty water and debris get deposited. This is a critical feature because it means you are always cleaning your floors with fresh water. With a traditional mop, you end up dipping it back into dirty water, which can leave behind a grimy film. A wet-dry vacuum avoids this completely. Seeing the tank of dark, dirty water at the end is satisfying proof of how much dirt was actually removed from your floors. Its main purpose is to be a convenient, all-in-one tool that can handle a wide variety of everyday messes, from dust bunnies to spilled soup, in a single pass. What is a Steam Mop? A steam mop is a specialized tool that uses plain hot steam to deep clean and kill germs on floors. It's a popular choice for people who want to sanitize their homes without having to use chemical cleaners like bleach or ammonia. How It Works A steam mop's function is very simple. You fill its small water tank with regular tap water. An internal heating element then boils that water very quickly, typically in under a minute, turning it into hot, high-pressure steam (over 212°F / 100°C). This steam is directed down through a nozzle and into a microfiber cloth pad attached to the mop's head. The intense heat does two things: It loosens grime: The hot, moist steam is excellent at dissolving sticky, stubborn messes that have dried onto the floor, like spilled soda, jelly, or caked-on mud. It sanitizes: The high temperature of the steam kills common household germs and bacteria on contact. This is a huge benefit for anyone concerned about hygiene, especially in kitchens and bathrooms. It's essential to understand that a steam mop has no suction whatsoever. It cannot pick up hair, dust, or any solid debris. Its only job is to sanitize and break down grime that is already stuck to the surface. For households with babies crawling on the floor, pets, or people with allergies sensitive to chemicals, this tool offers extra benefits, but doesn't replace a vacuum cleaner. Wet-Dry Vacuum vs. Steam Mop: Head-to-Head Comparison Understanding how they work is one thing; knowing how they perform in your own house is what really matters. Let's break down how they stack up in different situations. Which One Saves You More Time? When it comes to getting the job done fast, the wet-dry vacuum is the clear winner. It combines two long chores, vacuuming and mopping, into one quick and easy step. Imagine it's a typical weeknight after dinner. There are crumbs under the dining table, a few stray pieces of rice on the kitchen floor, and a small puddle of water near the sink. Steam mop: You would first need to get a broom or a vacuum to clean up all the loose crumbs and debris. Once that's done, you can plug in the steam mop and wait for it to heat up before you start sanitizing. It's still a two-step process. Wet dry vacuum: You just grab the one machine, turn it on, and clean the entire mess in a minute or two. The crumbs and the water are gone in the same pass. Over the course of a week, the time saved by not having to do that first step of sweeping or vacuuming really adds up. Which Can Clean Up Spills and Accidents? This is perhaps the biggest practical difference between the two tools. A wet-dry vacuum is specifically designed to handle spills and wet messes. It's an emergency cleanup tool and a regular cleaner all in one. If a child drops a full bowl of cereal and milk, or the dog tracks in muddy paw prints from the rain, you can clean it up instantly. It sucks up the liquid (milk, water) and the solids (cereal, mud) without issue. A steam mop is completely unsuitable for these kinds of accidents. Because it has no suction, it cannot pick up the mess. If you tried to use a steam mop on spilled cereal, you would just be pushing around warm, mushy cereal with a cloth pad. If you used it on a raw egg, the heat would start to cook the egg, creating an even bigger, slimier mess to clean up. For any household where spills are a regular occurrence, a wet-dry vacuum is the far more practical and useful machine. Which Is Better at Killing Germs and Sanitizing? This is the one area where the steam mop has a distinct advantage. Its entire purpose is to sanitize. The high temperature of the steam it produces is proven to be effective at killing germs. The CDC, for example, recognizes steam as a reliable method for sterilization. This makes a steam mop an excellent tool for specific tasks, like sanitizing the floor around a toilet, cleaning a pet's eating area, or ensuring a floor is hygienic for a crawling baby. It achieves this without any chemicals, which is a major benefit for many people. A wet-dry vacuum cleans differently. It doesn't use heat to kill germs in contact. Instead, it physically removes germs from the floor by scrubbing them loose and sucking them away with the dirty water. While this leaves your floors extremely clean, it is not the same as the thermal sanitization that a steam mop provides. Which is Safer for Floors? This is a critical consideration. Using the wrong tool on your floor can lead to expensive and irreversible damage. You need to know what your floors are made of. A wet-dry vacuum is generally safe for any type of sealed hard floor. Because it sucks the water right back up, it doesn't leave your floors soaking wet. This makes it a safe choice for: Sealed Hardwood Laminate Vinyl (both plank and sheet) Tile (Ceramic and Porcelain) Sealed Stone A steam mop requires much more caution. The combination of high heat and moisture can be very damaging to certain materials. Tile and Sealed Stone: Generally safe and very effective. Steam can even help clean grout lines. Sealed Hardwood: This is risky. Over time, the heat can break down the polyurethane finish that protects the wood. Moisture can also be forced between the boards, causing them to warp. Laminate and Vinyl: These are also very risky. These floors are made of layers bonded together with adhesive. The heat from a steam mop can weaken that glue, causing the top layer to peel or the edges of the planks to swell and warp. Unsealed Wood: Never use a steam mop here. It will cause immediate damage. Always check what your flooring manufacturer recommends before using a steam mop. Which One is Easier to Maintain? A steam mop is very simple to maintain. After use, you just remove the dirty cloth pad and toss it in the washing machine. A basic wet-dry vacuum requires more effort. You have to empty the dirty water tank and clean the roller brush after each use to prevent smells and mold, which can feel like an extra chore. However, advanced wet-dry vacuums (like those from Dreame) solve this problem with a one-press "self-cleaning" function. At the push of a button, the machine automatically washes its roller brush with clean water and then dries it with hot air. This keeps it clean and odor-free without any hands-on work from you. Summary Table Feature / Use Case Wet Dry Vacuum (The Remover) Steam Mop (The Sanitizer) Winner for Most Homes Time-Saving Vacuums & mops in one step Requires pre-vacuuming Wet Dry Vacuum Spill Handling Excellent for wet & dry messes Not suitable; can spread messes Wet Dry Vacuum Chemical-Free Sanitizing Uses cleaning solution or water Excellent; uses only steam Steam Mop Floor Safety Safe on most hard floors Risk of damage to wood/laminate Wet Dry Vacuum Post-Clean Maintenance Tank/roller cleaning (can be automated) Simple pad washing Wet Dry Vacuum (with self-cleaning) How to Choose the Right Floor Cleaner The best choice is the one that solves your most common cleaning problems. Get a Wet Dry Vacuum if... You have kids or pets. If your life involves cleaning up frequent spills, food messes, and muddy footprints, a wet-dry vacuum will make a huge difference. You want to save time and effort. If your main goal is to get your floors clean as quickly and easily as possible, this is the tool for you. It combines two chores into one. You like having one tool for many jobs. If you want a single, versatile machine that can handle almost any everyday mess on your hard floors, a wet-dry vacuum is a practical choice. [product handle="h15-pro-heat-wet-dry-vacuum" rating="4.7"] Get a Steam Mop if... You already own a reliable vacuum cleaner. A steam mop works well alongside a robot vacuum and mop, which effectively manages your daily cleaning tasks. Your top priority is sanitizing without chemicals. If you are committed to having a germ-free home but want to avoid harsh cleaners, a steam mop is the best tool for that specific job. You have mostly tile or stone floors. If your home has a lot of durable flooring that can handle high heat, you can use a steam mop without worrying about damaging it. You don't mind a multi-step process. If you already vacuum your floors regularly and are just looking for a tool to do a final, deep-cleaning pass, then a steam mop can be a good addition to your routine. FAQs Q1: Do I have to vacuum before using a wet-dry vacuum? No. It's designed to do both jobs at once. That's its biggest time-saving benefit. Q2: Can a steam mop remove old stains? It's very good for breaking down sticky, sugary, or greasy messes. However, for a set-in stain like wine, coffee, or ink that has dyed the floor's surface, it likely won't be effective since it doesn't use a chemical cleaning solution. Q3: Which is safer for my sealed wood floors? The wet-dry vacuum is much safer. A steam mop's high heat and concentrated moisture can damage the wood's protective finish over time. Q4: Can I put vinegar or a cleaning solution in a steam mop? No, you should not. Steam mops are only designed to be used with water. Adding vinegar or other cleaners can corrode the internal parts and break the machine. The Bottom Line When you strip away all the features, the choice is pretty simple: A wet-dry vacuum is a tool for cleaning up messes. A steam mop is a tool for killing germs. If your biggest daily frustration is the time and hassle it takes to clean up dirt, spills, and pet hair, then a wet-dry vacuum is the most practical and useful tool for you. It solves the most common cleaning problems in one simple step. If your main concern is sanitizing your bathroom floors without bleach, and you don't mind vacuuming first, then a steam mop could be what you need. If you think a wet-dry vacuum sounds like the right choice for your home, consider the models Dreame offers. They are designed to make the daily job of keeping floors clean much quicker and easier.
Continue reading
Robot Mop Cleaning Solutions: The Ultimate Guide to a Deeper, Safer Clean

Robot Mop Cleaning Solutions: The Ultimate Guide to a Deeper, Safer Clean

Editorial TeamDreame |
Have you ever done the "white sock test" after your robot vacuum cleaner finishes a cycle? Or just walked barefoot across the kitchen floor? Perhaps too often, the floor appears clean, but it lacks that perfectly smooth, squeaky-clean feel underfoot. It might even feel a little sticky. That's the residue that plain water can't lift. If you're chasing that satisfying, barefoot-on-a-spotless-floor feeling, the secret lies in a better robot, and also a better cleaning solution. Let's talk about how to make your floors look clean and feel great. Is a Robot Mop Cleaning Solution Worth It? Think about washing dishes with just water. Can you clean a greasy plate properly? Probably not. The same thing happens with robot mopping. While your robot vacuum and mop are powerful, using them with only water is like trying to clean with one hand tied behind your back. So yes, a robot mop cleaning solution is definitely worth it. Why Water-Only Cleaning Is Not Enough Water has natural limits that restrain it from cleaning well. Surface tension makes water drops stick together. This causes water to roll around on surfaces instead of spreading out, so it can't get into dirt and lift it. Many everyday messes create extra problems. Kitchen grease, oily paw prints from pets, and food spills actually push water away. When your robot mops with only water, it often just spreads these oily messes around instead of cleaning them up. What's left behind? A dull, streaky mess on your floors. How Cleaning Solutions Work A good robot vacuum cleaning solution uses two key ingredients that work together: surfactants and enzymes. Surfactants Break Down Water's Barriers These special cleaners act like tiny magnets for dirt. Each cleaning molecule has two parts: One end that sticks to water Another end that hates water but loves grease and dirt When you use a cleaning solution with your robot vacuum and mop, it helps break down water's surface tension. This creates molecules that grab onto dirt and grease, lifting them off the floor so the vacuum's mop pad can easily wipe them away. Enzymes Target Specific Stains If regular cleaners handle everyday dirt, these special ingredients are like expert stain fighters called enzymes. These natural proteins speed up cleaning by targeting specific types of messes. According to the American Cleaning Institute, enzymes work by breaking down stains into smaller pieces that surfactants can easily remove. They work like a lock and key: each type is made to break down a particular kind of stain. Cleaner Type What It Is Common Stains Protein fighters Protease Food spills, pet messes, milk, and blood Grease fighters Lipase Kitchen grease, butter, oily marks Starch fighters Amylase Pasta sauce, gravy, potatoes, ice cream By using these specialized enzymes to dismantle big, stuck-on molecules into tiny pieces that dissolve in water, your robot mop can wipe away stubborn stains that would normally require intense scrubbing. 4 Benefits of Using a Robot Vacuum Cleaning Solution Using a quality robot mop cleaning solution gives you several benefits: Deeper Cleaning: It effectively removes germs and sticky residues that water alone cannot tackle. Streak-Free Results: The solution dries quickly, leaving no marks or residue behind. Saved Money: These highly concentrated solutions last for months, providing a low cost per use. Longer Robot Vacuum Lifespan: The low-foam, metal-safe formulas help prevent damage to the robot's pumps, seals, and tubes. In summary, while your robot handles the scrubbing, the cleaning solution does the essential work, together delivering professional results. What is the Best Robot Mop Solution? If you've decided to use a cleaning solution, the next question is which one to choose. The market offers two main types, official and generic, and the difference between them is critical for your robot's health and performance. Official Brand Cleaners: The Safe Pick This is, without question, the safest and smartest choice for your robotic vacuum cleaner. You don't have to worry about compatibility. The same people who built your robot also made these cleaning solutions. They tested them with every part inside your machine: the plastic water tank, rubber pieces, and water pump. Everything works together perfectly, making your cleaner a true robot vacuum and mop combo. You don't have to guess about performance. The cleaner is made specifically for how your vacuum works: how fast water flows and what kind of mop pad it uses. This means you get great cleaning without problems like too much foam (which can break the pump) or streaky floors. You don't have to stress about your warranty. This is the biggest reason to choose official cleaners. If you use anything else and your robot breaks, the company might refuse to fix it for free. Then you're stuck paying hundreds or thousands of dollars for repairs. With official cleaners, your warranty stays safe. Universal Cleaners: Maybe a Gamble These third-party solutions look attractive because they usually cost less or provide various scents, but at the same time, they may cause problems you don't expect. Universal cleaners claim to work for "all robot vacuums," but that's impossible since different brands use different materials inside. Plus, you're on your own if something goes wrong. If a universal cleaner breaks your vacuum, you might be denied warranty coverage. Important The official solution is generally your safest bet and your best robot mop solution. Can You Make a DIY Robot Vacuum Solution? No. The internet is full of "hacks" suggesting you can use common household products in your robot mop. It's easy to think, "What's the harm in a little vinegar?" The hard truth is that these DIY solutions can cause damage to your high-tech cleaning vacuum. A Breakdown of the Chemical Dangers Common household products can seriously damage your robot vacuum cleaner: Vinegar: Even diluted, this acid slowly eats away at your robot's rubber seals and metal parts Essential oils & soaps: A few drops of these sticky substances will clog spray nozzles and make your tank brittle Bleach & strong cleaners: Strong often means they are corrosive and will destroy your robot's delicate internal components Regular floor cleaners: Designed for buckets, not robots - they foam up and jam your water pump Cleaning Solutions: What to Use & What to Avoid For a quick reference, use this simple guide to make the right choice every time. Solution Type Our Verdict Risk to Robot Vacuum and Mop Impact on Floors Warranty Status Manufacturer-Approved Solution Gold Standard None - Designed for it Streak-free shine Protected Plain Water Safe Backup None May leave water spots Protected Universal "Robot" Cleaner High Risk Potential for corrosion/clogs Can leave residue/streaks At Risk / Likely Void DIY Vinegar Solution Do Not Use High - Corrodes seals/metal Can dull finishes VOID DIY Essential Oils/Soap Do Not Use High - Degrades plastic, clogs tubes Leaves sticky, dirt-attracting film VOID Standard Floor Cleaner Do Not Use High - Foaming, residue buildup Leaves sticky residue VOID Bleach/Harsh Chemicals Do Not Use Extreme - Severe corrosion Can cause permanent damage/discoloration VOID How to Use Cleaning Solution in Your Robot Vacuum? Using the cleaning solution is simple. The exact method depends on whether your robot has a fully automated docking station or a manual-fill tank. For Robots with Auto-Mixing Stations These advanced systems significantly simplify the cleaning process. Locate the solution cartridge: Open your docking station to find the dedicated cartridge or reservoir for the cleaning solution. Fill the cartridge or insert a new one. Use undiluted concentrate. Do not add water. The station is designed to automatically mix the perfect ratio of solution and water for every cleaning and mop-washing cycle. Ensure the cartridge is secured. Close the lid, and you're done. Your robot vacuum will handle the rest. For Robots with Manual-Fill Water Tanks This method requires one simple measurement. Check the golden ratio: Most manufacturers recommend a dilution ratio of 1:200 or 1:300. This usually translates to about one capful of solution for a standard-sized clean water tank in a docking station. Always check the bottle for the specific recommendation for your product. Fill with water first: This is a crucial pro-tip. Always fill the clean water tank with cool water before adding the solution. Adding the solution first can cause it to foam up excessively when you add water from the tap. Measure and add the solution: Use the bottle's cap as a measuring tool, as intended by the manufacturer, and add the recommended amount to the water-filled tank. Close and start clean: Secure the tank lid, place it back in the dock or robot, and start your cleaning cycle. FAQs Q1: What cleaning solution can I safely use in my robot vacuum? The safest and most effective option is always the cleaning solution specifically made by your robot's manufacturer. If that's not available, using plain, cool water is the only other universally recommended option that will not damage your device or void your warranty. Q2: Can I put vinegar in my robot vacuum? No. This is one of the most common but dangerous DIY mistakes. Vinegar is acidic and will corrode the robot's internal rubber seals and metal parts over time, leading to leaks and permanent damage. Q3: Can I use bleach or other disinfectants in my robot vacuum? Absolutely not. Harsh chemicals like bleach and ammonia are highly corrosive and will quickly destroy the sensitive internal components of your robot. They can also damage your floors. Q4: Which cleaners should be avoided for all types of floors? In general, avoid highly acidic cleaners (like undiluted vinegar) on natural stone like marble or granite, as they can cause etching. Also, avoid oily or waxy cleaners (like oil soaps or polishes) as they leave a residue that dulls the finish and can make floors slippery. Always stick to pH-neutral formulas for the broadest safety. Conclusion Water alone can't handle grease because it doesn't spread well. Special cleaners use ingredients that grab dirt and break down tough stains, giving you much better cleaning. For safer use, select cleaning solutions that are made by the manufacturer of your robot vacuum. These products are designed to protect the internal components and help maintain your warranty. Other cleaners may not function properly, and homemade mixtures, such as vinegar or oils, can damage your robot vacuum. Use official cleaning solutions to get the best results and help your vacuum last for many years. Ready to unlock a truly effortless and brilliant clean? Discover Dreame's specially formulated cleaning solution, engineered to bring out the best in your robot and your floors.
Continue reading
10 Smart Home Ideas You’ll Actually Use (and How to Automate Your Home in 2025)

10 Smart Home Ideas You’ll Actually Use (and How to Automate Your Home i...

Dreame Editorial Team |
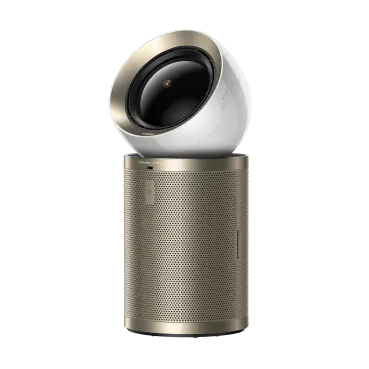
Imagine this: You grab your bag, lock the door, and head out. As your phone’s GPS senses you’ve left, the doors auto-lock, the thermostat lowers, the robot vacuum glides into action, and your air purifier switches on low. By the time you return, your home feels cleaner, fresher, and smarter. That’s not a future fantasy; it’s what smart home automation makes possible today. This guide shares practical smart home ideas you’ll actually use, explains what systems you’ll need, and gives you a starter checklist to make automation simple in 2025. Smart Home or Home Automation? Before diving in, let’s clear up terms people often confuse. What is smart home automation? It’s the setup of devices, sensors, and apps that automate everyday tasks, like lights turning on at sunset or a vacuum running when you leave home. What is a home automation system? Think of it as the “brain” of your setup. Platforms like Apple Home, Google Home, or Home Assistant connect your devices so they work together seamlessly. Smart home vs. home automation: A “smart home” can simply mean you own gadgets like a smart lock or robot vacuum. “Home automation” goes further; it connects these devices to routines, so they act without you lifting a finger. Why does this distinction matter? Because many people stop at “smart home” by buying single devices. The real benefits (time saved, energy reduced, peace of mind) come when you tie them into automation systems. For example, owning a Dreame robot vacuum is great, but linking it to your “Out-the-Door” routine means it works automatically when you leave the house. That’s where convenience turns into lifestyle change. 10 Smart Home Automation Ideas You’ll Actually Use Here’s where the fun starts: practical automations you can build today. 1. Out-the-Door Routine Trigger: Phone GPS senses you’ve left home. Actions: Doors lock, security activates, thermostat lowers, robot vacuum runs in Quiet Mode, and air purifier switches to low. Benefit: Come back to a secure, fresh, and clean home. If you often forget lights, add smart switches to this routine. They’ll shut off automatically, saving both energy and money.   Pro-tip Try pairing this with the Dreame L40s Ultra, which can vacuum and mop automatically when you’re away.   2. Doorbell Moments Trigger: Someone rings your doorbell. Actions: Porch lights turn on, your TV shows a snapshot, and your speakers chime. Benefit: You instantly know who’s at the door without scrambling.   Pro-tip An enhancement idea would be connecting this to a smart lock so you can remotely unlock the door for a delivery or trusted visitor.   3. Air-Quality Guard Trigger: Sensor detects high PM2.5 or VOCs. Actions: Air purifier boosts and phone alert sent. Benefit: Breathe healthier air right away. Pairing air-quality data with a Dreame air purifier means you don’t just guess your air is better; you’ll see numbers drop in real time. That’s peace of mind for allergy sufferers and families with kids. 4. Kitchen Night Reset Trigger: 11:00 PM. Actions: Lights dim, your robot vacuum makes a quick pass, and air purifier runs for 30 minutes. Benefit: Wake up to crumb-free floors and a fresh-smelling space. Want to level up? Add a smart plug for your dishwasher so it runs during off-peak energy hours, saving money. 5. Gentle Wake Trigger: Sunrise + workday calendar. Actions: Lights warm up, thermostat preheats, coffee machine turns on, and purifier refreshes the air. Benefit: Easier mornings that feel natural. This routine can also sync with your sleep tracker to ensure the wake-up process starts at the lightest phase of your sleep cycle, making mornings even smoother. 6. Cleaning Day Trigger: Saturday at 10:00 AM. Actions: Robot vacuum on high suction + mop, laundry starts, vacuum pauses if motion is detected. Benefit: Chores run themselves while you relax. Check out Dreame’s guide on smart vacuums to learn how they can transform your routine. Pro Tip: If you have pets, schedule this for when you take them for a walk. That way, cleaning happens without scaring them. 7. Kids’ Homework Mode Trigger: After school, kids in the living room. Actions: TV turns off, lights brighten, and purifier goes into Quiet Mode. Benefit: Fewer distractions, cleaner air for focus. You can also restrict internet access to gaming consoles during “Homework Mode” for maximum productivity. 8. Pet Comfort Trigger: Hot day and indoor temperature rises. Actions: Fan switches on, purifier on medium, and robot vacuum avoids pet zones. Benefit: Pets stay cool, calm, and unstressed. For even more comfort, connect an indoor camera so you can check on your pet when you’re away. Peace of mind and happy pets. 9. Movie Nights Trigger: TV turns on after 7 PM. Actions: Lights dim, shades lower, and purifier goes into Quiet Mode. Benefit: Instant cinema vibe in your living room. Enhance the vibe by syncing smart bulbs with the movie soundtrack. The immersive lighting will turn your living room into a theater. 10. Leak & Freeze Sentinel Trigger: Water leak sensor or pipe freeze alert. Actions: Water valve shuts, lights flash blue, and phone receives alert and snapshot. Benefit: Prevent damage before it starts. Some insurers offer discounts for leak detection systems. Check with your provider to see if you qualify. How to Set Up a Smart Home in 5 Steps Smart homes don’t need to be complicated. Start simple: Pick your “brain”: Begin with Apple, Google, or Alexa. Add Home Assistant if you want advanced control. Map one daily routine: Choose morning, bedtime, or away mode. Buy a minimal kit: Don’t splurge. Just start with locks, sensors, and one robot vacuum. Name devices clearly: Use room-based names (e.g., “Kitchen Light”), not brands. Get your Wi-Fi right: Place your router well and use a guest network for smart devices. Mistake to avoid: Buying 20 gadgets at once. Start with 2–3, build routines, and expand gradually. This keeps costs low and avoids setup frustration. Platforms & Apps You’ll Need Apple Home, Google Home, Alexa → Best for voice control and family adoption. Home Assistant → Open-source, powerful, and customizable. IFTTT → Great for connecting apps and devices. Many Dreame devices already integrate with Alexa and Google, meaning you can add vacuuming or air purifying to existing routines without extra apps. How Does Smart Home Automation Work? Smart devices communicate using protocols like Wi-Fi, Zigbee, Z-Wave, and Matter.   Pro-tip Choose products that support Matter, the new industry standard designed to make cross-brand setups easier. Dreame devices are Matter-compatible, meaning they work smoothly across ecosystems.   Example: Your Zigbee sensor detects movement → it signals your Matter-enabled hub → the Dreame robot vacuum starts cleaning. This chain reaction is what makes automation seamless, and choosing Matter means fewer headaches when adding new devices. Shortlist (Buy These First, Not Everything) Building a smart home doesn’t mean buying every gadget on the market. Start with a few essentials that give you the biggest impact and expand from there. Smart switches and bulbs (lighting is your daily win) Multi-sensors (motion, temperature, humidity, and light) Smart lock and doorbell Robot vacuum (for automated cleaning) Air purifier One bridge (if needed) Check out Dreame’s article on home robots for more innovative devices worth exploring. Privacy & Security Tips for Your Smart Home Keeping your data safe matters as much as convenience. Use a guest network for smart devices. Prefer local control where possible. Keep firmware updated. Limit camera placement and use privacy shutters. Also consider two-factor authentication for smart apps. Hackers rarely target smart homes, but adding this layer ensures your system remains yours alone. FAQs About Smart Homes Q: Are smart homes a good idea?Yes, when set up thoughtfully. They save time, boost security, and cut energy bills. Q: Why may smart homes be a bad idea?They can feel complex and raise privacy concerns. But with local-first setups and careful device choice, risks are manageable. Q: What is the best-rated open-source home automation software?There’s no single “best,” but Home Assistant is popular for advanced control. OpenHAB and Domoticz are also options. Choose one that fits your comfort level. Q: Do smart homes use more electricity?Most smart devices are energy-efficient, and automations (like turning lights off automatically) usually save more energy than they consume. Final Thoughts Smart homes aren’t about showing off gadgets; they’re about making life easier. With simple automations like out-the-door routines, bedtime resets, or cleaning days, you’ll save time and enjoy a fresher, safer space. If you’re starting your journey, keep it simple, choose Matter-compatible devices, and let products like Dreame robot vacuums handle the daily cleaning chores. A smarter home in 2025 doesn’t have to be complicated—it just has to work for you.
Continue reading