What is the Easiest Robot Vacuum to Use? A 2025 Guide

What is the Easiest Robot Vacuum to Use? A 2025 Guide

Dreame Editorial Team |
Robot vacuums promise a future of clean floors with minimal effort. But for many, the reality involves frustrating Wi-Fi pairing, confusing apps, and daily maintenance that feels like a new chore. If you’ve ever wondered if there’s a robot vacuum that actually makes life easier, you’re in the right place. In this guide, we’ll explain what makes a robot vacuum truly easy to use, outline the features that matter most, and highlight our top models designed for convenience. By the end, you’ll know which option fits your lifestyle, home size, and cleaning needs. What Makes a Robot Vacuum "Easy to Use"? Ease of use isn't just about pressing a button. It's about a seamless experience from unboxing to everyday cleaning. Based on common user experiences, the easiest robot vacuums excel in these key areas. Effortless Setup There’s nothing worse than a gadget that takes hours to set up. An easy-to-use robot vacuum gets you cleaning quickly. Clear Instructions & Guided App Onboarding: Look for models with intuitive buttons and an app that walks you through setup. Most connect over 2.4 GHz Wi-Fi for smoother pairing. Benefit: You spend minutes, not hours, getting started. No more trial and error with complicated manuals.   Dreame Take The Dreamehome app is designed for this. You can add a new device in minutes, even if you’ve never used a smart appliance before.   Simple Daily Operation The best robot vacuum fits into your life without demanding attention. One-Touch Start & Voice Control: Physical buttons on the vacuum or its dock allow for instant cleaning without your phone. Integration with voice assistants like Alexa or Google Assistant means you can start a cycle while your hands are full. Benefit: Launch a cleaning session without bending down or searching for your phone. It’s cleaning at the sound of your voice. Vacuum and Mop Mixed Floors For homes with a mix of hardwoods, tile, and low-pile rugs, a versatile cleaner is essential. All-in-One Cleaning: The easiest models switch between vacuuming dry debris and mopping up spills automatically. They intelligently adjust suction and water flow based on the floor type. Benefit: One device handles all your floor cleaning, saving you the time and storage space of multiple tools. Low-Maintenance Dock (The Real Time-Saver)  This is where the true "easy" experience shines. The less you touch the vacuum, the better. Self-Emptying Docks: Instead of emptying the small dustbin every day or two, a self-emptying dock sucks the debris into a larger bag that you might only need to change every month or two. Automatic Mopping Maintenance: Some advanced docks automatically wash and dry the mopping pads after each run, preventing mildew and smelly odors. Anti-Tangle Brushes: Specialized brushrolls resist hair wrap, reducing the need to cut out tangled strands manually. Benefit: You reclaim valuable time. The vacuum cleans your home, and its dock takes care of the vacuum. For a deeper dive into how these features add up, our blog on “Are Smart Vacuums Worth It?” breaks down the long-term value. Intuitive App Experience A powerful app shouldn’t be a complicated one. Ease of use means clarity and control. Clear Maps & Easy Zones: After its first run, the vacuum maps your home. The best apps let you easily set no-go zones or specific cleaning areas. Simple Scheduling: Setting a daily or weekly schedule should be straightforward. Benefit: You spend less time figuring out the "how" and more time enjoying a consistently clean home. Smart Navigation & Obstacle Avoidance A vacuum that’s always stuck isn’t an easy vacuum. Smart navigation is key to peace of mind. LiDAR (LDS) Navigation: This laser-based technology creates a precise map of your home, allowing for efficient, methodical cleaning without bumping into furniture. AI Obstacle Avoidance: Using a camera and artificial intelligence, the vacuum can see and avoid common hazards like shoes, cords, and pet waste. Benefit: Your vacuum works independently, navigating room-to-room and under furniture without getting confused or stuck. Easy to Move and Store Finally, an easy robot vacuum shouldn’t be a burden when you need to move it. Lightweight Build & Compact Dock: A lighter vacuum is easier to carry upstairs. A dock with a small footprint fits neatly against a wall without being an eyesore. Benefit: Flexibility for multi-story homes and a tidy-looking living space. Easy Robot Vacuum vs. Manual Cleaning How much easier is it, really? This table compares the key features of an advanced robot vacuum against traditional manual cleaning. Feature Easy Robot Vacuum Manual Cleaning Daily Effort Scheduled auto-clean or voice command Hauling out a vacuum, plugging it in, pushing it around Emptying Self-emptying dock (every 30–60 days) Emptying bin/canister after every use Mopping Automatic pad washing and drying Filling a bucket, wringing a mop, dealing with dirty water The initial investment is higher, but an easy-to-use robot vacuum saves hours each month and keeps floors consistently clean with far less effort. For more on this comparison, see our blog on “Can Robot Vacuums Replace Traditional Vacuum Cleaners?” Who Needs the Easiest Robot Vacuums? Almost anyone can benefit, but these groups will find particular value in a truly hands-off model. Pet Owners: Choose a model with a self-emptying base and anti-tangle brushes. Pet hair fills bins fast, so automation here is a game-changer. Explore our specific guide to robot vacuums for pet hair for more details. Seniors & Elderly Users: Look for features that reduce physical strain. Voice control and large, visible buttons in the app mean less bending and simpler operation. A lightweight vacuum with reliable obstacle avoidance adds safety and peace of mind. New to Robot Vacuums? Tips for True "Set-and-Forget" If you're new to robot vacuums, a few simple habits will maximize your "easy" experience. Set Auto-Runs: Use the scheduling feature! A daily clean while you’re at work means you always come home to clean floors without thinking about it. Declutter First: A quick pick-up of cords, toys, and clothing from the floor helps the vacuum run uninterrupted. Invest in Key Features: For the ultimate hands-off experience, prioritize a model with a self-emptying dock and automatic mop washing/drying. These features save you the most frequent maintenance tasks.   Pro-tip If you're buying your first robot vacuum, prioritize self-emptying and mop drying. These save you the most time day to day.   Our Top Dreame Models That Keep It Simple At Dreame, we engineer our robot vacuums around the principle of powerful, intelligent cleaning that simplifies your life. Here are our top models that embody "easy to use." 
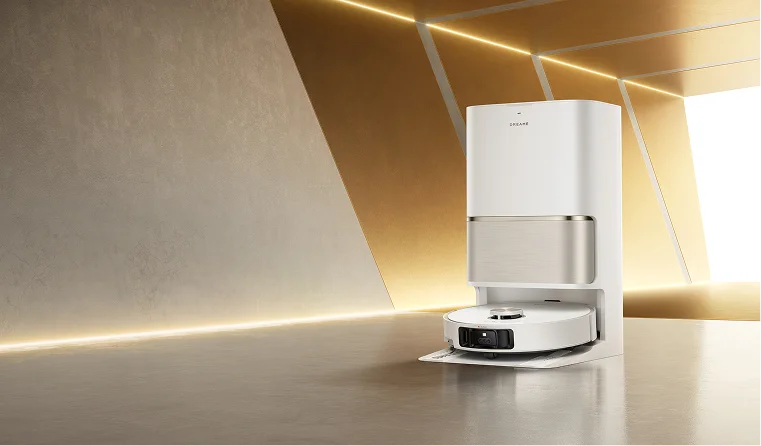
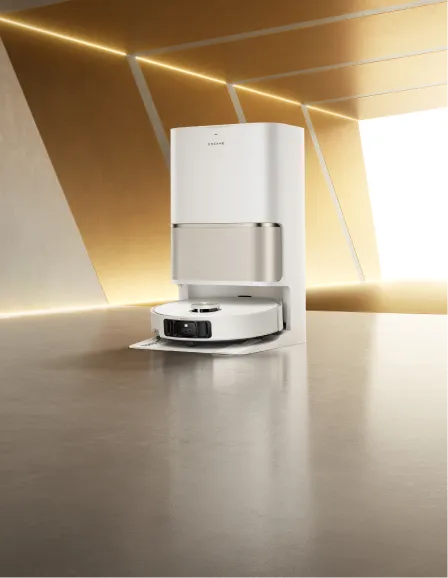
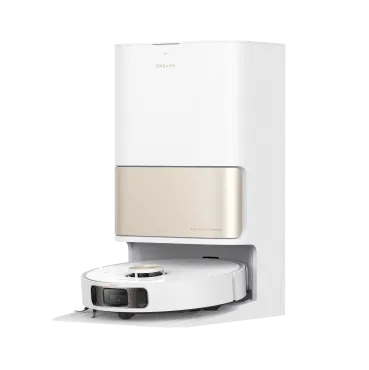
Dreame L40s Ultra: The hero of low maintenance, the L40s Ultra features a self-emptying dock and automatic mop wash/dry for a true “set-and-forget” experience. Dreame X50 Ultra: For homes that need the ultimate in intelligence, the X50 Ultra offers premium AI Obstacle Avoidance to confidently navigate around obstacles. Its full-service dock combines self-emptying, mopping, and drying for a completely automated clean. Dreame Aqua10 Ultra Roller: This model features a unique roller mop that scrubs floors more effectively. With its fresh-water system and upgraded climbing ability, it delivers a superior mopping performance and can easily transition between different floor types for whole-home coverage. All Dreame models pair with the intuitive Dreamehome app that makes mapping and scheduling simple, sending you helpful updates so you’re always in the know. How to Choose the Right Easy Robot Vacuum for You Let’s summarize this guide into actionable steps to find your perfect match. Decide How Hands-Off You Want to Be: Are you okay with emptying a bin every few days, or do you want the full autonomy of a self-emptying dock that works for weeks? Match Features to Your Floors & Lifestyle: Do you have pets that shed? Prioritize anti-tangle brushes. Hardwood and tile throughout? A vacuum-and-mop combo is essential. Consider Your Comfort with Tech: If you love smart home control, choose a model with a feature-rich app. If you prefer simplicity, ensure it has reliable physical buttons. Balance Budget with Convenience: Easy-use features scale with price. Self-emptying and AI navigation are premium features, but they offer the highest level of daily convenience. FAQs What is the best price for an easy robotic vacuum? Prices vary by features and regions. True hands-off models with self-emptying start around $800, while basic models begin near $300. What is the easiest robot vacuum to use for the elderly? Look for voice control, clear on-device buttons, dependable navigation (LiDAR), and a dock that empties and maintains the robot automatically. What are the negatives of simpler robot vacuums? Entry-level robots often require more manual maintenance and lack smart navigation, leading to less efficient cleaning. For a balanced view, read about the advantages and disadvantages of robot vacuums. What is the easiest vacuum to maneuver? Robot vacuums with LiDAR (LDS) navigation for precise mapping and AI obstacle avoidance for everyday hazards. Final Thoughts The easiest robot vacuum to use in 2025 is one that saves you time, effort, and second-guessing. For compact living, the Dreame L40s Ultra is hard to beat. For families, the X50 Ultra combines smarts with convenience. And if you want a mop system that nearly eliminates manual work, the Aqua10 Ultra Roller delivers. Ready to make cleaning one less thing to think about? Whatever you choose, Dreame makes sure your robot vacuum fits your life—not the other way around.
Continue reading
How Many Decibels is a Vacuum Cleaner?

How Many Decibels is a Vacuum Cleaner?

Dreame Editorial Team |
Vacuum cleaner noise is one of the most common frustrations in home cleaning. You turn it on, and suddenly it sounds like a mini jet engine in your living room. But have you ever wondered how many decibels a vacuum cleaner is supposed to make? Or what does that number actually mean for your ears, your pets, or your peace at home? Today, we’ll break down what those sound levels mean, how they affect you, and what to look for if you want a quieter, calmer cleaning routine. What is the Average Vacuum Cleaner Noise Level? Most household vacuums range from 65 to 80 dB, but what does that actually mean in everyday life? To answer that, we need to understand how decibels work and what the average vacuum cleaner's sound level looks like in context. Vacuum Decibels vs. Real-World Sounds The dB scale is logarithmic, not linear: every 10 dB increase means roughly 10× more sound energy and about twice the perceived loudness to our ears. That’s why a jump from 70 dB to 80 dB can feel so massive. As you’ll see in the table below, vacuum cleaners are typically louder than normal conversation but quieter than heavy city traffic. Noise Source Approx. Decibel Level Impact Whisper 30 dB Extremely Quiet Normal Conversation 60 dB Typical Background Average Vacuum Cleaner 65 - 80 dB Sustained exposure causes irritation Heavy City Traffic 85 dB Hearing protection threshold (OSHA) Lawnmower 90 - 100 dB Protection is needed for sustained exposure The noise level is not static, however, it varies significantly depending on the vacuum's type and things like cleaning mode (Eco vs. Turbo), motor type, airflow design, brush system, and even the type of flooring under the vacuum,, which we'll explore next. Noise Comparison: Cordless, Upright, and Robot Vacuums Vacuum Type Typical Noise Range (dBA) Noise Characteristic Robot Vacuums 55 - 65 Quietest, suited for background and frequent cleaning. Short lound spike (~75db) when self-emptying at the dock. Cordless Stick Vacuums 65 - 75 Mid-range, motor noise often reduced; spikes in 'Max' mode. Wet Dry Vacuums 63 - 76 Mix of motor airflow "whoosh," brush hum, and water-pickup gurgle, typically low in Quiet/Auto mode. Traditional Upright/Corded 75 + Loudest overall, driven by motor size and lack of insulation. How Floor Type Affects Vacuum Cleaner Noise Flooring makes a bigger difference than most people expect. On hard floors (wood, tile, laminate), vacuums tend to sound louder, up to 80 dB, because the surface reflects noise instead of absorbing it. Brush heads may also “chatter” slightly on rigid surfaces, adding to the perceived volume. On carpet, the opposite happens. Fibers absorb vibration and airflow noise, making the vacuum noticeably quieter (60-72 dB), but the suction motor often works harder, which may raise the underlying pitch. Thick carpets can even muffle the sound so much that higher suction levels feel more comfortable than they do on bare floors. If your vacuum seems louder in one room than another, it’s often the flooring, not the machine. Why Vacuum Cleaner Decibels Matter to Your Home and Health Noise isn’t just some boring tech spec. It’s a real part of your living comfort. A loud vacuum can do more than just annoy you; it can affect your hearing health, elevate stress, and even cause tension in your household. You might laugh, but vacuum noise is one of those hidden stressors that creep into everyday life. Think about it. You’re trying to relax after dinner, and someone fires up a 78 dB vacuum in the hallway. Or your toddler is napping, and the robot vacuum decides it’s go time. It’s not just inconvenient, it’s disruptive. The Health Impact of Loud Noise Prolonged exposure to high-decibel sounds, anything over 85 dBA, can harm your hearing. It doesn’t happen all at once, but it builds up quietly (pun intended). That ringing in your ears after cleaning? A warning sign. And it’s not just your ears. Loud sounds mess with your stress hormones, too. They make it harder to focus, sleep, or even enjoy silence afterwards.   Important Remember that even short bursts of high-intensity noise can damage the tiny hair cells in your cochlea. Hearing, especially for kids and pets, is extra sensitive. So yes, those few minutes of roaring vacuum noise matter more than you might think.   Common Frustrations: When is a Vacuum Too Loud? If you’ve ever tried vacuuming late at night, you probably already know. Thin apartment walls, echoing floors, it’s a recipe for neighbor complaints. Vacuum noise carries, and it doesn’t fade easily. Pets are another story. Many dogs and cats panic at the first sound of a vacuum turning on. That’s because their hearing range is way higher than ours. What sounds like a hum to you might feel like a roar to them. What Are the Noise Regulations for Vacuum Cleaners in the US? Here’s something surprising: there’s no single federal law in the U.S. that limits how loud your vacuum can be. Occupational Safety and Health Administration (OSHA) Rules: OSHA sets workplace rules: 90 dBA for 8 hours is the maximum before hearing protection becomes mandatory. At 85 dBA, employers must start a hearing conservation program. But those apply to factories and commercial vacuums, not your home. State and Local Noise Ordinances: Local noise ordinances matter more for home use. Many cities restrict loud activities during “quiet hours,” usually between 10 p.m. and 7 a.m. Homeowners’ associations or apartment leases can even go stricter than city laws. Contrast with the European Union: Over in the European Union, it’s a different story. The EU caps consumer vacuum sound power at 80 dB(A) under eco-design rules. That’s a nice benchmark, one the U.S. hasn’t officially matched yet. Industry Standards and Guidance from Other Bodies: The EPA once suggested keeping environmental noise below 70 dBA for long-term hearing safety. And manufacturers often test noise levels under ANSI/ASTM F1334-18, a voluntary U.S. standard. What Makes a Vacuum Cleaner Quiet (or Loud)? So what’s actually making all that noise? It mostly comes from three things: the motor, the airflow, and the structure of the vacuum. Motor Speed and Vibration: Faster motors are the primary sound source, generating high-frequency noise from internal component movement. Air Turbulence: Air whistling through narrow pipes or vents makes a surprising amount of noise. Sealing and Structure: Poor sealing allows air to leak and vibrate against plastic walls, like a mini drum inside your vacuum. How to Find a Quiet Vacuum Cleaner You don’t need to give up suction for silence. The latest technology balances both. Key Features for Low-Noise Engineering Noise-Optimized Motors: Look specifically for brushless digital motors (BLDC). By eliminating the physical contact of carbon brushes, BLDC motors drastically reduce mechanical noise and vibration. This design also features precise airflow structures to isolate high-frequency noise. Multi-Layer Sound Dampening: Quality vacuums use sound-absorbing materials (foam, acoustic rubber, or layered structures) strategically placed around the motor to absorb sound waves and trap vibration before they can escape the casing. Optimized Airflow Path: Smooth, wide internal channels and optimized fan designs minimize the air turbulence that creates whistling and roaring sounds, ensuring quiet air movement. Softer Brush Rolls: Robot Vacuums like the Dreame X50 Ultra use soft bristles & raised rubber in the brush rolls, minimizing floor friction noise while maintaining effective cleaning. [product handle="x50-ultra-robot-vacuum" rating="4.7"]   Dreame Take Dreame’s vacuum cleaners use high-speed brushless digital motors that balance suction and silence beautifully. In quiet mode, they hover around 60 dB, roughly the sound of a calm conversation. That means you can clean while the baby naps, your pet snoozes, or your favorite show plays in the background.   How to Make Your Existing Vacuum Quieter Even the best vacuum gets louder with age or neglect. A few quick habits can cut the noise dramatically. Empty the Dust Cup Often: A full dust bin forces the motor to push harder. Clean or Replace Filters: Clogged filters restrict airflow and cause a louder, strained sound. Check the Brush Roll: Hair tangles increase friction, which leads to rattling and vibration. These minor fixes often restore the “new vacuum” quietness. Conclusion So, how many decibels does a vacuum cleaner make? Most fall between 65 and 80 dB, but the lower, the better for your ears and your peace. A quiet vacuum isn’t just a luxury; it’s a more intelligent, healthier choice. If you value calm cleaning, we recommend you read our complete Robot Vacuum Buying Guide to find the best model for your home. Brands like Dreame show that power and quiet can coexist. Ready to upgrade to a peaceful cleaning routine? Explore Dreame's quiet vacuum line today! Frequently Asked Questions (FAQ) Is 70 dB loud for a vacuum cleaner? Not really. It’s about average. Louder than a chat, softer than traffic. Safe for short use, fine during the day. What are the quietest vacuum cleaner decibels I can expect? Some robot or handheld vacuums can go as low as 55-60 dB, which is similar to the hum of a quiet dishwasher. Does a powerful vacuum cleaner have to be loud? It used to, but not anymore. With digital motors and better sound insulation, brands like Dreame deliver both deep cleaning power with surprisingly soft vacuum sound.
Continue reading
How to Clean a Robot Vacuum Properly in 2026

How to Clean a Robot Vacuum Properly in 2026

Dreame Editorial Team |
You tap Start, grab a coffee, and your robot vacuum hums to life. It cruises under chairs, then hiccups. The bin is full, hair hugs the brushes, and a smudge on the sensors throws off its aim. The good news? It isn’t broken, it just needs a little attention. A few minutes of care keep suction strong, maps accurate, and your warranty and vacuum cleaner happy for the long run. This guide covers what to prepare, how to clean each component, and how to care for the dock. You will also get a maintenance schedule, quick troubleshooting, and answers to common questions.  Before You Start Tools: Dry microfiber cloths, a soft brush, tweezers or scissors, a small Phillips screwdriver, and disposable gloves.  Prep: Power off the robot and undock it.  Water rules: Identify which parts can be rinsed, like filters, bins, and mop pads, and which must stay dry, like sensors and electronics.    Important Rinse only with clean water, avoid detergents and abrasives, and never scrub filters with brushes or fingers. Keep liquids away from sensor windows, charging contacts, and seams where water could seep inside.   Dry time: Plan your timing so the robot is free for a full day. Rinsed parts must air dry completely for 24 hours before reinstallation. Reinstall only when parts are fully dry. Moisture in filters, bins, or wheel wells can reduce airflow, create odors, and risk electronic damage.  Clean Your Robot Vacuum: Step by Step Dust Box and Filter Open the cover, press the clip, and remove the dust box.  Take out the filter, empty the bin over a trash bag. Tap the filter frame gently to release fine dust.  Rinse the dust box and filter with clean water, then air dry. Do not use soap, abrasives, or sharp tools, and never reinstall a damp filter. Main Brushes or Dual Brushes Release the brush guard and lift the brushes straight out.  Cut away tangles at the ends and along the bristles using scissors or the included comb.  Check bearings and end caps; remove wrapped strands. Reseat the brushes fully, close the guard, and spin to confirm smooth movement. Side Brush Use a screwdriver to remove the side brush and clear hair at the hub.  Wipe the arm with a dry cloth, check for warping. Reinstall and hand spin to confirm free movement. A quick monthly clean here stabilizes edge work on hard floors and along baseboards. Wheels  Separate the wheel from its axle, rinse, dry completely, and reinstall.  Rotate auxiliary or climbing wheels to release if your model allows, then clear hair from the main wheels as well.  Align arrows or tabs to reseat parts until they click, and wipe wheel wells to remove grit that can affect traction. Why it matters: cleaner wheels = better traction, fewer “stuck” alerts. Sensors and Optics Wipe cliff sensors, LiDAR or laser windows, carpet sensors, and charging contacts with a dry microfiber cloth only.  Clean optics reduce mapping errors and improve docking, while clean contacts support faster charging.  Pro move: If maps look off, start with a sensor wipe before remapping. Mop Pads and Mop Pad Holders Remove mop pads and rinse or machine wash only if permitted. Clean holders separately and let all parts dry fully.  Replace pads every 1-3 months based on home size and floor type.    Dreame Take Systems like Dreame L40s Ultra and Aqua10 Ultra Roller pair powerful suction with auto mop washing, so you never need to rinse pads or rollers by hand. Every cycle ends with a hot-water wash and drying process that keeps the mop fresh, the system unclogged, and cleaning power at full strength for your next run.   If you're curious about whether a mopping robot vacuum can replace or complement your regular cleaning routine, check out Are Mopping Robot Vacuums Worth It? for an insightful comparison. Robot Body and Battery Wipe the shell with a dry cloth and clear vents so air moves freely.  If your model has a removable battery, top up charge at least every 3 months during storage.  Keep the robot and dock in a cool, dry spot with a clear approach lane. If you'd like to help your robot vacuum last even longer between deep cleans, check out Dreame’s expert tips in 10 Expert Tips to Extend Your Robot Vacuum’s Lifespan.  How to Clean the Robot Vacuum Dock The dock charges the battery, empties dust, and refreshes mop pads. A clean dock prevents clogs, odors, and long empty cycles. Don’t forget to unplug before you begin. Washboard and Filter Remove the washboard filter after mop cleaning cycles. Rinse with clean water, air dry, and reinstall. A clear filter shortens maintenance cycles and keeps water paths open. Dust Intake and Auto Empty Vents Wipe the dust intake and vent openings with a dry cloth to maintain airflow. If auto empty runs longer than usual, check this area first. Clear vents also reduce fan strain and help keep noise consistent. Dust Collection Bag Open the dust chamber, pull the handle, and remove the bag.  Dispose of the sealed bag, wipe the cavity, and install a new bag firmly.  If you run daily or have pets, expect more frequent changes since fur and hair increase fill rates. Water Tanks, Clean and Used Empty the used water tank after each mop session, then rinse it with clean water, wipe the interior, and let it dry.  Some robot vacuum models, like the Dreame X40 Master, take this process a step further with its Auto Water Refilling and Draining system. When connected to a water line, the dock automatically refills the clean tank and empties the dirty one, removing the need for manual handling altogether. This setup maintains a continuous supply of clean water while safely disposing of wastewater, keeping the system hygienic and ready for daily use with almost zero upkeep. Keeping tanks clean and properly connected ensures optimal performance, prevents clogging in water lines, and guarantees your mop pads always start each run with fresh water. Charging Contacts and Signaling Area Wipe the metal charging contacts on the dock and the robot with a dry cloth.  Keep the space in front of the base flat and clutter-free so the robot can line up. Think of that space as a short runway: no thick rugs, shoes, or cords in the way.  Clean contacts plus a clear runway fix most docking hiccups fast. Maintenance Schedule at a Glance Use this table to tailor upkeep for your home type. Short cells keep it scannable while you work. Task Light Homes (low traffic, no pets) Pet / Long-Hair Homes Notes Used water tank Empty after each cycle Empty after each cycle Odor control and hygiene Clean water tank Rinse every 2 weeks Rinse weekly Clean water only Dust box, filter Empty after 2–3 runs, rinse 3–6 mo Empty every run, rinse monthly Replace filter 3–6 mo Main brushes Clean monthly Clean weekly Replace 6–12 mo Side brush Clean every 2 months Clean monthly Replace 3–6 mo Mop pads Wash every 2–3 uses Wash after each use Replace 1–3 mo Washboard filter Rinse every 2 months Rinse monthly Prevent dock clogs Dust bag Replace every 3 months Replace every 2 months Seal before disposal Sensors, contacts Wipe every 2 months Wipe monthly Dry cloth only Scale inhibitor Check 24–36 months Check 18–24 months Replace as needed   Pro-tip Add these to your calendar so maintenance happens on time, even during busy weeks.   How to Clean a Robot Vacuum That Encountered Pet Mess If your robot vacuum runs into pet waste, don’t panic, but act fast to avoid permanent damage or odors. Take these steps:  Stop the cleaning cycle, block off the affected area, and wear disposable gloves. Move the robot to a well-ventilated space or outdoors to clean. Lift solids with disposable towels first to avoid smearing into seams and wheels.  Wipe hard parts dry, then disinfect. Keep liquids away from sensors and electronics. Wash or toss mop pads and any porous parts that soaked up residue.  Clean the floor separately with a suitable cleaner, as the robot mop doesn’t sanitize. Once everything is dry, reassemble, check wheels and sensors, and run a short supervised test.   Dreame Take We aim to minimize both the risk and the cleanup that follow pet mishaps. Our latest robot vacuums use AI-powered object recognition and 3D structured-light sensing to identify up to 200 common household obstacles, including pet waste. Instead of rolling through a mess, it detects and navigates around it in real time, keeping your floors, wheels, and mop pads clean.    Troubleshooting After Cleaning Still low suction? Check the air duct, confirm the filter is seated, and make sure the bag or bin seal is tight. Replace clogged parts, then test a small area. Poor docking? Clean the charging contacts and clear the base area. If alignment is off, place the base on a level surface and try again. Uneven mopping? Refill the clean tank and seal the used tank. Clear the tank vent or air hole, confirm pad installation, and replace worn pads. Mapping issues? Clean cliff and LiDAR optics and restart the robot. If problems remain, scan rooms again with floors clear and keep the dock in the same spot. While you map and label rooms, give the robot a name. It turns reminders into habits. You can wake it up only by calling it "Dreame", whatever name you give it. See our fun robot vacuum names for ideas. Frequently Asked Questions How often should I clean my robot vacuum? Empty after each run, wipe sensors monthly, and deep clean every 1–3 months. Pet or large homes should service filters and pads more often. Can I wash the filter instead of replacing it? Yes. Rinse with clean water and air-dry 24 hours, then reinstall. Replace every 3–6 months and keep a spare so drying doesn’t pause cleaning. Can I reuse the dust bag? No. Bags are single use. Replace when full to keep suction and trap fine dust. Daily runs or lots of hair mean more frequent changes. What parts must stay dry? Keep sensors, charging contacts, and signaling windows dry. Use a dry cloth only and never spray cleaner on the robot or dock. Do I need to clean the dock? Yes. Empty used water, replace bags on schedule, wipe contacts, and clear vents. A clean dock keeps cycles quick and odor free. Wrapping Up and Next Steps A consistent cleaning routine turns a good robot vacuum into a dependable system. Keep the dust path clear, remove hair from brushes, wipe optics so maps stay accurate, and give the dock a few minutes of care each month.  If you want to lower routine chores while keeping performance high, compare models in the robot vacuum collection to match features to your home and schedule.
Continue reading
How to Clean a Vacuum Cleaner Hose (and Why It Might Be Time to Upgrade)

How to Clean a Vacuum Cleaner Hose (and Why It Might Be Time to Upgrade)

Dreame Editorial Team |
Let's be honest: there is nothing more annoying than dragging a vacuum around only to realize it's just pushing dirt around instead of picking it up. You've checked the bag, you've shaken out the filters, but the crumbs are still there. The likely culprit? A clogged hose. It happens to the best of us. Over time, hair, dust bunnies, and random debris get stuck in the ridges of those traditional vacuum hoses. This chokes off the airflow and, worse, starts to smell. But don't call a repairman just yet. Learning how to clean a vacuum cleaner hose is actually a quick fix that can bring your machine back to life instantly. Here is the no-nonsense guide to unclogging, washing, and deodorizing your vacuum hose—plus a reality check on why modern vacuums don't have this headache. Signs Your Vacuum Hose Needs Cleaning Before you start taking things apart, look for these dead giveaways: Zero Suction: The motor is roaring, but the dirt isn't moving. Weird Whistling: If your vacuum sounds like it's straining or whistling, air is trying to squeeze past a blockage. The "Old Dust" Smell: That musty, stale odor coming from the exhaust usually indicates rotting grime or mold inside the tube. Visual Clumps: Sometimes you can actually see a hairball or a wrapper stuck right near the opening. Step-by-Step: How to Clean a Vacuum Cleaner Hose Ready to get your hands dirty? Follow this routine to clear the airway and sanitize the hose. Step 1: Detach and Inspect First, turn off the power. Unplug the vacuum and immediately detach the hose. You need to be safe and have leverage. Lay the hose flat on the floor and shine a light through one end. No light coming out the other side? You've got a solid blockage that needs to go. Step 2: Remove Physical Blockages Grab a broom handle or a long wooden dowel and gently slide it through. Gravity rarely works on sticky messes, so you need to mechanically push that clump of pet hair or stuck sock out of the tube. Mistake to Avoid: Don't get aggressive with wire hangers. Those plastic hoses are flimsier than they look. If you poke too hard with a sharp metal wire, you'll puncture the airtight seal and permanently lose suction. Step 3: Soak and Wash Dunk the whole hose in a bathtub filled with warm water and dish soap. A broomstick can't clean the sidewalls. Soaking allows the soapy water to reach every ridge, breaking down the fine dust and sticky residue that's been building up for months. Swirl it to ensure the water reaches every inch. Mistake to Avoid: Skip the boiling water and bleach. Super hot water can warp the plastic connectors, and bleach is way too harsh for the rubber seals. Stick to mild soap. Step 4: Dry Completely Hang it up and walk away. Drape the hose vertically over a shower rod or a door in an airy room. Gravity is your best friend here—it pulls the water out while the air dries the rest. Mistake to Avoid: Put the hair dryer away. It's tempting to speed things up, but focused heat can melt or warp the plastic.   Important Never reattach a wet hose. We mean it. Even a few drops of trapped moisture can ruin the vacuum's motor or turn your machine into a mold factory. Give it a full 24 hours to be bone dry.   Why Your Vacuum Hoses Get Clogged It really comes down to bad design. Traditional vacuum hoses use a classic ribbed, accordion-style design that allows them to bend and stretch. The problem? Those ridges are dirt magnets. Friction and static electricity cause dust to adhere to the uneven surface rather than fly into the bin. Layer by layer, grime builds up until one day a stray wrapper or a coin gets stuck, and airflow drops to zero. The reason you are dealing with this mess is that your cleaning tool is outdated. How to Avoid the Vacuum Hose from Getting Clogged You can't prevent every clog, but you can lower the odds. Pick up the big stuff: Don't be lazy—pick up socks, large paper scraps, or coins by hand. Don't force your vacuum to eat them. Empty the bin often: A full dust cup reduces airflow, making it easier for dirt to settle in the hose. Ditch the hose entirely: Since ribbed hoses are designed to clog over time, the only permanent fix is to switch to a modern robot vacuum, wet/dry vacuum cleaner, or cordless stick vacuum that doesn't use them.   Dreame Take Traditional canister and upright vacuums rely on long, ribbed, flexible hoses that naturally trap dirt and require messy manual maintenance. Dreame’s straight air duct and self-cleaning technologies permanently eliminate these traps.   Upgrade to Smart Vacuum Cleaners If you are tired of the mess, the soaking, and the drying times, maybe it's time to let technology handle it. For Complete Automation: The Dreame X60 Max Ultra Complete takes you out of the equation. This robot vacuum's fully automated base station does it all: automatically empties the dustbin, washes the mop pads with hot water, and refills the solution. You literally never touch the dirt. For Odor Elimination: The Dreame H15 Pro Heat is the cure for smelly vacuums. Unlike manual washing, this vacuum and mop uses 212°F (100°C) hot water to scrub its own internals and 194°F (90°C) hot air to dry them instantly. Bacteria and odors don't stand a chance. For Deep Carpet Cleaning: Traditional uprights are notorious for hose clogs. The Dreame H15 Pro CarpetFlex changes the game. It deep-cleans carpets with 212°F (100°C) hot-water self-cleaning technology and lies flat (180°) to slide under furniture—no corrugated tubes required. Maintenance Tips for a Clog-Free Home A little attention goes a long way. Eyeball it monthly: Take a peek inside the hose once a month. Catching a small hairball now is way easier than fighting a solid clog later. Don't ignore filters: Wash your HEPA filters on schedule. A dirty filter chokes the airflow just as badly as a clogged hose, putting unnecessary strain on your motor. Listen to the engine: If your vacuum starts whining (high-pitched sound), stop immediately. That's the machine screaming for air before it loses suction completely. FAQs About Vacuum Hose Cleaning How often should I clean my vacuum cleaner hose? Aim for once a month. A regular rinse keeps odors away and suction high. But don't wait if you smell something funky or lose power—clean it right away. Can I use bleach to clean a vacuum hose? Definitely not. Bleach is too harsh and can crack the plastic or ruin the rubber seals over time. Stick to dish soap or vinegar—they are safe and effective. How do I quickly dry a vacuum hose? Patience and gravity. Hang it vertically to allow the water to drain. Do not use a hair dryer or put it on a radiator—high heat will warp the plastic faster than you think. Do all vacuums have hoses that clog easily? Nope. Modern stick vacuums use straight metal tubes instead of those flimsy ribbed hoses. Debris flies straight through, so clogs are rare. How to deodorize a vacuum hose? Baking soda and vinegar are your best friends. Fill the hose with warm water, dump in half a cup of baking soda and a cup of white vinegar, and let it fizz for 20 minutes. The chemical reaction lifts the stuck-on grime, while the soda neutralizes the smell and the vinegar kills the bacteria. Conclusion Let's face it: cleaning a vacuum hose is a gross job. But for traditional vacuums, it's the price you pay for suction power. By following these steps—detach, unclog, wash, and dry—you can get things running smoothly again. But if you're done with the hassle? Take it as a sign. Modern vacuum technology has advanced, and you can too. Get a machine that cleans itself so you don't have to.
Continue reading
How to Sanitize Floors: Your Ultimate Disinfecting Guide

How to Sanitize Floors: Your Ultimate Disinfecting Guide

Dreame Editorial Team |
Thousands of microscopic bacteria and allergens may still be present on visibly clean surfaces. To parents and pet owners, proper cleaning—specifically knowing how to sanitize floors—requires more than a bucket and soap. It is necessary to know the correct method to use without ruining the finish of your home. Let's cut through the noise. This guide will provide you with straight facts on how to defy floor cleaning myths and which tools really work. Prepare for Floor Sanitization Attempting to sanitize a dirty floor is a waste of time. Without removing the physical mess first, you are literally just mixing dust with liquid to create a muddy layer of grime that protects bacteria. Clear the Area Move rugs, toys, and furniture out of the room before you commence. You have to make sure that your sanitizing agent reaches all corners, baseboards, and grout lines where bacteria multiply. In addition, clearing the floor ensures that your belongings are not damaged accidentally by cleaning chemicals. Remove Loose Debris The Right Way Vacuum thoroughly to remove hair, dust, and crumbs. This is the crucial "make or break" step.   Important Older vacuums with poor seals often exhaust bacteria back into the room, nullifying your sanitization efforts. Always use a fully sealed vacuum with HEPA filtration to trap 99.9% of particles inside.   3 Simple Steps on How to Sanitize Floors Follow this proven three-step process to ensure maximum hygiene. Step 1: Select the Appropriate Disinfectant Solution It is always a good idea to check the instructions from your floor manufacturer. Applying the incorrect pH balance may strip the finishes and void warranties faster than you can say "oops." For Wood: Use pH-neutral cleaners specifically made for hardwood. For Tile: Oxygenated bleach solutions or alkaline cleaners are the best. Natural Alternative: Diluted white vinegar will kill some bacteria, but take care—it is acidic and can etch natural stone or damage unsealed wood. Step 2: Mop and Disinfect Apply your solution and let it sit. The "dwell time" (typically 3 to 5 minutes) is non-negotiable. As emphasized by the CDC, if  you wipe it off immediately, you leave bacteria alive. Disinfectants require these few minutes to break down cell walls.   Dreame Take Heat is often more useful as a sanitizer than chemicals alone. High temperatures dissolve grease and destroy bacteria without leaving sticky residue. Conventional mops use cold water, which tends to merely move germs around. The Dreame H15 Pro Heat utilizes hot water washing to sanitize the floor and then cleans itself with heat to prevent the development of odors in the brush roller.   Step 3: Rinse and Dry If your disinfectant label says to rinse, do it. This eliminates chemical residue, which may cause irritation to a pet's paws or a baby's skin. Dry the floor immediately using a clean towel to prevent slips and water damage. Special Sanitizing Tips for Different Floor Types Different materials have specific vulnerabilities. Here is a quick cheat sheet to keep your floors safe. Floor Type Best Cleaner What to Avoid Pro-Tip Hardwood pH-Neutral Wood Cleaner Bleach, Ammonia, Excess Water Dry immediately to prevent warping. Vinyl / Laminate Mild Detergent Abrasive Scrubbers, Steam Mops Watch out for scratches where dirt can hide. Tile & Grout Oxygenated Bleach / Alkaline Acidic Cleaners (on Stone) Use a nylon brush to agitate grout lines. Natural Stone pH-Neutral Stone Soap Vinegar, Lemon, Bleach Seal stone regularly to prevent bacteria absorption. Hardwood Floors Wipe with a mop that is barely damp. Wood is porous. Excess water leads to warping, while bleach and other harsh chemicals strip away the protective finish and discolor the grain. Vinyl and Laminate Floors Protect the wear layer. Vinyl is durable, but it can be easily scratched by stiff brushes, creating tiny grooves where dirt gets trapped. Do not use a steam mop on laminate; the high heat and moisture may cause the planks to peel. Tile and Grout Focus on the grout lines. Tile is non-porous, whereas grout acts like a sponge for bacteria. This is the sole area where you can be a little bit rougher with scrubbing. How Often Should You Sanitize Floors? Sanitize high-traffic spots once a week and living areas every two weeks. More isn't always better. Protective coatings may be worn away by over-sanitizing with harsh chemicals. Kitchens & Bathrooms: Once per week (or immediately after raw meat spills). Bedrooms and Living Rooms: Every 2-4 weeks. Pet Owners: Sanitize entryways daily and main living areas 2-3 times a week to stop paws from tracking in outdoor germs. Make Floor Sanitization Part of Your Routine The best way to clean floors with pets and hectic schedules is to automate your cleaning habit. Daily Maintenance with Robot Vacuums Keep bacterial loads low in between deep cleans using a robot vacuum. Use roller mop for active scrubbing. It is not just wiping that is required, but friction. The Aqua10 Ultra features an active scrubbing design which scrubs floors using fresh water instead of only dragging a damp cloth. This lifts germs away rather than dispersing them. [product handle="aqua10-ultra-roller-robot-vacuum" rating="4"] Protect your machine by avoiding harsh chemicals. Most tanks are designed for water only. Harsh chemicals destroy pipes on the inside, resulting in leaks. Unless specified by the manufacturer, stick to water. For a complete guideline on safe products and practices, see our article on how to perform antibacterial cleaning with robot vacuums. Weekly Deep Cleaning Arrange a regular deep clean or a heavy-duty cycle with your wet/dry vacuum to tackle corners and edges that day-to-day cleaning may not reach. Tips for Keeping Your Floors Clean and Hygienic Once your floors are sanitized, adopting a few smart habits will ensure they stay hygienic for longer. Prevent Cross-Contamination You wouldn't clean your toilet with the same sponge you use on your kitchen counter, yet many use one mop pad for the entire house. This common oversight propagates bacteria from the bathroom to the kitchen. The Dreame Matrix10 Ultra solves this with its multi-mop switching dock. It automatically switches specialized pads—such as sponge pads for bathrooms and scrubbing pads to ensure germs are never moved between different zones. For instance, it utilizes Thermal Mop Pads with phase-change materials that maintain a temperature above 40°C (104°F). This consistent heat enhances cleaning effectiveness and, when used with a deodorizing agent, helps inhibit bacterial growth. It also switches to scrubbing pads for grease in kitchens and water-locking sponge pads for bathrooms, providing a tailored, hygienic clean for every room. Adopt a "No Shoes" Policy Leave shoes at the door. Shoes are carriers of E. coli, fecal matter, and pesticides. Removing them is the single most effective preventative action you can take. Frequently Asked Questions What is the difference between sanitizing and disinfecting? Sanitizing reduces bacteria to safe levels (99.9%), while disinfecting eliminates 100% of organisms. Daily cleaning is often just sanitizing, but disinfection is usually required for high-risk messes (such as raw meat spills) or when a person is ill. What is the best natural disinfectant for floors? Diluted white vinegar is a typical choice, although hot water is safer. Vinegar destroys certain bacteria; however, its acid damages stone and wood. Hot water washing (via a wet/dry vacuum) kills bacteria thermally without leaving chemical residues. Can I use bleach on wooden floors? No, never. Bleach dissolves wood fibers, permanently discolors the stain, and destroys the polyurethane finish. Always select a product that is designed specifically for wood. Can I put disinfectant into the water tank of my robot vacuum? No, harsh chemicals will ruin the internal pump. In the absence of a specific cleaning solution sold by the manufacturer, use water in the tank and apply sanitizers directly to the floor. Conclusion Learning how to sanitize floors is not complex but requires consistency. It starts with effective dust removal using a sealed vacuum, choosing floor-safe solutions, and preventing cross-contamination. Whether you choose the power of a hot-water wet/dry vacuum or the ease of an intelligent robot, upgrading your tools can make your household a healthier place. Ready to improve your cleaning routine? Explore Dreame’s range of smart cleaning solutions today.
Continue reading
Dreame Matrix10 Ultra Review: A Robot Vacuum Built for True Whole-Home Cleaning

Dreame Matrix10 Ultra Review: A Robot Vacuum Built for True Whole-Home C...

Dreame Editorial Team |
A robot vacuum should save us time, not add chores to our week. That’s the standard we used when reviewing the Dreame Matrix10 Ultra, a flagship robot vacuum engineered for homes that mix hard floors, carpets, pets, and everyday messes. What separates it from most premium robots is how it handles the entire cleaning process, from switching mop types to washing mop pads with hot water. After spending time with the Matrix10 Ultra across different real-life scenarios, we found that it aims to solve several long-standing robot vacuum pain points. This review breaks down how well the Matrix10 Ultra vacuums, mops, navigates, manages clutter, and maintains itself. If you're tired of being your robot’s assistant, read on to see if the Matrix10 Ultra is the true partner in cleaning you’ve been waiting for. What’s New: Key Upgrades That Make the Matrix10 Ultra Stand Out Before diving into performance, here are the most important upgrades that differentiate the Matrix10 Ultra from previous Dreame models and competing flagship robots. Multi-Mop Switching Dock (First of Its Kind) The Matrix10 Ultra automatically switches between three mop types based on the room type: Kitchen: Nylon-bristled scrubbing pads tackle grease and dried-on spills. Bathroom: Super-absorbent sponge pads quickly dry wet areas and inhibit bacteria. Living Areas & Wood Floors: A thermal mop pad maintains warmth for enhanced stain removal and can be used with a dedicated wood floor care solution. This targeted approach means you’re no longer smearing kitchen grease onto your living room rug or using a damp pad where a deep scrub is needed. It’s the closest thing to having a dedicated cleaning tool for every surface. HyperStream™ Detangling DuoBrush: A Solution for Pet Hair and Long Hair Hair tangling is the Achilles' heel of many robot vacuums. The HyperStream™ DuoBrush combats this with a dual-roller system. One with full-TPU rubber flaps for hard floors, the other with a mix of nylon bristles and TPU rubber for carpets. More importantly, the system is designed to cut and channel hair into the dustbin, drastically reducing tangles. In our testing, it handled a mix of pet and human hair without a single clog. 30,000 Pa Vormax™ Suction: Power When and Where You Need It With 30,000 Pa of suction power (about 4.35 psi), the Matrix10 Ultra has more than enough force to pull embedded dirt from deep within carpet fibers and pick up larger debris like cereal and pet food. The key is its intelligence: it automatically increases suction on carpets and boosts power when it detects heavier concentrations of dirt, ensuring efficiency without sacrificing deep-cleaning capability. VersaLift Navigation with AI Obstacle Avoidance: Seeing and Thinking Navigation is a leap forward. The vacuum uses a retractable DToF sensor that lifts in open spaces for fast mapping and retracts under low furniture like sofas and beds. It’s complemented by a dual-laser 3D structured light system and an RGB camera. Together, these systems allow it to identify and avoid over 240 common household objects like shoes, cables, and socks. It accurately mapped our 1,500 ft² (139 m²) test home in under 10 minutes and reliably avoided clutter. 212°F (100°C) ThermoHub™ Mop Self-Cleaning: Sanitary Pads Every Time After each run, the Matrix10 Ultra's dock washes the mop pads with 212°F (100°C) hot water. This isn't just a warm rinse; it’s a high-temperature wash that effectively dissolves grease. The result is that every time the robot vacuum starts a job, it’s using freshly cleaned pads, preventing you from spreading yesterday's grime around your home today. Overview of Key Features Before we look at real-world performance, it helps to break down the Matrix10 Ultra’s core capabilities and the tangible benefits they deliver: Feature Specification Why It Matters Suction Power Up to 30,000 Pa Removes heavy debris and deep dust Brush System HyperStream™ Detangling DuoBrush Drastically reduces hair tangles, ideal for pets and long hair Mop System Auto-switching mop pads (3 mop types) Provides the right mop for each surface Mop Lift 0.4 in (10.5 mm) Keeps carpets dry Navigation VersaLift DToF Faster, smarter obstacle handling Obstacle Avoidance AI + Dual-Laser 3D Structured Light + LED Sees and avoids small objects like cables and socks for fewer rescues Dock 212°F (100°C) hot-water washing + hot-air drying + auto-emptying Full hands-free maintenance for up to 100 days Best for Large homes with mixed flooring and pets Reliable, set-and-forget cleaning across all room types Cleaning Performance of Matrix10 Ultra: Real-World Results on Every Surface A robot vacuum can have all the specs in the world, but it means nothing if it doesn't perform in a real home. We put the Matrix10 Ultra through its paces on a variety of surfaces. Hard Floors: Spotless and Streak-Free On hardwood and tile, the combination of powerful suction and the dual rotating mops (spinning at 165 RPM) was impressive. It picked up 99% of debris like flour and coffee grounds in a single pass. The mopping action is thorough; the 8N (newtons) of downward pressure and the self-adjusting mop heads ensured even contact, leaving behind no streaks and a genuinely clean feel. Carpets: Deep Cleaning Without the Dampness The moment the Matrix10 Ultra detected a carpet, the mop pads instantly lifted 0.41 in (10.5 mm), and suction power ramped up. It effectively pulled sand and embedded pet hair from a medium-pile rug that standard robot vacuums often struggle with. Knowing that carpets are protected from moisture while still getting a deep clean is a major advantage for mixed-floor homes. Hair and Debris: No Tangles, No Fuss For households with pets or long hair, the brush system was a highlight. After cleaning an area littered with dog and human hair, we inspected the rollers. The patented design worked with minimal hair wrapped around the ends and the main bodies of the brushes remaining almost entirely clear. This means less time spent cutting hair off the brush, making it an ideal pet-friendly robot vacuum for shedding. Brushes & Attachments A robot vacuum’s cleaning performance depends heavily on its tools, not just its suction. Here’s a breakdown of what’s included with the Matrix10 Ultra and how they contribute to a deeper clean. Attachment Function Benefit HyperStream™ Detangling DuoBrush Dual-roller system with self-detangling tech Cuts and channels hair to prevent clogs, maintaining powerful suction on all floors SideReach Brush Extendable, anti-collision side brush Thoroughly sweeps debris from corners and along baseboards without getting stuck Dual Omni-Scrub Pads Self-adjusting mops that tilt ±5° Maintains perfect floor contact for superior scrubbing on uneven surfaces Sponge Mop Pads Highly absorbent pads for wet areas Dries wet areas quickly, inhibits bacteria Scrubbing Mop Pads Nylon-bristled pads for tough messes Aggressively scrubs away dried-on grease and grime without damaging floors Navigation and Mapping A powerful vacuum is useless if it gets stuck. The Matrix10 Ultra’s navigation inspires confidence. Its VersaLift sensor allowed it to glide under low sofas (with about 0.4 in/10 mm of clearance) without getting stuck. The 3D structured light and AI recognition reliably helped it navigate around chair legs and avoid phone chargers and dog toys left on the floor. It handled thresholds up to 0.8 in (20 mm) high and easily moved between rooms. We rarely see this level of obstacle handling in robot vacuums, making it suitable for homes with raised entries or multi-surface transitions. Navigation Feature Description Sensor Suite VersaLift DToF + Dual-Laser 3D Structured Light + RGB AI Camera Obstacle Avoidance Identifies and avoids 240+ objects (shoes, cables, toys, etc.) Threshold Climbing Up to 0.8 in (20 mm) Mapping Fast, accurate LiDAR mapping with multi-floor support Maintenance and Docking: Truly Hands-Free The All-in-One Base Station is what makes the "Ultra" name meaningful. For 100 days, you don’t have to think about emptying the dustbin. After every mopping session, the dock washes the pads with 212°F (100°C) water, dries them with hot air, and automatically refills the internal water tank and dispenses cleaning solution. Your only task will be refilling the clean water and solution tanks every few weeks, a far cry from the daily upkeep of other robotic vacuums! Dock Function Detail How It Benefits You Dust Emptying 100-day capacity (with standard use) Forget about the dustbin for months Pad Washing 212°F (100°C) hot water Sanitized, grease-fighting mop pads Pad Drying Warm air circulation Prevents mildew and odors Solution & Water Auto-refill and dosing Consistent cleaning results without manual intervention App Experience and Customization The Dreamehome mobile app is intuitive and powerful. Setting up cleaning schedules, dividing rooms, and creating no-mop zones was straightforward. The live map is engaging to watch as the vacuum cleans, and features like designating carpet areas and setting the cleaning order are incredibly useful. Voice control with Alexa and Google Assistant worked flawlessly for starting and stopping jobs. Noise Levels For a robot vacuum with this much power, the Matrix10 Ultra is relatively quiet. We found the acoustic insulation around the motor keeps noise at a comfortable level for daily use. Mode Noise Level Comparison Quiet 55 dB Similar to a quiet conversation Standard 60 dB A background hum, easily ignored Max/Ultra 72 dB Comparable to a standard upright vacuum Battery Life and Efficiency The 6,400 mAh battery provides up to 220 minutes (over 3.5 hours) of runtime. It cleaned an entire main floor, which was a mix of hard floors and carpets, on a single charge with power to spare. For massive homes, it supports recharge-and-resume, meaning it will return to the dock to charge and then automatically continue where it left off. Price and Value At MSRP $1,999.99, the Dreame Matrix10 Ultra is a premium investment. However, its value proposition is clear: it’s an all-in-one system that replaces not only your vacuum and mop but also the constant maintenance they require. When you factor in its best-in-class suction, intelligent navigation, and versatile three-mop types, it competes directly with other flagship models—and in many ways, goes beyond them. [product handle="matrix10-ultra-robot-vacuum" rating="5"] Here’s a quick list of its standout strengths and the few considerations to keep in mind before purchasing: Pros Multi-mop switching for diverse rooms and messes Excellent vacuuming and mopping performance Over 3 months of hands-free maintenance Best-in-class obstacle handling and navigation 3-year warranty Cons Premium price Dock requires floor space Is the Dreame Matrix10 Ultra Worth It? Yes, if you want the most comprehensive, hands-off cleaning experience available. The Matrix10 Ultra is for homeowners who are tired of compromising. It’s for those with mixed flooring, pets, and busy lives who want their floors consistently clean without daily intervention. Its combination of raw power, smart navigation, and the revolutionary Multi-Mop™ Switching Dock creates a level of automation that truly lives up to the marketing hype. If you’re ready to stop babysitting your robot vacuum and start enjoying a perpetually clean home, explore the Dreame Matrix10 Ultra. If you're considering different needs, check out The Complete Robot Vacuum Buying Guide. FAQs About Dreame Matrix10 Ultra Robot Vacuum How well does it handle pet hair? Very well. The HyperStream™ Detangling DuoBrush cuts and separates hair automatically, reducing tangles and maintaining strong suction. Does it avoid small objects like socks or cables? Yes. The RGB and structured-light sensors with AI recognition detect more than 240 types of obstacles. Will carpets get wet? No. The mop lifts 0.4 in (10.5 mm) when carpet is detected, keeping carpets dry while the vacuum increases suction for deeper cleaning. How often do I need to maintain it? Usually every 100 days for dust bags under typical use. The dock does the rest. Is it good for homes with different floor types? Yes. The mop-switching system was designed for homes with multiple floor types, from kitchens and bathrooms to living rooms and wood floors. 
Continue reading