Can You Vacuum Hardwood Floors? The Safe Way to Keep Them Scratch-Free

Can You Vacuum Hardwood Floors? The Safe Way to Keep Them Scratch-Free

Dreame Editorial Team |
If you’ve ever hesitated before rolling a vacuum across your hardwood floors, you’re definitely not alone. A lot of homeowners feel the same way. Those tiny, almost invisible micro-scratches can add up over time, and once the shine is gone, it’s hard to get it back. So let’s clear this up right away: Yes, you absolutely can vacuum hardwood floors. In fact, in most homes, you should. Vacuuming is often gentler than sweeping, but it does come with one important condition: you need the right tools and the right settings. Using a basic vacuum with a spinning beater bar is where most of the damage happens, not the vacuuming itself. Once you know how to avoid that, hardwood becomes one of the easiest floor types to maintain without scratching Why Should You Vacuum Your Hardwood Floors? A lot of us grew up thinking sweeping was the safest method for hardwood. But sweeping has a hidden downside known as the Sandpaper Effect. The Sandpaper Effect (Why Brooms Can Dull Wood) When a broom pushes dust and grit forward, it drags small particles across the surface. These particles work like tiny pieces of sandpaper, slowly wearing away the finish. You won’t notice the damage immediately, but over time, the floor starts looking dull, even if it’s technically clean. Vacuuming, on the other hand, relies on vertical lift instead of horizontal drag. Suction pulls dirt upward, so it doesn’t scrape the wood while being removed. That alone makes it a safer choice. Vacuums clean what brooms can’t reach. Even the best brooms have their limits: dust slips into the seams between floor planks, fine powder settles deep into tiny grooves, and pet hair loves to cling to the grain no matter how many times you sweep. A vacuum can reach all of these spots easily.   
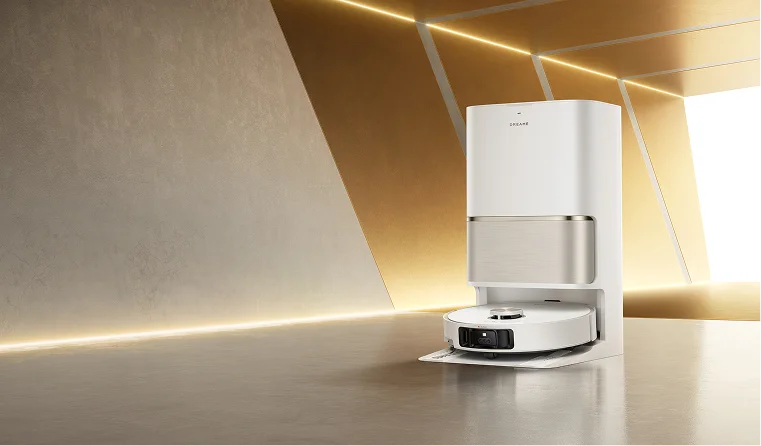
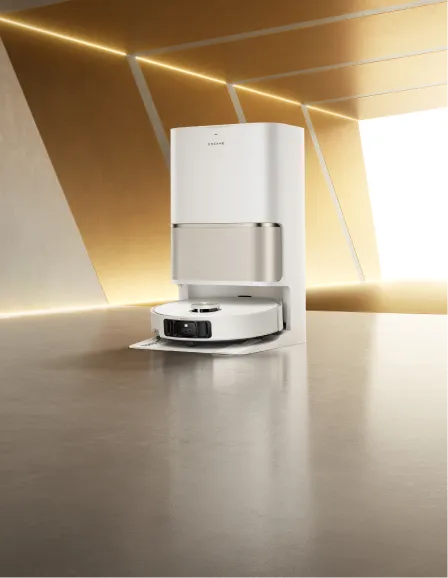
Dreame Take Dreame vacuums' design philosophy focuses on delivering strong suction while maintaining gentle airflow. The idea is simple: clean deeply without disturbing the protective finish. This balance matters especially for hardwood floors, where too much force can do more harm than good.   How to Vacuum Hardwood Floors Safely Before you turn the vacuum on, a little preparation can save your floor from accidental scratches. Step 1: Do a Quick Visual Scan Look for anything large that could get dragged across the floor—coins, pebbles, tiny toy parts, clipped nails, bits of gravel stuck in shoe soles. Pick them up by hand instead of vacuuming them. Step 2: Check The Wheels and Brush Roll Flip the vacuum over and inspect the wheels and brush roll. Grit, sand, and hair often lodge in the wheel treads or wrap around the brush. Even a few grains can leave dull lines or swirl marks when repeatedly rolled over hardwood.  Step 3: Vacuum With the Grain Moving in the same direction as the wood grain helps lift dust from the seams between planks. While it’s not mandatory, it’s a small technique that gives noticeably better results.   Pro-tip for robot vacuum owners: If your robot vacuum allows directional cleaning or edge-following, set it to run parallel to the grain when possible. This helps it lift fine dust and reduces cross-grain drag on delicate finishes.   While these preparation steps address external risks, such as trapped rocks or loose debris, they don't account for damage caused by the vacuum itself. A clean wheel won't help if a stiff-bristle brush is scouring your finish at 3,000 RPM. To fully protect your investment, your vacuum’s settings need to follow these four golden rules. 4 Vacuuming Rules for Any Hardwood Floor These four rules should be non-negotiable. If you follow them every time, you minimize the risk of scratching your floor. Rule 1: Learn Your Vacuum Settings If your vacuum has a Hard Floor Mode, use it. If it has adjustable suction, lower it when you’re cleaning delicate areas. Too much suction can make the vacuum head stick to the floor, causing unintentional drag. Rule 2: Ban the Beater Bar This is an important one. Traditional beater bars have stiff nylon bristles that rotate at high speed. On carpet, that’s fine. On hardwood, those bristles can strip away the finish and create long, visible scratches. Always turn the brush roll OFF on hardwood floors.   Important Older vacuums that rely on “auto floor detection” often mistake hardwood for thin carpet, automatically activating the brush roll. Manually switch modes whenever possible.   Rule 3: Use a Soft Roller Head Soft-roller or “Fluffy” heads are perfect for hardwood. They lift dust while gently buffing the surface. They’re made of microfiber and felt instead of bristles, so they don’t scratch the finish. Rule 4: Choose Gentle Wheels and Attachments Hard plastic wheels can scuff wood over time. On the other hand, rubber-coated or felt-lined wheels are far safer. Attachments should also be soft, with no stiff bristles or rough plastic edges to keep your hardwood floors smooth as ever. Engineered vs. Solid Wood: A Comparison Different types of hardwood flooring respond differently to cleaning methods. Here’s a quick breakdown: Floor Type Scratch Risk Notes Solid Wood Moderate Can be refinished multiple times; scratches aren’t permanent. Engineered Wood High Thin veneer means scratches cannot be sanded out. Textured / Hand-Scraped Wood Low–Moderate Needs higher suction (Pa) to remove dirt from grooves.   Pro-tip Oil- or wax-finished floors are more delicate than polyurethane finishes. For these, avoid bristles completely and stick to microfiber or soft rollers only.   How to Choose the Right Vacuum for Your Hardwood Floors Different vacuums serve different cleaning styles. Here’s how to choose based on your daily routine: For the “Daily Duster”: Stick or Robot Vacuums If your floor collects dust quickly, a lightweight stick vacuum or a robot vacuum for hardwood is ideal. Robot vacuums are especially useful because they run daily without you thinking about it, preventing grit buildup. For the “Deep Cleaner”: Wet & Dry Vacuums For kitchens, dining areas, or homes with toddlers, wet/dry vacuums are a lifesaver. They handle dried spills, sticky patches, and daily messes without harming the wood. Just make sure they have a hardwood-safe mode. For the “Hands-Off” Homeowner: Robot Vacuums It is Again If you want to clean without lifting a finger, a smart robot vacuum is the safest long-term tool for hardwood floors. It keeps dust from accumulating and reduces the chance of grit acting like sandpaper. FAQs What is a good suction power for vacuuming hardwood floors?  For hardwood floors, 1,500–5,000 Pa is typically plenty to lift dust from seams without risking damage. High suction itself won’t scratch wood, most issues come from hard brushes, debris stuck in wheels, or grit being dragged across the surface. That’s why modern vacuums, including Dreame models, pair strong suction (even up to 23,000 Pa) with soft rollers, cushioned wheels, and smart floor-detection to keep hardwood safe at any power level. In short, that suction range is more than enough, but the brush design matters far more than the suction number when it comes to protecting delicate floors. Why is my vacuum leaving scuff marks? Usually, it's because of dirty wheels or a brush roll that’s still spinning. Clean the wheels, and disable the beater bar. Is it safe to vacuum old or unsealed hardwood floors? Yes, simply use a soft roller and low suction. Avoid wet cleaning unless the manufacturer specifically approves it. How often should I vacuum hardwood floors? According to the National Wood Flooring Association (NWFA), most homes do well with 2–3 times per week. Homes with pets may need daily vacuuming. Should I vacuum with the grain or against it? Vacuuming with the grain is ideal as it helps lift dust out of the seams. Conclusion Vacuuming is not just safe for hardwood floors, it’s usually the best way to keep them clean and scratch-free. As long as you follow the four core rules (no beater bar, soft roller, proper settings, and clean wheels), you’ll protect the finish and maintain the floor’s natural shine for years. If you want a vacuum designed with hardwood protection in mind, consider upgrading to a Dreame model, built to clean deeply, gently, and intelligently, without risking scratches or dullness.
Continue reading
What Floors Should NOT Be Steam Mopped? Avoid Damage & Voiding Warranty

What Floors Should NOT Be Steam Mopped? Avoid Damage & Voiding Warranty

Dreame Editorial Team |
Steam mops can feel like a dream; no harsh chemicals, no sticky residue, just the power of heat and water to lift away grime. They’re fast, sanitizing, and perfect for quick refreshes around the house. But here’s the catch: not every surface loves steam. So, what floors should not be steam-mopped? That’s the question many homeowners miss until they notice warped planks or peeling vinyl. Steam can be a fantastic cleaning ally, but also a silent destroyer for certain materials. In this guide, you’ll learn which nine floor types to avoid and the safer cleaning methods that keep your home spotless without the risk of damage or warranty trouble. Why Steam is Risky for Certain Floor Types  Steam combines two powerful elements that can spell disaster for delicate surfaces: high heat and moisture. At temperatures up to 212°F (100°C), steam softens adhesives, melts wax coatings, and weakens finishes. Meanwhile, moisture seeps into pores and seams, causing swelling, delamination, or hidden mold growth beneath the surface. Using a steam mop on unsealed, porous, or layered floors, like laminate or engineered wood, is one of the fastest ways to void your flooring warranty. Always read the manufacturer’s care guide first. What feels like a “deep clean” can quickly turn into a costly mistake. 9 Floors You Should NEVER Clean with a Steam Mop (And Why) You may wonder if you can steam hardwood floors. Before you roll your steam mop across every surface, know this: protecting your flooring investment starts with knowing its limits. Here are the nine floor types that should never meet a blast of steam. 1. Unsealed or Heavily Waxed Hardwood Flooring Reason: Moisture causes warping and cupping; heat causes clouding and stripping. Unsealed hardwood drinks up water like a sponge, leading to swelling or cupping. Even waxed or older sealed floors can dull or turn cloudy when exposed to steam heat. If you’re unsure, try the simple Water Bead Test before using any steam mop. For safe care, see how to clean hardwood floors the right way. 2. Engineered Hardwood Flooring Reason: Layers may delaminate due to adhesive failure. This flooring type uses multiple wood layers glued under pressure. Steam’s combination of heat and moisture can weaken the adhesive bond, causing layers to separate and edges to lift. Once delamination starts, it’s almost impossible to reverse. 3. Laminate Flooring Reason: The core swells, causing edges to lift and warp. Laminate floors might look like wood, but their core is compressed fiberboard. When steam forces water between the joints, the core swells and the surface buckles. Instead, vacuum first and lightly damp mop to stay safe. 4. Bamboo and Cork Flooring Reason: Prone to warping, staining, and cracking under heat and moisture. Both are natural, eco-friendly, but porous. Steam can strip away sealants and make them expand or crack. Once moisture gets in, discoloration and surface splitting follow. 5. LVP/LVT & Sheet Vinyl Reason: Heat softens and breaks down adhesive layers. Vinyl planks and tiles are often glued down. Steam heat can loosen that adhesive, causing bubbling or shifting. Stick to a wet-dry vacuum with low-moisture cleaning instead, it safely handles spills and dirt without damaging the adhesive layer. 6. True Linoleum (Older Floors) Reason: Heat and water can cause lifting and waving. Made from natural materials like linseed oil and cork dust, linoleum doesn’t respond well to heat. Steam cleaning can cause the material to lift or soften, especially near seams. 7. Porous or Unsealed Natural Stone Reason: Moisture penetration leads to spalling and mineral deposits. Stone like slate, marble, or travertine can absorb steam through microscopic pores. This leads to flaking, etching, or white mineral buildup. For sealed stone, clean with minimal water and dry immediately.  8. Unsealed Grout Lines Reason: Weakens over time, leading to cracking and mold. Steam can slowly erode grout and allow moisture to seep underneath tiles. The result? Crumbling joints and hidden mildew. Regular vacuuming with high suction is a safer option.  For cleaning guides on moisture-prone areas, check how to clean the bathroom floor. 9. Painted Floors Reason: High risk of paint blistering and peeling. Steam heat softens paint, making it bubble or flake. Once the finish lifts, there’s no quick fix, you’ll need to repaint. Can My Floor Handle Steam? 3 Quick Home Tests  Before you give up on the idea of what a steam mop is good for, test your floors first. These three checks can help you decide if it’s safe: Method 1. The Water Bead Test Drop a few drops of water on an inconspicuous spot. If the water beads up for several minutes, your floor is sealed and might tolerate steam. If it absorbs instantly, do not use steam. Method 2. The Small Spot Test If your floor passes the first test, try your steam mop on the lowest heat setting in a hidden area. Wait 10-15 minutes, then check for swelling, stickiness, or dullness. No change? You’re likely safe for light use. Method 3. Check the Manufacturer’s Manual Always the most reliable step. If the care guide says “no steam,” don’t risk it, using steam can instantly void your warranty. Not sure when to choose a wet/dry vacuum or a steam mop? Read our side-by-side guide Wet Dry Vacuum vs Steam Mop. Safer Ways to Clean Your Floor Without Steam When in doubt, go gentle. Controlled moisture and the right cleaning tools make all the difference: Floor Type Recommended Cleaning Method Cleaning Action Sealed Hardwood Low-Moisture Mop or Advanced Cleaner Use a cleaning solution that allows for controlled moisture output with a pH-neutral detergent; minimize standing water. Laminate & Vinyl Vacuum and Light Damp Mopping Vacuum dry dirt first. Use a mop that is only slightly damp (not wet) to avoid moisture seepage into the core. Tile & Sealed Stone Advanced Cleaner or Damp Mopping Ideal surface for controlled wet-cleaning. Use tools with strong suction to immediately remove dirty water and prevent residue buildup. Unsealed Stone/ Grout Powerful Stick Vacuum (Dry) Skip wet cleaning entirely. Use a high-suction vacuum with a soft brush roll or a soft cloth to prevent etching or forcing water into pores. What to Use Instead of a Steam Mop  If you love the convenience of a steam mop for hardwood floors but need something safer, try modern robot vacuums or wet-dry vacuums.  Robot Vacuums: For day-to-day debris and light maintenance, robot vacuums keep floors clean with minimal involvement. They’re ideal for preventing dirt and grit from building up—one of the biggest causes of surface scratches on hard flooring. Automated scheduling and hands-off operation help maintain cleanliness without ever introducing excessive moisture. Wet-Dry Vacuums: When you need deeper cleaning, wet-dry vacuums offer precise water control and strong pickup. They remove dirty water immediately rather than pushing moisture into seams or pores, making them safe for most sealed surfaces. These tools handle spills, sticky spots, and general upkeep while keeping moisture levels predictable and safe for flooring. FAQs Can you steam mop sealed hardwood? Even sealed hardwood is sensitive to heat and moisture. Most manufacturers caution against steam because it can weaken finishes or seep into tiny cracks. A low-moisture cleaning method is usually safer. Will a steam mop void my vinyl warranty? In many cases, yes. Most vinyl flooring warranties specifically prohibit steam cleaning because high heat can soften adhesives or discolor the surface. Always check your warranty before using steam. Can you safely steam-clean tile grout? Only sealed grout may tolerate occasional steaming, and even then, it can weaken over time. Unsealed grout should never be exposed to steam, as moisture can penetrate deeply and lead to crumbling or mold growth. Is natural stone safe to steam mop? Unsealed natural stone is too porous for steam and may spall, flake, or develop mineral deposits. Even sealed stone is safer with controlled moisture rather than high heat. Bottom Line: Protecting Your Investment with the Right Tools  The secret to beautiful floors isn’t blasting them with steam, it’s controlling moisture and heat. Once a floor is damaged by steam, there’s rarely a fix that doesn’t involve replacement. Choose tools designed for the job. Dreame’s cleaning systems, like the H15 Pro Heat Wet Dry Vacuum and Aqua10 Roller Robot Vacuum, let you clean deeply and safely across all modern surfaces. Because protecting your floors shouldn’t mean giving up convenience, it just means using the right cleaning method.
Continue reading
What Is a Good Vacuum Cleaner for Hardwood Floors?

What Is a Good Vacuum Cleaner for Hardwood Floors?

Dreame Editorial Team |
Hardwood floors look beautiful, but they are also unforgiving. Anyone who lives with them knows the three constant worries: tiny scratches from abrasive debris, dust that settles deep into plank seams, and the ever-present risk of water marks if moisture sits too long. These challenges haven’t changed, but thankfully, the technology we use to care for wood floors has. In 2026, finding a good vacuum cleaner for hardwood floors matters more than ever. It's not just about power; knowing how to choose a robot vacuum for hardwood floor protection is key. Modern machines come with stronger suction, controlled mopping systems, and AI sensors that recognize delicate surfaces. With the right features, your vacuum can clean efficiently without harming your hardwood’s finish or structure. The 5 Must-Have Vacuum Features for Hardwood Floors in 2026 To safely clean hardwood floors without scratches, dents, or water damage, a vacuum must meet these five non-negotiable requirements. 1. Soft Roller Brushes Soft roller brushes are essential if you want to clean hardwood without leaving visible marks or long-term surface damage. Soft, fluffy or velvet rollers lift fine dust while gliding smoothly over the floor, protecting polyurethane and oil finishes—especially matte coatings that show every scratch. Standard stiff-bristle brushes are not suitable for hardwood. They drag grit across the surface and can create micro-scratches that dull the finish over time, even when used gently. 2. Scratch-Free Rubber Wheels Rubberized, cushioned wheels prevent track marks and friction damage on hardwood floors. They roll smoothly across the surface and reduce pressure points, making them especially important for softer woods like pine. Standard rugged plastic wheels create unnecessary risk. Over time, they can leave visible tracks, fine lines, or compression marks—damage that accumulates slowly and is difficult to reverse. 3. Floating Brush Housing A floating brush assembly adjusts itself to maintain contact with the floor without applying downward pressure. This protects softer species and prevents denting along plank edges. Hardwood floors are rarely perfectly level, so fixed brush housings can dig in or miss spots entirely. 4. Precision Water Control If you’re shopping for a vacuum mop for hardwood, water control isn’t a nice-to-have, it’s the safety feature. Look for models with a pump-driven, metered water system that keeps the pad consistently damp, not wet, so you can clean without risking swelling or warping. By contrast, gravity-fed mop systems tend to drip unevenly and can oversaturate certain spots. That inconsistency is risky on wood, where even small moisture imbalances can lead to warping over time.   Important Unsealed or waxed hardwood absorbs water quickly. Always test in an inconspicuous corner before using a wet and dry vacuum on unsealed flooring to ensure the moisture levels are safe.   5. Suction Power ≄ 6,000Pa Strong suction is critical for actually removing dirt from hardwood floors—not just moving it around. A suction rating of at least 6,000Pa pulls dust, grit, and fine debris out of the narrow gaps between planks, where particles would otherwise remain trapped.   Nice-to-Have Features That Make Hardwood Vacuuming Easier  Now that you’ve got the non-negotiables covered, these nice-to-have features are what make hardwood cleaning feel genuinely easy. They’re not required for safe cleaning, but they reduce daily friction, prevent missed debris, and keep your floors preserved, looking better with less effort. Auto Surface Detection & Mop Lift  Some robot vacuums and wet-dry mop vacuums can detect transitions from tile to hardwood or carpet and automatically lift the mop pad, typically 10–20 mm (0.4–0.8 in). This prevents unnecessary moisture from touching the wood and eliminates cross-contamination. Hot-Water Mop Washing at the Dock High-temperature pad cleaning at the base station—typically 140–194°F (60–90°C)—sanitizes the mop using heat. The mop dries faster, resists odor, and kills bacteria without you needing to add extra moisture to your floors during the cleaning cycle. Dirt-Detection for Grooved Planks Many modern vacuums use acoustic or optical sensors to detect dirt density. When passing over deep grooves or hand-scraped planks, the vacuum boosts suction automatically, targeting the spots where dust hides most. Wood-Grain Following Mode & Edge-Stretch Arms Some devices adjust their movement pattern to run parallel to the grain, helping the brush head sweep debris along natural grooves. Extendable side brushes help reach baseboard edges where lint gathers. AI Object Recognition AI-based object recognition allows a robot vacuum to identify cables, socks, toys, or pet waste before contact. Avoiding these objects helps prevent scratches, smearing, and debris from being dragged across hardwood surfaces, reducing unnecessary wear over time.   Dreame Take We view AI as a way not just to improve cleaning, but to gently protect your floors. By steering clear of hard objects that could harm the finish, our vacuums ensure your investment stays pristine.   Comparison Table Feature Upright Vacuum Cordless Stick Wet Dry Vacuum (Floor Scrubber) Robot Vacuum & Mop Canister Vacuum Robot Vacuum (Vac-only) Soft Roller Brushes Select models support hardwood heads ✓Quite common ✓roller-based washing heads ✓ (rubber/soft rollers) △ (hard-floor heads) ✓ Scratch-Free Rubber Wheels Select models ✓ ✓ ✓ ✓ ✓ Floating Brush Housing Select models △ ✓ ✓ △ ✓ Precision Water Control ✕ ✕ ✓ ✓ ✕ ✕ Suction Power (range) ~15,000–25,000 PaHigh, corded ~12,000–28,000 PaMid–high ~8,000–22,000 PaBalanced for wash + extract ~2,000–30,000 Pa ~18,000–30,000 PaHigh, corded ~2,000–12,000 Pa Auto Surface Detection & Mop Lift ✕ ✕ ✕ ✓ ✕ ✕ Hot-Water Mop Washing at the Dock ✕ ✕ ✓Select models ✓Select models ✕ ✕ Dirt Detection (optical/AI) ✕ Sensor-based Liquid/soil sensing ✓ ✕ ✓ Wood-Grain Following Mode Manual Manual Manual Auto Manual Auto Edge-Stretch Arms ✕ ✕ ✓Select models ✓Select models ✕ ✓Select models AI Object Recognition ✕ ✕ ✕ ✓ ✕ ✓ Our Best Vacuums for Hardwood Floors in 2025 Choosing the right vacuum cleaner depends on your home layout, wood floor sensitivity, and daily cleaning habits. Whether you need a powerful robot vacuum and mop or a handheld device, here is how to match the right tool to your home. Best Value for Everyday Spills: Dreame H12 Pro If you want something budget-friendly and easy to use, the H12 Pro Wet-Dry Vacuum is the best choice. It provides steady suction and controlled damp cleaning, making it ideal for small homes with sealed hardwood. [product handle="l50-ultra-robot-vacuum" rating="4.8"] Best for Pet Owners: L50 Ultra Robot Vacuum If you have pets that shed daily, the L50 Ultra is a reliable hands-off solution. Its soft brush and strong suction lift hair without scratching, and the AI object avoidance prevents dragging toys or bowls across the floor. [product handle="l50-ultra-robot-vacuum" rating="4.8"] Best for Moisture-Sensitive Floors: H15 Pro Heat For solid hardwood that is sensitive to water, the H15 Pro Heat Wet-Dry Vacuum offers precise water control and fast heat-assisted drying. This protects the planks from swelling or warping. [product handle="h15-pro-heat-wet-dry-vacuum" rating="4.6"] Best for Mixed Flooring: H15 Pro CarpetFlex If your home features both wood and carpet, the H15 Pro CarpetFlex seamlessly switches between the two surfaces without requiring tool changes. [product handle="h15-pro-carpetflex-wet-dry-vacuum" rating="5"] Ultimate Daily Care: Matrix10 Ultra For completely hands-off care, the Matrix10 Ultra automatically vacuums, lifts its mop when needed, and navigates hardwood safely. [product handle="matrix10-ultra-robot-vacuum" rating="5"] Everyday Hardwood Floor Care Tips Hardwood floors stay beautiful only when both the vacuum and the floor are maintained properly. Knowing how to clean hardwood floors correctly prevents long-term damage. Clean the main brush weekly. Dirt caught in bristles or wheels acts like sandpaper. Removing debris prevents micro-scratches and keeps the vacuum gliding smoothly. Control the water. Use the lowest water setting for mopping—or disable mopping entirely. Even sealed hardwood should never be exposed to excessive water. A slightly damp mop is safe; a wet one is not. Ventilate the dock. Keep the charging dock in a ventilated spot. Base stations can trap humidity while pads are drying. Good airflow prevents moisture from accumulating under your flooring over time. For more maintenance advice, check our clean wood floors tips. Use pH-balanced floor solutions. Acidic substances like vinegar can weaken a floor’s finish. Their low pH can slowly erode the protective coating, reducing shine and potentially dulling the surface over time.   Pro-tip Stick to specialized solutions, like the Dreame Wood Floor Care Solution, which are pH-balanced to clean without etching or dulling the top layer.   Conclusion Taking care of hardwood floors is a balancing act: you want powerful cleaning without risking scratches or water damage. With the right vacuum—one that uses soft brushes, gentle wheels, controlled water output, and smart AI—you don’t have to compromise. In 2026, your vacuum should protect your floors as it cleans them. When the technology works with your wood instead of against it, you can enjoy spotless floors without the constant fear of damaging your investment. Ready to upgrade your floor care routine? Explore our full collection of robot vacuums for hardwood floors and protect your investment today.   FAQ Will a robot vacuum definitely scratch my hardwood floors? Not if you choose the right model. A modern robot vacuum is safe for hardwood floors if it uses rubber wheels and soft brushes designed for wood. However, scratches can occur if hard debris (like a small rock) gets stuck in a wheel, so checking your vacuum's wheels weekly is essential. Is it better to vacuum or sweep hardwood floors? Vacuuming is generally superior. Sweeping often pushes fine dust into the air or down into the cracks between planks. A vacuum with strong suction lifts this dust out completely, preventing build-up in the seams. What should you not use on hardwood floors? Avoid steam cleaners, which force moisture deep into the wood, causing warping. Also, stay away from stiff-bristled brooms, vinegar (which is acidic and dulls the finish), ammonia, and bleach. Is dish soap ok for wood floors? We do not recommend it. Dish soap often leaves a sticky residue or film that actually attracts more dirt and makes the floor look dull. It is safer to use a dedicated, pH-neutral wood floor cleaner. How often should you mop hardwood floors? For most homes, a damp mop once a week is sufficient. If you have a robot vacuum with precise water control, you can run it more frequently (e.g., every few days) because it uses very little moisture that dries almost instantly. Why are my floors still dirty even after mopping? This usually happens for two reasons: using dirty water (redistributing dirt) or using too much detergent (leaving a sticky residue). Systems like the Dreame L50 Ultra or Matrix10 Ultra solve this by washing the mop pads with fresh, hot water at the station, ensuring you never clean with a dirty mop.
Continue reading
Wet Dry Vacuum vs. Steam Mop: Which Floor Cleaner Is Right for You?

Wet Dry Vacuum vs. Steam Mop: Which Floor Cleaner Is Right for You?

Editorial TeamDreame |
Tired of the tedious floor cleaning routine? Sweeping, mopping, and waiting for the floor to dry... It can easily take up your whole afternoon. Fortunately, two modern tools can simplify this task: wet/dry vacuums and steam mops. Both look similar but serve different purposes. Wet dry vacuums streamline the cleaning process by combining all your steps into one quick process and handling everyday dirt. On the other hand, steam mops take a different approach and use hot steam to eliminate germs, providing a different yet effective cleaning method. Each one works better for different types of floors and cleaning situations. But which one is right for you? Keep reading to find out. What is a Wet Dry Vacuum? A wet-dry vacuum is a versatile machine that is designed to vacuum and mop your hard and carpeted floors. It eliminates the need for a broom, dustpan, and traditional mop and bucket. How It Works The concept is to combine suction with washing. As you push the machine across the floor, it performs a few actions all at once: It washes: A roller brush, which is constantly wet with fresh water and a bit of cleaning solution from a clean water tank, spins against the floor. This action scrubs the surface, loosening dirt and grime much more effectively than just wiping a mop across it. It vacuums: As the roller scrubs, a powerful vacuum motor sucks up everything in its path. This includes the dry debris like dust and crumbs, any larger spills, and, most importantly, the dirty water that was just used to scrub the floor. The key to its design is its two separate water tanks. One tank holds the fresh water and cleaning solution. The second tank is where all the dirty water and debris get deposited. This is a critical feature because it means you are always cleaning your floors with fresh water. With a traditional mop, you end up dipping it back into dirty water, which can leave behind a grimy film. A wet-dry vacuum avoids this completely. Seeing the tank of dark, dirty water at the end is satisfying proof of how much dirt was actually removed from your floors. Its main purpose is to be a convenient, all-in-one tool that can handle a wide variety of everyday messes, from dust bunnies to spilled soup, in a single pass. What is a Steam Mop? A steam mop is a specialized tool that uses plain hot steam to deep clean and kill germs on floors. It's a popular choice for people who want to sanitize their homes without having to use chemical cleaners like bleach or ammonia. How It Works A steam mop's function is very simple. You fill its small water tank with regular tap water. An internal heating element then boils that water very quickly, typically in under a minute, turning it into hot, high-pressure steam (over 100°C / 212°F). This steam is directed down through a nozzle and into a microfiber cloth pad attached to the mop's head. The intense heat does two things: It loosens grime: The hot, moist steam is excellent at dissolving sticky, stubborn messes that have dried onto the floor, like spilled soda, jelly, or caked-on mud. It sanitizes: The high temperature of the steam kills common household germs and bacteria on contact. This is a huge benefit for anyone concerned about hygiene, especially in kitchens and bathrooms. It's essential to understand that a steam mop has no suction whatsoever. It cannot pick up hair, dust, or any solid debris. Its only job is to sanitize and remove grime already stuck to the surface. For households with crawling babies, pets, or people sensitive to chemicals, this tool offers additional benefits but doesn't replace a vacuum cleaner. Wet-Dry Vacuum vs. Steam Mop: Head-to-Head Comparison Understanding how they work is one thing; knowing how they perform in your own house is what really matters. Let's break down how they stack up in different situations. Which One Saves You More Time? When it comes to getting the job done fast, the wet-dry vacuum is the clear winner. It combines two long chores, vacuuming and mopping, into one quick and easy step. Imagine it's a typical weeknight after dinner. There are crumbs under the dining table, a few stray pieces of rice on the kitchen floor, and a small puddle of water near the sink. Steam mop: You would first need to get a broom or a vacuum to clean up all the loose crumbs and debris. Once that's done, you can plug in the steam mop and wait for it to heat up before you start sanitizing. It's still a two-step process. Wet dry vacuum: You just grab the one machine, turn it on, and clean the entire mess in a minute or two. The crumbs and the water are gone in the same pass. Over the course of a week, the time saved by not having to do that first step of sweeping or vacuuming really adds up. Which Can Clean Up Spills and Accidents? This is perhaps the biggest practical difference between the two tools. A wet-dry vacuum is specifically designed to handle spills and wet messes. It's an emergency cleanup tool and a regular cleaner all in one. If a child drops a full bowl of cereal and milk, or the dog tracks in muddy paw prints from the rain, you can clean it up instantly. It sucks up the liquid (milk, water) and the solids (cereal, mud) without issue. A steam mop is completely unsuitable for these kinds of accidents. Because it has no suction, it cannot pick up the mess. If you tried to use a steam mop on spilled cereal, you would just be pushing around warm, mushy cereal with a cloth pad. If you used it on a raw egg, the heat would start to cook the egg, creating an even bigger, slimier mess to clean up. For any household where spills are a regular occurrence, a wet-dry vacuum is the far more practical and useful machine. Which Is Better at Killing Germs and Sanitizing? This is the one area where the steam mop has a distinct advantage. Its entire purpose is to sanitize. The high temperature of the steam it produces is proven to be effective at killing germs. The CDC, for example, recognizes steam as a reliable method for sterilization. This makes a steam mop an excellent tool for specific tasks, like sanitizing the floor around a toilet, cleaning a pet's eating area, or ensuring a floor is hygienic for a crawling baby. It achieves this without any chemicals, which is a major benefit for many people. A wet-dry vacuum cleans differently. It doesn't use heat to kill germs in contact. Instead, it physically removes germs from the floor by scrubbing them loose and sucking them away with the dirty water. While this leaves your floors extremely clean, it is not the same as the thermal sanitization that a steam mop provides. Which is Safer for Floors? This is a critical consideration. Using the wrong tool on your floor can lead to expensive and irreversible damage. You need to know what your floors are made of. A wet-dry vacuum is generally safe for any type of sealed hard floor. Because it sucks the water right back up, it doesn't leave your floors soaking wet. This makes it a safe choice for: Sealed Hardwood Laminate Vinyl (both plank and sheet) Tile (Ceramic and Porcelain) Sealed Stone A steam mop requires much more caution. The combination of high heat and moisture can be very damaging to certain materials. Tile and Sealed Stone: Generally safe and very effective. Steam can even help clean grout lines. Sealed Hardwood: This is risky. Over time, the heat can break down the polyurethane finish that protects the wood. Moisture can also be forced between the boards, causing them to warp. Laminate and Vinyl: These are also very risky. These floors are made of layers bonded together with adhesive. The heat from a steam mop can weaken that glue, causing the top layer to peel or the edges of the planks to swell and warp. Unsealed Wood: Never use a steam mop here. It will cause immediate damage. Always check what your flooring manufacturer recommends before using a steam mop. Which One is Easier to Maintain? A steam mop is very simple to maintain. After use, you just remove the dirty cloth pad and toss it in the washing machine. A basic wet-dry vacuum requires more effort. You have to empty the dirty water tank and clean the roller brush after each use to prevent smells and mold, which can feel like an extra chore. However, advanced wet-dry vacuums (like those from Dreame) solve this problem with a one-press "self-cleaning" function. At the push of a button, the machine automatically washes its roller brush with clean water and then dries it with hot air. This keeps it clean and odor-free without any hands-on work from you. Summary Table Feature / Use Case Wet Dry Vacuum (The Remover) Steam Mop (The Sanitizer) Winner for Most Homes Time-Saving Vacuums & mops in one step Requires pre-vacuuming Wet Dry Vacuum Spill Handling Excellent for wet & dry messes Not suitable; can spread messes Wet Dry Vacuum Chemical-Free Sanitizing Uses cleaning solution or water Excellent; uses only steam Steam Mop Floor Safety Safe on most hard floors Risk of damage to wood/laminate Wet Dry Vacuum Post-Clean Maintenance Tank/roller cleaning (can be automated) Simple pad washing Wet Dry Vacuum (with self-cleaning) How to Choose the Right Floor Cleaner The best choice is the one that solves your most common cleaning problems. Get a Wet Dry Vacuum if... You have kids or pets. If your life involves cleaning up frequent spills, food messes, and muddy footprints, a wet-dry vacuum will make a huge difference. You want to save time and effort. If your main goal is to get your floors clean as quickly and easily as possible, this is the tool for you. It combines two chores into one. You like having one tool for many jobs. If you want a single, versatile machine that can handle almost any everyday mess on your hard floors, a wet-dry vacuum is a practical choice. [product handle="h15-pro-heat-wet-dry-vacuum" rating="4.7"] Get a Steam Mop if... You already own a reliable vacuum cleaner. A steam mop works well alongside a robot vacuum and mop, which effectively manages your daily cleaning tasks. Your top priority is sanitizing without chemicals. If you are committed to having a germ-free home but want to avoid harsh cleaners, a steam mop is the best tool for that specific job. You have mostly tile or stone floors. If your home has a lot of durable flooring that can handle high heat, you can use a steam mop without worrying about damaging it. You don't mind a multi-step process. If you already vacuum your floors regularly and are just looking for a tool to do a final, deep-cleaning pass, then a steam mop can be a good addition to your routine. FAQs Q1: Do I have to vacuum before using a wet-dry vacuum? No. It's designed to do both jobs at once. That's its biggest time-saving benefit. Q2: Can a steam mop remove old stains? It's very good for breaking down sticky, sugary, or greasy messes. However, for a set-in stain like wine, coffee, or ink that has dyed the floor's surface, it likely won't be effective since it doesn't use a chemical cleaning solution. Q3: Which is safer for my sealed wood floors? The wet-dry vacuum is much safer. A steam mop's high heat and concentrated moisture can damage the wood's protective finish over time. Q4: Can I put vinegar or a cleaning solution in a steam mop? No, you should not. Steam mops are only designed to be used with water. Adding vinegar or other cleaners can corrode the internal parts and break the machine. The Bottom Line When you strip away all the features, the choice is pretty simple: A wet-dry vacuum is a tool for cleaning up messes. A steam mop is a tool for killing germs. If your biggest daily frustration is the time and hassle it takes to clean up dirt, spills, and pet hair, then a wet-dry vacuum is the most practical and useful tool for you. It solves the most common cleaning problems in one simple step. If your main concern is sanitizing your bathroom floors without bleach, and you don't mind vacuuming first, then a steam mop could be what you need. If you think a wet-dry vacuum sounds like the right choice for your home, consider the models Dreame offers. They are designed to make the daily job of keeping floors clean much quicker and easier.
Continue reading
Robot Mop Cleaning Solutions: The Ultimate Guide to a Deeper, Safer Clean

Robot Mop Cleaning Solutions: The Ultimate Guide to a Deeper, Safer Clean

Editorial TeamDreame |
Have you ever done the "white sock test" after your robot vacuum cleaner finishes a cycle? Or just walked barefoot across the kitchen floor? Perhaps too often, the floor appears clean, but it lacks that perfectly smooth, squeaky-clean feel underfoot. It might even feel a little sticky. That's the residue that plain water can't lift. If you're chasing that satisfying, barefoot-on-a-spotless-floor feeling, the secret lies in a better robot, and also a better cleaning solution. Let's talk about how to make your floors look clean and feel great. Is a Robot Mop Cleaning Solution Worth It? Think about washing dishes with just water. Can you clean a greasy plate properly? Probably not. The same thing happens with robot mopping. While your robot vacuum and mop are powerful, using them with only water is like trying to clean with one hand tied behind your back. So yes, a robot mop cleaning solution is definitely worth it. Why Water-Only Cleaning Is Not Enough Water has natural limits that restrain it from cleaning well. Surface tension makes water drops stick together. This causes water to roll around on surfaces instead of spreading out, so it can't get into dirt and lift it. Many everyday messes create extra problems. Kitchen grease, oily paw prints from pets, and food spills actually push water away. When your robot mops with only water, it often just spreads these oily messes around instead of cleaning them up. What's left behind? A dull, streaky mess on your floors. How Cleaning Solutions Work A good robot vacuum cleaning solution uses two key ingredients that work together: surfactants and enzymes. Surfactants Break Down Water's Barriers These special cleaners act like tiny magnets for dirt. Each cleaning molecule has two parts: One end that sticks to water Another end that hates water but loves grease and dirt Using a cleaning solution with your robot vacuum and mop helps break down water's surface tension. This creates molecules that grab onto dirt and grease, lifting them off the floor so the vacuum's mop pad can easily wipe them away. Enzymes Target Specific Stains If regular cleaners handle everyday dirt, these special ingredients are like expert stain-fighting enzymes. These natural proteins speed up cleaning by targeting specific types of messes. According to the American Cleaning Institute, enzymes work by breaking down stains into smaller pieces that surfactants can easily remove. They work like a lock and key: each type is made to break down a particular kind of stain. Cleaner Type What It Is Common Stains Protein fighters Protease Food spills, pet messes, milk, and blood Grease fighters Lipase Kitchen grease, butter, oily marks Starch fighters Amylase Pasta sauce, gravy, potatoes, ice cream By using these specialized enzymes to dismantle big, stuck-on molecules into tiny pieces that dissolve in water, your robot mop can wipe away stubborn stains that would normally require intense scrubbing. 4 Benefits of Using a Robot Vacuum Cleaning Solution Using a quality robot mop cleaning solution gives you several benefits: Deeper Cleaning: It effectively removes germs and sticky residues that water alone cannot tackle. Streak-Free Results: The solution dries quickly, leaving no marks or residue behind. Saved Money: These highly concentrated solutions last for months, providing a low cost per use. Longer Robot Vacuum Lifespan: The low-foam, metal-safe formulas help prevent damage to the robot's pumps, seals, and tubes. In summary, while your robot handles the scrubbing, the cleaning solution does the essential work, together delivering professional results. What is the Best Robot Mop Solution? If you've decided to use a cleaning solution, the next question is which one to choose. The market offers two main types, official and generic, and the difference between them is critical for your robot's health and performance. Official Brand Cleaners: The Safe Pick This is, without question, the safest and smartest choice for your robotic vacuum cleaner. You don't have to worry about compatibility. The same people who built your robot also made these cleaning solutions. They tested them with every part inside your machine: the plastic water tank, rubber pieces, and water pump. Everything works together perfectly, making your cleaner a true robot vacuum and mop combo. You don't have to guess about performance. The cleaner is made specifically for how your vacuum works: how fast water flows and what kind of mop pad it uses. This means you get great cleaning without problems like too much foam (which can break the pump) or streaky floors. You don't have to stress about your warranty. This is the biggest reason to choose official cleaners. If you use anything else and your robot breaks, the company might refuse to fix it for free. Then you're stuck paying hundreds or thousands of dollars for repairs. With official cleaners, your warranty stays safe. Universal Cleaners: Maybe a Gamble These third-party solutions may seem attractive because they often cost less or offer multiple scents, but they can also cause unexpected issues. Universal cleaners claim to work for "all robot vacuums," but that's impossible since different brands use different materials inside. Plus, you're on your own if something goes wrong. If a universal cleaner breaks your vacuum, you may be denied warranty coverage. Important: The official solution is generally your safest bet and your best robot mop solution. Can You Make a DIY Robot Vacuum Solution? No. The internet is full of "hacks" suggesting you can use common household products in your robot mop. It's easy to think, "What's the harm in a little vinegar?" The hard truth is that these DIY solutions can cause damage to your high-tech cleaning vacuum. A Breakdown of the Chemical Dangers Common household products can seriously damage your robot vacuum cleaner: Vinegar: Even diluted, this acid slowly eats away at your robot's rubber seals and metal parts Essential oils & soaps: A few drops of these sticky substances will clog spray nozzles and make your tank brittle Bleach & strong cleaners: Strong often means they are corrosive and will destroy your robot's delicate internal components Regular floor cleaners: Designed for buckets, not robots - they foam up and jam your water pump Cleaning Solutions: What to Use & What to Avoid For a quick reference, use this simple guide to make the right choice every time. Solution Type Our Verdict Risk to Robot Vacuum and Mop Impact on Floors Warranty Status Manufacturer-Approved Solution Gold Standard None - Designed for it Streak-free shine Protected Plain Water Safe Backup None May leave water spots Protected Universal "Robot" Cleaner High Risk Potential for corrosion/clogs Can leave residue/streaks At Risk / Likely Void DIY Vinegar Solution Do Not Use High - Corrodes seals/metal Can dull finishes Void DIY Essential Oils/Soap Do Not Use High - Degrades plastic, clogs tubes Leaves sticky, dirt-attracting film Void Standard Floor Cleaner Do Not Use High - Foaming, residue buildup Leaves sticky residue Void Bleach/Harsh Chemicals Do Not Use Extreme - Severe corrosion Can cause permanent damage/discolouration Void How to Use Cleaning Solution in Your Robot Vacuum? Using the cleaning solution is simple. The exact method depends on whether your robot has a fully automated docking station or a manual-fill tank. For Robots with Auto-Mixing Stations These advanced systems significantly simplify the cleaning process. Locate the solution cartridge: Open your docking station to find the dedicated cartridge or reservoir for the cleaning solution. Fill the cartridge or insert a new one. Use undiluted concentrate. Do not add water. The station is designed to automatically mix the perfect ratio of solution and water for every cleaning and mop-washing cycle. Ensure the cartridge is secured. Close the lid, and you're done. Your robot vacuum will handle the rest. For Robots with Manual-Fill Water Tanks This method requires one simple measurement. Check the golden ratio: Most manufacturers recommend a dilution ratio of 1:200 or 1:300. This usually translates to about one capful of solution for a standard-sized clean-water tank in a docking station. Always check the bottle for the specific recommendation for your product. Fill with water first: This is a crucial pro-tip. Always fill the clean water tank with cool water before adding the solution. Adding the solution first can cause it to foam up excessively when you add water from the tap. Measure and add the solution: Use the bottle's cap as a measuring tool, as intended by the manufacturer, and add the recommended amount to the water-filled tank. Close and start clean: Secure the tank lid, place it back in the dock or robot, and start your cleaning cycle. FAQs Q1: What cleaning solution can I safely use in my robot vacuum? The safest and most effective option is always the cleaning solution specifically made by your robot's manufacturer. If that's not available, using plain, cool water is the only other universally recommended option that will not damage your device or void your warranty. Q2: Can I put vinegar in my robot vacuum? No. This is one of the most common but dangerous DIY mistakes. Vinegar is acidic and will corrode the robot's internal rubber seals and metal parts over time, leading to leaks and permanent damage. Q3: Can I use bleach or other disinfectants in my robot vacuum? Absolutely not. Harsh chemicals such as bleach and ammonia are highly corrosive and will quickly damage the sensitive internal components of your robot. They can also damage your floors. Q4: Which cleaners should be avoided for all types of floors? In general, avoid highly acidic cleaners (such as undiluted vinegar) on natural stone, including marble and granite, as they can cause etching. Also, avoid oily or waxy cleaners (like oil soaps or polishes) as they leave a residue that dulls the finish and can make floors slippery. Always stick to pH-neutral formulas for the broadest safety. Conclusion Water alone can't handle grease because it doesn't spread well. Special cleaners use ingredients that grab dirt and break down tough stains, giving you much better cleaning. For safer use, select cleaning solutions that are made by the manufacturer of your robot vacuum. These products are designed to protect the internal components and help maintain your warranty. Other cleaners may not function properly, and homemade mixtures, such as vinegar or oils, can damage your robot vacuum. Use official cleaning solutions to get the best results and help your vacuum last for many years. Ready to unlock a truly effortless and brilliant clean? Discover Dreame's specially formulated cleaning solution, engineered to bring out the best in your robot and your floors.
Continue reading
How to Clean Hardwood Floors Naturally: Eco-Friendly Tips and Techniques

How to Clean Hardwood Floors Naturally: Eco-Friendly Tips and Techniques

Editorial TeamDreame |
A weeknight sprint to get dinner on the table, a swirl of little feet and paws, and—whoops—tomato sauce on the boards. If you've ever reached for something "strong" and then worried about fumes, this guide is for you. Below, you'll learn how to clean hardwood floors naturally using pantry-safe ingredients. These brilliant routines protect your finish, fit busy lives, and keep costs down, all while using items you likely already have in your kitchen. No need to rush to the store for expensive cleaners-just grab your vinegar, baking soda, and oils, and you're ready to go. Why Choose Natural Cleaning for Hardwood Floors? Natural methods are a sanctuary for your hardwood floors, steering you away from volatile organic compounds (VOCs) commonly found in harsh cleaners. According to the EPA guidance on indoor air quality, indoor VOCs can irritate eyes and skin and may trigger asthma. By choosing natural cleaning, you're not just creating a safer environment for your family but also gaining confidence in the safety of your cleaning methods. They're also wallet-friendly. A gallon (3.8 L) of white vinegar and a small box of baking soda cost only a few dollars and last months. Compared with $10+ specialty cleaners used weekly, simple DIY mixes can save hundreds per year—without sacrificing results when used correctly on sealed hardwood. By choosing natural cleaning, you're not only protecting your floors but also your wallet. Essential Materials and Tools for Natural Cleaning Gathering a few basics up front keeps natural cleaning fast and consistent: Ingredients White vinegar (acetic acid) loosens mineral films and everyday grime when properly diluted. Baking soda provides mild abrasion for spot-treating scuffs. Olive oil (very sparingly) helps revive sheen when buffed thoroughly. Lemon juice adds a fresh scent; use diluted for sticky spots. Essential oils (optional), such as tea tree or lavender, can be used for scent only, as some demonstrate antimicrobial activity, but they're not EPA-registered disinfectants. For disinfection needs, use an EPA-registered product as directed. Tools Microfiber mop (gentle on finishes). Soft, lint-free cloths for drying and buffing. Spray bottle for controlled application. Vacuum with a hardwood attachment to capture grit without scratching. Optional: a robot vacuum to handle daily dust automatically (more on that below). Methods for Cleaning Hardwood Floors Naturally These proven, low-tox methods keep hardwood sparkling and safe—perfect for busy families and pet owners. Preparing Your Floors for Cleaning Preparation prevents scratches and streaks. First, sweep or vacuum grit with a hardwood-safe head. Move light furniture (or use felt pads) to protect contact points. Check for pebbles or sand near entries so you don't grind them into the finish while mopping. Important: Always spot-test solutions in an inconspicuous area—especially on unsealed or waxed floors—to confirm no dulling or discoloration. This step is crucial to prevent any potential damage to your floors. Routine Daily Cleaning For tidy floors with minimal effort: In a bucket, mix warm water with a few drops of mild, eco-friendly dish soap. Damp-mop (not wet) with a microfiber head, following the wood grain. Wring well to avoid standing water. Dry immediately with a soft cloth to prevent spots. Pro-tip: Treat cleaning as a ladder: daily dust, weekly light mop, then periodic deep clean and polish. A robot vacuum can automate the first rung so you stay ahead of dust and grit without lifting a finger. Deep Cleaning with a Vinegar Solution The vinegar method is best for dull traffic lanes, light kitchen grease film, salty footprints, or mineral residue after wet weather. Mix œ cup (≈120 mL) white vinegar with 1 gallon (3.8 L) water. Prepare the mixture in a large container and transfer it to a spray bottle for control. Lightly mist a small section and mop with a microfiber head. Buff dry immediately with a clean cloth. Important: Vinegar has some antibacterial properties, but due to its high acidity, it is recommended only for use on sealed hardwood floors. Removing Tough Stains Naturally Scuffs: Make a paste of baking soda and water, apply gently with a soft cloth, then wipe clean and dry. Sticky residues (juice, gum): Dab with diluted lemon juice, let sit briefly, then lift and wipe clean. Always test first and avoid abrasive pads—your goal is to preserve, not thin, the finish.   Pro-tip: For heel scuffs, a clean tennis ball buffed in small circles can lift marks without abrasion. Always test first.   Polishing for a Natural Shine Monthly—or when floors look dull—refresh luster: Mix equal parts olive oil and white vinegar (e.g., ÂŒ cup / 60 mL each). Apply sparingly with a soft cloth along the grain. Buff thoroughly to remove excess and prevent slipperiness. Focus on high-traffic lanes; less is more to avoid buildup. Want more fundamentals? See our detailed companion guide, How to Clean Hardwood Floors, for step-by-step basics and finish-specific tips. How Often to Clean Your Hardwood Floor Naturally? Daily: Sweep or vacuum to remove dust and grit that can scratch over time. Weekly: Do a light damp-mop with warm water and a drop of mild soap. Every 1–2 weeks: Deep clean with the diluted vinegar solution on sealed floors. Every 1–2 months: Polish sparingly to restore sheen (or sooner in high-traffic homes with kids, pets, or frequent entertaining). Seasonality matters: increase dry dusting during pollen season, and in winter, track less moisture inside and run a humidifier to reduce gaps. Always consult your floor manufacturer's care guide and adjust cadence to your finish type (polyurethane, oil, or wax). When in doubt, start gentler and ramp up only as needed. Advanced Tips for Hardwood Floor Cleaning Different homes and finishes call for minor tweaks. Use these variations to stay safe and effective. For different floor types Sealed hardwood tolerates well-diluted solutions and careful damp-mopping. Unfinished or oil-finished planks require drier methods—such as vacuuming and targeted spot-cleans—because liquids can soak in. Engineered wood has a hardwood veneer; treat it like sealed hardwood, but keep moisture extra light at seams. Pet-friendly options For pet owners, you can add a drop or two of pet-safe essential oil (e.g., lavender) for scent only—then dry thoroughly so paws don't slip. However, it's important to note that essential oils, even when diluted, can leave a residue on your floors. A pet parent dealing with fur tumbleweeds can pair daily robot vacuuming with weekly damp-mops to keep odors and debris in check. Seasonal adjustments In winter, use less water and run a humidifier (35–55% RH) to prevent shrinkage. In summer/pollen season, dust more frequently and rinse mop heads often to avoid spreading allergens.   Dreame Take Most scratches come from grit, not mopping. Automating daily pickup keeps grit off the boards, so your weekly damp mop is faster and gentler. With the DreameX50 Ultra handling dust and hair daily—and washing pads with up to 176°F (80°C) hot water—you can reserve natural solutions for quick spot care, not whole-room resets.   Common Mistakes to Avoid When Cleaning Hardwood Floors Naturally Even the greenest routine can backfire if you miss these: Too much water → warping/cupping. Damp-mop only; dry immediately. Abrasive pads → scratches. Stick to microfiber and soft cloths. Undiluted acids → finish etching. Always dilute vinegar; don't use it on unsealed/waxed floors. "Natural" ≠ disinfected. Vinegar and essential oils aren't EPA-registered disinfectants. For proper disinfection after bodily fluids or similar, clean first, then use an EPA-registered product as directed. Conclusion Natural hardwood care is simple, effective, and sustainable: dry debris removal, light damp-mopping, targeted spot care, and occasional buffing. Imagine wrapping a lively family get-together, glancing down at spotless boards, and not smelling a thing but dinner. That's the balance you want—clean floors, calm air, and preserved finishes. Layer in smart assistance—Dreame X50 Ultra for automatic daily dusting and hands-free mop care—and you'll spend less time prepping and more time enjoying the room you cleaned. Try the steps above today, and explore Dreame's lineup for tools that automate your natural routine.
Continue reading