The best robot vacuum fits your home's layout and cleaning needs. A model that works in a studio apartment won't keep up in a house full of pet hair, and homes with thick carpeting need more suction than those with hardwood floors. This guide organizes our top picks by home type, so you can find the right match for your space.
Best Overall
Dreame Pick: The Dreame X60 Max Ultra Complete is the all-rounder when you want one robot vacuum for the whole house, with 35,000 Pa Vormax™ suction and a 7.95cm slim body that slides under most sofas and beds. At the time of writing, Vacuum Wars ranks it number one on their Top 20 robot vacuum list, which backs up its best overall rating.
The suction clears pet hair and crumbs from hard floors and carpets alike. With dual retractable legs that climb thresholds up to 8.8cm, it covers every room on a floor without getting stuck on door tracks.
The dock washes the mop pads at 100°C between runs, so each mopping pass starts clean instead of smearing yesterday's grime. Its dual AI cameras recognize 280+ objects and steer around them, so it doesn't drag a sock or a charging cable across the room.
[product handle="x60-max-ultra-complete-robot-vacuum" rating="4.8" slogan="Editor's Pick"]
Also consider: Roborock, a flagship name with a loyal enthusiast following. MOVA, a mopping-focused brand known for hands-off floor care.
Best Robot Vacuum for Pet Hair
Dreame Pick: The Dreame L60 Ultra stands out as the best robot vacuum for pet hair, thanks to its HyperStream™ Detangling DuoBrush. This clever design prevents long fur from wrapping around the roller and channels long fur smoothly through the system, so you won't find yourself untangling clumps every few days
Backed by a powerful 35,000 Pa Vormax™ suction, it identifies different carpet types and reacts with precision, from automatic mop lifting or removal to suction boost, ensuring the vacuum pulls stubborn pet hair from low-pile carpets with ease.
AI-enhanced 3D ToF detection recognizes over 280 object types, helping the vacuum to spot unexpected pet waste and steer around it so the mess doesn't get dragged across the floor.
[product handle="l60-ultra-robot-vacuum" rating="4.9" slogan="Best for Pet Hair"]
Also consider: eufy, a popular pet-household choice known for easy-to-use models. Shark, a familiar name from its upright vacuums.
Best Robot Vacuum for Carpet and Mixed Floors
Dreame Pick: The Dreame Matrix10 Ultra is a top choice for homes with both carpet and hard floors, offering a smart solution to the common damp-pad issue that frustrates many robot vacuum owners.
On carpet it lifts the mop pad, and on thick rugs it removes the pad entirely, so a wet pad never drags across your floors. For hard floors, its Multi-Mop™ Switching Dock swaps pads by room on its own. A nylon-bristle pad scrubs grease and stuck-on grime, while a water-absorbing sponge pad is meant for bathrooms. A thermal pad handles tougher stains with hot-water cleaning, so you are not switching pads by hand.
The 100°C ThermoHub™ dock keeps each mop pad fresh between cleaning sessions, so the floors are never cleaned with a dirty pad. Powerful 30,000 Pa Vormax™ suction easily cleans debris on both carpets and hard floors, while OmniSight™ navigation smoothly guides the robot vacuum around the obstacles that usually trip up other vacuums.
Read the full Matrix10 Ultra review for more details.
[product handle="matrix10-ultra-robot-vacuum" rating="4.7" slogan="Best for Carpet and Mixed Floors"]
Also consider: Roborock, a premium name carpet-focused shoppers often consider. Shark, a familiar brand with a broad retail presence.
Best Robot Vacuum Mop for Hard Floors
Dreame Pick: The Dreame Aqua10 Ultra Roller is the best robot vacuum mop for homes with mostly hard floors, mopping with fresh water the whole way instead of pushing a dirty pad around.
The roller is rinsed continuously as it cleans, so each pass leaves a clean, wet finish on the floor. On carpet, AutoSeal™ closes and lifts the mop 1.4cm to help keep the pile dry. Between runs, the dock auto-empties for up to 100 days and washes the roller at 100°C.
It handles everyday vacuuming too, with 30,000 Pa Vormax™ suction and OmniSight™ 2.0 navigation that steers around 240+ objects.
[product handle="aqua10-ultra-roller-robot-vacuum" rating="4.8" slogan="Best for Hard Floors"]
Also consider: Roborock, a strong mopping name that enthusiasts often shortlist. Narwal, a mopping specialist known for wet cleaning.
Best Robot Vacuum for Large Homes
Dreame Pick: The Dreame L60 Pro Ultra is built for big homes that need a robot vacuum to move smoothly between rooms.
Its ProLeap™ Robotic Legs cross obstacles up to 8.8cm, helping it handle thresholds that would strand many robot vacuums when moving between rooms. Liftable LiDAR navigation maps the home from above, then retracts to slide into gaps as low as 8.9cm, so it can still clean under low furniture.
It also includes 280+ object detection plus an extendable mop and side brush that reach edges and corners, so it covers more ground with fewer missed spots. Recommended over the L50 Ultra for buyers shopping today.
[product handle="l60-pro-ultra-robot-vacuum" rating="4.8" slogan="Best for Large Homes"]
Also consider: Roborock, a premium name often shortlisted for larger homes. Ecovacs, a long-running brand in robot vacuums.
Best Budget Robot Vacuum
Dreame Pick: The Dreame D20 Pro Plus is an excellent budget-friendly robot vacuum designed for studios and small apartments. It's the best budget robot vacuum option because it manages daily cleaning without the high price of flagship models.
Its 13,000 Pa Vormax™ suction power effectively tackles everyday dust and crumbs, while the dock can hold up to 150 days' worth of debris, reducing the need for frequent emptying. The HyperStream™ Detangling DuoBrush resists hair wrap, making it easier to prevent long hair from snagging the roller.
Additionally, the D20 Pro Plus combines vacuuming and mopping in one run, handling light floor washing without requiring a separate tool. Easy to set up, simple to operate, and unobtrusive in daily life, it's a solid entry point into automated cleaning.
For more, read budget vs high-end robot vacuums.
[product handle="d20-pro-plus-robot-vacuum" rating="5.0" slogan="Best Budget Robot Vacuum"]
Also consider: eufy, a popular value name for first-time buyers. iRobot, one of the most familiar names in robot vacuums. Yeedi, a budget-minded brand worth a look.
Match a Robot Vacuum to Your Home
Start with your floor type, then factor in pets and square footage. High-pile carpet requires more suction to reach debris deep in the fibres than hard floors, so pay closer attention to suction if carpet is your main surface, and lean towards the Best Overall or Mixed Floors picks above.
Hard-floor homes benefit more from mopping, which makes the Aqua10 Ultra Roller a good fit. Pet households should prioritize an anti-tangle brush and consider the L60 Ultra. Large homes need the navigation and threshold-crossing of the L60 Pro Ultra, while a small apartment is a good fit for the budget D20 Pro Plus.
Jump back up to the category that sounds most like your home: Best Overall, Pets, Mixed Floors, Hard Floors, Large Homes, or Small Apartments.
How to Choose a Robot Vacuum
Prioritizing good navigation and obstacle avoidance is essential, since a robot vacuum that gets stuck or pushes clutter around won't complete its cleaning. After that, consider features like an anti-tangle brush for pets and a mopping setup for hard floors. Check the suction power for carpets, and a self-emptying dock can be a real help if you want months of hassle-free use.
For a detailed look at each feature, see the robot vacuum buying guide.
How Dreame Tests Robot Vacuums
The standard industry test for a robot vacuum is dust pickup in an empty square room. Your home is not an empty room, so Dreame's testing starts where that test ends.
Hair is the clearest example. Engineers run each robot vacuum against a blended mix of hair lengths from 3cm to 30cm, built to clog and tangle a poorly designed roller brush. After every run, the team collects and weighs the hair from three collection points: the dust box, the roller brush, and the side brush. The result is a hair tangling rate, which shows how much hair the vacuum actually swallowed versus how much wrapped around its brushes. Cleaning efficiency alone hides that difference, and it's the difference that matters in a home with pets or long hair.
Durability gets the same scrutiny. Every model passes compression and drop testing, then vibration runs that simulate real shipping. Environmental simulation chambers expose finished units to extreme heat, humidity, rain, and salt spray.
Read the full methodology in How Dreame Tests Robot Vacuums.
Find the Robot Vacuum That Fits Your Home
The best robot vacuum for you comes down to your home. Pet owners should start with the anti-tangle brush, while homes with hard floors get more out of mopping. Carpet homes should prioritize suction, and a budget pick fits a small space, running hands-off for months.
Browse the full robot vacuum collection to compare the models above and find the one that matches your floors.
FAQ
What is the best robot vacuum overall?
The Dreame X60 Max Ultra Complete is the best all-rounder. With 35,000 Pa Vormax™ suction and 100°C mop-pad washing, one machine covers vacuuming and mopping across any home type.
What's the best robot vacuum for pet hair?
The Dreame L60 Ultra, thanks to its HyperStream™ Detangling DuoBrush. An anti-tangle brush matters more than raw suction in pet homes, since hair that wraps the roller jams it fast.
Do I need a robot vacuum that mops?
It depends on your floors. Hard-floor homes benefit from a robot vacuum mop like the Aqua10 Ultra Roller, while carpet-heavy homes get less from mopping and should prioritize suction instead.
Are budget robot vacuums worth it?
Yes, for small or simple homes. A budget robot vacuum like the D20 Pro Plus handles daily dust and crumbs well and runs hands-off for up to 150 days. The trade-offs are fewer dock features and simpler navigation than the flagship models.
How much should I spend on a robot vacuum?
Spend to match your home and how hands-off you want it. A budget pick is a good fit for a small apartment, while a do-everything flagship suits a larger or pet-heavy home that has to handle every surface. Focus on the features your floors actually need rather than reaching for the top of the range.
Is a self-emptying dock worth it?
Worth it for pet homes and larger homes where low maintenance matters most. A dock that empties itself for up to 150 days means months without having to touch the bin.
A powerful vacuum cleaner delivers suction that actually reaches the dirt. A high strength rating (measured in Pa) does nothing on its own if the airflow and brush can't use it.
A high strength rating (measured in Pa) does nothing on its own if the airflow and brush can't use it. Get that right, and a vacuum lifts pet hair out of the carpet instead of dragging it around. Get it wrong, and the vacuum still leaves grit behind.
Here are the most powerful vacuums for 2026, sorted by the task each one does best.
Most Powerful Robot Vacuum
Dreame Pick: The Dreame X60 Max Ultra Complete is the strongest pick in the robot vacuum collection, with 35,000 Pa Vormax™ suction that lifts embedded pet hair out of mid-pile carpet rather than leaving it stuck in the fibers.
It recognizes over 280 object types, steering around cords and pet bowls instead of bumping into them, and can climb thresholds up to 8.8 cm. It washes its own mop pads between runs using 100°C hot water. At just 7.95 cm tall, it fits under low furniture where taller robot vacuums can't reach. If you want one machine to handle your entire home with minimal effort, this is the highest suction robot vacuum in the collection.
[product handle="x60-max-ultra-complete-robot-vacuum" rating="4.8" slogan="Most Powerful Robot Vacuum"]
Also consider: Roborock has a strong following among robot vacuum enthusiasts, eufy is a popular pick among first-time buyers, and Ecovacs often appears in premium roundups.
Most Powerful for Carpet and Pet Hair
Dreame Pick: The Dreame L60 Pro Ultra brings the same 35,000 Pa Vormax™ suction to carpets, where it pulls hair and crumbs out of the pile rather than dragging them along the surface.
The DuoBrush system effectively cleans hair up to 30 cm long, preventing it from wrapping around and jamming the brushes. When you enable Smart Carpet Cleaning in the app, suction automatically increases when a rug is detected. ProLeap™ legs help the vacuum cross obstacles up to 8.8 cm, so it can handle transitions between rooms and varying floor levels. For deep-pile carpets and high-traffic areas where pets shed most, this is the model to choose.
[product handle="l60-pro-ultra-robot-vacuum" rating="4.8" slogan="Most Powerful for Carpet and Pet Hair"]
Also consider: Shark is a name many carpet owners already trust, Dyson carries a premium reputation, and Roborock offers a wide range of carpet-capable models.
Most Powerful Wet/Dry Vacuum
Dreame Pick: On sealed hard floors, the most powerful solution is a cordless wet/dry that can vacuum and mop in one pass. The Dreame Aero Pro stands out in this category, offering 25,000 Pa of suction power in an ultra-slim 9.86 cm body.
TangleCut 2.0 scrapes hair off the roller as it spins, so spills and sticky residue clear without the brush jamming, even when dried pet tracks are mixed in. It runs up to 60 minutes on a charge, cleans its own roller with 90°C hot water, then dries it in five minutes with 95°C flash drying so it never goes back damp. For a slim but powerful cordless vacuum for sealed hard floors like tile and vinyl, this is the pick.
On carpet, it dry-vacuums only, since pulling water from the carpet requires a dedicated carpet cleaner. Compare our full range of wet dry vacuums to find the right model.
[product handle="aero-pro-wet-dry-vacuum" rating="4.9" slogan="Most Powerful Wet Dry Vacuum"]
Also consider: Tineco is well known in the cordless wet/dry space, Bissell is a long-standing name in floor care, and Dyson brings its premium reputation to the category.
Most Powerful for Dedicated Hard Floor Cleaning
Dreame Pick: The Dreame Matrix10 Ultra is built for mopping and backed by 30,000 Pa Vormax™ suction.
Its Multi-Mop™ Switching Dock changes the pad to match the room, so a nylon scrubbing pad tackles kitchen grease, a water-absorbing sponge pad handles damp bathroom floors, and a thermal pad is for living areas and wood. A Three-Solution Compartment keeps separate cleaning solutions ready, including a dedicated wood-floor care solution for sealed wood, so each surface gets the right treatment rather than one damp pad for everything.
Dual Omni-Scrub mopping presses the pad down at 8N and scrubs at 165 RPM for even contact on wood and tile, and the 100°C ThermoHub™ washes the pads between runs so they start fresh every time.
[product handle="matrix10-ultra-robot-vacuum" rating="4.7" slogan="Most Powerful for Hard Floors"]
Also consider: Roborock offers a wide range of mopping-capable models, and Ecovacs is a familiar name in robot mopping.
What Makes a Vacuum Powerful
The Pa rating measures the suction the motor generates, but actual cleaning power depends on more than just that number. The air path and brush design must deliver that suction directly to the floor. If there are leaks or the brush isn't suited to your floor type, much of the suction is lost before it reaches the dirt. That's why a vacuum with a high Pa rating can sometimes perform worse than a lower-rated model in actual use.
When it comes to raw suction, the Dreame X60 Max Ultra Complete leads the category with 35,000 Pa, far above the 10,000 to 22,000 Pa range of most premium robot vacuums.
For a complete understanding of suction power, check out our guide on what's considered good suction for a vacuum cleaner, and another on why vacuums lose suction over time.
How to Choose the Right Powerful Vacuum for Your Home
Choose suction power based on your floors, not just the highest number. Hard floors are best cleaned with a controlled wet/dry vacuum that can mop as it vacuums, while thick carpets need a high-suction robot vacuum with a brush designed to detangle hair. If you have pets, prioritize strong suction and anti-tangle brushes to handle fur, which is the main cause of jams.
For larger homes, look for longer runtime and the ability to cross thresholds. Deciding between a hands-off robot vacuum and a powerful cordless model depends on whether you prefer automated or on-demand cleaning.
For more details, check out our robot vacuum buying guide for a full overview, and see our comparison of budget vs. high-end robot vacuums to help you decide how much extra suction power is worth.
How Dreame Tests Robot Vacuums
The standard industry test for a robot vacuum is dust pickup in an empty square room. Your home is not an empty room, so Dreame's testing starts where that test ends.
Hair is the clearest example. Engineers run each robot vacuum against a blend of hair lengths from 3 cm to 30 cm, designed to clog and tangle a poorly designed roller brush. After every run, the team collects and weighs the hair from three collection points: the dust box, the roller brush, and the side brush. The result is a hair tangling rate, which shows how much hair the vacuum actually swallowed versus how much wrapped around its brushes. Cleaning efficiency alone hides that difference, and it's the difference that matters in a home with pets or long hair.
Durability gets the same scrutiny. Every model passes compression and drop testing, then vibration runs that simulate real shipping. Environmental simulation chambers expose finished units to extreme heat, humidity, rain, and salt spray.
Read the full methodology in How Dreame Tests Robot Vacuums.
How Dreame Tests Wet Dry Vacuums
A wet-dry vacuum gets judged on two jobs at once: how well it cleans your floor, and how well it cleans itself. Dreame's lab tests both.
Floor cleaning starts with engineered messes. Lab technicians work butter, olive oil, and ketchup into hard flooring, then measure how much lift they get in a single pass. A robotic-arm streak test follows, pushing and pulling the machine across the floor and measuring the water residue left behind after each round.
Hair handling gets the harshest treatment. Repeated rounds of wet and dry hair are fed through the brush system, and the brush is inspected for tangles after each round.
Self-cleaning is tested as its own discipline. The lab coats the roller in sauce and pet hair, runs the one-press self-clean cycle, then tears down the brush head to inspect the interior. Thermocouples confirm the drying temperature, and sound meters confirm the dryer stays quiet enough to run at night.
One important limitation shapes our testing: on carpet, these machines are designed for dry vacuuming only. Extracting liquid from carpet requires a different type of machine, and Dreame's recommendations are based on this distinction.
The Most Powerful Vacuum Is the One That Fits Your Floors
Households with hard floors get the best results from a cordless wet/dry vacuum. For homes with carpet or pets, look for high suction and a detangling brush. If you want a hands-off, whole-home solution, opt for the most powerful robot vacuum on the market. Focus on the cleaning task that matters most in your space, then choose the model designed to handle it.
Ready to compare? Browse the robot vacuum collection for hands-off whole-home cleaning, or the wet-dry vacuum collection if your floors are mostly hard surfaces.
Most Powerful Vacuum Cleaner FAQs
What is the most powerful vacuum cleaner?
In terms of suction power, the Dreame X60 Max Ultra Complete leads the category at 35,000 Pa, well above the 10,000 to 22,000 Pa range of most premium models.
How many Pa is powerful for a vacuum?
Most premium robot vacuums offer between 10,000 and 22,000 Pa of suction. Anything above that is considered strong, with 35,000 Pa at the top end of the range. Keep in mind, Pa isn't the only factor to consider.
Is a higher Pa always better?
No. Airflow, a sealed air path, and brush design matter as much as the suction power. A lower-Pa vacuum with better airflow and the right brush can outperform a higher-suction vacuum that lacks both.
What is the most powerful robot vacuum?
The X60 Max Ultra Complete offers 35,000 Pa of suction power. This extra strength makes a noticeable difference on mid-pile carpet, pulling embedded pet hair out of the fibers instead of just cleaning the surface.
Are cordless vacuums powerful enough for a whole home?
For many homes, yes. For deep carpet and heavy pet hair, suction and brush design matter more than cordless versus corded. On hard floors, a cordless wet/dry often cleans better than raw suction alone, which is why the most powerful cordless vacuum for hard floors is a wet/dry model.
Robot vacuums have transformed home cleaning by offering a faster, easier, and more convenient way to maintain a tidy space. With features like hands-free operation, smart mapping, and customizable schedules, these devices automate the cleaning process, saving valuable time and energy for busy households.
The global market for robotic vacuum cleaners is projected to reach USD 29.82 billion by 2030, fueled by a rising demand for smart home technology and hands-off cleaning. Despite their popularity, you should still consider whether a robot vacuum is right for your cleaning routine and the layout of your home.
The Many Advantages of Robot Vacuums
Let's pierce the veil over some of the most notable advantages robot vacuums bring to the table.
1. Hands-free cleaning
Robot vacuums are a bonus, particularly for those with a packed schedule. They save you time and effort by cleaning your floors without requiring your constant attention. Many modern models feature scheduling options and voice assistant integration with Direct Voice Call, Alexa, Google Home, or Siri. This means you can set it to clean when it's convenient for you, such as while you're at work or relaxing at home. The hands-free approach makes everyday cleaning hassle-free, leaving you with more time to enjoy your life.
2. Advanced maneuverability: glide over obstacles and reach deeper corners
Take the Dreame X50 Ultra and its world-first retractable legs, which lift it over obstacles up to 2.36in (6cm) high, like carpet edges and door thresholds, with minimal noise. The newer X60 Max Ultra Complete pushes that further, clearing thresholds up to 3.47in (8.8cm). Both models reach the spots that collect dust, sliding under low furniture and into tight corners to clear what builds up there. Their anti-tangle DuoBrush handles hair without wrapping or clogging
Curious how the obstacle crossing capability of robot vacuums keeps improving? Read our Why Smart Robot Vacuums Still Get Stuck (And How Hardware is Fixing It) report.
3. Precise and customized cleaning with smart mapping
Modern robot vacuums come equipped with cutting-edge sensors, like LiDAR and AI-driven navigation, to scan and create a precise map of your home. Once mapped, the vacuum plans an optimized cleaning path, avoiding obstacles while covering all areas of your floor. The smart mapping allows you to set specific cleaning schedules for different rooms, ensuring that your kitchen or bathroom gets the attention it needs without wasting time on areas that don't require cleaning.
4. Low maintenance, low cost
Modern robot vacuums are built to take care of themselves. With self-emptying, self-refilling, and self-charging features, they automatically return to their dock when the battery runs low and empty their dustbins without your help. Many advanced docks can store 90-150 days of debris, cutting down on daily maintenance and saving you time. Even better, their efficient use of water and power keeps operating costs low, making them a smart, budget-friendly choice for busy homeowners who want a spotless home with minimal effort.
5. Improved air quality with consistent cleaning
Regular use of vacuum cleaners equipped with HEPA filters can significantly improve indoor air quality by reducing dust, pet hair, and allergens that accumulate in the home. A study found that HEPA-equipped vacuums do not significantly increase particulate matter (PM) emissions during operation, which prevents harmful particles from being released back into the air. This means that consistent vacuuming with these devices helps keep allergens, dust, and pet hair from circulating in the home, leading to a cleaner and healthier environment, especially for those with respiratory issues.
In addition to minimizing particulate emissions, vacuuming regularly helps prevent the buildup of dust and allergens, which can worsen indoor air quality. The study showed that vacuums without HEPA filters, such as bagged models, emitted higher levels of PM, suggesting that vacuums with HEPA filtration are far more effective at maintaining clean air. With continued use, these vacuums contribute to a healthier living space, particularly for individuals who suffer from allergies or asthma, by reducing the number of airborne particles that could trigger respiratory problems.
6. Deeper clean with bacteria removal technology
Many high-end robot vacuums are designed with bacteria removal features. These vacuums often include UV-C sterilization or antibacterial brush materials that help eliminate harmful microbes and bacteria from your floors. This added layer of protection ensures that your home is not only visibly clean but hygienic as well. This is particularly beneficial in homes with young children, elderly family members, or pets, as it helps maintain a safe and clean environment, free from germs and harmful bacteria.
7. You can name your robot vacuum
Naming is a fun part. You can name your robot vacuum as Moptimus Prime, Meryl Sweep, Steve McClean, among other quirky names, and share your unique "adventures" on Instagram and TikTok. Anyway, naming your robot vacuum not only makes it feel more personal but also allows you to share its cleaning exploits with friends and family.
What are the Potential Drawbacks of Robot Vacuums?
While robot vacuums can facilitate our lives, they do come with some drawbacks. Let's get to some potential challenges and how Dreame robot vacuums address them.
1. Higher initial cost
Robot vacuums fall within a price range of $200 to over $1,500 on the whole. Lower-end models typically cost around $200-$400, offering basic functionality that can clean efficiently but may not meet the needs of more diverse cleaning tasks. The shining features, such as impressive suction power, smarter navigation, longer battery life, etc., have pushed up the overall price, often reaching $800-$1,500+.
Dreame Take: We successfully struck a balance between price and performance, catering to a wide variety of user needs by introducing three categories: premium, advanced, and essential.
2. Larger homes require several cleaning cycles
Understanding how battery life affects cleaning time is crucial. For larger homes, robot vacuums may need to complete several cleaning cycles to cover the entire space. This is quite a challenge for limited battery life.
Dreame Take: Our robot vacuums come equipped with long-lasting batteries capable of cleaning large spaces on a single charge. The X60 Max Ultra Complete runs on a 6,400mAh battery and recharges fully in about 80 minutes, so even after a big job it's ready again quickly. For larger homes, that mix of capacity and fast charging keeps cleaning moving with fewer stops.
3. Some robot vacuums can be noisy
Generally quieter than traditional models, robot vacuums can still produce noticeable noise (60dB to 75dB, comparable to street noise) during operation, especially when running at higher suction power or getting over obstacles. Such noise may be particularly disruptive in quieter environments, such as bedrooms or offices.
Dreame Take: Dreame's robot vacuums are designed with noise-reducing technology that ensures quieter operation compared to many other models. For example, the Dreame X50 Ultra uses the integrated shock absorption system to prevent harsh collisions and maintain an impressively low noise level.
4. First-time set-up might seem complicated
For first-time users, setting up a robot vacuum and syncing it with smart home systems can sometimes be challenging. The initial configuration might take longer than expected, especially when trying to connect the vacuum to the app or configure custom settings. Users may also need time to learn how to adjust cleaning schedules and zones properly.
Dreame Take: Dreame robot vacuums come with a highly intuitive Dreamehome app, that simplifies the setup process and integrates with smart home systems like Alexa and Google Home. The app offers a user-friendly interface, allowing users to easily configure cleaning schedules, set no-go zones, and control cleaning modes. With regular software updates, Dreame ensures that users have a seamless experience and minimal connectivity frustrations, especially for first-time users.
5. Suction power varies
The suction power of robot vacuums can vary significantly between different models. Most budget-friendly models offer suction power around 1,000 to 2,500Pa, which is sufficient for light cleaning on hard floors. However, these vacuums often struggle to pick up dirt or debris from thicker carpets, corners, or high-pile rugs. Mid-range models usually range from 3,000Pa to 5,000Pa and provide better suction, but they still may not be effective for homes with pets or large, heavily soiled areas.
Dreame Take: Dreame's high-end robot vacuums use powerful suction systems that clean well across the whole home. The X60 Max Ultra Complete, for example, pairs 35,000Pa Vormax™ suction with the HyperStream™ Detangling DuoBrush, pulling debris from tight corners and narrow gaps while handling hair up to 15.75in (40cm). Strong suction and a tangle-resistant brush mean edges and the space under furniture get cleaned thoroughly.
Should You Get a Robot Vacuum?
Whether a robot vacuum is right for you depends on several factors. The advantages and disadvantages of robot vacuums above apply to nearly every model, but how much each one matters comes down to your home, your pets, and your budget.
A small apartment with hardwood needs a different vacuum than a large house with carpet and two shedding dogs. If you're weighing the decision to get a robot vacuum for your home, this guide breaks down whether a robot vacuum is worth it for your household.
Choosing the Right Robot Vacuum
A robot vacuum makes sense when it fits your home and your routine, not when it has the longest feature list. Match the suction, brush type, and navigation to your floors and pets, and daily cleaning turns into something you stop thinking about.
Most Dreame models handle that mix with strong suction, self-emptying docks, and anti-tangle brushes built for pet hair. Browse the Dreame robot vacuum collection to find the model that suits your space.
Advantages and Disadvantages of Robot Vacuums FAQ
Which is better, a robot vacuum or a robot mop?
While robot vacuums are designed to pick up dirt, dust, and pet hair from floors, robot mops specialize in mopping, leaving floors sparkling clean by wiping away sticky residues, spills, and grime. If you want a vacuum for dirt and hair pick up only, a robot vacuum will do the job. If you want to maintain shiny, clean floors without manually mopping, a robot mop may be a better option. For complete home cleaning, some people opt for a robot vacuum-mop combo for the best of both worlds. Read Robot Vacuum No Mop or Combo: Which Is Best? to make your decision.
How to choose a good robot vacuum?
When selecting a robot vacuum, consider suction power, battery life, navigation, and maintenance. For pet owners, a model with anti-tangle brushes and strong suction is ideal. Capable battery (eg. 6,400mAh) suits larger homes. Look for smart features like app control and voice assistant integration, as well as self-emptying, mop washing and mopping for convenience.
How efficient is a robot vacuum for pet hair?
Robot vacuums excel at picking up pet hair. With powerful suction (20,000Pa) and anti-tangle brushes, they easily get hair from carpets and hard floors. These vacuums are designed to handle pet hair without getting clogged.
Can you integrate a robot vacuum into a smart home system?
Yes, many robot vacuums, including the Dreame's, work seamlessly with smart home systems, and support protocols like Matter. You can also try the Dreamehome app to control and monitor the vacuum with voice commands or your smartphone.
Bamboo floors are warm and durable, but they don't handle standing water well. The key to cleaning them is to use as little moisture as possible, just enough so your cloth or mop is barely moist, not dripping.
You want the bamboo to dry quickly after wiping. Follow this rule and your bamboo floors will stay smooth and bright. If you let water pool, it can seep into the planks, causing the finish to lift and the boards to warp or swell.
This guide walks you through the safe method and the common mistakes that shorten a bamboo floor's life.
What Makes Bamboo Floors Different
Bamboo may look and feel like hardwood, but it's actually a grass, which means it reacts to water in its own way. While most wood floor cleaning tips work well, moisture is the key factor to watch with bamboo floors.
Most modern bamboo comes sealed with a polyurethane finish, which tolerates a barely-damp mop. Older or oil-finished bamboo is more open and needs drier methods. Before you settle on a routine, find out which one you have.
Put a few drops of water on an out-of-the-way spot. If it beads, the seal is intact and light damp cleaning is fine. If it soaks in, treat the floor as unsealed and keep it dry. Getting this right shapes how to clean bamboo flooring for the rest of its life.
The Right Tools for Bamboo Floor Care
The safest way to clean bamboo floors is to start with a dry method, then follow up with a barely damp pass. Use a microfiber dust mop or a vacuum to pick up dust and grit that could scratch the finish. Our hardwood floor vacuuming tips work just as well for bamboo. For the damp step, use a microfiber mop that you can wring out almost completely.
When it comes to the best cleaner for bamboo floors, stick with a pH-neutral formula labeled safe for bamboo or hardwood. This type of cleaner is ideal for most homes because it removes dirt without damaging the floor's protective seal.
Here's a list of what not to use on bamboo floors:
Stiff bristles scratch the surface.
Oil soaps leave a film on sealed bamboo.
Vinegar is acidic and dulls the finish over time.
Steam mops are the quickest way to damage a bamboo floor, so keep them off it entirely.
Important: Never use a steam mop on bamboo, even one labeled "safe for hardwood." The high-temperature moisture from steam can penetrate bamboo's surface in ways that cause swelling or damage, unlike traditional hardwoods such as oak or maple.
Cleaning Routine for Bamboo Floors: Daily, Weekly, Monthly
Bamboo floors are easy to maintain with a simple schedule. Dry clean often, damp clean only when needed. Since grit is what wears down the finish, most of your regular cleaning should focus on removing dust and dirt with dry methods.
Daily: dry-vacuum or run a microfiber dust mop to clear grit and pet hair before it scratches.
Weekly: a barely-damp microfiber pass with a pH-neutral cleaner.
Monthly: a slightly more thorough damp clean, with extra attention to high-traffic paths.
Never: steam, vinegar, flood-mopping, or hot water.
This cleaning routine also explains how to mop bamboo floors without overdoing it. Always use a damp mop, never a wet one. A little moisture goes a long way.
How to Clean Bamboo Floors Safely: Step-by-Step
Cleaning bamboo floors safely involves a six-step process that starts with dry methods and uses as little water as possible. Follow these steps in order to remove grit before any moisture touches the surface.
Clear the floor. Lift rugs and floor mats, move any light furniture you can shift easily, and pick up cords, toys, and larger bits of debris so the surface is fully clear.
Dry-vacuum or dust-mop the whole floor to remove loose grit.
Spot-test your cleaner in a hidden corner before using it everywhere.
Apply the cleaner to the mop pad, not straight onto the floor.
Mop with the grain of the bamboo, working backward toward the door.
Dry the floor right away with a clean microfiber cloth, and do not let water sit.
Pro-tip: Put the cleaner on the mop pad, not the floor. Spraying or pouring straight onto bamboo creates little pools the surface cannot handle, even for a moment.
So, can bamboo floors be mopped? Yes, with a damp pad and quick drying. Those are the by-hand steps. If you would rather not repeat them every time, there is a faster way to cover the same ground in one pass.
Wet/Dry Vacuums and Bamboo: The Honest Answer
You can use a wet/dry vacuum on bamboo, but the honest answer is to keep it in dry mode for everyday cleaning. Wet mode on these machines is built for sealed hard floors like tile and vinyl, and the default settings push out more water than bamboo can safely take.
If you would rather vacuum and mop in fewer passes, a slim cordless model like the Dreame Aero Pro handles daily bamboo care in dry mode. Its 25,000 Pa suction lifts the grit that scratches the finish and TangleCut™ 2.0 lifts pet fur and long hair instantly, so your roller stays clear without clogs or residues. Its 3.88in (9.9cm) slim design slides under furniture for seamless reach.
What Damages Bamboo Floors (And What Most People Get Wrong)
Bamboo floors are damaged mostly from trapped moisture and acidic cleaners. The worst of it comes from cleaning advice that sounds safe. Three myths do the most harm.
Steam mops are not gentler than wet mopping
Steam forces hot moisture down into the planks, and that mix of heat and water swells the bamboo and breaks down the finish faster than a quick damp pass ever would. A wrung-out microfiber pad cleans just as well without soaking the wood.
Vinegar is not a safe cleaner for bamboo floors
The acid wears down the polyurethane seal over time and leaves the surface looking cloudy and dull. This is the clearest example of what not to use on bamboo floors. A pH-neutral hardwood cleaner lifts the same dirt without stripping the protective layer.
"Water-resistant" bamboo is not fully waterproof
Standing water still seeps into the seams and settles under the finish, no matter what the label promises. Wipe up spills the moment they happen.
There's a quieter culprit too. Everyday grit, the fine sand and dust that rides in on shoes and paws, grinds against the finish and scratches it a little more with every step. Keeping that grit off the floor matters as much as picking the right cleaner, and it's the easiest part to let slide on a busy week.
Keep Your Bamboo Floors Looking New
For homes that mix bamboo with carpet or tile, a robot vacuum clears the loose grit that wears down the finish, and it does the daily work without you thinking about it.
The Dreame L60 Pro Ultra fits these homes well. Its 35,000 Pa Vormax™ suction pulls grit off the surface before it can scratch, and its Extendable Mop & Side Brush reaches the edges and corners along your baseboards where dust builds up. Lean on its dry passes over bamboo and keep any damp work light.
[product handle="l60-pro-ultra-robot-vacuum" rating="4.8"]
Frequently Asked Questions
Can bamboo floors be mopped?
Yes, but only with damp methods. Sealed bamboo handles a barely-damp microfiber mop with a pH-neutral cleaner. Keep it damp, never wet, and skip steam entirely. Unsealed bamboo should stick to dry methods only.
What cleaner can you use on bamboo floors?
A pH-neutral cleaner labeled safe for bamboo or hardwood is your safest pick. Skip vinegar, which dulls the finish, and oil soaps, which can leave residue on sealed bamboo. When in doubt, plain warm water on a barely-damp microfiber mop beats the wrong cleaner.
What should you avoid using on bamboo floors?
Steam mops, vinegar, oil soaps on sealed floors, wax products, and abrasive pads all cause problems, along with any cleaner made for tile or stone. Hot water mopping is also off the table.
How do I make my bamboo floors shine again?
Dust the floor well, run a damp pass with a pH-neutral cleaner, then dry it right away with a microfiber cloth. The shine lives in the seal, so treat the seal gently and it comes back. If the floor still looks flat, it may be due for a refinishing pass, usually every 5 to 10 years.
How often should I clean bamboo floors?
Dust-mop or vacuum daily, since grit causes most of the scratching. Damp-clean weekly with a pH-neutral cleaner, and do a more thorough damp clean monthly. Wipe up spills the moment they happen, since standing water is the top cause of bamboo damage.
Finding carpet beetles in your home is an unsettling experience. One day your wool rug looks fine; the next you're spotting larvae in the fibers and wondering how long they've been there.
The frustrating part is that a quick spray or a once-over with the vacuum won't remove the carpet beetle problem. These beetles survive because of their life cycle, and until you break that cycle from egg through larva, they will keep coming back.
This guide covers how to confirm what you're dealing with and which cleaning methods work. We'll also explain some cleaning habits that keep carpet beetles away for good.
How to Distinguish Carpet Beetles from Other Bugs
There are two distinguishing traits that you'll see with carpet beetles. These beetles shed skins and small dark pellets in low-traffic areas like baseboards and closet corners, or even under your furniture. Those are the clearest signs of an active carpet beetle infestation, and they come from the larvae, not the adults.
Adult carpet beetles are tiny (about 1.5 to 3 mm) and mostly harmless on their own. You'll usually spot them drawn to light on the windowsill before you notice any fabric damage. It's the adult carpet beetle that eats through your wool, silk, and stored clothing. They're slightly larger (up to 5 mm) than adult beetles. They are bristled, and usually brown or tan.
Below are a few quick checks to rule out carpet beetle lookalikes:
Bed bugs: These bugs are flat and reddish-brown. They also bite, which carpet beetles don't.
Ladybugs: They look round and are brightly colored. These bugs don't damage your fabric.
Carpet moths leave silken tubes and visible webbing. Their larvae leave behind shed skins and pellets with no webbing.
If you need to confirm the species, the UC ANR Integrated Pest Management Program has detailed profiles for each.
How Carpet Beetles Get In and What Draws Them to Stay
Carpet beetles get in through open windows or screen gaps. They also hitch on cut flowers brought inside. Once in, they stay because your home has what their larvae need to feed on: natural fibers, pet hair, and undisturbed corners.
As long as you stay on top of removing pet hair from carpet, your home becomes a lot less appealing to these beetles.
The 5-Step Plan to Break the Carpet Beetle Life Cycle
Here's the full sequence before we go deeper into each step. Try to follow the order; you'll find that each one sets up the next step, and jumping ahead usually means you'll have to come back to redo it.
Deep vacuum every room, making sure you get the edges and under furniture
Wash all fabrics and pet beds in hot water, or steam-clean what can't go in the machine
Treat the hidden spots you don't normally check: Carpet beetles may stay in your closet corners, attic vents, storage bins
Apply targeted treatments where you found the most activity; natural options work well for mild cases, but you'll have to apply chemical ones for heavier infestations
Make sure to seal entry points and make a habit of checking cut flowers and window screens going forward
Important: If you find carpet beetles in stored woolens or silk, seal those items in plastic bags before cleaning the rest of the house. Carrying contaminated items from room to room is one of the most common ways an infestation spreads during clean-up.
The Right Way to Vacuum When You Have Carpet Beetles
Vacuuming works, but only if you're doing it with the right vacuum specifications and cleaning frequency. Here's what helps to eliminate carpet beetles from your property.
High vacuum suction pulls eggs out of the fiber base
Carpet beetle eggs and young larvae sit at the base of the carpet, not on the surface, so the vacuum's suction strength decides whether you actually remove them. A weaker vacuum clears the surface but leaves the eggs behind, which is why you can vacuum every day and still see new larvae.
Reaching that fiber base takes strong suction, roughly 15,000 Pa to 35,000 Pa on more powerful vacuums. If yours lands in that range, it can lift embedded eggs in a single pass.
A HEPA filter keeps the debris from going back into the air
Make sure that your vacuum comes with a HEPA filter. Larval skin sheds are a known asthma and skin-irritation trigger, and a vacuum without proper filtration can release those particles back into the room as you clean. A HEPA filter traps what gets captured and keeps it there.
Dreame Take: Most vacuums are tested on what they pick up, but they are not tested on what they release. Dreame builds HEPA-grade filtration into its collection because clean air and clean floors are part of the same job.
Slow, overlapping passes cover more than a quick run
Run your vacuum at about half your normal speed and go over each area twice: once in one direction, then again at a 90-degree angle. You'll want to pay close attention to edges and under furniture, as well as where your carpet meets the wall. These spots are where carpet beetle larvae tend to settle in.
Weekly vacuuming for a month is what breaks the cycle
Carpet beetle eggs hatch in about two weeks, so vacuuming once and stopping gives the next generation time to mature. Try to vacuum at least once a week over three to four weeks to clear new hatches before they cause more damage.
You can use a robot vacuum for daily maintenance between deep cleans to keep things from building up. Dreame's guide on how to clean carpet with a vacuum cleaner covers this in more detail.
Pro-tip: Empty the vacuum bin or bag outside immediately after every pass. If you leave it in the house, even briefly, larvae can crawl back into your living space from the bin. This single step protects all the work you just did.
How to Get Rid of Carpet Beetles Permanently
Heat is the only thing that kills carpet beetles at every life stage. Anything above 120°F (49°C) kills eggs, larvae, and adults on contact, which is why hot water and steam are your most reliable tools once vacuuming has cleared the surface debris.
Wash all fabrics in the hottest water they can handle
You can start by washing everything fabric-based in the affected area: bedding, pet beds, curtains, and throw blankets. Run them through the hottest wash cycle, but only as far as the material allows. As for items that can't go in the machine, such as wool rugs or upholstered furniture, steam cleaning at 200°F (93°C) or higher will kill eggs and larvae embedded deep in the fibers.
Hot-water mop your hard floors
Your hard floors need attention as well even if the infestation is centered on carpets. Carpet beetle larvae that drop off during cleaning can survive on tile or hardwood if the floor isn't treated.
The Dreame H15 Pro Heat washes floors with 185°F (85°C) water, well above the threshold needed to end the life cycle on contact. It vacuums and mops in a single pass, so you're not pushing debris around while you clean.
[product handle="h15-pro-heat-wet-dry-vacuum" rating="4.7"]
Steam closets, corners, and storage edges
Closet floors and storage areas are where eggs tend to settle undisturbed. You can run a steam cleaner along baseboards and corners to be as thorough as possible in the cleaning process. You'll also want to pay close attention to the edges where the floor meets the wall. Most dry cleaning treatments miss the edges, so heat is a more reliable option for these areas.
Natural vs. Chemical Treatments: What Works for Your Carpet Beetle Infestation
Natural treatment options are usually enough for mild carpet beetle infestation cases. However, if an infestation has spread across multiple rooms, you'll want to step up to chemical treatments.
Your choice of treatment depends on how bad the carpet beetle infestation is. Natural options work well for mild cases; chemical treatments might be a better choice when the infestation is heavier or has spread across multiple rooms.
Natural treatments for mild carpet beetle infestations
Food-grade diatomaceous earth is the most reliable natural option you can use at home. It works by damaging the larvae's exoskeleton, which dehydrates and kills them within a few days. All you have to do is to sprinkle a thin layer along baseboards and in closet corners, and then leave it down for at least a week. You can vacuum it up afterwards.
Boric acid works in a similar way and you can dust it into cracks and behind appliances. However, you'll have to keep both treatments here away from pets and children.
If you're just looking for a repellent, you can consider peppermint oil and vinegar. They discourage adult carpet beetles from laying eggs in treated areas, but they won't clear an established infestation. You'll get more out of them as a preventive layer on top of vacuuming and heat treatment.
Chemical treatments for heavier carpet beetle infestations
Residual insecticide sprays formulated for carpet beetles are your best option when the infestation has spread or natural treatments haven't cleared the pests. Try looking for products containing pyrethroids and follow the label instructions carefully.
If you have pets or young children at home, you might want to consider calling a pest professional instead. They can apply targeted treatments in the cracks and voids where carpet beetles hide, which is something household sprays might miss.
How to Prevent Carpet Beetles From Coming Back
Good prevention comes down to a few consistent habits that cut off the two main ways carpet beetles get in and settle: entry points and food sources for their larvae.
Seal off entry points and food sources
The most common ways carpet beetles find their way in are through gaps in screens and cut flowers. They may also enter through bird nests near vents. Here's what you can do to prevent the carpet beetles from entering here:
Store woolens and silks in sealed containers or vacuum bags during the off-season. Loose storage in cardboard boxes is an open invitation for carpet beetles to enter your property.
Inspect cut flowers before bringing them inside, especially during spring and summer when adult carpet beetles are most active.
Check window screens for tears and replace damaged ones.
Clear old bird nests from attic vents and eaves every fall, since these are a common source of new arrivals.
Cedar blocks and lavender sachets can help repel adults, but treat them as a supporting measure rather than a standalone fix.
Keep up a regular cleaning cadence
A consistent cleaning routine stops larvae from building up between deep cleans. These are the habits that make the biggest difference:
Vacuum at least once a week during peak season. You'll want to pay close attention to closet floors and under beds, as well as anywhere your pet rests.
Check your windowsills weekly during warm months. Adult carpet beetles tend to gather there before moving deeper into the house, so catching them early stops the next cycle before it starts.
Running a robot vacuum daily between deep cleans keeps things from building up. You can look deeper into carpet care tips which cover a full maintenance routine for more details.
You Can Get Rid of Carpet Beetles for Good
If you've made it this far, you already know more about carpet beetles than most people do when they first spot them. The good news is that you don't need specialist equipment or a professional visit to clear them.
What you do need is consistency; the treatments in this guide work, but only when you follow through across a few weeks rather than stopping after one clean. Make sure to stay patient with the process, and don't get discouraged if you see a few larvae after your first round. That's normal. Stay the course and your home will be clear before long.
Browse the Dreame collection of robot vacuums to find a model that fits your home's flooring and weekly cleaning routine.
Frequently Asked Questions
What kills carpet beetles instantly?
Heat is your most reliable option. Steam cleaning at 200°F (93°C) or hot-water washing above 120°F (49°C) kills carpet beetles at every life stage on contact, including eggs that vacuuming won't reach.
How long does it take to get rid of carpet beetles?
You can expect to clear a typical infestation in two to six weeks, as long as you vacuum consistently. The egg cycle runs about two weeks, so aim for at least three to four weekly cleans without skipping.
Can carpet beetles bite humans?
Carpet beetles don't bite, but you might develop itchy welts from contact with the bristly larvae. Their shed skins are also a known skin and respiratory irritant, so you should still keep up with HEPA-filtered vacuuming even after the infestation clears.
How do exterminators get rid of carpet beetles?
A professional pest exterminator will identify the source, then apply residual insecticide in cracks and voids where household sprays can't reach. They'll usually recommend that you keep up vacuuming and heat treatment at home alongside their treatment.
Will vacuuming alone get rid of carpet beetles?
Vacuuming can be enough if you're consistent with technique and frequency for a mild carpet beetle infestation. As for a heavier infestation, you'll want to combine it with steam or hot-water treatment to make sure the eggs don't survive. The technique in the vacuuming section above makes the biggest difference for light infestations.
You walk into the living room and smell it before you see it. Or you see it first, that wet patch in the carpet, and you already know what the next hour looks like. We've all been there. Maybe it's the new puppy who hasn't figured out the back door yet. Maybe it's your senior dog who can't hold it like she used to.
The good news is you can get dog pee smell out of carpet if you do it right. However, most people get it wrong, which is why the smell remains.
TL;DR: Get Dog Pee Smell Out of Carpet in 5 Steps
Blot fresh urine with white paper towels. Do not rub.
Apply an enzymatic cleaner (Nature's Miracle or similar) generously.
Wait at least 15 minutes for the enzymes to break down the uric acid.
Blot dry with clean towels and let the area air-dry.
Sprinkle baking soda over the area, leave overnight, and vacuum up in the morning.
How to Get Dog Pee Smell Out of Carpet (Quick Method)
The quick method works because it tackles dog urine in the right order. Skipping a step or doing them out of sequence is the most common reason the smell comes back a week later.
Step 1: Blot, don't rub. Press white paper towels into the wet spot and apply your body weight. Stand on it if you have to. The goal is to pull liquid up and out of the carpet fibers before it soaks into the padding underneath. Rubbing does the opposite. It pushes urine deeper and spreads the stain wider.
Step 2: Apply enzymatic cleaner. This is the single most important step. Enzymatic cleaners contain bacteria that produce enzymes which break down the uric acid crystals in dog urine. Standard cleaners (vinegar, soap, ammonia-based products) mask the smell but leave the crystals intact, which is why the smell returns the next humid day. Pour the cleaner generously. Saturate the same area the urine soaked.
Step 3: Wait 15 minutes. The enzymes need time to work. Some products recommend longer dwell times for severe stains. Read the bottle. Cover the spot with a damp towel during the wait so the area stays moist.
Step 4: Blot dry. Use a fresh stack of clean white towels. Press, don't scrub.
Step 5: Baking soda overnight. Sprinkle a generous layer of baking soda over the cleaned area. Let it sit overnight to absorb residual moisture and lingering odor. Vacuum it up in the morning.
That's the basic playbook. The rest of this guide covers the situations where the basic playbook isn't enough.
Pro-tip: Keep an enzymatic cleaner on hand at all times if you have pets. The 30-minute window after a fresh accident is the difference between a 15-minute fix and a multi-day padding-replacement project. Nature's Miracle is widely available at PetSmart and Amazon. There's no excuse not to have a bottle in the closet.
Why Dog Urine Smell Comes Back Even After Cleaning
Dog urine contains uric acid, which crystallizes as the urine dries. These crystals lock the odor compounds in place and reactivate every time the area gets damp. Humid weather, mopping nearby, even normal foot traffic on a sticky summer day will trigger the smell.
Standard cleaners can dissolve the surface-level urine but cannot break down the crystals themselves. Breaking those crystals down is the entire reason enzymatic cleaners exist. The enzymes eat the crystals, leaving nothing for moisture to reactivate.
Pheromones are the second factor. Dog urine contains them, and PetMD explains they encourage your dog to urinate in the same spot again. Standard cleaners don't break down those compounds, which is why veterinarians recommend enzymatic cleaners specifically for pet accidents.
If you used an ammonia-based cleaner, you made the problem worse. To a dog's nose, ammonia smells almost exactly like another dog's urine. You're not removing the marker. You're refreshing it.
The third reason is depth. If the urine soaked through the carpet into the padding, surface cleaning will not fix the problem. The smell is coming from underneath the visible surface. We'll cover that scenario in detail below.
Vinegar masks the smell. Baking soda absorbs it. Only enzymatic cleaners actually remove the compounds responsible for it. Learning how to get dog urine smell out of carpet means using the right cleaning product, not just more product.
Important: Never use ammonia-based cleaners on dog urine. Dogs smell the ammonia as another dog's territorial mark and will return to re-mark the same spot. This is the single most common reason pet urine smell keeps coming back even after thorough cleaning.
Step-by-Step: How to Remove Fresh Dog Urine from Carpet
For fresh accidents (within the first 30 minutes), speed is the difference between a 15-minute clean and a weekend project. Every minute the urine sits, more soaks down through the carpet fibers and into the padding. This is the full protocol on how to clean dog pee from carpet before it becomes a bigger problem.
Move fast, but don't panic
Drop everything and grab paper towels. Lots of them. White ones only. Colored towels can transfer dye into wet carpet.
Blot with full body weight
Place a thick stack of paper towels over the wet area. Stand on them. Shift your weight from one foot to the other to maximize contact. The goal is to physically pull liquid out of the carpet. A weak blot leaves most of the urine in the fibers. Replace the towels and repeat until they come up nearly dry.
Spot-vacuum heavy soaks (optional)
For a heavy soak, especially if the urine has had a few minutes to spread, a carpet extractor pulls liquid deeper than manual blotting can. These machines, the kind you can rent from a hardware store or buy for home use, spray cleaning solution into the carpet and immediately suction the dirty liquid back out, which keeps the urine from migrating further down while you work.
A wet/dry vacuum is not the tool for this, since the wet pickup is built for hard floors, not carpet. To be clear, an extractor catches the soak. It is not a urine deodorizer. Enzymatic cleaners are what break down the uric acid crystals, so follow up with one either way.
Apply enzymatic cleaner generously
Saturate the same area the urine soaked, not just the visible stain. The actual soak zone is usually about 30% wider than the visible wet patch. Pour generously enough that the cleaner covers the entire urine spot.
Cover with a damp towel for 15 minutes
The enzymes need moisture to stay active. A dry surface kills the reaction halfway through.
Blot dry, then air dry
After the dwell time, blot the area with fresh towels and let it air-dry completely. Don't walk on it until it's bone dry. Walking on damp enzymatic-treated carpet can grind cleaner residue into the fibers.
Avoid heat
Don't use a hair dryer or steam cleaner during the cleanup. Heat can set the proteins in urine and make the smell permanent. This is how you should remove dog urine from carpet without accidentally making it worse.
How to Get Old or Dried Dog Urine Out of Carpet
Fresh urine is one problem. Old, set-in urine is a different problem entirely. If you just moved into a rental and discovered old pet stains, or your dog has been hitting the same spot for months and you only now realized why the corner of the room smells, the standard quick method won't be enough.
Here's what you can do for old stains.
Step 1: Find the actual extent of the damage
Old urine doesn't always show as a visible stain. Get a UV blacklight flashlight. They're inexpensive on Amazon. Turn off the lights at night and shine the blacklight across the carpet. Dried urine fluoresces yellow-green. Most people find more spots than they realized.
Step 2: Re-wet the urine
This sounds counterintuitive but it's necessary. Old uric acid crystals need moisture to reactivate before enzymes can break them down. Pour warm (not hot) water on each spot until the area is damp. Yes, the smell will get worse temporarily. The crystals are reactivating, which means the enzymes can now reach them.
Step 3: Apply enzymatic cleaner with extended dwell time
For old stains, regular 15-minute dwell isn't enough. Saturate the spot, then cover with plastic wrap and a damp towel on top. Let it sit for 30 minutes, sometimes overnight for severe cases. The plastic wrap keeps the enzymes from drying out.
Step 4: Expect multiple treatments
One application of enzymatic cleaner will not remove months-old urine. Plan for at least two or three rounds, with the carpet drying fully between rounds. If round one doesn't get it, round two usually finishes the job.
Step 5: Document everything if you're living in a rental
If you're treating old pet stains in a rental, document everything. Photograph the original stains under blacklight and your treatment progress. At some point, the cost of professional carpet cleaning becomes lower than the risk of losing your security deposit.
Important: Know when to stop DIY and call a pro. This is how you can get rid of the dog pee smell on your carpet when the stain has been sitting for months.
Best Enzymatic Cleaners for Pet Urine
The wrong enzymatic cleaner will under-perform, especially on chronic or set-in stains. Below are the four enzymatic options worth knowing, plus a DIY recipe for when you're in an emergency with no bottle on hand.
Cleaner
Best For
Why It Works
Nature's Miracle Advanced Stain & Odor Eliminator
Fresh accidents, mild-to-moderate older stains, single-pet households
The widely-recommended default across pet-owner forums. Bio-enzymatic formula breaks down uric acid crystals. Wide retail availability (PetSmart, Amazon, Target). The Advanced formula is stronger than the standard one and is the version you want for carpet.
Rocco & Roxie Stain & Odor Eliminator
Stains that came back after enzymatic treatment, multi-pet households, chronic problems
Higher-concentration enzymatic formula. The next step up if Nature's Miracle didn't get the smell out on the first try. Particularly strong on returning smells. The price per ounce is higher, but you use less per application.
Angry Orange Pet Odor Eliminator
The "I cleaned the carpet but the room still smells" phase. Ambient lingering odor after enzymatic treatment
Citrus-based deodorizer, not an enzymatic urine remover. Useful for finishing a room after enzymatic cleaning has done its work on the carpet itself. Do not use it as your primary urine remover. It won't break down uric acid crystals.
Anti-Icky-Poo (AIP)
Padding-saturated urine, rental move-in mystery stains, multi-pet chronic problems
Professional-strength enzymatic cleaner used by carpet cleaning companies and animal shelters. Not the first thing to try, but the thing that often works when nothing else has.
DIY (warm water + Dawn + 3% hydrogen peroxide + baking soda)
Acute emergencies with no enzymatic cleaner on hand
Mix 1 cup warm water + 1 tbsp dish soap + 1/4 cup 3% hydrogen peroxide. Apply, blot, then sprinkle baking soda. Test on a hidden carpet area first (peroxide can lighten some dyes). Works for surface-level fresh urine but does NOT break down uric acid crystals. The smell will likely return. Follow up with a real enzymatic cleaner within 24 hours.
What to avoid
Ammonia-based cleaners (dogs re-mark the same spot), bleach (damages carpet and doesn't touch uric acid), vinegar alone (masks but doesn't dissolve crystals). Vinegar can work as a rinsing aid before enzymatic application, but it's not a urine remover on its own. Knowing how to remove dog urine smell from carpet means picking the right product first, not just applying more of the wrong one.
For a deeper breakdown of products and a longer comparison by stain type, our complete pet carpet cleaner guide goes into the specifics.
What If the Urine Soaked Through to the Carpet Padding?
If your smell returns within hours of a thorough cleaning, you might have padding saturation. At that point, knowing how to get pet urine smell out of carpet means treating the layer underneath, not the carpet fibers themselves.
Signs that the urine has soaked through to the padding:
The smell returns within hours of a thorough cleaning
A blacklight shows fluorescence below the visible carpet level
The wet area is significantly larger than the visible stain
The smell intensifies during humid weather even after multiple treatments
The padding cleaning method:
Pull back the carpet at the nearest seam. Most wall-to-wall carpet is held down with tack strips at the edges of the room. With work gloves and pliers, you can carefully lift a corner section. You don't need to remove it entirely. You just need access to the padding under the affected area.
Flood-treat the padding directly. Pour enzymatic cleaner onto the padding itself, not just the carpet backing. Use significantly more cleaner than you'd use on a surface stain.
Weighted dwell overnight. Place a damp towel over the treated padding and weigh it down with books. Leave it overnight. The enzymes need long contact to penetrate the dense padding foam.
Air-dry completely before reattaching. Damp padding under carpet grows mold. Use fans, open windows, run a dehumidifier. The padding needs to be fully dry before the carpet goes back down.
Know when the padding can't be saved. Sometimes urine has been sitting in padding for months and even professional treatment can't remove the smell. In those cases, replacing the padding (and possibly the carpet) is the only fix. Padding replacement is cheaper than full carpet replacement, and you don't always need to redo the whole floor.
How to Get Cat Urine Out of Carpet
Cat urine is a different challenge from dog urine. The chemistry is more concentrated, the smell is sharper, and cleaning takes longer.
Cats have more efficient kidneys than dogs, which is why their urine is more concentrated. Cat urine has higher uric acid content and stronger odor compounds per drop. The same enzymatic cleaners work, but they need to work harder.
Longer dwell time. For cat urine, plan for 30 minutes minimum, often overnight for set-in stains. Cover with plastic wrap to keep the enzymes active.
Multiple treatment cycles. A single application of enzymatic cleaner rarely finishes cat urine. Expect to treat the same spot two or three times, with full drying between treatments.
Padding replacement is more common. With dog urine, padding can often be saved with aggressive treatment. With cat urine, especially if the cat has been re-marking the same spot for months, the padding sometimes can't be saved. Pulling back the carpet to check the padding underneath is more often the right call with cats.
Pro-tip: If your cat is suddenly urinating outside the litter box, it's almost always either a medical issue (urinary tract infection, kidney problems, or another underlying condition) or a stress response (new pet, moved furniture, change in routine, dirty litter box). Talk to your vet before deciding it's a training problem. A cat that pees on the carpet usually has a reason.
Preventing Future Dog Pee Accidents on Carpets
Once the smell is gone, the goal is to keep it gone. Most pet urine carpet issues are about repeated accidents in the same spot over time. Here's how you can prevent the next accident.
Training and behavior
If you have a puppy or a recently adopted adult dog, consistent housetraining is the foundation. Take your dog out at predictable times, reward outside elimination immediately, and clean any indoor accident thoroughly with enzymatic cleaner so they don't return to the same spot. If a previously housetrained dog suddenly starts having accidents indoors, get them checked by a vet. Behavior changes often signal medical issues.
Carpet protection
Pet-safe carpet protector sprays add a thin invisible barrier that gives you more time to respond to accidents before urine soaks in. They aren't a substitute for cleanup, but they buy you the 30-minute window that matters most.
Daily cleaning frequency
For pet households, the right cleaning schedule prevents baseline odor buildup that masks fresh accidents. A daily robot vacuum run keeps pet hair and dander from accumulating in the carpet. A weekly enzymatic spot-check on known accident-prone areas catches small problems before they escalate. A monthly full-carpet treatment with carpet cleaner keeps the overall odor profile neutral.
Best Vacuums and Cleaners for Pet Households
A pet household needs a different vacuum setup than a non-pet household. You're dealing with more hair, more dander, more frequent accidents, and more variety in what gets cleaned. Here are the picks by use case.
Best wet/dry vacuum for pet accidents
The Dreame H15 Pro Heat is the best pick for fast accident response on hard floors like tile, sealed wood, vinyl, and laminate. It dispenses controlled 185°F hot water and immediately suctions the mess and cleaning solution back, so a fresh accident on a hard surface gets cleaned up in one pass instead of spreading or sitting.
Use it as your quick-response tool the moment you catch an accident on hard flooring, then follow up with an enzymatic cleaner for the smell itself. For accidents on carpet, blotting and an enzymatic cleaner are the right method, since wet pickup on a wet/dry vacuum is built for hard floors only.
Dreame's full range of wet and dry vacuums covers different models and price points for your household needs.
[product handle="h15-pro-heat-wet-dry-vacuum" rating="4.7"]
Best robot vacuum for pet households
The Dreame X60 Max Ultra Complete uses Binocular Vision enhanced by proactive lighting to detect and avoid pet waste among the 280+ object types it recognizes during cleaning runs. This matters because most robot vacuums will roll straight through a fresh accident and smear it across the floor, which turns a small spot into a much bigger one. At the time of writing, the X60 Max Ultra Complete holds the top spot in Vacuum Wars' "Top 20 Best Robot Vacuums in 2026" list.
The Dreame L60 Pro Ultra is the newest L-series model and a strong fit for a pet household. It runs 35,000 Pa Vormax™ suction, the same as the X-series flagship, so it pulls embedded hair and dander out of low-pile carpet instead of skimming the surface. Its DuoBrush system handles up to 11.8in (30cm) of pet hair with zero tangling, and ProLeap robotic legs clear thresholds up to 3.47in (8.8cm), so it moves room to room without getting stuck at carpet-to-tile transitions.
The Dreame L50 Ultra is the more accessible pick if the L60 Pro Ultra is more than you need. Its HyperStream™ Detangling DuoBrush also prevents the daily tangling that turns a robot vacuum into a maintenance job, though at 19,500 Pa it has less pull on deep carpet than the L60 Pro Ultra. The dock's AceClean™ DryBoard system washes the mop pads at 167°F to reduce residual ambient odor on hard floors. Brush type and dustbin maintenance are also the two biggest factors in how long a robot vacuum lasts.
This guide on how robot vacuums clean carpets covers what to consider for pet households. You can also browse the full range of robot vacuums for pet hair and the robot vacuum for carpet collection.
Best cordless vacuum for cleaning pet hair from furniture and vehicles
A robot vacuum and a wet/dry handle the main cleaning, while a cordless stick vacuum handles everything else. The Dreame Z30 delivers 310 AW of suction and up to 90 minutes of runtime in eco mode per charge, with a 150,000 RPM TurboMotor™ and auto-adjusting suction that ramps up when it detects more debris.
HEPA 14 filtration captures 99.99% of particles down to 0.1µm, which matters in pet households where dander and allergens build up faster. The included Pet Deshedding Tool combs out fur from furniture, stairs, and car upholstery, and the CelesTect™ celeste light on the multi-surface brush reveals dust you'd otherwise miss.
The Z20 handles the same tasks for cleaning pet hair with a bit less power. It features 250 AW of suction, a built-in pet brush head, and Blue Light Dust Detection that reveals fur and dander across carpet and hard floors, with up to 90 minutes of runtime covering up to 3,229 sq ft (300 m²) on a charge.
Check out Dreame's full range of cordless stick vacuums to find the right model.
Dreame Take: We're constantly developing pet-friendly solutions for everyday cleaning. The Dreame Robot Vacuums Pet Odor Solution is a plant-based and pet-safe formula that goes into a compatible robot vacuum's mopping tank and breaks down pet-accident odors on hard floors as the robot cleans.
When to Call Professional Carpet Cleaners
Sometimes DIY isn't the answer. Knowing when to call a professional is part of solving the problem.
Severe stain age
If you have discovered urine stains that have been sitting for months, like a rental move-in or a senior dog you didn't notice was having accidents, professional carpet extraction reaches depths that home equipment can't. Truck-mounted extraction units pull urine from padding without removing the carpet.
Multi-room chronic issues
If the smell is in multiple rooms and keeps coming back across all of them, you're probably dealing with an ongoing pet behavioral issue (talk to a vet) plus deep-seated urine buildup that one-room-at-a-time DIY treatment can't keep up with.
Health considerations
Urine ammonia exposure can be a real concern for households with young children, elderly residents, or anyone with respiratory conditions. If the smell is significant enough to be a daily air quality concern, professional remediation is worth the cost.
The Bottom Line on Getting Dog Pee Smell Out of Carpet
Getting dog pee smell out of carpet means breaking down the uric acid crystals, which only works with enzymatic cleaners. Blot fast, saturate the full soak area, give the enzymes time to work, and finish with baking soda. Old stains and padding-deep soaks take the same approach with longer dwell times and repeat treatments. Vinegar only masks the smell and ammonia makes it worse, so skip the shortcuts and reach for the product that actually removes it.
A wet/dry vacuum catches a fresh accident before it soaks into the padding, and a robot vacuum keeps pet hair and dander from building into the baseline odor that makes a pet home smell like one. Neither removes the smell of urine.
Browse Dreame robot vacuums for pet hair to find a model that fits your home to keep everyday pet hair and dander from adding to the problem.
Frequently Asked Questions
Does dog urine smell ever go away on its own?
No. Dog urine contains uric acid that crystallizes as it dries, and the crystals will reactivate with humidity for years if they're not broken down. The smell may seem to fade temporarily in dry weather, but it'll come back the next humid day. Enzymatic treatment is the only way to actually remove it.
What kills the smell of dog urine permanently?
Enzymatic cleaners. The enzymes eat the uric acid crystals in dog urine, which is what locks the smell in place. Standard cleaners mask the surface odor but leave the crystals intact. Look for a product labeled "enzymatic" or "bio-enzymatic" and apply it generously enough to reach the full soak area, not just the visible stain.
Can baking soda remove dog urine smell?
Partially. Baking soda absorbs surface-level odor and moisture, which is why it's a useful finishing step after enzymatic cleaning. By itself, it can't break down uric acid crystals, so it won't fix the underlying problem. Use it as a deodorizing layer on top of enzymatic treatment, not as a replacement.
Will a carpet cleaner remove dog urine smell?
A carpet extraction cleaner (the rental kind from a hardware store, or a wet/dry vacuum like the H15 Pro Heat) pulls surface-level urine and moisture out, which helps. It won't break down uric acid crystals on its own. The full protocol is: extract first, then apply enzymatic cleaner. Extraction alone gets you maybe 60% of the way.
How long does dog urine smell last on the carpet?
Untreated, dog urine smell in carpet can last for years. The uric acid crystals don't break down naturally and continue reactivating with humidity indefinitely. With proper enzymatic treatment within the first 30 minutes of an accident, the smell can be completely gone in a day. Old stains take longer, often multiple treatment cycles.
Can I use vinegar on dog urine?
Vinegar is a partial solution. It can neutralize fresh urine acids and works as a rinsing aid before enzymatic treatment, but it doesn't break down uric acid crystals on its own. Used by itself, vinegar usually means the smell returns. Used as a step before enzymatic application, it can help slightly.
What is the best enzyme cleaner for dog urine?
Nature's Miracle Advanced is the most-recommended starting point and is widely available at PetSmart and Amazon. For chronic returning smells or multi-pet households, Rocco & Roxie is a stronger option. For severe cases like padding saturation or rental move-in stains, Anti-Icky-Poo is the professional-grade option.







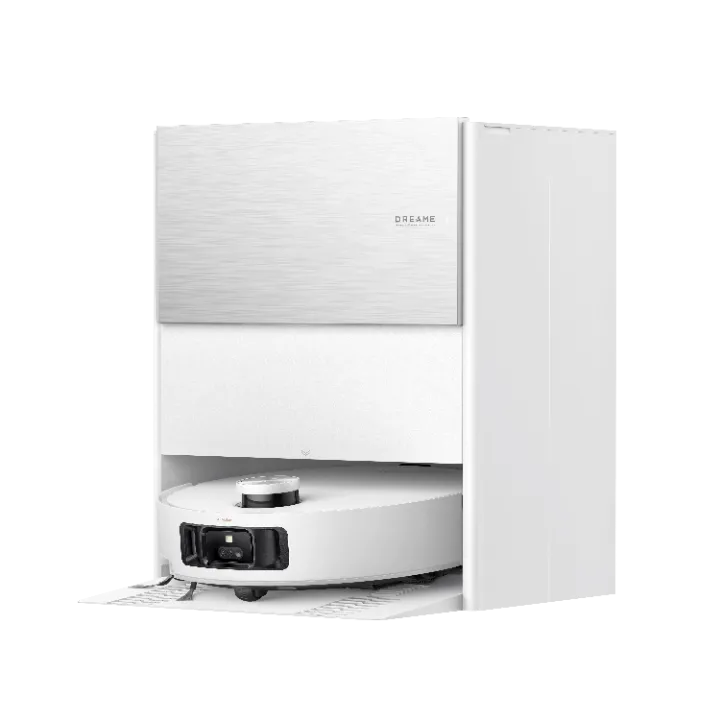
















 Robot Lawn Mowers


































 Humidifiers


 Smart Door Lock


 Australia
 中国大陆
中国大陆 日本
日本


 Türkiye


 Ireland
 Portugal
 Italia
 Netherlands
 Belgium
 Greece
 Polska
 Norway
 Sweden
 Finland
 Denmark
 Hungary
 Czechia
 Slovenia
 Croatia
 Switzerland
 United
Kingdom
United
Kingdom
 Canada


 Colombia


