Black Friday Sale Is Live! Best Prices of 2025
00
Days
: 00
Hours
: 00
Mins
: 00
Secs
Shop Now > close button
How to Clean Bathroom Surfaces Like a Pro in 10 Steps

How to Clean Bathroom Surfaces Like a Pro in 10 Steps

Editorial TeamDreame |
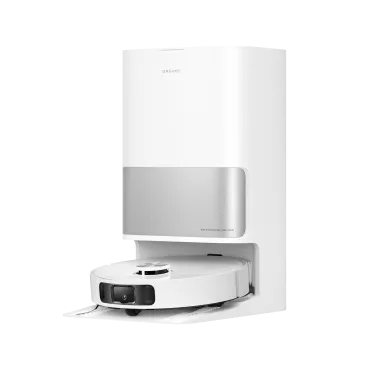
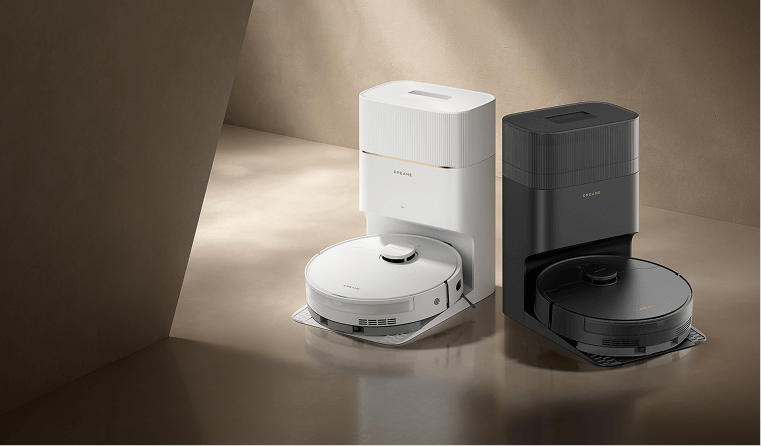
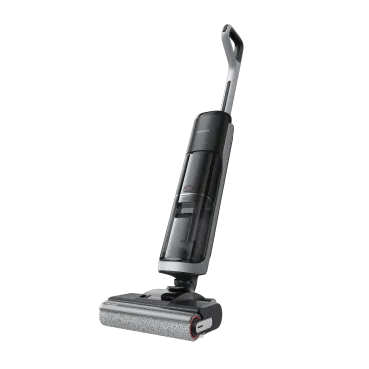
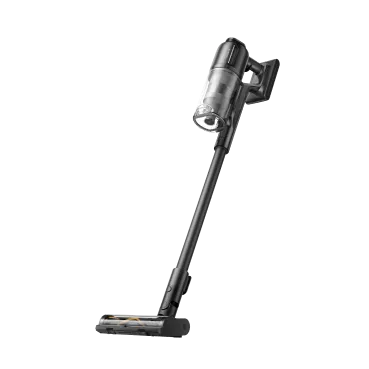
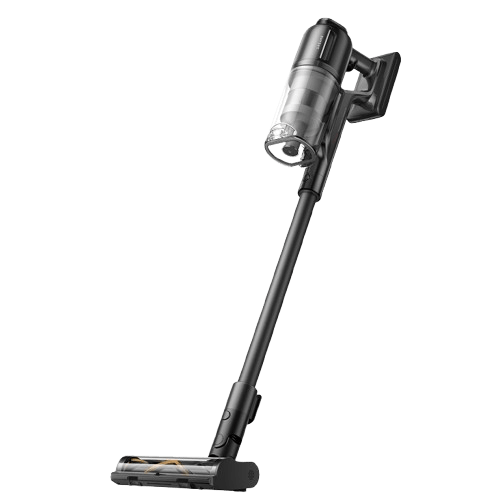
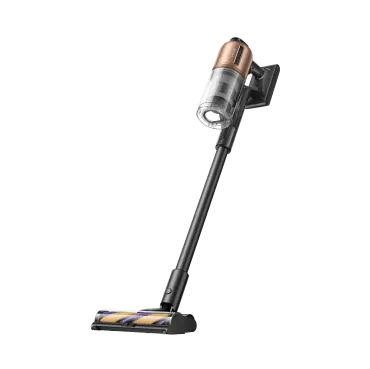
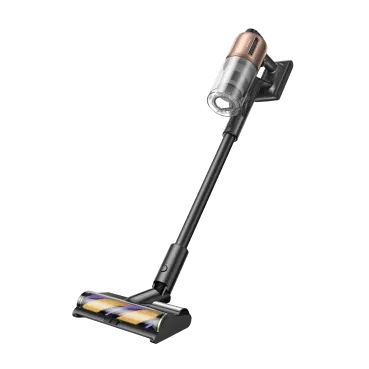
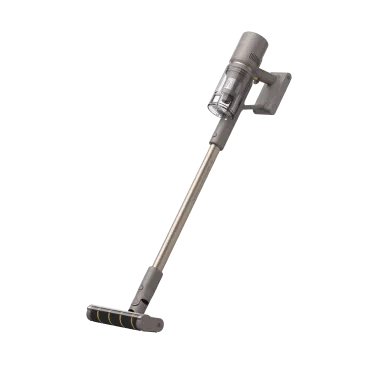
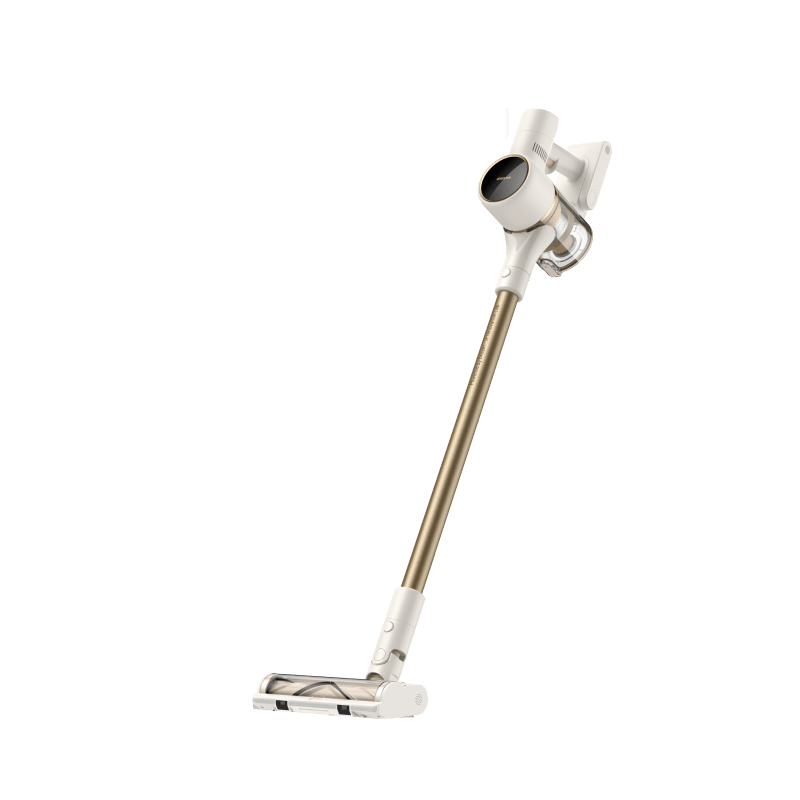
A clean bathroom helps people feel more relaxed at home. It also supports good health. Water spots, soap scum, and bacteria can build up quickly on surfaces. Over time, this can lead to stains, bad smells, and even mold. Keeping your bathroom clean does not have to be overwhelming. With the right plan, anyone can do it in small, simple steps. This article introduces a 10-step guide to cleaning all bathroom surfaces the right way. Each step focuses on one task at a time, so no area is missed. You will also learn about tools that save time and energy, such as wet and dry vacuums, robot mops, and smart cleaning tips. Supplies for Effective Bathroom Cleaning Before starting, it helps to gather everything in one place. This saves time and keeps you focused. You won't need to stop and search for anything once the cleaning begins. Cleaning Tools Microfiber cloths: These grab dust and wipe surfaces without leaving streaks. Toilet brush: Used to scrub inside the toilet bowl. Scrub brush: Useful for sinks, tubs, tiles, and grout. Squeegee: Helps with mirror and glass door cleaning. Vacuum: A handheld or wet and dry vacuum removes dust and dirt from tight areas. Bucket and mop: Used for floors that need water-based cleaning. Gloves: Protect your hands from chemicals and dirty water. Cleaning Solutions All-purpose cleaner: Works on sinks, countertops, and many other surfaces. Glass cleaner: Leaves mirrors and windows clear. Toilet cleaner: Designed for deep bowl cleaning and stain removal. Tile and grout cleaner: Breaks down tough buildup on floors and walls. White vinegar and baking soda: Great for soap scum and drains. Disinfectant spray or wipes: Use only on high-touch areas like flush handles, faucets, and doorknobs. Step-by-Step Guide to Clean Bathroom Surfaces Now that everything is ready, it's time to move through the bathroom step-by-step. 1. Declutter Your Bathroom Cleaning becomes easier when surfaces are clear. Start by removing all loose items. These include bottles, razors, tissue boxes, towels, and rugs. Move them to another room or hallway. This gives you full access to every area that needs attention. Look through baskets, containers, and drawers. Throw away expired products, broken tools, or anything you no longer use. If you have items that are rarely used, put them into a cabinet or storage bin. 2. Dust and Vacuum from Top to Bottom Begin with the highest spots in the room. Dust light fixtures, shelves, the top edges of mirrors, and the tops of door frames. Use a microfiber cloth or a long-handle duster. Work from the top down, so dust falls to areas that haven't been cleaned yet. Move to the middle areas next: windowsills, towel racks, and countertop edges. Wipe with a dry cloth to collect hair, lint, and loose dirt. Finish with the lower sections, including baseboards and floor edges. A vacuum is helpful here. Use one with a narrow attachment to reach along corners and tight spots. Wet and dry vacuum cleaners can save time during this step. They pick up fine dust, dry hair, and small crumbs from floors, tile edges, and around the toilet base without scattering debris. Take the Dreame H14 Pro Wet and Dry Vacuum as an example. It features 18,000Pa suction and a resilient scraper that lifts embedded hair and dry particles. The dual-edge brush cleans along baseboards, and the 180° lie-flat body fits under cabinets and low furniture. This design helps reach areas where dust often hides and collects. 3. Clean Shower Doors (or Bathtub) For glass doors, spray a glass cleaner across the entire surface. Let it sit for a minute. Use a squeegee or microfiber cloth to wipe it down. Clean both sides of the door, not just the one you see most often. Don't forget the edges and metal frame. If your shower door has water spots or soap buildup, use a mix of white vinegar and warm water. Spray the mix, wait 5–10 minutes, then scrub gently with a sponge. Rinse well with clean water. For bathtubs, apply an all-purpose or bathroom cleaner along the tub walls and bottom. Focus on areas with discoloration or rings. Use a soft scrub brush to go over the surface in small circles. Rinse using warm water. A detachable showerhead or a pitcher works well to rinse fully. Check around the tub edges and the caulking line. Use a toothbrush or a small scrub brush to clean corners and gaps. 4. Clean the Bathroom Sink and Drain Bathroom sinks collect toothpaste, soap, and water marks every day. Start by removing any items from around the sink, such as soap dishes, cups, and bottles. Spray the entire sink, faucet, and surrounding countertop with an all-purpose cleaner. Let the cleaner sit for a few minutes. Then scrub using a soft sponge or brush. Wipe dry with a microfiber cloth for a shiny finish. Focus on the faucet base and around the drain. These areas often collect grime and water deposits. Use a small brush or toothbrush to scrub around these parts. For a clogged or smelly drain, pour half a cup of baking soda down the drain. Then pour in half a cup of white vinegar. You will hear fizzing. After 10 minutes, flush the drain with hot water, about 140°F (60°C) works best. Wipe any remaining water around the sink edges. Place clean, dry items back on the counter, but only if you need them every day. 5. Remove Soap Scum Soap scum often looks like a white or gray layer. It builds up on tubs, shower walls, and doors. It feels sticky and dulls the surface. To remove it, spray a mix of equal parts white vinegar and warm water onto the surface. Let it sit for 10–15 minutes. Use a sponge with a rough side or a soft scrub pad to clean gently in circles. If the scum is thick or stubborn, sprinkle a small amount of baking soda directly on the sponge before scrubbing. The mix of vinegar and baking soda helps lift the buildup. Do not use steel wool or hard brushes. These can scratch tile or glass. After scrubbing, rinse the area with clean water and dry with a microfiber cloth or towel. 6. Address Bathroom Tiles and Grout Tiles can look clean from far away, but dirt, mold, and grime often settle in the spaces between them. How to Clean Bathroom Grout Grout is a thin, light-colored line between tiles. It absorbs dirt, moisture, and bacteria. Over time, it can turn gray, yellow, or even black. To clean grout, spray it with a tile or grout cleaner. If you prefer a natural method, mix baking soda and water into a paste and apply it directly to the grout. Let it sit for 10 minutes. Use a stiff-bristle brush or an old toothbrush to scrub along the lines. Move back and forth gently but firmly. Then rinse with warm water. Dry the area with a cloth. If stains remain, repeat the process once more. For very old or dark stains, use a grout-specific cleaning solution. How to Clean Bathroom Tile Tile surfaces are easier to clean than grout. Spray them with an all-purpose bathroom cleaner. Let the solution sit for 3–5 minutes. Use a sponge mop or a soft scrub brush to clean the tile surface. Focus on high-traffic zones like the area behind the sink or inside the shower. The Dreame H15 Pro Heat Wet and Dry Vacuum uses 185°F (85°C) hot water to dissolve stuck-on grime and soap scum. Its resilient scraper lifts greasy debris, while the gap-free cleaning arm reaches near baseboards and wall edges. A liquid separation system keeps dirty water from re-circulating, and after use, the roller dries automatically with 194°F (90°C) hot air to stay clean and odor-free for next time. Once the tiles and grout are clean, the room feels brighter and fresher. 7. Sanitize the Toilet and Surrounding Area The toilet is one of the most-used areas in any bathroom. It also collects bacteria quickly, so this part needs both cleaning and sanitizing. Start by flushing once. Then apply toilet cleaner to the inside of the bowl. Aim under the rim and along the waterline. Let the cleaner sit for 5–10 minutes. While waiting, spray an all-purpose cleaner or disinfectant on the outside of the toilet. Wipe down the handle, tank, lid, seat, and base using a cloth or disinfecting wipe. Use a separate cloth for the toilet so germs don't spread to other parts of the bathroom. Next, scrub inside the bowl with a toilet brush. Focus on the area under the rim and at the bottom. Once done, flush again. Check the floor around the toilet base. Spray cleaner and wipe this area too. Hair, dust, and drips often collect here. Keep a small brush for tight areas behind the toilet if needed. Use gloves during this step. Once finished, wash or replace all cleaning tools used for the toilet. 8. Wipe Down Mirrors and Fixtures Bathroom mirrors collect water spots, toothpaste spray, and fingerprints. Use a lint-free cloth or microfiber towel to get a clear result. Spray glass cleaner lightly across the mirror. Let it sit for a few seconds, then wipe in a zigzag motion. Avoid using too much cleaner, as it can drip and cause streaks. Flip the cloth to the dry side to buff and finish. Next, clean all metal fixtures, such as faucets, handles, and shower hardware. These often show water stains and fingerprints. Spray an all-purpose cleaner or a mix of vinegar and water onto a soft cloth. Wipe each surface, including behind handles and around joints. Use a small brush for tight spots. Polish each piece until it reflects light clearly. Doing this keeps your bathroom looking fresh and helps prevent buildup over time. With mirrors and fixtures shining, the upper half of your bathroom is now complete. Next, it's time to look up and deal with the fan and hidden dust near the ceiling. 9. Clean the Bathroom Fan Bathroom fans pull out moist air, but they also pull in dust. Over time, dust builds up on the cover and inside the vent. If left too long, the fan becomes noisy and less effective. Turn off the fan before starting. Remove the vent cover if possible. Wash the cover in warm, soapy water and dry it with a towel. To clean the fan itself, use a handheld vacuum with a nozzle attachment. This helps you reach dust tucked inside the housing. A soft brush attachment also works well around edges and tight corners. The Dreame Z30 Cordless Stick Vacuum can be used for this job. It has a strong 310AW suction power and a motor speed of 150,000 RPM, which helps collect fine dust quickly. The lightweight body makes it easy to lift overhead. You can also use the nozzle tool to clean around the ceiling, baseboards, and other tight spots. Once the fan is dust-free, reinstall the cover. A clean fan keeps air moving well and reduces moisture buildup. 10. Clean Bathroom Floors and Mats Bathroom floors get wet, dusty, and grimy. Hair collects near corners, and water leaves streaks near the toilet and sink. Different tools help handle each of these problems. How to Clean a Bathroom Floor with a Wet and Dry Vacuum You can start by removing any baskets, bins, or obstacles on the floor. If the floor is dusty or has loose debris, use a vacuum first. Then use a wet and dry vacuum to clean the surface more deeply. These machines lift dirt and also scrub away sticky marks or dried spills. The Dreame H14 Pro Wet and Dry Vacuum is built for this task. It delivers 18,000Pa suction, a 520 RPM rotating brush, and a resilient scraper that targets stubborn grime. It cleans with 140°F (60°C) hot water to remove stains and grease. Dual-edge brush design allows cleaning along walls and furniture legs. After cleaning, it runs a 5-minute sealed hot air drying cycle, keeping the brush hygienic and ready for the next session. The method works well on tile, vinyl, and sealed wood floors. How to Clean a Bathroom Floor with a Robot Vacuum and Mop Robot vacuums are useful for keeping floors clean every day. Some models can sweep dry dust and also mop wet areas. Use a robot vacuum with mopping functions to clean after your main session or during the week between deep cleans. This is especially helpful in tight bathrooms where bending and scrubbing are hard. The Dreame X50 Ultra Robot Vacuum is a powerful option. It comes with 20,000Pa suction and smart pathing for efficient cleaning. The robot can easily sweep dust and debris while mopping with hot water to leave floors streak-free. Set it to clean after showers or during busy mornings to keep floors tidy without effort. How to Clean Bathroom Mats Mats often trap hair, dust, and water. Shake them outside to remove loose debris. Check the label to see if your mat is washable. Most fabric mats can go in the washing machine using cold or warm water. Add a small amount of detergent, and avoid using high heat when drying. For non-washable mats, use a vacuum or a handheld vacuum to remove debris. Spray with fabric-safe cleaner if needed, then air dry completely before placing it back. A clean floor improves the feel of the whole bathroom. How to Keep the Bathroom Clean A bathroom stays clean longer when small habits are added to the daily routine. You don't need to clean the whole room every day. Instead, focus on high-use spots and build good habits over time. Tips for Maintaining a Bathroom Cleaning Routine Wipe the sink and countertop each night. This prevents watermarks and keeps the area clean for the next day. Sweep or vacuum the floor in the morning or after showers. Hair and dust collect fast, especially in corners. Put items back in place after each use. This includes soap, brushes, and hair products. A tidy surface is easier to clean. Keep a cleaning spray and cloth in the bathroom. Quick access helps remove small spills or toothpaste marks right away. Use a robot vacuum to handle daily dust and hair. Models like the Dreame X50 Ultra move across the floor automatically and can be set to run once a day or several times a week. This helps keep the bathroom fresh without extra effort. How Often to Clean Your Bathroom? Some areas need attention every day. Others only need weekly or monthly care. Daily Wipe down sinks and counters. Put away items. Run the fan after hot showers. Shake out floor mats. Weekly Clean the toilet. Wipe mirrors and glass. Mop or vacuum the floor. Wash towels and replace mats. Monthly Deep clean tiles and grout. Wash shower curtains. Clean behind the toilet. Vacuum the fan and vents. Robot vacuum cleaners are helpful throughout the week. They can be scheduled to run while you're out or busy. This keeps floors free of dust and hair without adding extra tasks. How to Remove Bathroom Odors? Bathroom smells often come from the toilet, drain, or damp surfaces. To reduce these smells, open a window or use a fan after each shower. Keep the door slightly open to let air move through the room. Clean drains with baking soda and vinegar once a month. This helps break down the buildup that can cause bad smells. An air purifier adds another layer of freshness. It removes airborne particles and odors from the room. Choose one with a HEPA filter and quiet mode for bathroom use. You can also add a small bowl of baking soda or activated charcoal near the toilet. These help absorb smells without using strong scents or sprays. A Cleaner Bathroom Starts with Smarter Habits (and Smarter Tools) A clean bathroom supports your health and brings a sense of calm. Following a clear 10-step process helps cover every surface without stress. Daily habits like wiping the sink and using a robot vacuum can reduce buildup between deep cleans. Smart tools such as the Dreame H14 Pro/H15 Pro Wet and Dry Vacuum, the Dreame Z30 Cordless Stick Vacuum, the Dreame X50 Ultra Robot Vacuum and a compact air purifier help simplify the job. With the right approach and support, keeping a fresh and hygienic bathroom becomes much easier to manage.
Continue reading
Transform Your Space: How to Deep Clean Your House—and Actually Enjoy the Results

Transform Your Space: How to Deep Clean Your House—and Actually Enjoy th...

Editorial TeamDreame |
Deep cleaning your home is more than just a seasonal task—it's a methodical process that gets into places your regular routine might miss. If you're wondering how to deep clean your house effectively, don’t worry—it’s simpler than it sounds. While the term may seem daunting, deep house cleaning is really just a series of manageable steps. It's not only about creating sparkling surfaces, but also about building a peaceful and healthy home environment that genuinely boosts your mood and well-being. While the schedule for optimal deep cleaning varies according to each household and room, there are some general guidelines for tackling the task. How Often Do You Need to Deep Clean Your House? How often you really need to deep clean your house depends on a few things. Here's a quick list to help you figure it out: Generally, aim for every 3–6 months, a good timeframe to keep things really fresh by tackling those hidden grime spots. Got pets or little ones? You might want to increase that to every 2–3 months. More activity usually means more messes. Dealing with allergies? If someone in your home has allergies or respiratory issues, more frequent deep cleans can really help reduce dust, pet dander, and other triggers. Think about high-traffic areas. Of course, your kitchen and bathrooms need a deeper scrub more often. Some people do a mini-deep clean in those zones monthly. Seasonal spruce-ups are great. A good spring and fall deep clean that gets you ready for changing weather is like giving your house a fresh start. Ultimately, it's about what’s right for your home and lifestyle. And a little planning makes bigger cleaning tasks seem easier if you gather the right tools and organize the mission. Prepare Essential Deep Cleaning Tools First Before you begin scrubbing, you've got to get your arsenal together. Gather some microfiber cloths, a good set of scrub brushes for different surfaces, and some spray cleaning solutions you trust. And don't forget a dustpan, brush, and bucket. Getting these basics on hand will save you countless trips back and forth. Once you've got your general tools, it's time to think about more specialized items that will tackle those really tough spots. The Dreame H15 Pro Heat Wet Dry Vacuum is a game-changer for sanitizing and breaking down grime without harsh chemicals. The Dreame Z30 Cordless Stick Vacuum has the power, handiness, and attachments to deep clean all those nooks and crannies that like to harbor dirt. Other go-to helpers include a good squeegee for streak-free windows and mirrors and a long-handled duster for those high, forgotten spots. Preparation is important, and so is the approach. Taken in smaller steps, a clear process makes the effort less daunting. Here’s a general sequence of actions: The Process Is the Solution Preparation is important, and so is the approach. Taken in smaller steps, a clear process makes the effort less daunting. Here’s a general sequence of actions: Remove clutter: To begin deep cleaning your home, first declutter each area by removing any misplaced items, trash, or unneeded possessions. This initial purge creates clear surfaces and open spaces essential for effective cleaning. Clean surfaces: After decluttering, use appropriate cleaners, whether all-purpose or specialized for wood, stone, or other materials. Wipe down shelves, furniture, and light fixtures thoroughly, removing all dust, grime, and sticky residues. Finish by polishing or drying surfaces to prevent streaks and ensure a sparkling finish. Vacuum or mop floors: Floors should be the last area cleaned as you get rid of both existing dirt and the messes left from cleaning above. The Dreame range of wet and dry and cordless stick vacuums are invaluable in dealing with the floors, no matter the surface material. Pro-tip For the best cleaning results, work from the top down, allow cleaning products to sit and penetrate surfaces before scrubbing, and use appropriate attachments to effectively reach and clean corners. Of course different rooms serve different purposes, so each has its own cleaning needs. Here are a few guidelines for those high-traffic areas: Room-by-Room Deep Cleaning Guide In the Kitchen When you're deep cleaning your kitchen, you'll want to pay special attention to the microwave, refrigerator, and oven. These tend to gather grime faster than you'd think. Microwave: Aim to deep clean weekly. Those food splatters are germ havens if not addressed. Refrigerator: Give your fridge a good deep clean monthly. Take everything out and wipe down the shelves and drawers with an antibacterial cleaner. Oven: You should deep clean your oven when you start smelling old food or grease when it heats up. Don't forget other spots like the dishwasher, stovetop, and sink—they need some deep cleaning too. Sprucing Up the Living Room How often you deep clean your living room depends on various factors. The frequency can range from weekly to every six months. Carpets: Deep clean your carpets once or twice a year. If you've got pets or little ones running around, you probably need to do it more often. Deep cleaning carpets can be a big job, but there are awesome deep-cleaning vacuums out there now, like the Dreame T20 Cordless Stick Vacuum, that make deep cleaning your sofa, carpets, and floors a breeze. Windows and drapes: Deep clean every three to six months. Window glass and frames are straightforward tasks with some readily available cleaning spray, but a professional might be the way to go for removing and cleaning drapes. Skirting boards: Give your skirting boards a deep clean quarterly. A quick vacuum and wipe will help get rid of all that dust and those pesky dust mites that love to gather there. Deep Cleaning the Bathroom Your bathroom is a hot spot for germs, so deep cleaning it is important. You can also check how to clean bathroom in 30 mins if you have limited time. Bathtubs and showers: Deep clean weekly because they're sites where fungus and bacteria grow, which can lead to skin infections. Be sure to use antibacterial cleaners and really get into every nook and cranny. Toilets: Clean your toilet daily and give it a good deep clean every week. Just like tubs and showers, use antibacterial agents. Bleach is effective for overall cleansing and stains. A good toilet cleaner also helps with mineral deposits. Bathmats: Clean weekly because they're another favorite spot for fungus and bacteria. After a sanitizing wash, let them dry outside in direct sunlight. Showerheads: Deep clean your showerhead once a year to remove mineral buildup and keep your shower running smoothly. Refreshing the Bedroom Your bedroom needs occasional deep cleaning too. After all, it's where you sleep. Pillows: Deep clean your pillows quarterly. They can collect a lot of dead skin, sweat, oil, dust mites and other allergens.   Mattresses, duvets, and blankets: These should be deep cleaned twice a year. Mattresses can harbor everything pillows do, or even bedbugs. Duvets and blankets also collect dust and allergens. Common Mistakes to Avoid A big mistake people often make is trying to do everything at once, leading to burnout and a less thorough job. Instead, break it down into smaller, manageable chunks. Focus on one room or even one area within a room at a time. Another thing to watch out for is neglecting to clean your cleaning tools. Using dirty sponges, mops, or rags just spreads grime around and defeats the purpose of deep cleaning. Taking your time and being methodical will make a huge difference! Deep Cleaning Tools to Invest In For large spaces or homes with pets, a high-suction wet and dry vacuum like the Dreame H15 Pro Heat saves time, effort, and stress. And to make the job even less demanding, routine cleaning beforehand with the L50 Ultra Robot Vacuum lightens the load. The Dreame Z20 and Z30 cordless stick vacuums are unmatched in getting into hard-to-reach places to eradicate hidden dust and pet hair with the help of specialized attachments.  👉 Extra info: Check out our guides to house cleaning: Your Essential Cleaning Supplies Checklist for a Spotless Home Home Deep Cleaning vs Regular Cleaning: What's the Differences? How to Keep Your House Clean Before, During & After Vacation: Essential Tips     It’s Worth It The effort is worth it—that deep clean brings renewal to your living space and state of mind. And the Dreame range of appliances is there to help you maintain that shine and serenity. Make your first move: Print our Ultimate Cleaning Guide!
Continue reading
How to Eliminate Dust from Home: A  Simple Step-by-Step Guide

How to Eliminate Dust from Home: A Simple Step-by-Step Guide

Editorial TeamDreame |
While dust might seem harmless, even just a little fuzz on the bookshelf or a fine layer on the TV, can quietly wreak havoc on your home and health. One moment your space is sparkling, and the next, it's covered in fine particles. Surprisingly, dust can be a mix of dead skin cells, dirt, pollen, pet dander, and even tiny insect parts. Yuck! And for allergy sufferers, dust isn't just a nuisance. It's a trigger. Here’s everything you need to know about how to eliminate dust from your home effectively, and why doing so might be one of the best things you do for your health, peace of mind, and indoor air quality. With the right strategies and smart tools like Dreame vacuums and air purifiers, you can reduce dust at its source and keep it from coming back. Best Dusting Techniques That Actually Work Dust hides in plain sight, clinging to blinds, baseboards, and ceiling fans. But it also floats invisibly through the air, settling the moment you stop paying attention. That’s why having a reliable technique matters. Use a dry microfiber cloth first to lift loose particles, then follow up with a slightly damp one to grab the finer dust that clings to surfaces. Always start from the highest points, like ceiling fans, shelves, and curtain rods, so that dislodged dust falls to areas you haven’t cleaned yet. For blinds, wrap a cloth around a butter knife to clean between slats. Don’t overlook doorframes, vents, or the tops of picture frames. When it comes to baseboards, try using an old dryer sheet. It not only collects dust but also leaves behind an anti-static layer that helps repel future buildup. For tight corners and crevices, use the crevice tool on your vacuum or an extendable duster to reach what your cloth can’t. If you’re having trouble with more than dirt, like critters in your bed, read Dreame’s recommendation on how to Get Rid of Bed Bugs.  Benefit: Dusting properly helps reduce allergens on surfaces you touch every day and keeps your home feeling truly fresh and tidy. Pro Tip: Dust ceiling fan blades with an old pillowcase. You can open the pillowcase to clean and trap the dust inside to prevent it from falling on your bed or floors. Use the Right Tools to Eliminate Dust Effectively  Gone are the days of spending hours dusting by hand every weekend. Traditional tools like feather dusters often just push particles around instead of removing them. And while standard vacuums can help, many miss the finer details, like allergens, pet dander, and dust hiding in tight corners. Modern cleaning tools, like stick and robot vacuums, are designed to tackle these problems head-on. Here's what to look for: Advanced brush design: Brushes that maintain full contact with the floor can reach into cracks and lift embedded debris, not just surface-level dust. Powerful suction with dust bag + auto-empty: Strong suction combined with a dust bag and auto-empty feature ensures you're capturing and removing fine particles—not just redistributing them. Quiet performance: Low-noise motors allow you to run your vacuum daily, even while you’re working or relaxing at home. Other smart tools worth adding to your cleaning setup: Extendable microfiber dusters for reaching ceiling fans and upper corners Vacuum attachments for furniture, stairs, baseboards, and tight edges And if you’re wondering which vacuum to use, check out how to Choose the Right Dust-Busting Machine for Your Home for expert tips on selecting the best model for each cleaning task. Owning a Dreame’s X50 Ultra Robot Vacuum is a next level cleaning game-changer. Benefit: The right tools save you time, effort, and frustration. More importantly, they help you eliminate dust at the root so you can breathe easier. How to Eliminate Dust in the Air Dust isn’t just collecting on your shelves—it’s floating in the air you breathe. If you’re only cleaning flat surfaces, you’re tackling just half the problem. Airborne particles like pollen, pet dander, and microscopic dust can linger for hours before settling, triggering allergies and worsening air quality in your home. One of the most effective ways to combat airborne dust is by using a high-efficiency air purifier. Look for models with a true HEPA filter, which can trap 99.97% of particles as small as 0.3 microns. These filters capture not only dust, but also allergens, bacteria, and even some viruses. Other helpful strategies to reduce dust in the air: Clean or replace HVAC filters every 1–3 months Use houseplants such as spider plants or snake plants to trap fine particles naturally Ventilate your space by opening windows only when the outdoor air quality is good Cleaner air has real benefits. You’ll likely sleep better, experience fewer allergy flare-ups, and notice a significant drop in surface dust—especially in rooms filled with fabric, like bedrooms or nurseries. For whole-room protection, consider the Dreame AirPursue PM2.0. It features: True HEPA-grade filtration with 99.97% efficiency Dual-way air outlets that circulate fresh air quickly A powerful 400 m³/h clean air delivery rate that makes it ideal for larger spaces like living rooms and bedrooms Benefits: Clean air promotes better sleep, fewer problems with allergies, and a noticeable drop in everyday dust, especially in fabric-heavy spaces like bedrooms or living rooms. Important: According to Consumer Reports, sealing off places where dust enters and settles is one of the top recommended strategies for healthier indoor air. How to Eliminate Dust from Every Room in the House Dust doesn’t discriminate. In fact, it settles everywhere. When cleaning, each room comes with its own set of special challenges. Here’s how to tackle each space like an expert: Living Room Dust behind the TV, under the couch, and behind the curtains Vacuum daily to catch dirt and debris tracked in from shoes or pets Pro-tip: The robot vacuum’s "set it and forget it" operation keeps dust from ever becoming a problem and frees up your time for literally anything else. Kitchen Clean the tops of cabinets and behind fridge coils Wipe surfaces like the microwave top, range hoods, and any other kitchen ledges or trim Bedroom Vacuum under the bed weekly Use pillow protectors and mattress covers to reduce trapped allergens Run an air purifier nightly while you sleep You can also follow this step-by-step guide on How to Clean Your Room like a Pro for even deeper dust management, especially in sleep spaces where air quality matters most. Bathroom Dust the vent fan cover and the top of the cabinets Wipe light fixtures and behind the toilet tank Total Benefit: Cleaning every room keeps dust from piling up in forgotten corners and cuts down on what circulates through the air. Dreame Take: A clean home isn’t about perfection. It’s about consistency and using the right tools that do more so you can do less. The Simple Trick to Eliminate Dust in Your House Want to know the one trick that actually works? Automate it. Set a robot vacuum to run daily, especially under furniture, around baseboards, and in high-traffic areas. To get that extra hygienic fresh feeling, pair it with the Dreame H14 Pro Wet & Dry Vacuum for weekly deep cleaning: Its durable cleaning  brush combs through rugs and couches, removing liquid messes and tangled hair It fits easily under beds and sofas, reaching dust you didn’t know existed It keeps surfaces visibly cleaner and fabric feeling and smelling fresher To find the best vacuum for your home setup, explore the full Dreame collection of vacuums and accessories for performance options suited for pet hair, large spaces, or automated cleaning. More Tips to Keep Your Home Dust-Free Wash bedding, throw pillows, and curtains weekly Declutter—less stuff means fewer surfaces to collect dust Change your filters regularly (robot vac, purifier, HVAC) Use doormats and leave shoes at the door to reduce tracked-in dirt and debris Benefit: A simple change in habits can lead to a home that feels lighter, fresher, and more breathable. Who doesn’t want that? FAQs Q: Does a robot vacuum help with dust? A: Yes! Dreame robot vacuums trap dust before it becomes airborne, keeping surfaces cleaner, especially under furniture and in tight corners. Q: What is a good air purifier for eliminating dust? A: The Dreame AirPursue PM2.0 captures 99.97% of particles, including dust, allergens, and even airborne bacteria. It’s especially helpful in bedrooms and homes with pets.  Q: How often should I dust to keep it under control? A: Once a week is ideal. But with tools like Dreame vacuums and purifiers running daily, you’ll need to do less manual dusting. Q: Can dust make me sick? A: Absolutely. Dust can carry mites, bacteria, and allergens that trigger asthma, sneezing, skin irritation, and fatigue. Dust-Free Isn’t Perfect, But It’s Possible Let’s be honest, completely eliminating dust from your home isn’t realistic. But keeping it under control? That’s absolutely doable. With smart, reliable tools from Dreame, such as robot vacuums and air purifiers, you don’t have to stress about dust anymore . You can breathe easier, sleep better, and enjoy a consistently clean home with minimal effort. Dust less. Live life more.
Continue reading
How to Clean Bathroom and Shower Floors in 30 Minutes

How to Clean Bathroom and Shower Floors in 30 Minutes

Editorial TeamDreame |
Keeping your bathroom floor clean isn't just about appearances; it’s about safety, hygiene, and comfort. Between slippery soap scum, hair buildup, mold in grout lines, and stubborn water stains, bathroom floors face some of the toughest messes in your home. The good news? You don’t need hours to make it spotless. In this guide, you’ll learn how to clean your bathroom floor, whether it’s tile, wood, marble, or vinyl, in just 30 minutes using the right method for each surface. We’ll also walk you through what tools to use, including time-saving smart solutions like Dreame’s wet and dry vacuums and robot vacuums. What to Use to Clean Bathroom Floor The tools and products you use can make or break your results—and your back! Before you start, gather your supplies based on your floor type. These are some must-haves that will help you clean more effectively and faster: Pick Floor-Specific Cleaning Solutions Tile or Ceramic: Mild detergent or tile-safe cleaner Marble or Stone: pH-neutral cleaner (avoid vinegar or bleach) Wood or Laminate: Damp mop with wood floor cleaner Vinyl or Linoleum: All-purpose or vinyl-specific cleaner Essential Tools Wet-Dry Vacuum: Try the Dreame H14 Pro, which effortlessly vacuums, mops, and dries in one pass Mop: Microfiber for wood, sponge for tile, or a steam mop for grime Scrub Brush: For grout lines and shower floor buildup Gloves and Bucket: For safety and rinsing Pro-tip For daily maintenance, a robot vacuum like the Dreame X50 Ultra can keep floors hair-free between deep cleans. Check out this guide on picking the best vacuum for your cleaning needs. Step-by-Step Guide: How to Clean Bathroom and Shower Floors Cleaning your bathroom floor can be quick and thorough if you follow a smart process. Here's a simple workflow to get every type of mess handled: How to Mop Bathroom Floors Properly Clear the Space: Begin by clearing the floor of bath mats, trash cans, and personal items. Vacuum or Sweep: Get rid of dust, hair, and debris. Use a wet and dry vacuum for an all-in-one clean that saves time. Prepare Your Mop and Cleaner: Fill a bucket with warm water and add a cleaner suitable for your floor. Start from the Far Corner: Start at the farthest corner and work toward the door so you don’t step on freshly cleaned areas. Spot Clean Stains: Pause for soap scum or grime with a brush and cleaner. Rinse (If Needed): Some cleaners need rinsing to prevent residue. Make sure you check the label. How to Clean Hair off the Bathroom Floor Bathroom hair is surprisingly stubborn. It clings to corners, baseboards, and tile seams. Using a regular broom isn’t always enough, as it tends to push hair around. Here’s how to handle hair: Use a vacuum with strong suction, like the Dreame H14 Pro Wet and Dry Vacuum, to pick up long strands in corners and under sinks. For persistent clumps, wrap masking tape around your gloved hand and press it into tricky spots to pick up what’s left. Empty your vacuum regularly to maintain suction power. What Is the Best Way to a Clean Bathroom Floor? The truth is, there’s no one-size-fits-all method. The best way to clean your bathroom floor depends on the material. Each type of surface has its own sensitivities and cleaning quirks. Here’s a quick comparison: Floor Type Best Cleaning Method What to Avoid Tile Mop with mild tile cleaner; scrub grout with brush Bleach on colored grout Wood Damp microfiber mop with wood floor cleaner Excess water, steam mops Marble pH-neutral stone cleaner and soft cloth Acidic or abrasive cleaners Vinyl/Laminate Light all-purpose cleaner and sponge mop Harsh scrubbing or hot water How to Clean Wooden Bathroom Floors Wooden bathroom floors look beautiful but require extra care. Here’s how to keep your wooden bathroom floor in top shape: Vacuum with a soft-brush head to avoid scratches. Use a slightly damp microfiber mop. Stick to wood-safe cleaners, avoiding bleach or vinegar. Wipe dry immediately to prevent moisture damage. Dreame Take If you’re pressed for time, the Dreame H14 Pro Wet and Dry Vacuum can help with precision moisture control to clean without oversaturation. How to Clean Marble Floors in Bathrooms Marble is one of the most delicate materials commonly used in bathrooms. It’s porous and stains easily. Here’s how to clean marble floors in your bathroom: Use a pH-neutral stone cleaner. Specifically look for a cleaner labeled safe for stone or marble. Avoid harsh or acidic products like vinegar or bleach, which can etch the surface. Polish gently with a soft cloth or mop, cleaning the area without soaking it. Use a microfiber cloth to buff dry, especially in high-gloss areas. Spot treat mold in grout with baking soda and water paste (not bleach!). Let it sit for a few minutes, then gently scrub and rinse. How to Clean Tile Bathroom Floors Tile is durable and one of the easiest surfaces to maintain, but it can still trap grime. Try this easy procedure: Start by vacuuming up or sweeping loose debris. Mop the surface with warm water and a tile-specific cleaner. Use a soft-bristled brush (or an old toothbrush) to scrub grout lines if they look discolored. Rinse and dry thoroughly to prevent slippery residue. This prevents any remaining cleaner from leaving a sticky or slippery residue. Pro-tip Learn how to tackle tough grime with our deep-cleaning guide: “How to Clean Tile Grout Like a Pro Tips to Keep Your Bathroom and Shower Clean The best way to reduce cleaning time is to prevent dirt from building up in the first place. A few consistent habits can keep your bathroom floor cleaner for longer and reduce the need for deep scrubbing. Here's a simple routine to follow: Daily Dry the floor after showers to prevent mold and water stains. A quick wipe with a towel or squeegee works. Pick up loose hair before it sticks or clogs the drain. A robot vacuum like the Dreame X50 Ultra can help by scheduling regular cleanups, which is especially handy if your bathroom has dry debris like hair or dust that accumulates daily. Ventilate the space by turning on a fan or cracking open a window to cut down on moisture buildup. Weekly Vacuum and mop the floor. Go for a wet and dry vacuum like the Dreame G10 Pro that can pick up debris while removing grime, saving you time and effort. Spot-clean grout lines and corners where grime builds up. Use a robot vacuum like the Dreame L50 Ultra for scheduled upkeep between deep cleans. Monthly Deep clean grout with a soft brush and floor-safe cleaner. Wash or shake out bath mats to remove trapped dirt and moisture. Clean under movable items like bins or cabinets to catch hidden debris. Stick to this routine, and your bathroom will stay fresher with far less effort. FAQs Q: How do I mop a bathroom floor? A: Use a suitable cleaner for your floor type, mop in sections toward the door, and avoid soaking the surface, especially for wood and laminate. Q: How to clean bathroom floor stains? A: Spot-treat with a tile-safe cleaning solution combined with baking soda, or use a pH-neutral cleaner on marble. For persistent stains, scrub gently with a soft brush. Q: Can I vacuum bathroom floors? A: Absolutely, especially with Dreame’s wet and dry vacuums, which handle both dry debris and wet spills. Q: How to clean a really dirty bathroom floor? A: Start with a deep vacuum. Then use a strong but floor-safe cleaner, hot water, and a stiff scrub brush, especially in corners and grout. Repeat mopping if needed. Final Thoughts Cleaning your bathroom floor doesn’t have to be a dreaded chore. With the right tools and routine, you can get it done in just 30 minutes. Knowing your floor type and how to treat it properly is the key to long-lasting cleanliness. Want to make it even easier? Explore Dreame’s floor-cleaning lineup. From powerful wet and dry vacuums to automated robot vacuums that do the dirty work for you, leaving your bathroom fresh, safe, and sparkling clean! Master the Art of Floor Care How to clean hardwood floors How to clean wood floors How to Clean and Mop Tile Floors How to Clean Laminate Floors How to Clean Grout on Tile Floor How to Clean Linoleum Floors Choosing Floor Cleaning Solution
Continue reading
How to Clean a Vacuum Filter: Step-by-Step Guide for Any Vacuum

How to Clean a Vacuum Filter: Step-by-Step Guide for Any Vacuum

Editorial TeamDreame |
A clean vacuum filter doesn’t just keep your vacuum running; it improves suction, traps allergens, and extends the lifespan of your machine. No matter what kind of filter you have, r, knowing how to clean it properly can make a big difference in both air quality and cleaning performance. In this guide, we’ll walk you through how to identify your filter type, how to clean it step-by-step, and how often to maintain or replace it so your vacuum performs at its best. Let’s start with the signs your filter might need cleaning. Signs Your Vacuum Filter Needs Cleaning Your vacuum filter may not come with a calendar reminder, but it certainly gives warning signs when it needs attention. Here are the most common indicators: Weak suction: If your vacuum isn't picking up dirt like it used to, and you find yourself going over the same spot multiple times, a dirty filter is a very likely culprit. Dust escaping or blowing around: If you notice a fine cloud of dust escaping from your vacuum's exhaust or see bits of dirt blowing around instead of being sucked up, that’s a red flag. This means your filter isn’t effectively trapping particles as it should. Unusual or musty odors: If your vacuum starts smelling musty or like something's burning, it could mean that the filter needs cleaning. Learn more about this using our  “Why Does My Vacuum Smell Bad?” guide. Hot vacuum motor: If your vacuum feels unusually warm after a short period of use, it could be struggling to pull air through a clogged filter. Filter indicator light: Many modern vacuums have smart indicators. If yours lights up with a warning, it's definitely time to take a look. Important If your vacuum stops working or shuts off automatically, it may be due to an overheated motor caused by poor airflow. Check the filter first. Identifying Your Vacuum Filter Type Not all vacuum filters are the same. To clean them properly , you need to know what type you’re working with. Here's a quick rundown of different types: HEPA Filters: HEPA (High-Efficiency Particulate Air) filters are designed to capture 99.97% of microscopic particles, making them ideal for allergy sufferers. These filters are typically not washable, but can be cleaned gently to extend their use. Foam Filters: Often used as pre-filters, foam filters trap larger dust particles and prevent them from reaching the motor or finer filters. Many of them are washable.  Washable Filters: As the name suggests, these filters can be rinsed and reused, reducing waste and saving money. They’re most common in bagless vacuum models.  Paper Filters: Mostly found in bagged vacuums, paper filters are disposable and should never be rinsed with water. They require periodic replacement depending on usage. Pro-tip Refer to your vacuum’s manual to confirm the filter type and whether it is washable. Incorrect cleaning can reduce efficiency, or worse, damage the filter permanently. Check out this comprehensive “Vacuum Filter Guide” for more information. How to Clean Your Specific Vacuum Filter Type How to Clean HEPA Vacuum Filters HEPA filters require delicate handling to avoid damaging the fibers. If your manual permits rinsing, here’s how to do it properly: Ensure the vacuum is unplugged from the power outlet. Carefully remove the HEPA filter from the vacuum without shaking it too much to prevent dust release. Rinse under cool, clean water until the runoff is clear. Do not scrub or use detergent. Shake off excess water and allow the filter to air dry for at least 12–24 hours before reinserting. Dreame Take The Dreame R20 Cordless Stick Vacuum includes a washable HEPA filter and powerful edge-to-edge suction, perfect for pet owners or allergy sufferers. For a more detailed HEPA filter cleaning guide to cleaning HEPA filters, check out Dreame’s full tutorial here. How to Clean Foam Filters Foam filters are relatively low-maintenance and reusable. Here’s the cleaning process: Remove the foam filter. You'll usually find it near the dustbag or motor. Give it a good tap over a trash can to shake off any loose dirt and debris. Rinse the filter under cool, running water. Add a few drops of dish soap only if the filter is especially dirty. Squeeze gently to help dislodge trapped dirt. Once you've rinsed it clean, squeeze out as much excess water as you can. Let it air dry completely. Don't put it back in your vacuum until it's completely dry; otherwise, you risk mold or mildew.. How to Clean Washable Filters Washable filters are a favorite for eco-conscious users. To clean one: Remove the filter and tap gently to remove loose debris. Rinse with cool, running water until the runoff is clear, gently squeezing to dislodge dirt. Let it air dry thoroughly before reinstalling. This can take up to 24 hours. Dreame Take The Dreame H12 Dual Wet and Dry Vacuum is designed with washable filters and smart water management, making deep cleans easier. How to Clean Paper Filters Paper filters are disposable, but you can sometimes prolong their life with gentle care: Tap the filter gently outdoors or over a trash can to remove loose dust. Avoid aggressive shaking. Use a soft brush to carefully remove embedded dust. Brush in the direction of the pleats. Do not use water on paper filters, as it can damage them. Check the filter against a light source for tears or holes. If found, replace the filter immediately. Special Case: How to Clean Robot Vacuum Filters Robot vacuums generally have small, easy-to-remove filters that need regular care: Remove and tap gently to dislodge dust. Rinse only if the filter is marked washable. Clean the dustbin with water only (no detergent). Let both components air-dry completely before reinstalling. Clean every two weeks and replace every 3 months. Dreame Take The Dreame L10s Ultra Robot Vacuum features automatic dust collection and washable components, meaning less work for you! Special Case: How to Clean Wet and Dry Vacuum Filters Filters for wet and dry vacuums often pick up heavier debris and liquids. To clean: Rinse under water if dirty. Let air-dry completely before next use. If suction remains weak or the filter looks worn, replace it every 3–6 months. Important Never reinstall a damp filter in a wet and dry vacuum. It can lead to mold or even motor damage. How Often Should You Clean Your Vacuum Filter? Cleaning frequency depends on use and environment. A few general rules: Light use (1–2x/week): Clean every 1–3 months. Heavy use or pets/allergies: Clean monthly or more. Robot vacuums: Clean biweekly, replace every 3 months. Paper filters: Replace instead of cleaning. Pro-tip If you vacuum daily or deal with heavy debris like pet fur, consider cleaning more frequently  Best Practices for Vacuum Filter Maintenance To keep your vacuum running like new, follow these tips:  Avoid overfilling the dustbin or bag, which pushes more particles into the filter. Clean the filter outside whenever possible to prevent dust from accumulating indoors. Check airflow regularly. Reduced suction usually means it's time to clean. Keep a backup filter on hand so you always have a clean one ready while the other dries. When Should You Replace Your Filter? Even with regular cleaning, filters wear out. Here’s how to tell when it’s time to replace, not just clean, the filter: Your vacuum’s suction isn’t restored even after cleaning the filter. You notice persistent odors that persist even after drying. The filter is torn, discolored, or permanently clogged. Your vacuum alerts you with a “check filter” or “replace filter” signal. Replace HEPA and foam filters every 6–12 months, and paper filters as needed. Final Thoughts Your vacuum’s filter plays a vital role in your appliance’s performance and your home’s air quality. Clean it regularly, replace it when needed, and always refer to your vacuum’s user manual for specific care guidelines. Bookmark this guide and set a calendar reminder to check your filter monthly. A little maintenance goes a long way in keeping both your vacuum and your home spotless!
Continue reading
How to Clean a Floor: Mistakes You Didn’t Know You Were Making

How to Clean a Floor: Mistakes You Didn’t Know You Were Making

Editorial TeamDreame |
Many people think cleaning their  floor just means running a mop over it, but that’s a fast track to damage, dullness, and grime buildup. Floors may look clean, but if you’re not cleaning the right way, you’re likely missing bacteria, grit, and residue that can degrade your flooring over time. This guide will walk you through how to clean floors properly, highlighting mistakes you might not even realize you’re making. Whether you have hardwood, tile, or vinyl, we’ll help you get it clean with smarter tools, easier techniques, and fewer headaches. What a Clean Floor Really Means Sure, a clean floor looks good, but real cleanliness goes deeper. A truly clean floor: Is free of fine dust, allergens, and bacteria Feels smooth underfoot, not sticky or gritty Has no lingering chemical smell Doesn’t get damaged over time due to harsh products or oversaturation If you’re aiming for just a “quick wipe,” you’re probably leaving buildup behind. And that can eventually lead to staining, dullness, or even warped floors - especially for wood and laminate. 3 Common Mistakes in Floor Cleaning 1. Ignoring Floor Type Every floor has its own requirements . What works great for tile might actually ruin hardwood. For instance: Using a steam mop on laminate or excess water on hardwood can lead to warping, bubbling, or discoloration. Stone and marble floors can also be damaged by acidic or abrasive products. To avoid costly repairs, always check manufacturer guidelines, and before buying any cleaning product or tool, check whether it’s compatible with your floor type. Dreame Take A smart wet and dry vacuum like theDreame H12 Dual adapts to multiple floor types, taking the guesswork out of your routine. 2. Using The Incorrect Cleaning Product Generic “floor cleaners” often do more harm than good, especially if they contain bleach or acidic chemicals. Many off-the-shelf products contain harsh chemicals that strip protective finishes, leave sticky residues, or attract more dirt over time. Instead, opt for floor-specific cleaners or homemade floor cleaner options like: A few drops of dish soap in warm water (for vinyl or tile) Castile soap and water (for sealed hardwood) pH-neutral stone cleaner (for marble) A rough scrub brush on laminate or a soaking-wet mop on hardwood can spell disaster. You could  try Dreame’s wet and dry vacuum options, like the Dreame H12 Dual, which adapts to multiple surfaces; and no harsh chemicals are needed. 3. Skipping Regular Maintenance Cleaning only when dirt is visible is like brushing your teeth only when you have a cavity. Dirt acts like sandpaper, wearing down floors over time. Regular cleaning not only keeps your home feeling fresh but also protects your floors from wear and tear. Create a floor cleaning schedule based on usage: Area Frequency High-traffic (entryways, kitchens) Daily spot clean, weekly deep clean Bedrooms & low-use areas Weekly clean Pet zones or kids' play areas Every 2–3 days Dreame Take Make a floor cleaning schedule that works for your home and stick to it. Set reminders, or better yet, let a robot vacuum like the Dreame L10s Ultra handle it for you with automated daily cleaning routines  especially for high-traffic areas. How to Clean Floors: Material-Specific Tips Different floor materials require different tools and techniques. Here's how to clean a floor based on what it's made of without causing damage or creating extra work. Hardwood Floors Hardwood is beautiful but sensitive. To avoid warping or scratches, you’ll need to clean gently and dry quickly. Sweep or vacuum daily with a soft brush attachment. Use a bare-floor-friendly vacuum like the Dreame R20 Cordless Stick Vacuum for edge-to-edge dust removal. Mop weekly with a damp (not wet!) microfiber mop and a wood-safe cleaner. Dry immediately to prevent water damage. Pro-tip Avoid steam mops, because they can damage wood sealants. For more details, check out our full guide on “How to Clean Hardwood Floors.” Laminate Floors Laminate looks like wood but doesn’t handle water the same way. Keep it dry and avoid excess moisture. Vacuum or sweep 2–3 times per week. Avoid steam or wet mops, as laminate is not waterproof. Use a laminate-safe cleaning spray. Wipe dry after mopping. Learn more by reading our “How to Clean Laminate Floors” guide.  Tile Floors Durable and water-resistant, tile is one of the easiest floors to clean. Still, unsealed grout can trap grime if neglected. Sweep daily to avoid gritty buildup. Mop with warm water and mild detergent. For grout: use baking soda and water paste and a soft brush to clean tough stains. Rinse thoroughly and dry because soap residue attracts dirt. Consider using the Dreame H12 Dual Wet and Dry Vacuum. It vacuums, mops, and self-cleans with hot air in one go, making it perfect for tackling tile and grout without extra effort. Vinyl/LVP Floors Vinyl is tough and forgiving, but it still needs regular care to keep its finish looking fresh. Vacuum or dry mop regularly. Use warm water with a few drops of mild dish soap (go for vinegar-free cleaners to preserve the top layer). Avoid abrasives or wax-based products, as they create a dull film. Rinse well and dry after cleaning. Marble/Stone Floors Natural stone needs special care. Harsh chemicals or abrasives can etch or dull the surface, so keep cleaning gentle and pH-balanced. Sweep with a soft brush or microfiber. Use pH-neutral stone cleaner only. Never use vinegar, lemon, or bleach. Dry polish with a microfiber cloth. What’s the Best Way to Clean Floors? Here's a quick overview of floor types and the best cleaning methods for them: Floor Type Best Tool Best Cleaner Key Tip Hardwood Soft brush vacuum Wood-safe liquid Dry quickly after mopping Laminate Microfiber mop Laminate spray No steam or wet mops Tile Wet/dry vacuum Mild soap + water Scrub grout monthly Vinyl Robot vacuum Soap + water solution Rinse well Concrete Mop + vacuum Neutral pH solution Reseal yearly Marble Soft cloth Stone-safe spray No acid or bleach Tips for Deep Cleaning Floors Always vacuum or sweep first; never mop over dust. Mop in sections, rinsing frequently. Use flooring-specific solutions; avoid one-size-fits-all. Dry immediately after mopping wood or laminate. Don’t forget the edges and under furniture! Dreame Take For a powerful deep clean, theDreame H14 Wet and Dry Vacuum combines strong suction, hot water mop washing, and edge-to-edge reach—perfect for floors that need extra care. Floor Cleaning Hacks You Should Know Set your robot vacuum to auto-clean during work hours. Use doormats at all entries to reduce tracked-in dirt. Create a DIY cleaner by mixing warm water with a few drops of essential oil and dish soap. Add tennis balls to mop buckets to absorb residue. Create a floor cleaning schedule, stick it to your fridge, and follow it! FAQs Q: Can I make a homemade floor cleaner? A: Yes. Mix warm water with a few drops of dish soap. Avoid vinegar or lemon juice. Q: How often should I clean my floors? A: High-traffic areas: sweep daily, mop weekly. Low-traffic: once a week for both is enough. Q: Can I use steam mops on all floor types? A: No. Avoid steam on hardwood and laminate, as it can damage them. Q: How often should I deep-clean floors? A: Every 3–6 months, depending on traffic levels. Q: What’s the best vacuum for all floor types? A: A cordless or wet/dry vacuum like the Dreame H12 Dual works effectively on multiple surfaces. Q: Are robot vacuums good for daily cleaning? A: Yes. Models like the Dreame L10s Ultra can automatically handle daily vacuuming and mopping chores Final Thoughts Getting a clean floor isn’t about working harder; it’s about working smarter. By using the right tools, cleaners, and techniques for your floor type, you can extend the life of your floors and keep your home looking (and feeling) fresh. Remember to: ✅ Invest in a smart floor care routine✅ Use tools like Dreame’s cordless stick or wet and dry vacuums✅ Avoid cleaning shortcuts that could damage your flooring  later Because a clean floor isn’t just about looks, it’s about comfort, health, and peace of mind. Master the Art of Floor Care How to clean hardwood floors How to clean wood floors How to Clean and Mop Tile Floors How to Clean Laminate Floors How to Clean Grout on Tile Floor How to Clean Linoleum Floors Choosing Floor Cleaning Solution  
Continue reading