Black Friday Sale Is Live! Best Prices of 2025
00
Days
: 00
Hours
: 00
Mins
: 00
Secs
Shop Now > close button
Small and Mini Vacuum Guide: How to Choose Your Perfect Portable Cleaner

Small and Mini Vacuum Guide: How to Choose Your Perfect Portable Cleaner

Editorial TeamDreame |
Spilled coffee again? And dragging out the heavy vacuum feels like more work than the mess itself? That's why portable vacuum cleaners have become increasingly popular nowadays. A portable vacuum cleaner is changing the game—lightweight, compact, and easy to grab when you need it. Whether it's spilled cereal, pet hair, or car crumbs, this mini vacuum handles it fast without the bulk. In 2024, the market was worth around $5.12 billion, and experts say it could reach nearly $9 billion by 2033. In simple terms, more and more people are turning to compact, grab-and-go vacuums to keep their homes clean without the bulk and hassle of traditional ones. You don't need a massive machine for most cleaning tasks. And this guide will walk you through the world of small and mini vacuums. 3 Benefits of Mini Vacuums 1. They're Ridiculously Easy to Use With much lighter weight than larger models weighing more than 10 lbs, you can use them for 15 minutes without breaking a sweat. So that you'll actually USE them, instead of leaving them to gather dust for the inconvenience. They live on your counter, in your car, or tucked in a drawer. There's no assembly trouble, no cord hunting; you just pick them up and use them. 2. They Get Into Places Where Your Big Vacuum Can't Ever tried vacuuming your car with a full-size vacuum? It's basically impossible. But handheld vacuum cleaners excel exactly where traditional vacuums fail miserably. Your workspace becomes actually clean—between keyboard keys, around monitors, inside those mysterious desk drawer corners. Your car interior finally gets the attention it deserves: cup holders, seat cracks, that black hole between the seat and console where everything disappears. The best mini vacuum for cars combines portability with specialized attachments designed specifically for automotive interiors. 3. They "Pay" for Themselves Here's something many people don't know: mini vacuums can actually save you money. Think about those cans of compressed air you buy to clean your keyboard. They usually cost $5 to $8 each and run out fast. But a mini vacuum can: Save on repeat costs — no need to keep buying compressed air cans Lower long-term spending — one purchase works for years Combine two tools — a vacuum and a blower in one device In the long term, it saves you time and money. How to Select the Right Mini Vacuum Loving mini vacuums is easy. Choosing the right one? That's where it gets messy. Let's match features to a real-life mess. Surface Analysis: Matching Power to Purpose For Hard Floors and Smooth Surfaces If you're cleaning tile, hardwood, or kitchen counters, you don't need super strong suction. A small vacuum with medium power (12–18 air watts) and a wide nozzle will clean well without using too much energy. For Carpets and Fabrics Carpets and couches hold onto dust more tightly. You'll need a vacuum with a spinning brush head that can lift dirt from deep inside the fibers. Look for one with 15–25 air watts of power and brush speeds of 3,000 RPM or more for the best cleaning. For Electronics and Delicate Items Cleaning computers, keyboards, or other sensitive devices? Go for a mini vacuum with adjustable suction and a blowing mode. These are gentle but still get the job done. Some even come with anti-static features to protect electronics from damage while removing dust. Debris Classification: Engineering Solutions for Real Problems For Pet Hair Pet hair wraps around cheap brushes and clogs up the filter fast. A good vacuum for pet owners uses anti-tangle brushes that mix silicone and bristles to grab fur without getting stuck. For Allergies If your nose gets stuffy or your eyes get itchy at home, your vacuum might be part of the problem. Look for models with true HEPA filters, such as Dreame Z30 Cordless Stick Vacuum. This can trap almost all the tiny stuff floating in the air—dust mites, pet dander, even smoke. For Mixed Messes One day it's cereal on the floor, the next it's sand from someone's shoes. If you're cleaning up random messes all the time, go with a vacuum that has changeable nozzles and medium suction power. These flexible tools handle crumbs, dust, and grit without switching machines. How You Clean: Match the Vacuum to Your Routine Clean Daily? If you like quick daily cleanups, go for a lightweight vacuum that charges fast. USB-C charging is handy and easy to use. A trigger-style button helps save battery since it only runs when you press it. Clean Weekly? If you do longer cleanups on weekends, you'll need a vacuum with a strong battery that lasts at least 25–40 minutes. A battery level display is useful so you know how much power you have left. A bigger dustbin helps too—you won't need to stop and empty it often. Use for Travel or Car? For the car or road trips, choose a small vacuum that's easy to pack. It should come with special nozzles for car seats and tight spaces. A carrying case and universal charging options will make it easier to use anywhere. Use at Home? Select a vacuum with strong suction, at least 20 minutes of battery life, and a mid-sized dustbin. A floor brush helps tackle everyday messes like dust, crumbs, and spills. If you have pets, look for a motorized brush with an anti-tangle design and a washable filter. These features help remove fur from sofas, rugs, and pet beds without clogging the system. Use at a Desk? Look for a quiet vacuum that won't interrupt meetings or focus time. It should be small enough to store in a drawer and light enough for one-handed use. A soft nozzle helps clean keyboards, monitors, and bookshelves gently and safely. How Much is a Mini Vacuum Cleaner? Prices vary, but most mini vacuums fit comfortably into a small appliance budget. You'll find solid options whether you're spending $30 or $150, depending on features and performance. Price Range Typical Offerings Under $30 Basic cordless minis (e.g., unbranded or small brands) $30–60 Quality handhelds from known brands $60–120 Feature-rich models with extra tools $120+ Premium units with motorized brushes and HEPA filters Types of Mini Vacuums Before you buy, it helps to know what kind of mini vacuum suits your needs. Here are the three most common types and what they do best: Portable / Handheld Vacuum Cleaners These are small, easy-to-carry vacuums perfect for quick cleanups. You can use them on furniture, stairs, cars, or countertops. Many models are cordless and lightweight, which makes them great for daily use. If you're not sure where to start, a handheld vacuum guide can help you pick the right one for your needs. Mini Robot Vacuum Cleaners These smart vacuums clean your floors on their own. Just set a schedule, and they'll sweep up dust and crumbs while you relax. Most are best for hard floors and low-pile carpets. Some even return to their dock to charge when the battery runs low. Mini Wet and Dry Vacuum Cleaners These vacuums can handle both dry messes and liquid spills. They're great for kitchens, bathrooms, or places with kids and pets. A good mini wet and dry vacuum can pick up crumbs, pet hair, and even small spills in one go. 5 Key Features to Consider for Mini Vacuums And when choosing a small vacuum, it's not just about size, budget, and types. Paying attention to a few key features can help you find the one that truly fits your cleaning needs. Suction Power Look for a vacuum that balances strength and efficiency. Most small vacuums offer between 12 to 25 air watts, which is strong enough for daily use. Wet and dry vacuums may have slightly higher power to handle liquids and heavier messes. Dustbin Capacity A larger dustbin means fewer trips to empty it. For daily home cleaning, 200ml to 500ml is ideal. Smaller models made for desks or cars usually hold less but are easier to carry. Filter Type If you have allergies or pets, a HEPA filter is a must. It traps tiny dust and pet dander. Some vacuums also use multi-stage filters, and the best ones come with washable filters to save money and reduce waste. Battery Life vs. Corded Options Most mini vacuums today use lithium-ion batteries. They charge faster and last longer than older types. Battery-powered models usually run for 20–40 minutes per charge. Some offer removable batteries, which means you can swap them out for extended use. If you prefer no battery worries, corded options still exist but are less flexible. Attachments The right tools make a big difference. Pets: Motorized brushes. Office: Anti-static dusting brushes. Car: Flexible hoses and narrow nozzles. Home: Wide floor heads. Comparison Table: Which Type is Right for You? Feature Small Handheld Vacuums Small Robot Vacuums Small Wet and Dry Vacuums Suction Power Medium (12–25 AW) Low to medium Medium to strong Battery Life 15–40 minutes 60–120 minutes (auto-run) 20–35 minutes Price Range $30 – $150 $100 – $300+ $60 – $180 Best For Cars, stairs, and small messes Floor sweeping, daily dusting Kitchens, bathrooms, and pet areas Practical Uses for Mini Vacuums If you already own a portable vacuum, see how far you can stretch its uses. Everyday Cleaning Tasks Mini vacuums are perfect for quick jobs you don't want to save for later. It can handle: Toast crumbs on the counter Pet hair on the sofa Dust hiding in window tracks Tight corners in your car The keyboard is full of dust and crumbs Unconventional Uses And here are more creative ways other than regular uses: Shoo away summer bugs: Use blow mode to gently push mosquitoes or flies off your desk, food, or baby gear. Dry up wet spots fast: A short burst of air can dry kitchen counters, bathroom floors, or damp sneakers. Cool off your face: Point the air at your face during skincare or makeup for a quick refresh. Clean up candles and diffusers: Vacuum away old wax flakes or dried flower bits without spilling a thing. Tidy up wrinkled clothes: Use warm air to smooth shirt collars or sleeves before a meeting. Dust your indoor plants: Gently blow or vacuum the leaves to help them stay healthy and shiny. Clear hair from bathroom corners: Those tricky strands near the tub or toilet? Gone in seconds—no bending needed. Of course, there are even more creative uses to be discovered as you use it yourself. Easy Maintenance Tips for Mini Vacuums Regular care keeps your vacuum running like new and saves you from early repairs. 1. Clean the Filter Wash every 3–5 uses Let it dry fully before reuse Replace disposable filters every 2–3 months 2. Empty the Dustbin After each use Rinse and dry to prevent odors 3. Charge the Battery Right Recharge at 20–30% Store at 40–60% if not using for a while Don't overcharge 4. Check Performance Weak suction? Clean the filter Check for blockages Final Take Mini vacuums aren't just for light messes—they're for life on the go. Whether it's a dusty keyboard, a spilled snack, or a furry couch, a good mini vacuum keeps your space clean without the hassle. Choose one that fits your habits, your home, and your time. The right mini vacuum helps you clean more, stress less, and stay ahead of everyday messes.
Continue reading
Your Essential New House Checklist: Things to Do & to Buy

Your Essential New House Checklist: Things to Do & to Buy

Editorial TeamDreame |
Moving into a new home is both exciting and overwhelming. There's so much to do, and it's easy to forget small details along the way. But don't worry. This guide will take you step by step through what needs to be done before, during, and after the move. Preparation Before Moving Getting everything ready before your big move can save you time, energy, and unnecessary stress. There are multiple tasks to manage weeks before the moving day. Two Weeks Before the Move At this point, you should be focused on securing logistics and taking care of time-sensitive tasks. Arrange Your Moving Method A full-service moving company is a great choice if you prefer convenience. The company takes care of everything, including packing and transporting your belongings, but this comes at a higher cost. Renting a truck is the most budget-friendly option. However, it requires physical labor, as you will be responsible for loading and unloading. Make sure to book the truck well in advance to avoid availability issues. A moving container offers a balance between convenience and flexibility. You pack and load your items, and the company handles the transportation, making it easier than a DIY truck rental. Labor-only movers can help if you have your own truck but need assistance with the heavy lifting. They will take care of packing, loading, and unloading, while you handle the transportation. Sort and Purge Go room by room and assess your belongings. Create piles to keep, donate, or sell. Items you haven't used in the past six months should probably be discarded or donated. If you have furniture or other valuable items, list them for sale. Websites like Craigslist, Facebook Marketplace, or Poshmark are great for this. Consider donating items you no longer need to local charities. Many will pick up large furniture or bulk items for free. For items that can't be donated or sold, arrange for a junk removal service or drop them off at a recycling center. Transfer Utilities Call utility providers to arrange the transfer of services (electricity, gas, water, internet, trash, etc.) to your new address. Some services may require a deposit or advanced notice, so give them at least two weeks' notice. Ensure the garbage collection service at your new home starts on the day you move in. If you're moving to a new city, check the schedule for trash and recycling days. Check for HOA fees. If your new home is part of a homeowners' association, confirm your move-in date with them and arrange payment for any fees. Notify Change of Address Forward your mail to your new address. This can also be done in person at the post office. It can take up to a week for this change to be processed, so do it early. Update your address with your bank, credit card companies, insurance, and any subscription services you have. One Week Before the Move By now, it's time to get into the final stages of preparation. You'll start to pack most of your things and confirm the details of your move. Confirm the Moving Details Double-check with the moving company or truck rental service to confirm time, place, and services. Reconfirm the number of movers or helpers and any specific instructions for the day of the move. If there are specific items that require extra care (fragile items, large furniture, etc.), make sure to discuss them ahead of time. Begin Packing Non-Essentials Pack room by room. Start with items you won't need immediately, like books, extra clothing, or decorative items. Label each box by room so you can unpack more easily later. If you have seasonal clothing or decorations, pack those early. You won't need them in the last week. Use bubble wrap, newspapers, or towels to protect breakable items. Keep electronics and fragile glassware in separate boxes labeled "fragile" for easier handling. Prepare a Moving Essentials Bag Pack a bag with the essentials you will need during the first few days in your new home, including toiletries, medications, chargers, cleaning supplies, and a set of clothes. Keep important papers, like your lease agreement, insurance info, and moving-related receipts, in a safe place. One Day Before the Move At this point, everything should be nearly packed, and you're almost ready to go. Now, it's time to take care of the final tasks that will make your move easier. Disassemble Furniture If you have furniture that needs to be disassembled, such as beds, bookshelves, or desks, do this the day before the move. Keep all screws, bolts, and assembly instructions in clearly labeled bags. Use blankets, bubble wrap, or specialized packing materials to protect large furniture from scratches or damage during the move. Clean the Old House Do a final sweep of your old home to leave it in good condition for the next residents. This includes wiping down surfaces, vacuuming carpets, and cleaning the bathroom and kitchen. Make sure all appliances (refrigerator, stove, microwave, etc.) are clean and unplugged. Pack the Last-Minute Items Essentials you'll need in the morning. These include kitchen items you may still need (like a coffee maker, mugs, etc.), toiletries, and any remaining clothing. Stock up on snacks and drinks for your moving day. You'll appreciate having something quick and easy on hand. Post-Move To-Dos Once the moving truck has left, the real work begins: settling into your new home and making it your own. After all the packing and unpacking chaos, it's time to focus on making your space functional, comfortable, and truly feel like home. Essential Items for a Comfortable New Home At the very least, you'll need a bed for resting, seating for lounging or entertaining, and a table for dining or working. Keep some basic cleaning products on hand for quick touch-ups as you unpack. You'll need things like multi-surface cleaner, disinfectant wipes, and paper towels. Set up trash and recycling bins in each room to help keep things tidy while you go through the unpacking process. Kitchen Essentials Basic pots, pans, a frying pan, and cooking utensils like spatulas and tongs are essential for preparing meals. A knife set, forks, spoons, and serving utensils will cover all your dining needs. Make sure you have enough plates, bowls, glasses, and mugs to accommodate your everyday meals. If you're a coffee or tea person, having this essential ready will make your mornings much easier. Dish soap, sponges, and dish towels are a must to help keep everything clean as you cook and eat. Bathroom Must-Haves Toilet paper might seem obvious, but it's easy to forget. Make sure you have enough toilet paper for the first few days. Keep a set of bath towels, hand towels, and washcloths on hand. Having extras is always a good idea. If you haven't installed one yet, make sure you have a shower curtain to keep water from splashing out of the tub. Don't forget essentials like shampoo, conditioner, soap, toothpaste, and toothbrushes. Living Room Comforts A sofa, some chairs, and side tables will help create a comfortable living area. A coffee table can add both function and style. Ensure you have a TV, remote controls, and any other media players or devices you need for entertainment. A vacuum cleaner or robot vacuum will help you tackle dust and debris, especially in high-traffic areas like the living room. Bedroom Necessities Sheets, pillows, blankets, and comforters are essential to make your bed as comfortable as possible. A dresser or wardrobe will help keep clothes, shoes, and accessories organized. Closet organizers like hangers and storage bins are useful, too. A bedside lamp or soft lighting creates a relaxing atmosphere for winding down. If you're sensitive to dust or allergens, consider getting an air purifier to improve the air quality and promote better sleep. Outdoor Items Keeping your lawn neat and tidy is much easier with a lawn mower, especially during the growing season. If you like gardening, make sure you have basic tools like a rake, shovel, or spade to keep your outdoor space looking good. A table and chairs will help you enjoy your patio or deck. Add cushions and throws for extra comfort. Cleaning Your New House Before and after the move, cleaning is essential to get rid of dust, debris, and any lingering odors from previous residents or renovations. Here's your new house cleaning checklist: Pre-Move Cleaning Tasks (Before Your Stuff Arrives) Vacuum carpets thoroughly. A HEPA vacuum helps remove dust, pet hair, and allergens embedded in carpets and crevices. This is especially important if the previous occupants had pets. Mop or wet-clean floors. For deep-cleaning tiled or hardwood floors, a wet-dry vacuum like the Dreame H14 is ideal. It uses 140°F (60°C) hot water and powerful suction to tackle sticky messes and renovation dust in one go. Improve indoor air quality. If your home was recently painted or renovated, use an air purifier to remove paint fumes, construction dust, and volatile organic compounds (VOCs). Clean air is just as important as clean surfaces for your family. Post-Move Cleaning Tasks (After You've Settled In) Once you've unpacked the essentials, it's time to shift to regular maintenance and habit-building. Set up a daily floor-cleaning routine. A robot vacuum like the Dreame X50 Ultra can handle everyday messes effortlessly. With 20,000Pa of suction power and an advanced navigation system, it tackles dirt on hard floors, carpets, and in tight corners, giving you one less thing to worry about while settling in. Freshen up soft furnishings and high-traffic areas. Wash or steam clean curtains, rugs, and couch covers to remove dust from storage or transit. Keep your bathrooms and kitchens spotless with frequent wiping and mopping. Helpful Resources Once you've taken care of the basics, you can continue to keep everything organized and manageable with a few tools. Recommended Apps for Home Organization In the digital age, there are plenty of apps designed for home organization, moving logistics, and interior design. Read on to find a curated list of apps that can simplify your moving journey: Home Design & Layout Apps Roomstyler allows you to create 3D room designs by uploading your room dimensions and experimenting with furniture arrangements. It offers over 120,000 items from popular brands, enabling you to visualize your space before making any physical changes. This tool is especially helpful for those looking to plan their interior layout efficiently. Autodesk Homestyler is a user-friendly application that lets you design and visualize your interiors in 3D. With over a million 3D models from brands like IKEA and Ashley, you can experiment with different design styles and layouts. Its AI tools assist in room scanning and design suggestions, making it ideal for both beginners and professionals. Magicplan utilizes augmented reality (AR) and LiDAR technologies to create accurate floor plans by scanning your rooms. It's particularly useful for documenting existing layouts and planning renovations. The app also allows you to add photos, notes, and measurements to your plans, aiding in detailed project planning. Task Management Apps Todoist is a powerful to-do list app that helps you organize and prioritize tasks efficiently. It offers features like project creation, sub-tasks, labels, filters, and reminders, allowing you to manage both personal and professional tasks seamlessly. The AI assistant in the Pro version can help automate task management, enhancing productivity. Microsoft To Do is a simple and intelligent task management app that integrates with Microsoft 365. It offers features like "My Day" for daily planning, task prioritization, and list sharing, making it easy to stay organized and collaborate with others. Asana is a comprehensive work management tool that allows you to track project and task progress, share files, comments, and notes, and keep track of deadlines. It's designed for both individuals and teams, offering customizable views like lists, boards, and timelines to suit different workflows. Moving & Inventory Apps Sortly is an intuitive inventory management app that enables you to visually track all your items and their details, such as quantity, location, and condition. It supports barcode scanning, offline access, and customizable folders, making it ideal for organizing your belongings during a move. Moving Organizer Lite helps you keep track of your boxes and their contents, including pictures and descriptions. It allows for quick searches, helping you locate and unpack items efficiently. This app is particularly useful for managing the chaos of moving and ensuring nothing is misplaced. Tips from Experienced Homeowners Learning from others can help make your move smoother and avoid common mistakes: Don't try to unpack everything at once. Focus on the essentials, like the kitchen and bathroom, so you can settle in comfortably. Once those are done, tackle the rest of the house. Don't stress about furniture layout. You can always rearrange later. Start with the basics and adjust as you get a feel for the space. Set up a "welcome station" when you arrive. Stock it with snacks, drinks, and supplies you'll need right away to make unpacking more comfortable. Label your boxes clearly with room names and contents. This will save you time and frustration when unpacking. Pack an essentials bag for moving day. Include toiletries, a change of clothes, medications, snacks, and important documents so you don't have to search for them later. Ask for help if you need it. Whether it's friends, family, or professionals, an extra pair of hands can make a big difference. Bonus: New House Inspection Checklist Category Details Inspect All Appliances Test appliances like the fridge, oven, dishwasher, and washing machine. Ensure everything works properly. Check Water Pressure Turn on faucets and showers to check for adequate water pressure. Look for any leaks or slow drainage. Security Systems Test smoke and carbon monoxide detectors, check locks, alarms, and cameras. Ensure everything is functional. Pest Control Check for signs of pests (insects, rodents) and inspect entry points like gaps in windows and doors. Foundation and Structure Look for cracks in walls, uneven floors, or doors/windows that don't open properly. Check the foundation for issues. Electrical System Test outlets, switches, and light fixtures to make sure they work. Inspect the circuit breaker and wiring. Windows and Insulation Check window seals for drafts and inspect attic or basement insulation for any issues with energy efficiency. Exterior and Landscaping Inspect the roof, gutters, and downspouts for damage. Make sure landscaping slopes away from the foundation.
Continue reading
Does Heat Kill Mold Effectively? The Science Behind Temperature and Spores Revealed

Does Heat Kill Mold Effectively? The Science Behind Temperature and Spor...

Editorial TeamDreame |
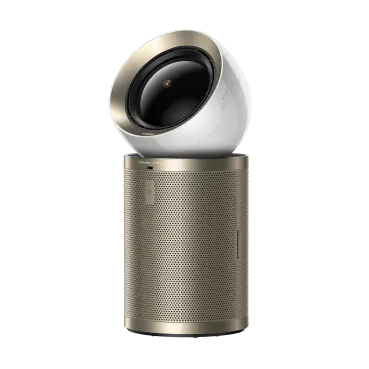
It’s an all-too-common scenario: A homeowner is standing in their basement, flashlight in hand, staring at alarming dark patches spreading across once-pristine walls. The musty odor was the first clue, but seeing fuzzy colonies of mold sends a chill down their spine despite the summer heat outside. Now alert, they notice black mold forming in the corners of other rooms.  Determined to thoroughly understand, the owner goes online to check a tip the neighbor gave: “Does Heat Kill Mold Effectively?” they ask a search site—and find that it does. But heat alone might not be the best solution. How Mold Reacts to Heat Mold thrives in moisture levels above 60% relative humidity amid temperatures between 60-80°F (15-27°C). Limited ventilation and darkness aid its growth as it spreads using seed-like spores so tiny they are undetectable to the unaided human eye.  Spores might sound like a scenario from a science fiction movie, but because they are real they can be eradicated through real actions based on real science. Though ominous to some because it can grow silently and undetected, mold is a manageable organism affected by temperature and other environmental factors. Heat is indeed a crucial component because household mold dies at temperatures above 140°F (60°C). Eliminating spores that spread it is more difficult, requiring temperatures of 160°F (71°C) sustained for several hours. Appliances that scrub the air clean are also important to the effort. Dry Heat vs. Moist Heat: Which Works Better? Boiling water or steam cleaners that reach 212°F (100°C) can kill surface mold, including on walls, while portable heaters can bring the temperature inside a room high enough to have an impact, though professional assistance is advised. Also useful in the fight against mold are HEPA air purifiers such as the heat-enabled Dreame Airpursue PM20 Air Purifier. It dries the air while removing micro-contaminants including airborne mold spores. Such purifiers also help lower the relative humidity to create an environment less hospitable to mold. Warmer, drier air helps keep surfaces dry, deterring condensation that helps mold take hold in the first place. If hot water is used to kill mold, Dreame’s wet and dry vacuum cleaners are excellent for extracting moisture from carpets or floors, either before or after heat treatment. The upright, bagless models offer both dry and wet cleaning with suction power of up to 21,000Pa to remove dirt, debris and micro-organisms from multiple surfaces. Does Heat Kill Black Mold Specifically? Heat can kill black mold along with other types of mold. But ideally it's not the standalone solution. Heat should be used as part of a broader remediation plan that eliminates the sources of moisture that cause mold. A holistic plan also includes manual removal, HEPA filtration and dehumidification. Dreame’s wet dry vacuum cleaners again come in handy, this time for safe removal of moldy water. The advanced technology uses hot water to weaken the organisms while the vacuum removes dead mold and water.  Most indoor heating systems can’t reach the temperatures needed to kill mold and its spores, so multiple portable units can be used to reach the required temperature. But with such high heat involved, professionals should be engaged to assist. Dreame Take Avoid using high heat on large areas or porous materials if you are not a trained professional as it can potentially damage materials or even spread spores if not done correctly. Hands-on techniques for mold removal vary according to the surface. For non-porous surfaces such as tile, glass or sealed wood boiling hot water and scrubbing with a brush or cloth using detergent is effective. Heavily affected porous materials such as drywall, insulation, carpet and fabric might have to be cut out and discarded.  Killing Mold in Hard-to-Reach Places: Spray Bottles and Other Tools Spray bottles with a nozzle can get a cleaning solution into corners and crevices. A microfiber cloth or soft washcloth wrapped around a paint stirrer or toothbrush can also help you scrub tricky spots.  Effective Cleaning Solutions: Bleach: Bleach is effective but should be used with caution due to toxic fumes. Mix one cup of bleach with one gallon of water. Apply the solution to the moldy surface using a sponge or spray bottle. Let it sit for 15-20 minutes, then scrub and rinse thoroughly.   Important NEVER mix bleach with ammonia or other cleaners, as it can create dangerous toxic fumes. White vinegar: Spray undiluted white vinegar directly onto the mold. Let it sit for at least an hour, or even 24 hours for tough spots. Then, scrub with a brush and wipe clean with a damp cloth. Hydrogen peroxide: A 3% solution of hydrogen peroxide is a less harsh alternative to bleach. Spray undiluted 3% hydrogen peroxide directly onto the mold. Let it sit for about 10-30 minutes.   Baking soda: Mix 1/4 teaspoon of baking soda with 2 cups of water in a spray bottle. Spray the moldy area and scrub with a brush.  Afterward: Thorough Cleaning and Drying: After physical removal, clean the entire affected area with a damp cloth and an all-purpose cleaner to pick up any remaining mold particles. Use fans, dehumidifiers and HEPA purifiers for complete drying. HEPA Vacuuming: Once the area is dry, a Dreame wet and dry vacuum can thoroughly remove leftover spores and fine dust.  The advanced appliance captures any residual airborne mold spores and fine dust that traditional vacuums might miss. Clean the canister outdoors to prevent re-releasing spores indoors. Another solution for preventative care is robot vacuums with mops. Unlike traditional robot vacuums that only suck up dirt and dust, these have an integrated mopping system that allows them to handle both dry vacuuming and wet mopping tasks.  They also incorporate advanced navigation systems, sensors, and sometimes AI, to map out homes, avoid obstacles and plan efficient cleaning routes. Dreame Robot Vacuum Cleaners vacuum, mop and navigate with precision to ensure floors are clean and dry. They use powerful suction and rotating brushes (main brush and side brushes) to pick up dust, dirt and other debris from the floor. The mopping action is accomplished using a tank that holds water or a cleaning solution and a microfiber pad or cloth attached to the bottom of the robot that scrubs.  With home floors dust-free, mold re-settlement is discouraged. Why Mold Is So Hard to Eliminate Mold is difficult to eradicate because it's a living organism that only needs moisture and some form of organic material to thrive. It grows rapidly and invisibly in hidden areas, and can cause both property damage and health problems. Effective remediation requires not just cleaning the mold, but thoroughly addressing the causes that enabled it to grow in the first place. Understanding the science behind why mold grows empowers us to eliminate it and ensure it doesn't return. A healthy environment provided by Dreame’s range of indoor air quality and cleaning appliances help eradicate mold, protecting your well-being, property and peace of mind.  
Continue reading
How to Get Rid of Bed Bugs: Vacuuming or Steaming?

How to Get Rid of Bed Bugs: Vacuuming or Steaming?

Editorial TeamDreame |
Bed bugs are more common than many people think—and they don’t care how clean your home is. Whether you’ve noticed itchy bites, strange rust-colored spots on your sheets, or tiny bugs hiding in your mattress seams, you may be facing an infestation. The good news? You don’t have to jump straight to toxic chemicals or costly professional treatments. Two of the safest, most effective ways to fight bed bugs are vacuuming and steaming. In this guide, we will describe how each method works, when you should use them, and tips for getting results that last a long time. How to Know If You Have Bed Bugs Bed bugs are small, flat insects that feed on human blood. They hide during the day and come out at night to bite, often leaving clusters of red, itchy marks behind. Signs of Bed Bug Activity Include: Small red bites in a line or cluster, especially on arms, legs, or neck Tiny blood stains or dark fecal spots on bedding or furniture Shedded skins or live bugs around mattress seams, headboards, or baseboards A musty, sweet odor in the case of severe infestations To inspect your space, use a flashlight and look along mattress seams, behind headboards, inside baseboard cracks, and around wall outlets or picture frames. Important Bed bugs are elusive. Even if you don’t see them right away, their signs often appear before the insects themselves. Are Bed Bugs and Dust Mites the Same? People often think bed bugs are dust mites, but they’re very different. Dust mites are minute creatures that require a microscope to be seen, and they live by eating dead skin cells. They don’t bite and aren’t visible to the naked eye, but these critters can cause allergy symptoms like itchy eyes, sneezing, or a runny nose. Bed bugs, on the other hand, are visible and bite humans. If you’re dealing with allergic reactions but no visible bites, the culprit may be dust mites instead. You can learn more in our guide on how to deal with dust mites.  Can Vacuuming Get Rid of Bed Bugs? Yes. Vacuuming is one of the fastest, easiest ways to reduce a bed bug population. It’s especially useful in the early stages of an infestation or when preparing for deeper treatment. Vacuuming removes live bugs, debris, and eggs from surfaces—but it does not kill them. That’s why it should always be paired with additional treatments like steaming or laundering. Pro-tip Vacuuming is an excellent first step, but follow it with steam or heat treatments to fully eliminate hidden pests. How to Vacuum Bed Bugs For best results, follow this step-by-step process. Use a high-powered vacuum with strong suction and a sealed HEPA filter. Attach a narrow crevice tool or brush to help dislodge bugs from tight spaces. Target critical areas like mattress seams, box springs, carpet edges, and behind baseboards or outlets. Learn more with these strategies for vacuuming other tight or hidden areas. Move slowly and carefully to avoid scattering bugs. Dispose of vacuum contents immediately by sealing them in a plastic bag and taking it outside. Wash reusable containers or nozzles in hot, soapy water. Vacuuming should be done regularly until the infestation is completely gone. If you’re using a bagged vacuum, replace the bag after every session. For bagless models, clean the dustbin thoroughly after each use.  Explore Dreame’s full collection of cordless stick vacuums. What Kind of Vacuum Works Best? When selecting a vacuum cleaner to get rid of bed bugs, look for models with multi-layer filtration, strong suction, and tight seals. Lightweight cordless models are convenient for furniture and tight areas, while upright vacuums are better for carpets and large surfaces. Some people find portable “bug vacuum” tools useful for spot treatments, but they shouldn’t be relied on alone.  We recommend a model like the Dreame Z30 Cordless Vacuum Cleaner, which offers high suction power, multi-surface tools, and a HEPA-level filtration system—ideal for targeting hidden pests. Will Vacuuming Kill Bed Bugs? No. Vacuuming doesn’t kill bed bugs or their eggs. It only removes them from surfaces. Some bugs may survive inside the vacuum unless the contents are sealed and disposed of correctly. Important: Never assume vacuuming alone is enough. Always combine it with additional treatments to avoid recurrence. Can Steam Kill Bed Bugs? Yes. High-heat steam is lethal to both adult bed bugs and their eggs on contact. That makes steaming one of the most powerful chemical-free methods for treating infestations. Dreame Take Steaming is one of the most effective eco-friendly treatments, especially when combined with HEPA-level vacuuming. It targets what vacuums can’t reach—eggs in deep crevices and fabric folds. How to Use Steam to Kill Bed Bugs Steam works by delivering intense heat deep into cracks, fabrics, and crevices—areas where bed bugs love to hide. Here’s how to use it safely and effectively: Choose a dry vapor steamer that reaches at least 200°F (93°C). Use nozzle attachments to control steam flow and access tight spaces. Move slowly—about 1 inch per second—to allow heat to penetrate. Focus on key areas like mattress seams, couch cushions, curtain folds, and baseboards. Avoid steaming electronics, outlets, or sensitive surfaces. Pro-tip Use a towel or cloth-covered nozzle to disperse steam evenly and increase fabric penetration. Will Steam Kill Bed Bug Eggs? Yes—if applied directly and at the right temperature. Steam must reach at least 120°F (49°C) to kill eggs. Most commercial-grade bed bug steamers exceed this threshold. For best results, follow up with vacuuming to remove any dislodged or dead bugs after the surface dries. Vacuum vs. Steam for Bed Bugs: Which Is Better? Here’s a quick and simple side-by-side comparison table to help you decide: Feature Vacuuming Steaming Removes live bugs Yes Yes Kills bugs on contact No Yes Kills eggs No Yes Works in tight crevices Yes (with attachments) Yes (with nozzles) Safe for daily use Yes No Chemical-free Yes Yes Pros Vacuuming is fast, non-invasive, and ideal for daily use. Steaming penetrates deep and kills bugs and eggs in one pass. Cons Vacuuming doesn’t kill pests or eggs. Steaming takes time and should be used cautiously around electronics. Dreame Take Use both methods for the best results. Vacuuming removes visible bugs fast, while steam kills hidden eggs and survivors. Together, they form a highly effective, chemical-free strategy. If you opt for a new vacuum or steamer, don’t let your old vacuum gather dust—give it a second life and help someone create a cleaner, healthier home by following this easy donation guide. What to Do After Treating for Bed Bugs After steaming or vacuuming, ongoing maintenance is key to preventing a rebound. Wash all clothes, bedding, and linens in hot water and dry on high heat. Encase your mattress and box spring in certified bed bug-proof covers. Continue vacuuming sleeping areas at least once a week. Install bed bug interceptors under bed and sofa legs. Reduce clutter to eliminate hiding spots. Inspect seams, furniture, and floors regularly for new signs. After getting rid of bed bugs, it’s important to keep a clean house.  Pro-tip Ongoing vigilance for the next 30 days is often the difference between success and relapse. How to Prevent Bed Bugs Long-Term Prevention is easier—and cheaper—than treatment. Stay ahead with these proactive tips: Inspect all secondhand items before bringing them indoors. Use luggage racks in hotels and avoid placing bags on beds or carpets. Vacuum and steam your suitcase after traveling. Seal cracks in baseboards, floorboards, and walls. Use mattress encasements year-round, especially in apartments or dorms. Educate roommates or household members about early warning signs. Important If you live in shared housing, coordinate prevention efforts with neighbors or building management to prevent re-infestation. FAQ Can bed bugs go away on their own? No. Left untreated, infestations grow larger. Active intervention is necessary. Are bed bugs hard to kill with your fingers? Yes. They are small, flat, and excellent at hiding. Manual squishing isn’t a solution. Are bed bug eggs sticky? Yes. They have a glue-like surface that allows them to stick to wood, fabric, and crevices. Can bed bugs live in vacuum-sealed bags? Not for long. Bed bugs need oxygen and will die in airtight conditions, but only if the seal remains intact. Can a clothes steamer kill bed bugs? Most clothes steamers do not maintain the consistent heat required. A dedicated bed bug steamer is more effective. A clean home isn’t just tidy—it’s a sanctuary for your mind, especially when you’ve finally kicked bed bugs to the curb; feel the relief and reclaim your peace with this uplifting guide from Dreame on the mental health benefits of cleaning. Final Note Bed bugs are tough—but not impossible to beat. With a strategy that combines regular vacuuming, targeted steaming, and consistent follow-up, you can get rid of them safely and efficiently. Whether you’re managing a light infestation or preventing a recurrence, the key is consistency and the right tools.
Continue reading
How to Clean Linoleum Floors Like a Pro: Tips and Tricks

How to Clean Linoleum Floors Like a Pro: Tips and Tricks

Editorial TeamDreame |
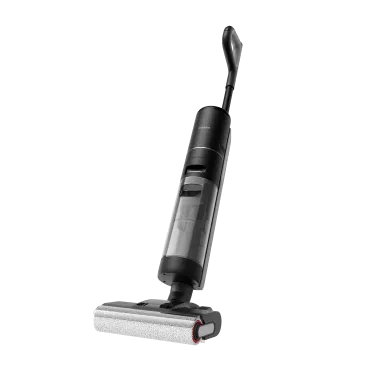
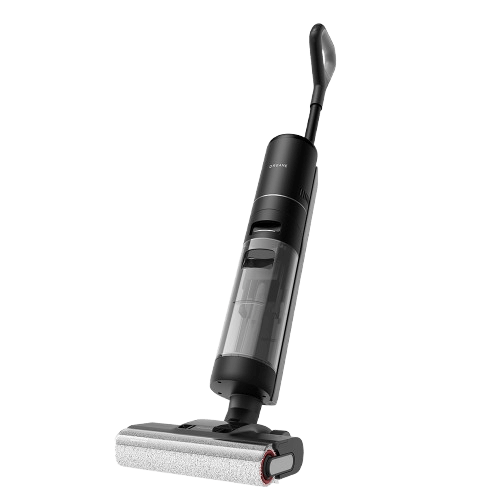
Linoleum flooring is making a comeback, and for good reason. It’s budget-friendly, eco-friendly, and surprisingly durable. But how do you keep it looking clean and fresh? That takes the right approach. Learning how to clean linoleum floors the right way can protect their finish, extend their lifespan, and help them shine like they were just installed. In this guide, we’ll walk you through the tools, tricks, and routines that make it easy to keep your floors spotless, even if you’re dealing with stubborn stains or ground-in dirt. What Is Linoleum Flooring? Linoleum is a natural floor covering made from renewable materials like linseed oil, cork dust, and wood flour. Unlike vinyl, which is synthetic, linoleum is biodegradable and hypoallergenic. It comes in a range of styles, from muted neutrals to bold patterns, and is commonly found in kitchens, bathrooms, and hallways. There are two common types: Sheet linoleum: Seamless and moisture-resistant Tile linoleum: Easier to install and replace Because of its porous, organic makeup, linoleum needs gentle care. Using the wrong cleaner or too much water can warp or damage the surface over time. That’s why choosing the right method and the right tools matters. What to Clean Linoleum Floors With Before diving into cleaning methods, let’s talk tools. Different cleaning tasks call for different tools. Here's a quick breakdown: Cleaning Task Best Tools Dreame Recommendation Daily dust/hair removal Soft broom, microfiber mop, robot vacuum Dreame L10s Ultra: Hands-free robot vacuum and mop combo with precision mapping and automatic dirt disposal. Perfect for daily maintenance. Weekly mopping Damp microfiber mop, gentle floor cleaner Dreame H14 Pro: Lightweight wet and dry vacuum that scrubs, vacuums, and dries in one go, without leaving streaks. Deep cleaning Soft-bristle scrub brush, mild pH-neutral floor cleaner, baking soda for spot treatment Dreame H14 Pro: Its powerful suction and intelligent water control make it ideal for tackling built-up grime or greasy residue. How to Deep Clean Linoleum Floors Over time, linoleum can trap ground-in dirt, develop yellow stains, or collect greasy buildup. Here’s how to deep clean linoleum floors effectively: Step 1: Clear the Area Remove rugs and furniture so you have a clean workspace. Step 2: Vacuum or Sweep Thoroughly Start by clearing away loose dirt, dust, and crumbs. If you're short on time, set your robot vacuum, like the Dreame L20 Ultra, to do the work while you focus on other tasks. If you need a quick and efficient cleanup, consider a wet and dry vacuum or a cordless stick model. These options offer precise spot cleaning and strong suction where it matters most. Step 3: Apply a Cleaning Solution Mix warm water with a bit of mild dish soap. Avoid vinegar, especially on older linoleum. Mop the floor lightly, avoiding puddles. The surface should stay just damp and not wet. Pro-tip The Dreame H14 Pro intelligently adjusts water usage and suction power based on the floor’s dirt level, so you get a deep clean without overwetting. This is perfect for moisture-sensitive linoleum floors. Step 4: Scrub Problem Spots For yellowing or grease buildup, apply a baking soda paste and scrub gently with a soft brush. Or use a wet and dry vacuum cleaner with strong suction and a rotating brush to lift stubborn grime. Step 5: Rinse and Dry Use a dry microfiber cloth or a wet and dry vacuum to prevent water damage. Make sure no dirty water is left behind. Regular Cleaning Routine (Easy Way to Clean Linoleum Floors) The best way to keep linoleum looking fresh? Follow this simple routine: Daily: Sweep or use a robot vacuum like the Dreame L10s Ultra to remove dust, crumbs, and pet hair. The vacuum’s built-in camera avoids cords, furniture, and rugs, so you don’t have to babysit it. Weekly: Lightly mop with a gentle cleaner or use the H14 Pro, which automatically senses dirt and adjusts suction and water flow to match. It’s perfect for fast refreshes that don’t soak your floors. Monthly: Deep clean with wet dry vacuum or supplement with the Dreame Z30 Cordless Stick Vacuum for edge-to-edge dust pickup before mopping. Its high suction power and precision cleaning attachments are ideal for getting into corners and around furniture. Dreame Take Consistency is key. Combining robot vacuuming with occasional manual mopping keeps linoleum looking spotless without wearing yourself out. How to Clean Stains and Sticky Linoleum Floors Life happens—grease spills, scuff marks, sticky juice spots, and even mold can show up. Here’s how to handle them: Grease Sprinkle baking soda over the greasy area, then mop with warm soapy water. Or let the H14 Pro take care of it. Its edge-cleaning design gets right up against cabinets and baseboards, gently lifting grease with automatic suction adjustments. Mold Use a linoleum-safe antimicrobial cleaner or a diluted 3% hydrogen peroxide solution to treat mold stains. Spray, let sit for 10 minutes, then gently scrub and wipe clean. Follow up with the H12 Dual in Auto Mode. Its robust brush head and suction power pick up spores and rinse residue clean. Scuff Marks Gently rub marks with a melamine sponge. For embedded dust, grab the Dreame Z30 Cordless Stick Vacuum. Its powerful suction and smart adaptive mode make quick work of dirt in corners or around furniture legs. Sticky Spots Spray with a linoleum-safe floor cleaner and let soak for 5–10 minutes. Then use the a wet and dry vacuum to scrub and vacuum simultaneously. If you use Dreame models like H14 Pro, their intelligent mess detection adjusts power precisely, and the dual water tanks keep dirty and clean water separate. For more information on tackling difficult areas, check out the article on “Tricky Spots for Vacuuming.” Dreame Take From sticky spots to tough stains, the H14 Pro combines strong suction, rotating brushes, and drying in one smooth pass, leaving your linoleum clean, dry, and residue-free. What Is the Best Way to Clean Linoleum Floors? The best way to clean linoleum floors combines the right tools and techniques. Here’s a quick summary of what works best: Use a robot vacuum daily to reduce dust buildup (L10s Ultra or L20 Ultra). Mop lightly with a gentle cleaner. Tackle stains with non-abrasive tools. Avoid bleach, harsh scrubbers, or soaking the floor. Important The Dreame wet and dry vacuum feature dual water tanks, so you’re never pushing dirty water around. Maintenance Tips for Longevity Place doormats at entrances to reduce dirt. Use furniture pads to avoid scratching the surface. Clean spills immediately to prevent staining. Avoid direct sunlight to prevent fading (use curtains or blinds). Reseal older linoleum every 1–2 years for extra protection. What to Avoid When Cleaning Linoleum Floors 🚫 Harsh chemicals like bleach or ammonia because they strip the finish. 🚫 Too much water, especially on old or unsealed linoleum; it seeps into seams and warps floors. 🚫 Steam mops: the heat can loosen adhesives over time. 🚫 Abrasive scrubbing tools (steel wool and stiff brushes) because they can scratch or strip the finish. Dreame Take Stick with smart tools like Dreame’s wet and dry vacuums, which use just the right amount of moisture and adjust based on floor condition. This helps prevent water damage while keeping floors spotless. FAQs Q: Can I use vinegar to clean linoleum? A: Avoid it. Vinegar’s acidity can dull the finish over time. Q: What’s the best mop for linoleum floors? A: A microfiber mop, spray mop, or wet and dry vacuum is ideal. Learn more on “How Wet and Dry Vacuums Transform Multi-Surface Cleaning at Home.” Q: How do I restore shine to old linoleum? A: Buff with a floor polish designed for linoleum. Q: Can robot vacuums handle linoleum transitions? A: Yes! Even the beginner models like Dreame’s D9 Max Gen 2 climb 0.8in (20mm) thresholds with ease. Q: What should I do if my linoleum starts curling? A: Dry the area thoroughly (try the wet and dry vacuum in Dry Mode), press small curls flat with adhesive, and consult a pro for major warping. Final Thoughts Learning how to clean linoleum floors isn’t rocket science, but doing it right makes all the difference. With a little daily care and the right cleaning tools, your floors can stay spotless and stunning year-round. Stick to gentle cleaners, avoid excess water, and consider smart tools like Dreame’s robot vacuums and mops for effortless maintenance. Your floors deserve it, and so do you! Master the Art of Floor Care How to clean hardwood floors How to clean wood floors How to Clean and Mop Tile Floors How to Clean Laminate Floors How to Clean Marble Floors How to Clean Grout on Tile Floor Choosing Floor Cleaning Solution
Continue reading
Mattress Vacuum vs. Traditional Vacuum: How to Clean Your Mattresses Better

Mattress Vacuum vs. Traditional Vacuum: How to Clean Your Mattresses Better

Editorial TeamDreame |
Sheets look fresh, but deep down, mattresses can hide dust mites, allergens, bacteria, and things you can't see. Cleaning your mattress the right way can make a big difference in how you sleep and how you feel. Let's look at what really works. What is a Mattress Vacuum and How Does it Work? A mattress vacuum is a cleaning tool designed to remove fine dust, dust mites, pet allergens, and other particles that settle deep inside a mattress. Unlike regular vacuums, it is built for soft surfaces and can gently lift debris from fabric without damaging the material. Many use strong suction combined with a flat head to press into the mattress and pull out what lies below the surface. Some models go further by adding UV light to help reduce germs or heated air to dry out moisture. Others use vibration to shake loose hidden dirt or include filters that trap tiny particles as small as 0.3 microns. Mattress vacuums are usually small, lightweight, and shaped for easy handling, so they're well-suited for cleaning beds, pillows, and other upholstered areas that collect allergens. Benefits of Regular Mattress Vacuuming Your mattress could be one of the dustiest places in your home. A study by medical researchers from Taiwan and New Zealand found that vacuuming your mattress daily can dramatically reduce this hidden buildup. Here's what the science says: Dust mite allergens reduced by 85.1% The study measured two key allergens, Der p 1 and Der f 1, commonly produced by house dust mites. After 8 weeks of daily vacuuming, their total amount dropped by 85.1%. These allergens are strongly linked to asthma, sneezing, and nighttime coughing, especially for sensitive individuals. Endotoxin levels lowered by 71.0% Endotoxins come from bacteria and can irritate your lungs even if you're not allergic. In the study, the total amount of endotoxin in mattress dust decreased by 71.0%, helping reduce exposure to harmful microbial fragments that may worsen respiratory symptoms. Mold dust (β-Glucan) decreased by 75.7% Mold fragments like β-glucan are often trapped in bedding and linked to breathing issues. The researchers found that daily vacuuming reduced total β-glucan levels in mattress dust by 75.7%, a major win for anyone with mold sensitivity or who lives in humid areas. Total dust weight removed: 77.7% Vacuuming didn't just reduce the bad stuff; it significantly lowered the actual amount of dust in the mattress. After 8 weeks, the total dust weight collected dropped by 77.7%. Less dust means fewer allergens, fewer irritants, and a cleaner sleeping environment overall. Easy, affordable, and highly effective Instead of relying only on expensive mattress covers, this study shows that just 2 minutes of daily vacuuming with a standard household vacuum cleaner can deliver meaningful health benefits without major cost or effort. Pet allergens are likely reduced as well Although the study didn't measure cat and dog allergens, previous research (cited by the authors) shows that regular mattress vacuuming also lowers levels of Fel d 1 (from cats) and Can f 1 (from dogs). Given the sharp reduction in total dust, it's likely these allergens will drop as well. One related study found that allergen levels returned to pre-cleaning levels just 6 weeks after stopping daily vacuuming. That means long-term benefits require long-term habits, but the payoff is a healthier, cleaner bed. How Mattress Vacuums Compare to Traditional Vacuums While mattress vacuums are specially designed to tackle deep allergens, dust mites, and bacteria, many traditional vacuums can still offer effective cleaning. Cleaning Power and Effectiveness Traditional Vacuums: Provide strong suction, typically ranging from 10,000 Pa to 18,000 Pa, which is enough for cleaning the mattress surface and picking up dust, hair, and dirt. Some premium models can exceed 20,000 Pa suction power, more efficient for deeper cleaning and better at lifting debris from deep inside the mattress fabric. Many high-end models feature smart suction adjustment based on the level of dirt, optimizing cleaning efficiency. They are capable of picking up dust, allergens, pet hair, and debris across various surfaces, including mattresses. Mattress Vacuums: Designed with features like UV-C light and vibration technology, mattress vacuums help to kill bacteria and remove deep-seated allergens that traditional vacuums may miss. Specializing in targeting dust mites and allergens that can accumulate in mattress layers, making them a great choice for those with allergies or respiratory concerns. Specialized Features and Attachments Traditional Vacuums: Include motorized brushes that help lift and remove dirt, dust, and hair from mattress surfaces. Equipped with HEPA filters, these vacuums capture very fine dust particles and allergens, improving air quality and reducing exposure to allergens. Some models are designed with advanced brush mechanisms that effectively clean along edges and corners, providing a more thorough clean of the mattress surface. Mattress Vacuums: Mattress vacuums are typically equipped with motorized fabric brushes, vibrating pads, and UV-C sterilizers, providing a deeper clean on fabric surfaces. While high-end traditional vacuums can clean the mattress surface, mattress vacuums are designed to clean seams and deep layers more effectively with specialized attachments and tools. Ease of Use and Handling Traditional Vacuums: These vacuums are generally lightweight, weighing between 3 lbs to 8 lbs, making them easy to handle and maneuver across mattress surfaces. Cordless models offer greater flexibility, allowing you to move freely and clean the entire mattress without restrictions. Some models are low-profile, enabling them to clean under beds and furniture where dust and allergens often accumulate. Mattress Vacuums: Mattress vacuums are compact and designed for one-handed use, making them easy to carry and store. They often feature a slim design that fits perfectly on soft surfaces like mattresses, allowing for precise cleaning without overcomplicating the task. At-a-Glance Comparison of Mattress Vacuums vs. Traditional Vacuums Feature Mattress Vacuums Traditional Vacuums Cleaning Power Designed for deep cleaning of allergens, dust mites, and bacteria using UV-C light and vibration technology Strong suction (10,000 Pa to 18,000 Pa), some premium models exceed 20,000 Pa for deeper cleaning Specialized Features UV-C light, vibration technology, motorized fabric brushes, HEPA filters, sterilizers Motorized brushes, HEPA filters, basic upholstery tools Deep Cleaning Targets dust mites, allergens, and bacteria deep inside the mattress fabric Effective at cleaning the surface of the mattress, but may miss deep allergens Ease of Use Compact, lightweight, and easy to use with one hand Lightweight (3-8 lbs), cordless models for greater flexibility, low-profile designs for cleaning under beds Attachments Motorized fabric brushes, vibrating pads, and UV-C sterilizers Basic upholstery tools, advanced brush mechanisms for edges and corners Suitability for Mattress Designed specifically for mattress cleaning with special tools Can clean mattress surfaces, but is less effective on deep layers and seams Can a Cordless Stick Vacuum Clean a Mattress Well? Yes - for surface-level cleaning. But it cannot clean deeply or remove allergens effectively. These vacuums are designed mainly for floors and large open areas. When used on a mattress, they can remove pet hair, loose dust, and crumbs from the top layer. If you attach an upholstery tool, you may improve pickup. They're lightweight, easy to handle, and useful for quick cleanups. However, a cordless stick vacuum usually cannot reach the deeper layers of a mattress where dust mites, mite waste, fungal particles, and bacteria often settle. It lacks features like UV sterilization and vibrating brushes that are found in many mattress-specific vacuums. Without these, the allergens stay trapped in the fabric. The suction may also be weaker compared to devices made for soft surfaces. In short, the cordless stick vacuum, like the Dreame Z30, is effective for mattress surface cleaning, handling dust, hair, and light debris with its 14000 Pa (310AW) suction and multi-surface brush. However, it may struggle with deep cleaning and allergen removal in the fabric. For thorough cleaning, especially for deep allergens and bacteria, a mattress vacuum with specialized features, such as UV-C light or vibration technology, would be more effective. Choosing the Right Vacuum Cleaner for Your Mattress To choose the right vacuum for your mattress, prioritize features that target allergens and moisture. Here's what to consider: Strong suction power. Look for vacuums with suction between 13,000 and 16,000 Pa. This range is strong enough to pull dust, skin flakes, and mites from deep inside the fabric. HEPA filter system. A true HEPA filter can trap over 99.9% of fine dust and allergens as small as 0.3 microns. This helps stop particles from going back into the air. UV-C light feature. Some vacuums shine UV-C light on the mattress to help kill bacteria and mites. This is helpful for people with allergies or skin sensitivity. High-frequency vibration. A vacuum with a vibrating base shakes the mattress surface. This helps lift dirt and mite waste that sticks to fabric. Heat function for drying. Warm air around 130 to 140°F (54 to 60°C) can reduce moisture and lower the chance of mold or bacteria growing after cleaning. Lightweight body. Choose a vacuum that weighs less than 4 pounds if possible. Lighter models are easier to lift and move across a bed. Easy to clean parts. A vacuum with washable filters and a quick-release dust bin saves time and keeps your tool in good condition. Long battery life. A strong battery lets you finish cleaning in one go. Try to find one that supports at least 10 to 15 minutes of run time per mattress. Are Mattress Vacuums Worth It? Yes, for most households, a mattress vacuum is worth it. It offers better results than general vacuum tools when it comes to cleaning beds. Regular vacuuming with the right tool helps reduce allergy risks. One study showed that daily mattress vacuuming reduced total dust mite allergens by 85.1% over 8 weeks. Unlike general vacuums, mattress vacuums focus on surfaces that collect skin flakes, moisture, and mites. They come with features designed just for mattresses, like UV light, vibration, and strong filters. For people with asthma, allergies, or sensitive skin, this can improve sleep and reduce irritation. Families with pets, small children, or humid bedrooms may also find it useful to have a vacuum meant for soft surfaces. Final Takeaway: Clean Deeper, Sleep Better A clean mattress goes beyond appearances - it's about health. In short, if clean air and a healthier sleep space matter to you, a mattress vacuum is a good investment.
Continue reading