Black Friday Sale Is Live! Best Prices of 2025
00
Days
: 00
Hours
: 00
Mins
: 00
Secs
Shop Now > close button
How to Use a Wet Dry Vac for Water — the Definitive Guide

How to Use a Wet Dry Vac for Water — the Definitive Guide

Editorial TeamDreame |
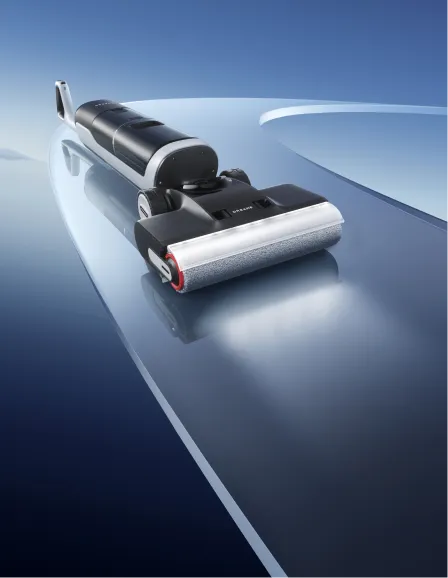
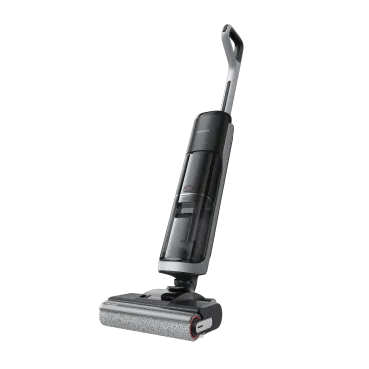
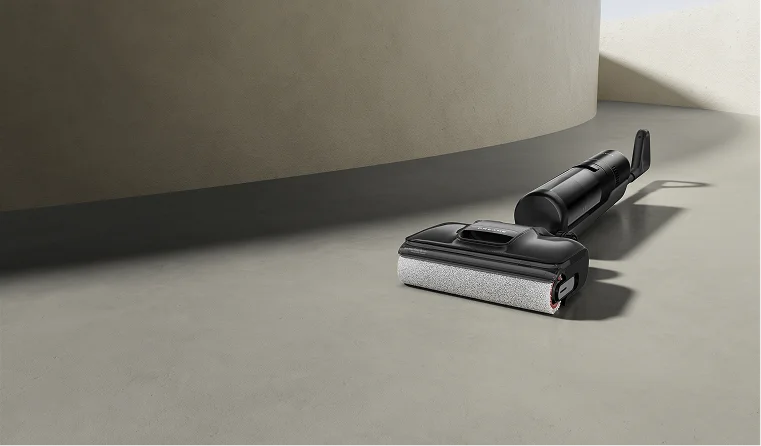
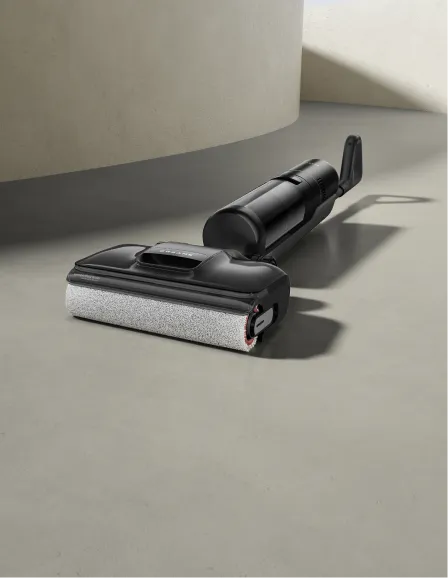
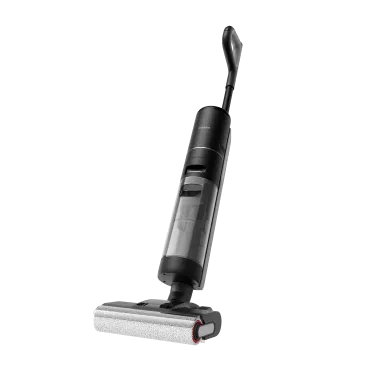
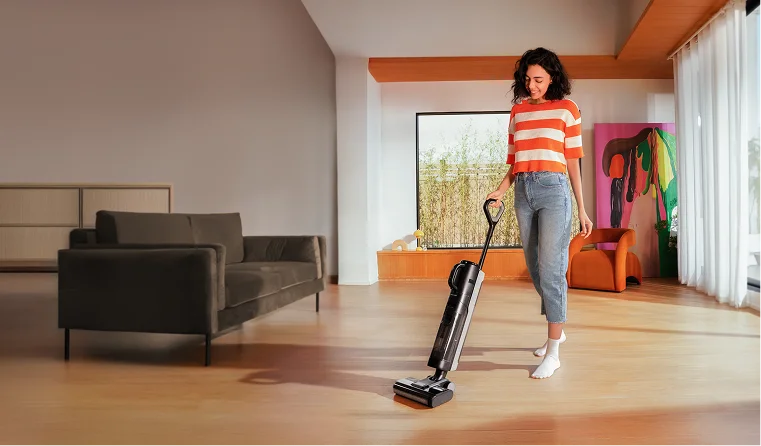
A freezer defrosting into a puddle across the kitchen floor is more than just an inconvenience—it's a cleanup challenge. You might instinctively reach for a mop, but a wet/dry vacuum is faster, safer, and more thorough for liquid pickup. This versatile appliance is specifically engineered to handle both dry debris and liquid spills, making it an indispensable tool for unexpected messes. Using the right equipment is crucial; never use a standard dry-only vacuum on water. Knowing how to use a wet/dry vacuum for water safely and efficiently turns a potential disaster into a quick task. To ensure a smooth cleanup, let’s cover what to prepare before you begin. What Should You Prepare Before Vacuuming Water? Proper preparation is key to efficient water cleanup. Before you start, make sure you have the right equipment on hand to manage the spill from start to finish. A little setup prevents scrambling for supplies mid-task and ensures you leave the surface as dry as possible. You will generally need three essentials: A Wet/Dry Vacuum: The main tool to remove most of the liquid. A Squeegee or Wiper: Helps guide water on hard surfaces to the vacuum nozzle making sure you pick up every drop. A Towel: Great for soaking up any leftover dampness or dealing with small scattered spots the vacuum might have missed. Safety & Setup Checks Confirm wet mode and install/remove filters and brush head per your model’s instructions. Keep cords and plugs away from standing water. Have a disposal plan. Use a floor drain, utility sink, or outdoor area permitted for gray water.   Dreame Take We believe you shouldn't have to follow up with extra tools, which is why we engineer our wet dry vacuums to deliver a complete clean. With features like an intelligent, self-lowering scraper that leaves floors virtually streak-free and powerful 22,000Pa suction to lift moisture effectively, our goal is to eliminate the need for a separate wiper or towel. The vacuum should do all the work, from spill to shine.   Step-By-Step Water Removal With a Wet Dry Vac Successful water removal follows a repeatable sequence: contain the perimeter, extract from the center, empty the tank, and finish the edges. Step 1. Contain the Spill by Securing the Perimeter Start by working around the spill's edges—along walls, baseboards, and around furniture. This pushes water toward the center instead of letting it seep into gaps. Keep the nozzle flat against the floor, using slow, overlapping strokes to create a dry "moat" that contains the spill for faster extraction.   Pro-tip To contain the spill better, place a folded towel along a baseboard to act as a temporary barrier and pull the vacuum nozzle inward from the towel. If you see water showing up again along a floor seam just change your approach angle and overlap your previous pass by at least a third to remove it.   Step 2. Extract Water from the Center with Slow Passes Once the perimeter is secure, move to the middle of the spill. Use deliberate, back-and-forth passes that slightly overlap to ensure consistent coverage. As the tank fills, an internal float will rise and cut off suction—a distinct change in the motor’s pitch is your signal to stop and empty the tank.   Pro-tip For deeper puddles, first squeegee to consolidate water, then vacuum. On large areas, work in zones—extract water from one section, empty the tank, and then move on to the next to avoid carrying a heavy, full tank across wet floors.   Step 3. Empty the Tank and Polish the Surface When suction stops or the motor pitch changes, empty the tank promptly to avoid spills. Dispose of the collected water in a floor drain or outdoors. Once the bulk of the water is gone, make a final "polish pass" over the area to lift any thin film of moisture from grout lines or seams. Step 4. Detail Edges and Tight Spaces For a truly dry finish, switch to a crevice tool for thresholds, under cabinet toe-kicks, and around appliance feet. Make light careful passes until the areas feel dry when you touch them. Keep in mind, a good nozzle seal works better than pushing down hard. Step 5. Speed-Dry to Finish the Job Even after visible water is gone, accelerate drying to protect floors and subfloors. Run fans and open windows if conditions permit; add a dehumidifier in humid rooms. Lift rugs/mats and use furniture coasters to protect legs. Check back after 30–60 minutes for any re-wicked moisture and repeat quick passes if needed.   Dreame Take Low furniture and tight corners shouldn't stand in the way of a perfect clean. We built our 180° lie-flat design into select Dreame wet dry vacuums for that exact reason. This feature enables the vacuum to glide effortlessly into cramped spaces, making it easy to clean hard-to-reach areas without disrupting your room's layout.   When to Use Wet Dry Vacuum With Liquid Spills Scenario Wet Dry Vac? Add-ons Escalate When… Clean water spill Yes Blot → vacuum → fans Subfloor/padding is soaked Sugary drinks Yes Extract liquid → Rinse with water & blot → Vacuum dry Odor/stickiness persists Pet urine (fresh) Yes Vacuum liquid first → Treat with enzyme cleaner Persistent odor/large area Small appliance leak Yes Fix source; dehumidifier Multi-room saturation Unknown/contaminated water No Isolate area Call certified pros Advanced Water Vacuuming Scenarios To handle more complex cleanups, tweaking your approach can make a big difference. Here are some tips to tackle tricky situations well. Large Areas Split the area into easy-to-handle sections using barriers or natural dips. Begin with the soggiest part, and drain the container right away when you notice the float-shutoff signal (a shift in engine sound) before you move on to the next area. Multi-Room Layouts Go room by room starting with the wettest spot and ending with the driest. Keep a dump site close and stick to a strict "extract → empty → return" pattern to stop overfilling and spills. Heavy Obstacles & Tight Geometry Switch to a crevice tool for areas like toe-kicks, thresholds, and gaps around appliances. Make multiple light, overlapping passes in these tight spaces until a fingertip check confirms the surface is dry. FAQs about Cleaning Up Water & Spills Q: Can you use a regular vacuum for water? A: No, never use a regular vacuum for water. It can cause electrical shock and permanent motor damage. Only vacuums specifically labeled as "wet/dry" models are designed for safe liquid cleanup. Q: Can you vacuum other liquids with wet and dry vacuums? A: Yes, wet/dry vacuums are built to handle various liquids like juice, milk, and even kitchen oil. Check your manual for restrictions: flammables/solvents are unsafe, and foamy/oily liquids may need a defoamer and extra hose/tank cleaning. Q: Can you vacuum water from the carpet? A: It is critical to check your model's specific guidelines. Many all-in-one wet/dry vacuums are designed exclusively for hard floors and should not be used on carpets, as this can damage the machine's brush mechanism and the carpet itself. Always refer to the user manual before tackling wet messes on soft surfaces. Our vacuums are optimized for superior cleaning on sealed hard floors. Q: What can you do if your vacuum smells bad after use? A: Odors often result from bacteria in leftover debris and moisture. You should empty and rinse the tank after each use. Many new vacuums help prevent smells with features like high-temperature self-cleaning, hot air drying, and specialized components like an antibacterial deodorizer in the used water tank. This module helps neutralize odors and inhibit microbial growth in the collected dirty water. Conclusion From preparing your space to executing the final "polish pass," you now have a complete, water-focused roadmap for wet dry vacuum use. The right technique—contain, extract, empty, detail, and speed-dry—protects your floors, prevents odors, and cuts cleanup time dramatically. With a methodical approach, you can handle anything from a small puddle to a multi-room incident confidently and safely.  Ready to find the perfect tool for the job or learn more cleaning strategies? Explore Dreame's innovative lineup of wet/dry vacuums and discover more expert usage tips on our blog to keep your home pristine.
Continue reading
Do Vacuums Kill Spiders or Just Scare Them Away?

Do Vacuums Kill Spiders or Just Scare Them Away?

Editorial TeamDreame |
Spiders are a common sight in many homes. They often evoke fear and curiosity. But what happens when you vacuum them? Do vacuums kill spiders, or do they just scare them away? This question puzzles many homeowners. Understanding the answer can help in managing spider encounters. Spiders can be more than just a spooky presence. For many, they cause real fear. While spiders are key for controlling other pests, their unexpected and constant appearances can be unsettling. Identifying spider species can also influence extermination methods. Some species are more resilient than others. Knowing this can guide your approach. Here, we explore vacuuming’s impact on spiders, considering: Whether vacuums kill spiders Alternative spider control methods Tips for effective spider vacuuming Understanding these aspects will help you decide the best approach for dealing with spiders in your home. How to Get Rid of Spiders Spiders are resilient, but certain methods can eliminate them. Understanding these options helps in choosing the best spider extermination approach. Common methods include: Chemical sprays and insecticides Natural deterrents like peppermint oil and citrus peels Physical removal with vacuums and sticky traps Each method has its pros and cons. Their effectiveness often depends on the spider species and the home's environment. Method Pros Cons Chemical sprays & insecticides Highly effective at killing on contact Can prevent re-infestation if residual Can be toxic to pets/kids  Harsh chemical smell Natural deterrents Eco-friendly. Repels spiders without killing them Easy DIY solution Limited effectiveness Doesn’t remove existing spiders Vacuum cleaners Immediate removal No chemicals involved Vacuums clean dust/debris at the same time Traps only work where placed Spiders may survive weak suction Do Chemical Killers Kill Spiders? Chemical insecticides are designed to kill spiders quickly. They are often effective due to their ability to target and eliminate spiders on contact. These sprays contain active ingredients that interfere with spiders' nervous systems. However, they may pose risks to humans and pets when not used properly. To safely use chemical spider killers: Follow all label instructions carefully. Ensure proper ventilation when spraying indoors. Keep children and pets away from treated areas until dry. While effective, chemical insecticides should be a last resort due to potential health risks. Homeowners should also consider their long-term impact on the environment. Opting for eco-friendly solutions where possible is a wise decision for those who prioritize safety and sustainability. Do Vacuums Kill Spiders? The idea of vacuuming spiders raises questions about its effectiveness. Most vacuums can trap spiders using strong suction. However, it doesn't guarantee immediate death. The impact depends on the vacuum's power and the spider's size. Small or fragile spiders may not survive the process. Larger spiders might endure and escape later. The enclosed dust bag or canister can suffocate or dehydrate spiders over time. It's important to use a vacuum with sufficient suction to increase the chances of spider extermination. For effective vacuuming, consider: Emptying the vacuum right after use to prevent escape. Utilizing vacuums equipped with HEPA filters to trap allergens and spider debris. Inspecting the canister regularly for any surviving spiders. Vacuuming remains a quick, non-chemical option for managing spiders in homes, but proper follow-up is crucial to ensure success. How to Vacuum Spiders Properly Take these steps: Set your vacuum to strong suction. Move slowly to direct the spider into the hose. Immediately dispose of the contents after vacuuming. Slow movement helps to avoid frightening the spider, which may allow for a more effective capture. Don't forget to seal and empty the vacuum's canister quickly to ensure the spider cannot escape back into your home. Steps for Killing Spiders With Robot Vacuum Robot vacuums are great at breaking the web “scaffold” along baseboards and under furniture. The side brush hugs walls, flicks silk and dust into the intake, and regular runs keep those spots too clean for webs to re-anchor. (Ceilings and high corners still need a duster—robots live on the floor.) If it vacuums a spider: Most get roughed up by the brush and airflow; some can survive in the bin/bag. What to Do After Vacuuming a Spider Following vacuuming, a few steps ensure the job is complete. Ignoring post-vacuum measures increases the risk of spider escape. What you should do: Want to release it? Pause the vacuum, seal the canister or bin, take it outside, and tap the spider out. Prefer to dispose of it? Empty into an outdoor trash bag (or swap the sealed dock bag). Not sure what species? Don’t reach in, put gloves on first, keep it sealed, toss it. Immediately clean the canister to remove debris. Cleaning the vacuum ensures no eggs or allergens remain. Outdoor disposal prevents spiders from re-entering the home. Implement these steps to enhance the efficacy of your vacuuming efforts and uphold cleanliness. Pro Tips for Choosing a Time-saving Vacuum Selecting an efficient vacuum saves time and improves spider control. A powerful device optimizes performance and results. Consider these features: Choose a model with strong suction power. Opt for machines with a transparent canister. Look for HEPA filters to trap allergens. A  facilitates quick inspections for surviving spiders. Strong suction ensures they are captured. HEPA filters keep your home environment healthy by trapping microscopic particles. Prioritizing these features helps maintain a spider-free home environment with ease. Click here to see Dreame robot vacuum's top picks. FAQ Do vacuums kill other bugs too? Vacuums often kill smaller bugs like ants and flies due to the powerful suction. However, larger insects may survive if the vacuum's force isn't sufficient. Ensuring regular disposal and cleaning aids in preventing any surviving pests from returning to the home environment. Can spiders survive inside a vacuum? Usually not for long. Even if a spider survives the suction, the vacuum’s dustbin or bag is a hostile environment.  Can a spider crawl out of a vacuum? Spiders could potentially escape from a vacuum if not emptied promptly. Some species, given time, might recover and find their way out. To avoid this, always empty and dispose of the vacuum contents immediately after use, preferably outdoors, to minimize the risk. How to clean my vacuum filter after vacuumed a spider? Cleaning your vacuum filter maintains its performance. Debris and allergens should be routinely removed. Here’s how to clean it: Remove the filter according to the manual. Tap out the debris or wash with water if washable. Let it dry completely before reinstallation. Regular maintenance ensures efficient vacuuming, keeping your home free of both spiders and allergens. Conclusion While vacuums can be effective against small or fragile spiders, survival varies across species. It largely depends on the vacuum's power and the steps you take after vacuuming. Employing vacuums as part of broader pest control methods helps maintain a spider-free environment. For those uneasy with critters at home, regular vacuuming and proper disposal can provide peace of mind. Implementing multiple strategies maximizes spider control, while respecting their ecological role.
Continue reading
Dust or Vacuum First? The Expert’s Guide to a Cleaner Home

Dust or Vacuum First? The Expert’s Guide to a Cleaner Home

Editorial TeamDreame |
When it comes to cleaning your home, one question stirs up more dust than answers: should you dust or vacuum first? It might seem like a small detail, but the sequence of these chores can greatly affect your home's cleanliness, your health, and how long your hard work lasts. If you clean in the wrong order, you risk undoing your efforts. In this guide, we’ll explore the science-backed reason behind the best cleaning sequence and provide actionable steps to make your routine more effective. Let’s settle this once and for all. Why the Order Matters? Dust moves in the air and settles. Dust particles are light and easily stirred by movement. When you dust, even gently, particles get kicked up into the air. These tiny specs can take minutes to settle, often landing back on surfaces or the floor after you've finished vacuuming, if you did that first. Vacuuming first vs dusting first changes results. If you vacuum first, then dust, you’ll likely have to vacuum again. The airborne dust falls back onto your freshly cleaned floors. But when you dust first, wait a few minutes for particles to settle, and then vacuum, you trap more dust in the process, leaving your home cleaner for longer. Cleaning experts’ recommendations Most cleaning professionals and allergists recommend dusting before vacuuming. This order ensures you capture more dust and allergens efficiently. Experts especially advise using vacuums with HEPA filters to trap fine particles after dusting. Method Best For Advantages Drawbacks Dust First, Then Vacuum Most homes; light–moderate dust Captures more dust in one pass Prevents re-dusting floors Recommended by cleaning pros & allergists Requires waiting a few minutes for dust to settle Vacuum First, Then Dust High-pet homes; allergy-prone households; high-traffic zones Removes hair/dander immediately Reduces airborne allergens quickly Ideal with HEPA vacuums Dust from surfaces may settle after vacuuming, requiring touch-up Hybrid Approach Deep cleaning days; perfectionists Gets both airborne & surface dust Works well with robot vacuums for maintenance More time-consuming When to Dust Before Vacuuming In most cases, dusting is the first task to do when you start cleaning your home. As you wipe surfaces, dust doesn’t stay put. It disperses into the air and eventually falls, mainly onto your floors. If you vacuum first, you’ll likely have to redo it after dusting. Starting with dusting ensures you don’t create extra work for yourself. Best tools for dusting effectively Microfiber cloths are ideal for trapping particles without releasing them into the air. Extendable dusters help reach high spots like ceiling fans or crown moldings. Pro-tip Robot vacuums and mops are perfect for daily light dust removal, especially under furniture and along edges. When to Vacuum Before Dusting Vacuuming first can help reduce dust resettlement on surfaces you’ve already cleaned. This method is especially useful in homes with constant foot traffic or pets, where floors tend to gather more dirt quickly. Use a vacuum cleaner with a HEPA filter to trap airborne dust before it resettles.  Does vacuuming first makes sense? Vacuuming before dusting is particularly effective in specific situations: Allergy-prone households: HEPA-filtered vacuums remove allergens before they have a chance to settle. Pet-heavy homes: Frequent shedding makes it practical to vacuum up hair and dander before wiping surfaces. High-traffic areas: Dirt and debris accumulate rapidly, making vacuuming a logical first step in these zones. Step-by-Step Guide to Combine Both Methods This suggested sequence captures both surface and airborne dust for a complete clean. Start by dusting surfaces from top to bottom using microfiber cloths or static dusters. Wait 5–10 minutes to allow airborne particles to settle naturally onto the floor. Vacuum all floor areas thoroughly, focusing on high-traffic zones and corners. Use a vacuum with a HEPA filter for best results. Dreame Take Enhance your routine with a Dreame robot vacuum like the X50 Ultra, X40 Ultra, or L40 series for scheduled, automated cleaning and mopping. Common Mistakes to Avoid Using feather dusters (spread dust) instead of microfiber: Feather dusters often release more dust than they trap. Instead, use microfiber cloths or static-charged dusters that grab particles and hold them. Skipping HEPA filter maintenance: Over time, HEPA filters become clogged and lose their effectiveness. Clean or replace your filter regularly according to the manufacturer's guidelines to ensure optimal suction and allergen capture. Forgetting to clean vacuum attachments: Attachments like crevice tools and rotating brushes also accumulate dust. Regular cleaning ensures you’re not redistributing dust while you vacuum. Tools & Their Best Uses Tool Type Best Use Microfiber cloth Trapping dust on surfaces Mop vacuum combo Hard floors and edges  Handheld vacuum with HEPA filter Cleaning tight corners and baseboards Robot vacuum  Daily maintenance and floor-level dust Static duster Reaching high or delicate areas Maintenance Tips to Keep Dust at Bay Set a dust + vacuum routine: Dust on one day, vacuum the next to prevent buildup. Clean your tools regularly: For example, set a reminder to clean HEPA filters every 1–3 months depending on use. Use robot vacuum daily to reduce buildup: Schedule your Dreame robot to run during the day to catch dust before it settles. By making these habits part of your regular routine, you’ll minimize allergens and extend your clean time between deep cleans. FAQs Q: Should I dust or vacuum first if I have pets? A: Dust first to dislodge fur and particles from surfaces, then vacuum to trap everything that’s fallen—especially using HEPA filters for allergens. Q: Does the type of flooring change the order? A: Yes. On carpets, always vacuum last. On hardwood or tile, vacuum or mop after dusting to remove fine particles that settle. Q: Are robot vacuums effective for dust? A: Absolutely. Models like the Dreame X50 Ultra and L40 series offer powerful suction and automated routines that maintain dust-free floors. Q: How often should I vacuum vs. dust? A: Dust weekly and vacuum at least twice a week. For allergy-prone homes or pet-heavy environments, consider daily vacuuming. Q: What’s the best way to trap fine particles? A: Use microfiber cloths for dusting and HEPA-filter vacuums for floors. Let dust settle before vacuuming to capture more. Q: Can I use a robot vacuum daily? A: Yes. Daily use keeps buildup under control, making it easier to maintain a cleaner home with less effort. However, it's important to note that running a robot vacuum daily may increase electricity usage slightly and accelerate wear on components like brushes and filters—leading to more frequent replacements. This could result in higher maintenance costs over time. Still, for many users, the convenience and cleanliness are worth the extra expense. Conclusion So, should you dust or vacuum first? For most homes, dusting first ensures airborne particles are captured during vacuuming, leading to a cleaner space. But in high-pet or allergy-sensitive households, vacuuming first might be more practical to reduce fur and allergens quickly. No matter which method, the key is following the right steps, and using the right tools. Dreame robot vacuums like the X50 Ultra, and L40s Ultra take the guesswork out of cleaning. With powerful suction, smart navigation, and automated mopping, they streamline your routine for smarter, faster results. Try the method that suits your home, and let us know what works best for you. Your cleanest home ever is just a few steps away!  
Continue reading
What Should You Need for a Small Apartment?

What Should You Need for a Small Apartment?

Editorial TeamDreame |
If you live in a small apartment or studio, then you’re well aware of how important it is to utilize the amount of space available to you. It’s crucial to make your usage of space count and make your surroundings as clean and comfortable as possible. In small apartments, feeling cluttered and uncomfortable is very easy if you’re not careful. Therefore, it’s vital to use the entire apartment and look to areas in your home that you may have not considered using before. In this article, we’ll go over five ideas to help you make the most out of the space in your small apartment. Items for Your Small Apartment Robotic Vacuum Cleaner Keeping your living space clean is an essential part of the home. A good robotic vacuum cleaner can operate on its own, leaving you free to attend to other matters. A prominent example of a robotic vacuum cleaner on the market is Dreame D9. It’s a compact and powerful machine that excels on a multitude of surfaces. Whether you have wall-to-wall carpeting, linoleum, hardwood floors, or a combination of any of these surfaces, Dreame D9 is the perfect option when considering robotic vacuums for your small apartment. It also sports a long battery life (2 and a half hours) and Wi-Fi capability so that it can connect to your smartphone. The feature that sets Dreame D9 apart from its counterparts is its 3000Pa suction power, guaranteed to leave nothing behind. The Dreame D9 has a compact size (350 x 350 x 96.8 mm), so on its own, it’s economical in its usage of space. The Dreame D9 does this essential job with little to no effort on your part and allows you to free up your mind so that you can attend to other needs around your home. Compact, powerful, and convenient, Dreame D9 is the perfect choice for a robotic vacuum cleaner in your home. Smart-Enabled Smoke Alarm There are no two ways about this: fire safety is vital. Not having a smoke alarm in your apartment poses a risk to not only yourself but those living around you in your apartment building. Therefore, having a properly functioning smoke alarm is a must-have for any apartment and not just for small ones. To take things to the next level, having a smart-enabled smoke detector will help you even more. There are smart smoke detectors that connect to your phone through wifi, allowing you to observe the status of your detector anywhere. These smart devices also come with the ability to sense carbon monoxide as well. An absolute must-have. Roll-out Pantry This item is especially useful if you’re in a studio space. If you’re a foodie and enjoy cooking, but don’t have the luxury of a pantry, then you will find this very useful. You can store it between your refrigerator and wall and/or counter and it provides the necessary space for your pantry needs. This item maximizes space because it makes use of an area that is often overlooked in the home: the gaps next to your refrigerator. Save space and eat like royalty with a roll-out pantry. Bookshelf One way to maximize the space in your apartment is to make use of your ceilings and the area higher up on your walls. In place of your typical standing bookshelf, a ceiling bookshelf will give you a much-needed place to store your books and help save space on the floor as well. In addition to its practical, space-saving application, it also gives the illusion of more space in your apartment by drawing attention upward toward the ceiling. With a ceiling bookshelf, you now have good use of space that would have gone otherwise ignored and have taken a positive step toward an apartment that is spacious, uncluttered, and comfortable. Readers who live in small apartments and studios can breathe a sigh of relief and get more space to work within their homes to boot! Practical, stylish, and intellectual, what’s not to love? Foldable Laptop Stand Having a dedicated workspace is usually a troubling prospect if you’re in a small apartment or studio. A foldable laptop stand solves this problem. When deployed, it takes up very little space and can be easily stored away. Using this in combination with a standard small table will help you maximize your space-saving ability and efficiency in your apartment, giving you a dedicated workspace without costing you precious space. A great idea for the creative types who need to use their laptops for their various projects, but don’t want to spend a great deal of space on a traditional desk area. Conclusion There you have it! 5 ideas to help you maximize the space in your small apartment. In your efforts to save space, it’s important to use every bit of what’s available to you and to take good care of that space by keeping it clean, organized and efficient. Home is where the heart is, and having a place to live that is clean, comfortable, organized, and spacious is crucial to one’s well-being and this is especially true in smaller apartments. Hopefully, this article has given you some ideas for what to include in your small apartment or helped you start your search for items to include in your small apartment and get the most out of the entirety of your apartment and make it a place worth living. Good luck, and may you have a happy home.
Continue reading
Homemade Floor Cleaner Recipes: Safe DIY Solutions for Every Surface

Homemade Floor Cleaner Recipes: Safe DIY Solutions for Every Surface

Editorial TeamDreame |
Want an easy, natural, and inexpensive way to clean your floors? These homemade recipes work wonders on wood, laminate, and tile. You can also pair them with smart cleaning tools like Dreame wet‑dry vacuums to save time and effort. Why Make Your Own Floor Cleaner? Store-bought floor cleaners are often packed with harsh chemicals, mysterious ingredients, and synthetic odors. Worse, they can be expensive, which is especially frustrating when you have multiple floor types to clean. DIY floor cleaners are a safer, budget-friendly alternative.  With a few simple ingredients, you can mix safe, effective solutions at home. They’re cost-friendly, kid- and pet-safe, and surprisingly powerful. That’s why more people in the U.S. are turning to homemade floor cleaner recipes.  What Is a Good Floor Cleaning Solution, Really? A true floor cleaning solution is crafted to clean without damaging the surface. Unlike all-purpose sprays, these solutions are designed specifically for floors and vary by material type. Some are made for manual mopping, while others are formulated for floor machines like wet-dry vacuums. Please make sure your vacuum is compatible with liquid-based cleaning solutions and always follow the manufacturer’s guidelines to avoid damage or voiding the warranty. Common DIY ingredients: White vinegar Castile soap Essential oils Rubbing alcohol Baking soda Benefits of Using DIY Cleaners Making your own floor cleaner isn’t just a trendy life hack, it’s a smart, sustainable choice that offers benefits well beyond a sparkling surface. From saving money to protecting your family’s health, here’s why DIY floor cleaning solutions are worth mixing up. Budget-Friendly = Big Savings Many store-bought cleaners cost anywhere from $5 to $15 per bottle. By contrast, DIY cleaners use inexpensive ingredients you probably already have (like vinegar, baking soda, and dish soap). A single $2 bottle of white vinegar can make up to four gallons of cleaning solution. That’s the kind of math your wallet will love. Bonus: You’ll also reduce “cleaning clutter” in your cabinets by consolidating multiple products into just one or two all-purpose solutions. Safe for Kids and Pets Commercial cleaners often contain synthetic fragrances, sulfates, and ammonia. These ingredients can often irritate sensitive skin, eyes, and respiratory systems. This is especially concerning for babies who crawl on floors, toddlers who touch everything, and pets who lick paws. Important Always double-check essential oil safety if you have pets, since some oils like tea tree or eucalyptus may be harmful to cats and dogs in high concentrations. Customizable to Your Preferences Don’t love the sharp smell of vinegar? Add lavender or orange essential oil for a natural fragrance. Want more shine on your wood floors? Mix in a drop of olive oil. DIY cleaners are infinitely customizable, allowing you to control not only the scent but also the strength, ingredients, and purpose. Using the same base, you can make a stronger formula for high-traffic tile areas and a gentler one for delicate hardwood floors Pro-tip Try seasonal blends like cinnamon-orange for winter or mint-lime for summer. Cleaning doesn’t have to smell sterile. Eco-Friendly: Reduce Waste, Chemicals & Footprint When you make your own cleaning products, you're not just helping your floors, you're helping the planet. Most store-bought cleaners come in single-use plastic bottles and contain non-biodegradable chemicals that wash down the drain. DIY Floor Cleaner Recipes by Surface Type  Wood Floor Cleaner  Ingredients: 1 cup warm water ¼ cup white vinegar 1 tablespoon olive oil 5–10 drops essential oil (lemon or tea tree) Step-by-Step: Mix in a spray bottle. Lightly mist sealed wood floors. Mop with a damp microfiber pad to avoid puddling. Style Tip: The How to Clean Hardwood Floors post offers extra care tips, including how wet‑dry vacuums like Dreame H14 help maintain ideal moisture levels so that they prevent wood damage and deliver a streak-free shine. Natural All‑Purpose Floor Cleaner Ingredients: 2 cups warm water 1 tbsp Castile soap 1 tsp baking soda Step-by-Step: Shake ingredients lightly in a spray bottle. Spray and mop across vinyl, concrete, and sealed stone surfaces. Cleanup works with spray mops or as a homemade mopping solution. Laminate Floor Cleaner  Ingredients: 2 cups water ¼ cup rubbing alcohol 5 drops of lemon or eucalyptus oil Step-by-Step: Lightly mist laminate floors. Mop with a microfiber pad to avoid over-wetting. Dry with a soft cloth to prevent warping. Safety Tip: Learn more in Best Laminate Cleaning: Tools & Tips for ideal cleaning methods. Tile Floor Cleaner  Ingredients: 2 cups warm water 2 tbsp white vinegar 1 tsp liquid dish soap Step-by-Step: Mop with the mixture. Rinse with clean water to avoid residue. Important Try seasonal blends like cinnamon-orange for winter or mint-lime for summer. Cleaning doesn’t have to smell sterile. For more in-depth guidance, see How to Clean and Mop Tile Floors. Citrus-Infused Floor Cleaner This natural floor cleaner recipe adds a refreshing citrus boost, which makes it great for spring cleaning and odor control. Best for: All sealed floors Ingredients: Peels from 2–3 oranges or lemons 2 cups white vinegar 2 cups water Optional: 10 drops sweet orange essential oil Instructions: Soak citrus peels in vinegar in a jar for 5–7 days. Strain and dilute with water. Pour into a spray bottle, spray the floor, and mop as usual.  🍋 Eco-Friendly Bonus: Reuse citrus peels that would otherwise go to waste! Eco-Friendly Tips for DIY Floor Cleaning Small changes in your cleaning routine can make a big impact on both your health and the environment. These tips are not only sustainable but also smart, cost-effective, and easy to adopt in any household. Reuse Glass Spray Bottles Instead of buying new plastic bottles for every homemade solution, opt for sturdy glass spray bottles. They're reusable, non-toxic, and don’t leach chemicals into your mix over time like some plastics can. Bonus: they look great on open shelves. Fun Fact: A single reused glass bottle can prevent dozens of plastic bottles from entering landfills each year. Choose Biodegradable Materials Many conventional cleaning supplies, such as disposable mop pads, end up in landfills and take centuries to break down. Instead, go for biodegradable tools made from bamboo, cellulose, or coconut fibers. Look for: Compostable sponge cloths Bamboo mop handles Bioplastic scrubbers Add Citrus Peels for Natural Scent Store-bought cleaners often mask odors with synthetic fragrances that can irritate allergies and skin. Lemon, orange, or grapefruit peels can give your DIY solutions a natural and refreshing boost. They also contain natural oils with antimicrobial properties. How to use them: Soak peels in vinegar for a week to create an all-purpose citrus vinegar cleaner. Drop dried peels in your mop water for instant aroma. Beyond DIY: Are There Better Ways to Clean Floors? Method Best For Effort Level Surface Compatibility Eco Impact DIY Natural Mop Solution Budget-friendly cleaning with natural ingredients High (manual scrubbing, prep, and rinse) Tile, vinyl, laminate, sealed hardwood Low waste; reusable mop and minimal chemicals Wet/Dry Vacuum Powerful daily cleaning with minimal water mess Medium (plug in, empty tank occasionally) Hard floors, tile, laminate, low-pile rugs Moderately efficient; uses electricity and some water Robot Vacuum + Mop Combo Hands-free cleaning and scheduled floor maintenance Low (set it and forget it) Most sealed hard floors; check model guidelines Varies by model; energy-saving options available Expert Insight from Consumer Reports According to Consumer Reports, many conventional cleaning products contain hidden or undisclosed ingredients that may contribute to allergies, asthma, reproductive harm, or poor indoor air quality. Ingredients like ammonia compounds, artificial fragrances, and colorants are flagged as potential irritants or endocrine disruptors. FAQs Q: Will vinegar damage wood floors? A: Only if the wood is unsealed or exposed. Use small amounts on sealed floors. Q: Can I pour DIY solutions into a robot mop? A: Only if recommended by the manufacturer. Dreame robot vacuums like the X50 Ultra typically require plain water or approved solutions. Q: How often should I vacuum and mop? A: Vacuum daily and mop weekly, or more if you have pets or kids. Final Thoughts With simple homemade floor cleaner recipes, you can save money, stay eco-friendly, and keep your home fresh. The best approach? Mist your floors with a safe DIY solution, then let a Dreame smart vacuum do the heavy lifting. It’s the best of both worlds, DIY and tech working together.  

Continue reading
Your Essential Cleaning Supplies Checklist for a Spotless Home

Your Essential Cleaning Supplies Checklist for a Spotless Home

Editorial TeamDreame |
Whether spring cleaning, daily cleaning, or moving home, having the right cleaning supplies makes removing stains, odors, and dust faster and easier. But the huge selection of products and brands makes it hard to know which ones to buy. To help you, we’ve compiled a checklist of cleaning products that will leave every room fresh, tidy, and germ-free. After reading this guide, you’ll know which must-have household cleaning products are missing from your cupboard. You’ll explore the most powerful cleaning products and the eco-friendly options too. And as an added bonus, you’ll get tips on which cleaning products work best for each room, as well as tips for organizing and disposing of your cleaning products. Must-Have Cleaning Products for Every Home To start, make sure you’ve got the basics, as some household cleaning products should be a permanent fixture in every home. All-purpose cleaner Disinfectant spray/wipes Glass cleaner Microfiber cloths Scrub brushes Broom and dustpan Mop (spray or traditional) Vacuum cleaner Sponges and scouring pads Rubber gloves Toilet brush and bowl cleaner Trash bags Paper towels or reusable rags Eco-Friendly and Safe Household Cleaning Products When it comes to stocking must-have household cleaning products, there is no reason why they cannot be eco-friendly. Sustainable cleaning products are better for the environment, safer for children and pets (and adults too), and often just as unforgiving on dirt as synthetic chemical options. Environmentally Friendly Household Cleaning Products To find sustainable cleaning products, look for products labeled “biodegradable,” “cruelty-free,” or “made without phosphates or ammonia.” This way, you’ll ensure they’re not tested on animals and that they protect the planet, the atmosphere, and our wildlife. Some of the eco household cleaning product brands to consider include Seventh Generation and ECOS. Non-Toxic Household Cleaning Products Non-toxic household cleaning products may seem an obvious choice, but they are even more important if your household includes someone who likes to lick or chew surfaces (such as small children or pets). Check the ingredients in cleaning products for particularly strong chemicals, such as bleach or formaldehyde, and choose plant-based formulas where possible. DIY Cleaners Using Household Items Sometimes, an old natural trick or recipe from grandma really does work (and it can save you money, too). Some examples within cleaning include: White vinegar is a natural disinfectant and deodorizer. Baking soda can deodorize carpets, fridges, and drains. Lemon juice removes grease and leaves a fresh scent. Castile soap is a gentle cleaning agent. Room-by-Room Cleaning Supply List Each room in a house is subject to a different type of dirt. For example, a kitchen is more prone to grease, a bedroom to dust, and the bathroom to hair and hygiene product stains. Here’s a breakdown, with a cleaning supplies checklist for each room: Kitchen Degreaser spray and/or white vinegar cleaning solutions Dish soap, sponges, and dishwashing gloves Dishwasher tablets and dishwasher salt (if you have a dishwasher) Stainless steel cleaner for pots, pans, and cooking appliances Garbage disposal bags Baking soda for cleaning the fridge and microwave Anti-bacterial spray and cleaning cloths/paper towels Floor mop and floor cleaner A vacuum Bathroom Toilet bowl cleaner and toilet brush Bleach-free shower and bathtub cleaner Disinfectant spray or wipes Mildew remover or hydrogen peroxide spray Glass cleaner (your vinegar solution will work wonders here!) and cleaning cloths Scrubbing brush for tiles and grout Living Areas Upholstery cleaner or spray foam Wax spray or wood polish for wooden furniture Duster and wiping cloths Carpet cleaner and stain remover Robot vacuum for constant automated cleaning For the full list in an easily printable format that you can take to the store, consult the cleaning supplies checklist table further down this article. Cleaning Tools That Make a Real Difference Sometimes, even the right products won’t help us keep a clean and tidy home. Why? Because we don’t have the time. This is where cleaning tools can make a real difference to a working household. Below you’ll find the top household cleaning products to shake up your cleaning routine and slash your cleaning time in half. Robot Vacuums The robot vacuum is a revolutionary cleaning product that will take care of the cleaning itself. And the best part? It’s affordable. Robot vacuums like the Dreame X50 Ultra Robot Vacuum will map your home and respond to a schedule, meaning your house will be cleaned at times that work for you (so there’s no need to trip over your vacuum helper when carrying a much-needed glass of red wine over to your white sofa). Robot vacuums are especially good for pet owners, as consistent cleaning can reduce dander, and thus allergic reactions. [product handle="x50-ultra-robot-vacuum" rating="4.7"] Wet and Dry Vacuums Using a traditional vacuum on a moist surface can result in the harboring of bacteria within the vacuum and even cause damage to the internal components; however, a wet and dry vacuum, such as the Dreame H15 Pro Heat Wet and Dry Vacuum, can tackle all surface types safely and efficiently. Using a wet and dry vacuum means better cleaning flexibility, since you can equally vacuum living areas and bathrooms, but it can also mean a longer usage period since it is less prone to breakage. [product handle="h15-pro-heat-wet-dry-vacuum" rating="4.7"] Cordless Vacuums Cordless vacuums offer a neat and compact vacuum experience for easy cleaning around the home; however, it’s important to check that your cordless vacuum of choice has a good battery life before you purchase it. The Dreame Z30 Cordless Stick Vacuum’s compact design and sturdy battery make it a great option for daily touch-ups and for reaching those high-up places that are out of reach for a traditional vacuum. [product handle="z30-cordless-stick-vacuum" rating="4.6"] Technology in cleaning is constantly evolving and offering new gadgets to simplify and speed up this sometimes-mundane task. If you’re interested in learning how to choose the right automatic cleaning tools, we’ve got a guide for that too. Cleaning Supplies Checklist To help simplify your shopping trip for cleaning products, we’ve compiled a household cleaning supplies checklist that is easily readable and printable. You could also stick it on the back of the cupboard door to encourage the other members of your household to do their bit! Item Use Area Eco Option Available All-Purpose Cleaner All rooms Yes Glass Cleaner Kitchen, Bath Yes Disinfectant Spray/Wipes High-touch areas Yes Baking Soda Kitchen, Bath Yes (DIY) White Vinegar Kitchen, All rooms Yes (DIY) Lemon Juice Kitchen, Bath Yes (DIY) Robot Vacuum Cleaner All rooms Energy-efficient Mop/Wet & Dry Vacuum Hard floors Yes Cordless Stick Vacuum All rooms Rechargeable Microfiber Cloths All rooms Yes Scrub Brushes Bath, Kitchen Yes Trash Bags All rooms Compostable options Toilet Bowl Cleaner Bathroom Yes Dish Soap Kitchen Yes Carpet/Upholstery Cleaner Living Areas Yes Cleaning Supplies Organization and Disposal Tips How to Organize Your Cleaning Closet Use separate boxes or clean bags to separate your cleaning products by room Label everything Store sprays the right way up and away from heat and moisture Where to Buy Household Cleaning Products Affordably Bulk buying is usually cheaper, so head to warehouse stores like Costco or Sam’s Club Buy your basics, such as gloves and scrubbers, at dollar stores Eco-conscious stores like Grove Collaborative often offer competitive pricing How to Dispose of Household Cleaning Products Safely Chemicals should NEVER be disposed of down drains or put in the trash Take chemical products to hazardous waste disposal sites Finish the product before recycling the container For additional guidance on how to safely dispose of chemical cleaning products, consult the EPA’s guide to disposing of cleaners. Where to Donate Unused Cleaning Products Community centers and local shelters often accept unopened cleaning products Ask at the local schools, churches, activity centers, and mutual aid groups Bonus: What NOT to Mix When Cleaning You may think that cleaning products are harmless, but remember that a lot of them are chemicals, and mixing them can cause strong (often unwanted) chemical reactions. Stay on the safe side and refrain from mixing the following ingredients: Bleach and ammonia can cause toxic chloramine gas Bleach and vinegar can cause chlorine gas Hydrogen peroxide and vinegar can cause peracetic acid, which can burn your skin Baking soda and vinegar placed together in a sealed container can cause a pressure buildup that can eventually blow up Stay safe by always reading product labels and don’t mix anything unless the instructions specifically ask you to. After reading this, you may wonder, “Are household cleaning products dangerous?” The truth is that they can be misused. So, handle them with care and don’t give chemical-based cleaning products to children. Conclusion Keeping a tidy home can seem like an impossible task, but when armed with a reliable cleaning supplies checklist of top household cleaning products, it gets a lot easier. In addition, today’s market means you can choose the cleaning products that align with your values (such as eco-friendly options) or the cleaning tools that will do the work for you (such as robot vacuum cleaners), meaning more clean surfaces with less stress. Now that you’re armed with the right cleaning products for you, you’re ready to go pro. Read our blog to learn cleaning strategies, including how to clean your room efficiently, and how to take care of specialty surfaces, such as how to care for hardwood floors.
Continue reading