Dreame V11 New Features

Dreame V11 New Features

YouTiga|
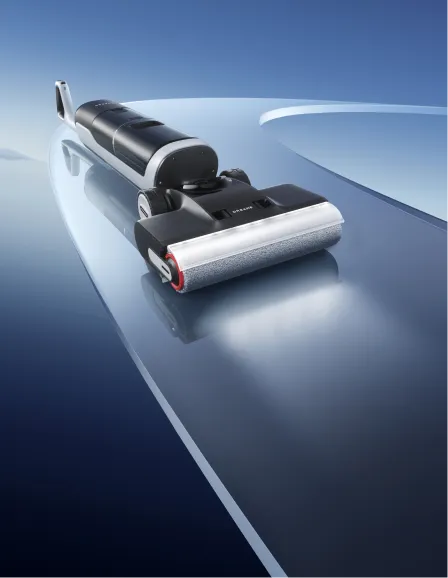
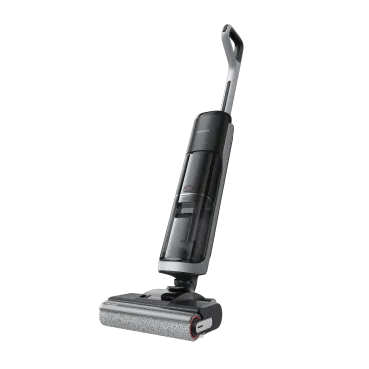
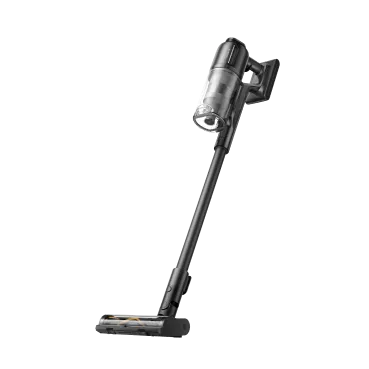
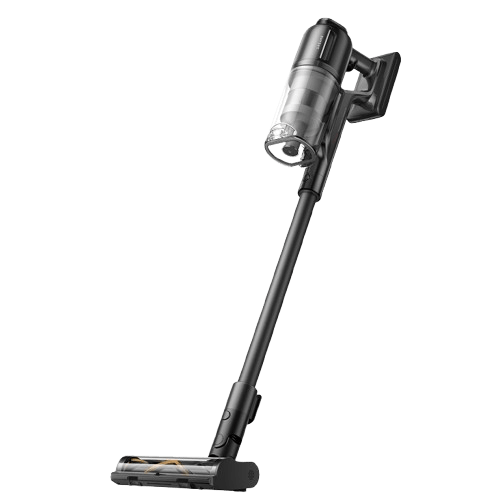
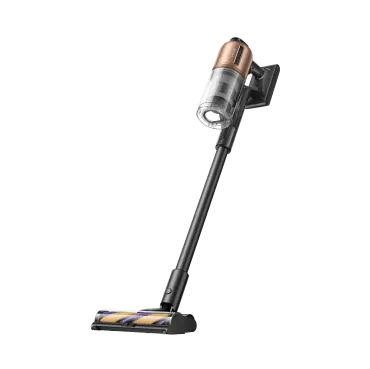
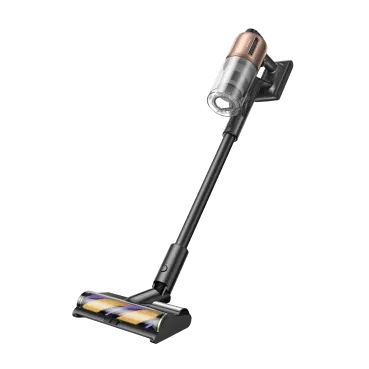
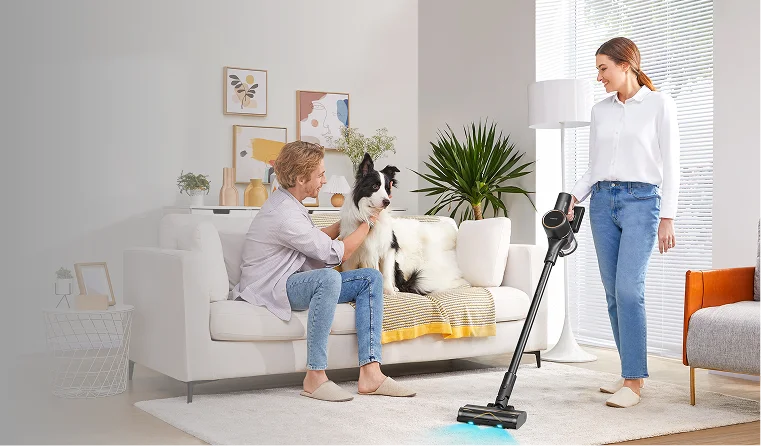
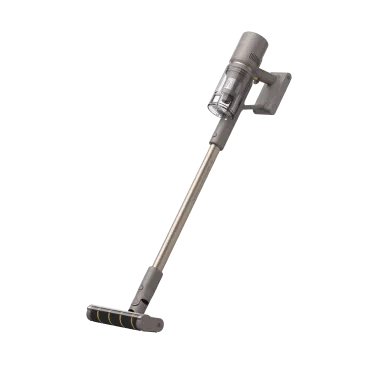
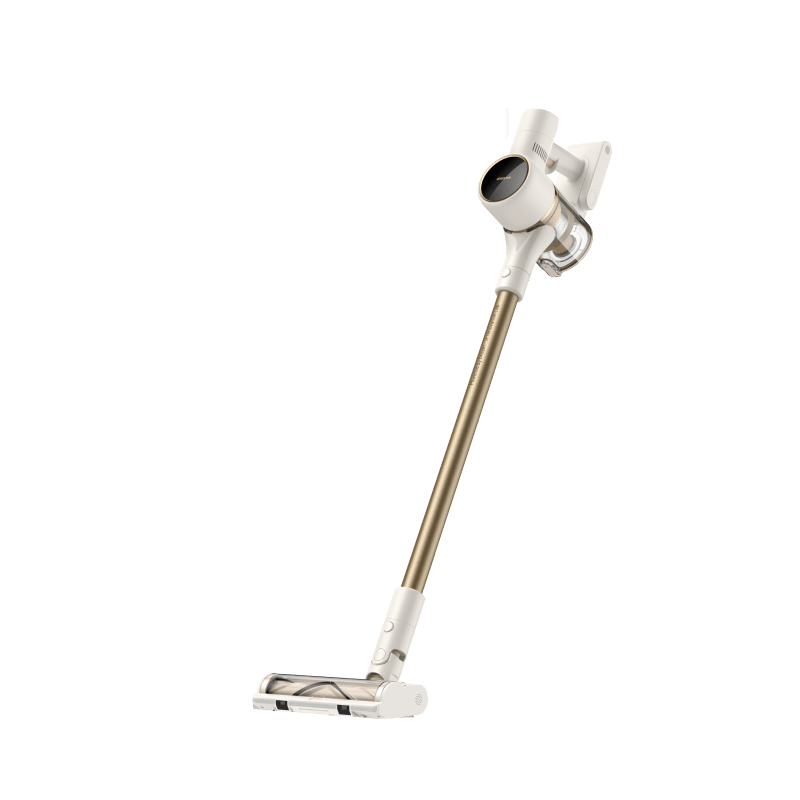
"Powerful”, “Practical”, “Ease of use”, “Peace of Mind”, “Sleek and stylish” are just a few of the things that come to mind when summing up the Dreame V11 Cordless Vacuum Cleaner, the latest model of cordless vacuum cleaners from Dreame. With a sleek, ergonomic design, the power and myriad features it offers, the Dreame V11 Cordless Vacuum Cleaner makes that task of cleaning the home that much easier. Compared to the V10, the V11 has a much brighter, slicker appearance. It sports a beautiful, metallic grey color on the vacuum itself and the accessories and metallic red in the extension handle and on/off trigger making for a color scheme that’s pleasant to look at. The physical design is compact and economical, so one needn’t worry about it taking up too much space. Specs of Dreame V11 Vacuum Cleaner Weight: 1.3KG Battery: 3000mAh Cleaning time: 90, 30, or 10 min (depending on settings) Motor: Dreame SPACE 4 Power: 450 watts Suction power: 150 AirWatts or 25000 PA 12 cyclone filtration + 5 layer filter Max noise: 73db Dust Bin: 0.5 liters Display in handle 4 attachments + dock The new lightweight design is lighter than the previous V10 model, it boasts an increase in suction power and at 73db it operates at a relatively quiet level even while on the maximum suction setting. The one touch dust bin button makes for easy cleaning as well, and even the buttons have undergone a slight change for a better feel when compared to the previous V10 model. New Features of Dreame V11 3 Modes of Operation The V11 offers three different modes of suction power for you. The “eco” mode is a long, enduring mode that runs for 60-90 minutes and is the lowest setting. This setting is still good enough to pick up strands of hair or noodles. This mode is great for light cleaning around the bedroom. The second mode, or “medium” mode runs for 30 minutes and offers more suction power than the previous setting. This mode is good enough to clean the classic messes on the floor such as crumbled cookies and other debris. The third mode, or “turbo” mode runs at maximum power for 10 minutes. This mode is great for hard to reach places when combined with the other accessories. Dreame SPACE 4.0 High-Speed Motor Boasts 125,000RPMS (25% faster than the previous model). A more powerful motor means better performance when picking up debris on any surface. The motor operates at 25,000 pascal (PA) and 150 airwatt (AW) which means more suction power. Optimized Air Flow System The air vents are put in place so that the Dreame V11 can perform at its highest quality by air flow without overheating. (The air vents are strategically placed and specially designed to dissipate heat). This means it can perform longer and at the standard the Dreame V11 is known for. Bigger, better, battery At 3000mAh, the Dreame V11 can operate for up to 90 minutes in eco mode, 30 minutes in medium mode and 10 minutes in turbo mode. The battery takes 4 hours to charge, meaning that you’ll get a lot done in your cleaning session and be ready for the next one without missing a beat. The battery indicator is located on the side of the vacuum unit, showing how much battery life is left in three levels. OLED 16-bit HD color display The all-in-on, high-definition LED color display screen shows battery life, suction strength setting and has hands-free “lock” mode for continuous use. It’s simple, elegant design makes the V11 easy to use. The lock button is located on the OLED screen display and allows for finger-free, continuous use. Instead of having to press the on button again and again, this mode allows for free-hand use as the vacuum cleaner will keep running while you clean and maneuver around. The display will also let you know if you have a filter that needs to be replaced. Filtration System Yet another upgrade from the previous model, the filtration system can filter out particles as small as 0.3 microns. It has 12 cone cylinders which allow more precise and finer filtration by trapping the fine dirt and dust in the dustbin. This also reduces the risk of clogging the motor, so the V11 won’t lose its suction power. The higher amount of cones reduces the workload of filter and extends the lifespan further. The filter is also easily removed, and can be easily cleaned as well, since it’s reusable it’s green friendly. The filter is symbolic of the entire system, as this vacuum will endure for a long time. The filtration system also allows for clean air output. These new features of Dreame V11 are a step up from the previous model and help make the machine that much better. Accessories Soft Roller Brush This attachment is great on floors. Flexible, maneuvers nicely and is the head that will be of most use to you when cleaning floors. Can handle debris a thick as crumbled cookies and peanuts with ease. Cleans in fewer strokes than the competition and the previous models. Electric Mite Motorized Head Good for cleaning the sofa, bed sheets or any fabrics. Pet owners will find this attachment useful for getting hair out of their seats in the home or the car. Also good for picking up crumbs and snacks that one might leave behind on a couch or loveseat. When combined with the “lock” setting, it makes for good use in the car. 2 in 1 flat brush Good for use on furniture, blinds, and lampshades and on the dash board of your car. Good versatile brush that works on many surfaces. Vertical Brush The brush has an adjustable height depending on the job and can slide up or down the narrow nozzle; the brush also has soft bristles. This attachment is good for cleaning your desk and objects such as your laptop. Flexible Hose This attachment allows for more ease of use in hard-to-reach areas around the home. Combined with the lock mode, this allows the V11 to easily reach places such as the various places inside a car, and behind fixtures in the home. Extension Rod Beautiful metallic red color that allows this lightweight machine to access hard-to-reach places high up in your home (such as a ceiling fan or air vent). Power Adapter Standard, easy to use. Wall Mount The included wall-mount dock for charging and storage isn’t just practical, it’s also stylish and stores the machine without too much hassle or taking up too much space and its metallic silver color fits just about any décor as well. Store it out in the open or in closed quarters, it’s economical and great looking. All of the accessories can be mounted directly into the vacuum cleaner, or with the extension rod between them. The V10 accessories can connect to the V11 and the V11 accessories can connect to the V10. The Dreame V11 has improved from the previous model in myriad different ways. From an increase in suction power, a new motor, an LED display, bigger battery size, upgraded filtration system and an increased array of accessories for any cleaning situation. It is reusable, stylish, easy to clean and easy to store and offers a lot of power in addition to its convenience and ease of use. The overall increase in performance from the V10, the better feel and the improvements put the V11 in a league of its own. The many accessories allow for a great cleaning in virtually all situations. It performs smoothly, quietly and picks up virtually any and all debris. The V11 is lightweight, versatile, easy to use, pleasing to the eye and environmentally friendly as well. All of this combines to make the cleaning experience easy for the consumer. It offers 5-star performance at a reasonable price when compared to other cordless vacuums. When it comes to cordless vacuums out on the market, the Dreame V11 matches or outright exceeds the competition. Give it a try today!
Continue reading
8 Safety Tips for Using a Vacuum Cleaner

8 Safety Tips for Using a Vacuum Cleaner

YouTiga|
Most people are confident that they know how to use a vacuum cleaner. Unfortunately, there are unspoken rules one needs to abide by. Using a vacuum cleaner correctly is vital to prevent accidents and ensure proper cleaning. As an electrical gadget, a vacuum has special handling that needs you to be aware of. Check out below for some important vacuum cleaner tips to make cleaning easy and safe. Do Not Vacuum a Wet Surface Unfortunately, vacuum cleaners are limited to only dry surfaces. This means they cannot clean water spills or wet surfaces as part of vacuum cleaner safety precautions. Water can be sucked into the vacuum cleaner and cause an electrocution accident. It can also damage the vacuum cleaner parts. Keep Pets and Children Away Your pets and children do not even know the first rule among vacuuming tips. Some older kids know a vacuum function, but they wouldn't know how to vacuum properly if given a chance. Kids and pets are naturally curious. Therefore, when you leave the vacuum cleaner lying around, they will sneak up and begin playing around with it. They may knock the cleaner over and get hurt or even tug the electricity cord. Keep the cleaner away and never leave it unattended since the kids and pets may be injured, possibly from electrocution. If you have kids who can understand and follow instructions, you can share some easy vacuuming cleaning safety tips to help them stay safe. Beware of Loops and Kinks Tripping over a cord is among the most common injury you might face when using a vacuum cleaner. Ensure you loop the wires correctly before storing the cleaner away, especially if you have many people in your house during or after cleaning. Stay away from sharp corners because they may cut into the vacuum cord, leading to unnecessary repair or replacement costs. If possible, also avoid overstretching the vacuum cord to keep it intact. Wear Slippers While You Vacuum Ensure you wear slippers whenever you are vacuuming. This is one of the using vacuum tips intended to protect you from injury, especially if you are cleaning the house in a hurry. There is an unfortunate chance that your toe might get stuck in the vacuum cleaner’s nozzle, mostly when the carpet is lifted. To avoid such, take your time to clean the house without hurrying. If hurrying is necessary, ensure you lift the carpet and wear slippers on your feet. While protecting your feet, you should also wear protective gear. Even though it sounds tiring and time-wasting, ensure you wear protective clothing when vacuuming. You can put on hand gloves that keep your hands free from dirt, debris, and dust. This is vital, especially if you are vacuuming an industrial area. As part of vacuum cleaner safety precautions, other protective gears include a face mask, which is beneficial, especially if you are asthmatic or allergic. A face mask helps you avoid close contact with the dust allergens in the air while vacuuming. Goggles will keep away dust or dirt particles and other contaminants from entering your eye. Fortunately, if you cannot bear the noisy vacuuming, ear protectors are convenient to keep the excess noise away. Don't Try to Pick up Large or Sharp Objects This is one of the key vacuum cleaning safety tips intended to protect the machine's integrity and keep it functioning. Going contrary to this advice has led many people to witness some serious mechanical accidents. Avoid picking up large objects forcibly, mostly metal, since they may damage your cleaner's motor's fan. Picking up metal objects will damage your machine, leading to more repair costs or even injury. Picking up sharp objects using a vacuum cleaner will tear the vacuum cord or cause damage to the internal components, leading to more repair costs. Ensure you read the cleaner's manual on how to vacuum properly. Most of these manuals highlight the objects that the vacuum cleaner can pick up. In most cases, it's usually small particles or things you can't pick up yourself. Avoid Flammable Materials A vacuum cleaner is an electric appliance that consumes electricity. As with any electric device, experts recommend keeping your vacuum cleaner far away from flammable or combustible materials while using the machine. Do not vacuum particles or materials that may cause a fire when they contact with electricity. Most vacuum cleaners emphasize this on their vacuum cleaner safety precautions to warn you from potentially hurting yourself and minimize their liability. Before vacuuming your house, check your surrounding for any combustible material that will likely cause a fire. Empty the Canister and Replace the Dust Bag Regularly Some vacuums come with a canister or a bag to collect the accumulated dirt. Vacuum cleaner experts advise that you should not wait until the canister is full to empty it. You should empty it when it is nearing capacity. The dust bag should be replaced as well before it reaches its optimum size. A fully loaded dust bag or canister will affect the vacuum cleaner's cleaning efficiency. Unfortunately, it might also blowback the dusty air into your surroundings. At worse, it could potentially clog the hose. Always keep an eye out for the dust bag or canister before cleaning. Use Only Compatible Extension Cords Vacuum cleaner experts advise against using extension cords that are faulty or do not match with your vacuum. This can lead to mechanical or electrical accidents, and worst of all, an injury to your person. The effect could be a potential fire outbreak. It can also lead to severe vacuum cleaner damage that will incur repair or replacement costs. As a rule of thumb, ensure you use suitable accessories that are strictly compatible with the vacuum cleaner. Conclusion At this point, if you still don't know how to use a vacuum cleaner, make good use of the manual guide for more vacuum cleaner tips. Your safety and that of the vacuum cleaner are paramount. The safety of people around you is also important, but ensure that fewer people are around you while vacuuming. A quality vacuum like Dreame T20 will give you all the functionality you desire in a vacuum while ensuring excellent and effective cleaning.
Continue reading
How Do Robot Vacuums Navigate?

How Do Robot Vacuums Navigate?

YouTiga|
How do robot vacuums move across the floor vacuuming, cleaning, and sweeping? When they were first launched, robot vacuums used basic technology and would move haphazardly when cleaning. They were able to clean large areas but were inefficient as they keep cleaning the same places. More developed models use an advanced robot vacuum navigation system, which is enabled by algorithms and sensors. The technology allows the vacuum to move in straight lines, covering all areas. The vacuum robot needs to map your home first to be able to clean effectively. It will then store this information and use it when vacuuming in the future. What is Robot Vacuum Mapping? Robot vacuum mapping is a process by which robot vacuums map your house during the initial cleaning. Mapping helps the robot understand how the house looks like, making it easier to clean all areas, and the majority of high-end models are capable of cleaning hard surfaces and carpets alike. Even in textures that seem similar, mapping helps it avoid the sections that it has already cleaned. This map can be saved in a smartphone app using the map saving option, which is especially helpful for larger homes. You can also use the app to pick areas that you want the robot to clean if you prefer zone cleaning. After buying the robot vacuum, stay home when it's cleaning for the first time and monitor the process. Since it's doesn't understand your house, it needs to learn the routes. Whenever a robot vacuum follows the route, they eventually will have to dock to recharge, but how do robot vacuums find their base? After cleaning or when the robot has run out of charge, infrared signals show where the base is. The robot vacuum navigates to the base. After recharging, it continues to clean the home. Though the process may seem straightforward, there are many different methods that a device can use to map out the home. The Main Types of Mapping Technology Vacuums use different technologies to map a house, which may include the 4 following main mapping technologies discussed in this section. Camera-based mapping This technology uses a digital camera that maps by taking photos of landmarks around the house. While this technology maps well, it does not work in the dark. But some manufacturers are beginning to add a source of light on some of the devices. Lidar-based mapping Lidar is an invisible spinning laser that detects information. It collects data on the room's size and obstacles, such as legs at the laser level, but it starts by mapping the house, cleaning it systematically in straight lines instead of randomly. Lidar technology is the most precise at mapping and has accurate navigation compared to the others. Gyroscope or accelerometer mapping Gyroscope and accelerometer sensors calculate the distance and direction of objects around the house. The vacuums that use this technology are affordable. But it does not create a precise map and does not navigate as well as vacuum robots that use lidar and camera-based technologies. Combined technologies Some vacuum robots combine two or three mapping technologies. These technologies are used together with sensors and the robot vacuum cleaner algorithm to help the device navigate efficiently. Sensors Help with Robot Vacuum Navigation Robot vacuums use mapping to form route cleaning, and while they are moving, they use sensors to detect road conditions. Let’s take a look at cliff sensors, obstacle sensors, and other forms of tech that help these devices work. Cliff sensors All vacuum robots have cliff sensors as a safety requirement. Cliff sensors use infrared light, which is reflected from objects. The objects then send a signal back to the receiver in the vac. If the vac does not receive any signal, the receiver detects no object and changes the path. This will prevent your vacuum from falling off the staircase. Obstacle sensors When cleaning your home, a vacuum will inevitably come across obstructions from furniture and other things that lie on the floor. Obstacle sensors, which are typically placed on a vacuum's bumpers, will guide it through the obstacles. When the vacuum comes into contact with an object, the sensor will go off, forcing the vacuum to steer away from it. Wall sensors These sensors use infrared light to detect walls and then clean along the boundaries. The robot will do so effectively and without bumping the walls. Wheel sensors Light sensors count the wheel rotation to determine the distance it has covered. Although it was common to use these sensors when robot vacuums were new, only low-end models use them. How Does Dreame Robot Vacuum Navigate Your Home? The Dreame F9 combines the camera and gyroscope mapping technology to move around your home when cleaning. The device can quickly learn the surroundings that it needs to know for cleaning purposes. This vacuum can capture up to 30,000 data points in the blind of an eye, creating an internal memory of the home so that it misses nothing during cleanup. With automatic room recognition, the Dreame robot vacuum moves effortlessly from one room to the next to clean, knowing exactly where it is at all times. Even after this robot vacuum maps out its path, it continues to calculate any changes in the path at a rate of 50 times in each second. This constant update of barriers gives it greater navigation skills to prevent damage and sense any fine particles that it needs to clean up. Dreame F9 has 14 infrared sensors, the device uses 8 of those sensors to check for obstacles in its path to avoid collision. The other sensors are used to map out the direction that the vacuum goes as it transitions from hard floors to carpet or as it nears the steps. Still, that doesn’t mean that the Dreame F9 is ill-prepared for obstacles since it is programmed to cross anything up to 20 mm. The upgrades in learning and exploration which is called pioneer 2.0 Visual Navigation System allow users to link up the Dreame app with their vacuum, giving the user the power to program wall barriers with ease. And the cleaning route can be further customized by using the app interface to choose which parts of the home are off-limits. Though the app also gives the user control over where they want it to clean. This app is available in both the Google Play store and the App Store (for Apple), so anyone should have the access to download it. With all of this advanced technology, the Dreame robot vacuum can continue to clean the home for up to 150 minutes (2 hours and 30 minutes) before it needs to dock and charge. If it runs out of power, it will automatically go to the base station and recharge. The base acts as both a resting and charging station, but there’s no need to go plug it in or order it to go charge. Instead, the smart technology will signal to the vacuum to go charge to eliminate the risk of losing power while cleaning.
Continue reading
How Many Times A Week Should We Vacuum?

How Many Times A Week Should We Vacuum?

YouTiga|
The vacuum cleaner is one of the best inventions ever made for more homeowners. Though it's a chore to clean up after the mess left on your floors, vacuuming is easy and flexible. So, how often should you vacuum those floors? We've got all you need to know about regular vacuuming and carpet cleaning. The Benefits of Vacuuming Keep Your Home Clean There are numerous benefits of vacuuming. It's one of the most effective ways to quickly clean your home. No matter the type of flooring in your home, it will get caked with dirt and grime. Clean homes are kept clean with frequent vacuuming. Vacuuming picks up the dirt and dust deep in any flooring or upholstery. The newest models of vacuum cleaners even attack the heavy debris in the grooves of hardwood floors. Vacuum cleaners make it fast and easy to pick up the dirtiest areas of your home. They're portable and much easier to use than they were in the past. You simply run over an area, and all of the tiny particles of dust and dirt are gone in a few seconds. Increase Your Health It might be surprising to many people, but vacuuming can increase your health. When you vacuum, you're taking care of everyone in your home. There are tiny microbes and germs floating around in the air of your home. If the tiny mites, mold, and bacteria in your home grow, they can cause sickness and allergies. If you are rid of dust in the flooring, you can help those that have trouble breathing. If you didn't want to take the time to vacuum, you could get down on your hands and knees to sanitize the floor with soap and water daily. That doesn't seem as easy to most people. Enhance The Air Quality A good vacuum usually comes with air filters that enhance the air quality as they clean. You also get a fresh look in your home without any dirt on the floors when you quickly vacuum. A vacuum cleaner equipped with a HEPA filter can help improve indoor air quality in all areas, especially those with allergies. How Many Times a Week Should We Vacuum? Some people wonder if weekly vacuuming is enough for their home. There are different factors that affect the number of times you vacuum each week. If you have pets, you'll notice hair popping up in a day. If you have kids, you'll notice tiny dropped specks of food that need to come up immediately. This also depends on the type of flooring in your home, whether you have a pet or the space is high-traffic or low-traffic. Hardwood Floor - Vacuum Weekly Your hardwood floors need to be vacuumed weekly because wood floors need to be kept dry. If you vacuum the wood floor every day, it will do a lot of damage to the board. So it's important to vacuum weekly to maintain your hardwood floor. Tile Floor - Vacuum Everyday Tile floors should step it up a notch with everyday vacuuming. Most tile floors are hard and flat with sealant, but grime can still get caught in the grooves. Vacuuming the tile floor every day can make it look as bright as new. Carpet Floor - Vacuum Twice Weekly Carpeting calls for twice a week when you vacuum your home. Dust, mites, and allergens love to live in your carpet. It's also tough to see see the dead skin cells and pieces of hair that fall out deep in your carpet, but they do build up. Vacuuming carpets is not as easy as vacuuming other floors. It takes a lot of time and effort. Vacuuming your carpet twice a week is enough to keep your carpet clean. Vacuum Daily If You Have Pets If you have pets, there are thousands of allergens hanging on their fur. Many breeds also shed that fur all over your flooring. It's important to vacuum each day to clean up their dust and hair. Vacuum High-traffic Spaces Every Day The areas of high traffic in your home should be vacuumed daily. These are areas where you frequently walk, sit, and hang out. When you walk into your home, you immediately track dirt in from outside. It's important to clean areas like these daily. Versatile Cordless Vacuum Cleaner The Dreame V11 Handheld Vacuum Cleaner is a powerful vacuum that keeps all types of floors clean with ten different cleaning methods. With a 90 minute runtime, you can clean your entire house without worry about the battery going out. The five-stage filtration system only releases fresh air, and it can filter particles as small as 0.3 microns. This vacuum cleaner is also high-tech with LED lighting. Dreame V11 can meet the needs of various vacuum frequencies because it is a functional diversity of a vacuum cleaner. Its powerful suction will get into deep carpets, grooves in the floor, and gaps in the wood. Vacuuming should be a quick, easy process. If you follow these guidelines, you'll keep your home looking nice and free of germs lurking on your floor. A nice vacuum cleaner with today's top technology will help your cleaning go fast so you can get on with your life without worrying about dirt and debris.
Continue reading
How to Clean and Mop Tile Floors?

How to Clean and Mop Tile Floors?

YouTiga|
Clean your tile floor gently with simple cleaning techniques that will leave the tiles and grout sparkling clean. Learn the challenges faced when cleaning tile floors, how to clean tile flooring and the best tile floor cleaning solution for easy and faster cleaning. Most homeowners love tile flooring because of its durability and beauty. However, to maintain this beauty, one needs to know how to clean the tile floors properly. Since most porcelain and ceramic tiles have an impenetrable and durable surface, this type of floor is always easy to clean. Germs, liquids, dirt, and water all clear out easily because the dense tiles cannot absorb them. When it is your time to clean, ensure that you adopt a proper technique for the type of tile you have. Below is a guide of the best ways to clean your tile floor regardless of the materials. Tile Floors Basics Tile floors are manufactured using a variety of materials, including metal, stone, clay, quartz, and terrazzo. Every tile flooring has unique characteristics depending on the material used. There are two common types of tile flooring: ceramic and natural stone. Ceramic tiles are made from clay that is manufactured into mold. These tiles are classified into porcelain and non-porcelain; the former is made from clay and minerals and 50% of sand or white dust. On the other hand, non-porcelain is a traditional ceramic tile made from red, white, or brown clay and other minerals. Natural stone tile flooring is manufactured from natural materials, i.e. stones like marble, limestone, slate, and granite. Tile floor cleaning is a challenging task. The location of the floor plays a key role in the maintenance task; the closer the floor is to the entrance, the more dirt and debris will be collected. This would mean more wear these tight spaces and tear and regular cleaning will be needed. Most tiles also trap water, dirt, and debris. This means that a sufficient number of water and dirt traps will be needed to maintain the tiles' cleanliness. How to Clean Ceramic or Porcelain Tile Floors? Ceramic or porcelain tiles are popular flooring options because of their durability. But just like other tiles, they need cleaning and care. Here is the process of how to clean these tile floors. Step 1: Remove loose debris Vacuum or sweep the tile floor to remove debris. Ceramic or porcelain tiles may not attract dirt, but grit and sand can make the glazed surfaces unpleasant and uncomfortable. Step 2: Select the right mop for cleaning Porcelain floors should be cleaned using clean water and mild detergent. One should also use a rag or a chamois-type mop instead of a sponge mop. Rags are the best for cleaning because they remove dirty water from the grout lines and leave the floor almost dry immediately. As you clean, ensure you change water frequently to avoid ending up with a cloudy floor. Step 3: Keep watch of flooring stains Once you finish cleaning, look around for any discoloration on the floor, and determine the cause of the stain. Consider the appropriate cleaner for the identified stain. Step 4: Remove soap residue If you notice haziness on the floor after cleaning, the next step is to remove the soapy residue. Use a non-abrasive all-purpose cleaner to remove the film. Alternatively, use a homemade cleaner with a mild acid like fresh lemon juice to remove soapy residue on the porcelain flooring. Step 5: Dry the tiles If ceramic or porcelain flooring tiles air-dry, the lying water might form water spots. This should be avoided by using a clean, lint-free cloth to dry the floor once cleaning is done. How to Mop Tile Floor? Before getting started, one should test the cleaning product on a section of the tile to prevent any discoloration or damage to the flooring. While different floor need different cleaning considerations, the basic cleaning method remains the same. Here is how to deep clean tile floors and grout. Remove loose dirt and dust: Take a broom and dustpan to sweep the floor. Alternatively, use a vacuum that has a soft attached bristled brush to do the cleaning. Take a cleaning solution: In warm water, dilute the tile cleaner. The cleaning solution selected should depend on the type of tile flooring. Check either with a cleaning product seller or the flooring manufacturer to confirm if the solution is recommended for your floor. Mop the tile: For the best cleaning results, use a chamois mop or a rag. After dipping the mop in the water, squeeze out excess water. The mop should not be dripping wet as this will be difficult to dry up. Be thorough in the cleaning process, and don’t ignore the stuck stains. Change the water bucket: Cleaning tiles with dirty water can leave ugly spots behind. Regularly dump the old water when it gets cloud, and swap with a clean on. Dry the tile: Use a microfiber cloth material to dry the floor once you are done washing. This will help prevent any water spots. Remove soap residue: To have a shiny, nice-looking floor, it is necessary to remove soap residue. If the floor appears cloudy after cleaning, quickly clean it using an all-purpose cleaner. The cleaner should be non-abrasive and be compatible with the tile type. Once again, dry the floor using a microfiber cloth. Clean the grout: As a final cleaning process, remove grime that may be hiding on the grout lines. Cleaning the grout does not require all-time attention, though occasional mopping is the secret to having glazing tile floors. Grout usually absorbs stains and grease, so more effort is needed during cleaning to ensure it remains clean. For better grout cleaning, make water and baking soda paste and apply it to the grout. Rub the bet and let it stay overnight. The following morning, use a stiff nylon brush to scrub the grout. Repeat this process until the grout becomes clean and retains its original color. In case the floor grout has persistent stains, use a silicon-based sealer. Tile Floor Cleaning Tips Here are a few tips on how to clean a tile floor. Clean regularly: When you clean your tile regularly, the cleaning process becomes easier. Don’t let the floor become a “project.” Mop regularly to make the look great. In fact, it is necessary to sweep frequently to help grit from creating a dull glaze on the tiles. Ensure you sweep or vacuum the floor at least once a week using a soft-bristle vacuum. In the corners, use a hand broom and dustpan to remove the hidden dust or debris. The kitchen tile floor should be wet cleaned at least once a week while the bathroom tile floor should be cleaning at least twice a week because this area tends to harbor germs. Remove dust and debris first: You must remove crumbs, debris, and other dirt from the floor before mopping. This can be done either through vacuuming or sweeping. Mop the tile from the back: Assess the house and follow a cleaning pattern that will ensure the mopping ends at the exit. Use a chamois mop or a rag: Unlike a sponge mop, which stocks water into the gout lines, a chamois mop ensures that all the water is dried up, making cleaning easier. Avoid excess detergent: When you use excess detergent, the tiles may begin to look hazy because of soap residue. Use a mild acid or all-purpose cleaner to remove the film. Change water as frequently as possible: When a tiled floor is cleaned with dirty water, the floor will remain cloudy and dirty. Dry the floor after cleaning: To prevent having water spots on the cleaned tile, use a clean cloth to dry it. You can slide a rag around the floor using your feet to make the process easier. The Best Tile Floor Cleaning Solution - Dreame F9 Robot Vacuum Cleaning a tile floor can be challenging, as it might demand more time. Ensuring that the grout is clean is even more tiresome. A common question that most people ask is: What is the best cleaning solution for ceramic tile floors? In order to complete your cleaning process, consider using Dreame F9 Robot Vacuum, the best tile floor cleaner solution. The new Dreame robot comes with 0.1mm microfiber roller brush and high-speed 190rpm side brush. The microfiber roller brush takes care of all types of dirt and grime. And the side brush covers all corners for thorough cleaning. The Dreame F9 Robot Vacuum is equipped with the Japanese Nidec brushless motor with 2,500Pa strong suction, which can help get rid of all kinds of allergens and dirt including coffee beans, cereals, hair, and even screw on the floor, the carpets and other surfaces. The cleaner solution also has a battery life of 150 minutes. With these strong features, Dreame F9 is the best tile floor cleaner machine for residential tile flooring.
Continue reading
How to Clean and Protect Vinyl Plank Flooring?

How to Clean and Protect Vinyl Plank Flooring?

YouTiga|
Vinyl plank flooring is surprisingly easy to clean whether you are using basic cleaning solutions or you are using sophisticated cleaning technology like the best robot vacuum for vinyl plank floors. Vinyl plank flooring is incredibly low-maintenance which makes it a great flooring option for virtually any area of the house. The key to taking care of vinyl plank flooring is to know how you can prevent long-term damage in the first place and what the best methods are for regular maintenance. Read on to know how you can do all these especially if you want your vinyl wood plank flooring to last for many years. How to Prevent Damage for Vinyl Plank Flooring While vinyl plank floors will show signs of age and wear over time, you can push this back by ensuring that your vinyl flooring is installed in the right way. Vinyl flooring is very easy to install but you still need to make sure that installation was done according to manufacturer instructions. Otherwise, you run the risk of warping planks, uneven planks, and other defects that could lead to faster wear and tear. Start off by using the right adhesive, rolling the floor to help achieve a flat and even finish, and using protective window treatments to protect your floors from harsh sunlight. Use Proper Adhesive You can run into problems like buckling if your planks are not laid down properly. Using the right adhesive ensures that your vinyl plank flooring stays tight on the floor on all sides. It is also important to know what kind of flooring requires an adhesive. If you are working with glue-down vinyl planks or loose lay vinyl, you will need floor adhesive to secure the planks on the floor base. Adhesives for vinyl flooring are often acrylic-based which are also resin-based. These are very strong and suited for strong bonding with different types of surfaces. These adhesives are sun-resistant, and can withstand regular changes in temperature, and are not easily affected by moisture. For best results, it is best to check the manufacturer's instructions on what kind of glue is suitable for your type of vinyl plank floors. Roll the Floor One crucial element during installation is the proper rolling of the vinyl plank flooring. Use a 100-pound roller to roll the floor after laying down the flooring with adhesive. Using this rolling weight will help secure and flatten all areas of the vinyl planks and prevent buckling over time. Avoid Direct Sunlight Vinyl flooring keeps its luster and color over time but direct exposure to sunlight can accelerate the process of wear. Direct sun can also strip the floors of color and shine. You can keep your vinyl floors new and shiny by protecting them from direct sunlight. Window treatments such as blinds or curtains offer effective protection against harsh sunlight. For maximum protection, use blackout or thermal curtains especially if your interiors are exposed to lots of sunlight during the day. Another alternative is UV film or tinted windows. These can limit the amount of heat and light that can pass through the windows. How to Clean Vinyl Plank Flooring Daily Cleaning Regular cleaning is also crucial to keeping your vinyl plank floors looking as good as new. For daily cleaning, wiping and mopping will usually leave you with a clean surface. A quick run with the vacuum ensures a thorough clean that doesn't take up too much time. Use a vacuum cleaner if you don't want to spread dust around or you want to clean while you are doing other chores. Robot vacuum cleaners like the Dreame D9 can do the job in a few minutes, giving you sparkling floors in minutes without you lifting a finger. Deep Cleaning For a deeper clean, you can wipe the floor with a mop or rag moistened with water and dish soap/ detergent solution. This helps remove dirt, grime, and stains that may have hardened on the surface of your vinyl floors. You can also spray the solution on the floor, provided that you use a neutral detergent diluted in water. This is often enough to clean your floor and keep it in top condition for the coming week. If you want a more organic cleaning option, swap the dish soap with white vinegar and dilute it in water. Use this for mopping or wiping the floors to remove tough stains and dirt. This vinegar solution also leaves your floors with a clean scent and a lasting shine. If you want to make sure that you are using safe cleaning solutions, check with the manufacturer. They may have recommendations for specific cleaning solutions that will work best with your vinyl flooring. It is also important to note that you should avoid using abrasive mops and streams when cleaning your vinyl floors. Abrasive brushes can leave scratches and will thin out the protective layer of vinyl planks. Steam cleaning is also a big No-No since most vinyl plank materials are not meant to withstand steam. How to Make Your Vinyl Floors Shine How shiny your floors get depends on the kind of finish you have. If you have vinyl floors with a matte finish, your floor wax or polish can only do so much. However, if you have flooring with a glossy finish, you can achieve sparkly shine with ease. A quick and easy way to make your floors shine is to use vinegar and water spray to clean your floors. Wipe dry with a microfiber cloth to buff out mop marks. If you want to see your reflection on the floors, you can also opt for floor wax made for vinyl flooring, which you can easily get from most hardware or home stores. Just make sure to clean the surface thoroughly with a soft broom. You can also use the Dreame D9 for vinyl plank floors to remove all dust and dirt before you start polishing. Regular and careful cleaning can keep your vinyl plank floors as shiny and as scratch-free as the day you installed them. Just remember to use the right cleaning tools and to set your expectations according to the type of flooring finish that you have. With properly-installed vinyl flooring and regular cleaning, you can keep your floors shiny and clean for years.
Continue reading